Very good.
Posts
-
RE: Modeling Simple Belt Around Pulleys
I do a lot of this kind of thing. I use TIG's Tangent Tools to aid in working out the tangents and instead of using circles for the bends in the belt I use the Arc tool between the tangent points.
Although this one is a round belt the idea is the same to create the Follow Me path.
A quick example.
-Circles represent the surface of the pulleys. Guide lines and points after using Common Tangents in Tangent Tools.
-Circles replaced with arcs between the guidepoints at the tangents.
-Edges drawing in to complete the loop.
-Offset to define the thickness of the belt.
-Belt extruded to final width. -
RE: ROUND CORNER
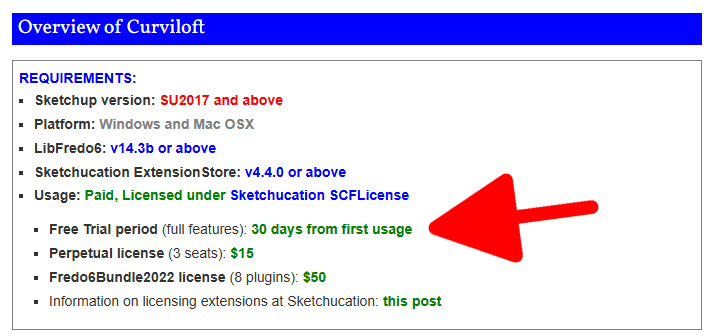
Round Corner and a number of other extensions from Fredo6 became paid extensions almost three years ago. See:
More Fredo6 plugins becoming paid extensions
After more than ten years of free distribution, some of my plugins will become paid extensions. Precisely, these are: RoundCorner JointPushPull Curviloft Fr...
sketchucation (community.sketchucation.com)
-
RE: [Plugin] SectionCutFace
@charliemortenson55 said in [Plugin] SectionCutFace:
Hello!
I was hoping that this plugin might allow me to color the section fill within a certain group while leaving other section fill to the default style setting.
You could have a color/material In Model that is the same as your default fill color and then after creating the section cut face, edit the resulting group and with Hidden Geometry displayed. paint the faces you wish to have a different color or fill. I frequently use a section cut face with different materials applied to different faces and this works perfectly.
Alternatively you can use multiple section cuts through different objects and apply different materials to each section cut face.
This uses one section cut face and two different hatch pattern materials. Some faces with a different rotation and scale for the material, though.
-
RE: Another Machinist's Model of a Steam Engine.
After putting her aside I did another engine today. This is a a little crankless engine.
-
Another Machinist's Model of a Steam Engine.
This one is called Lady Stephanie. I don't know who the real Lady Stephanie was but if she was anything like this engine, I'm guessing she was kind of ornery and hard to please.
-
RE: Details for scrapbook
It depends on what the details are and how you need to show them in LayOut. It might be easier to model them in SketchUp and create scenes to use for viewports in LayOut. After you've set up the viewports (making sure you do not modify the Camera properties) you could save as a scrapbook so those viewports are available to drag in to your CDs when needed. For 2D symbols and such, it would probably be better to draw those in LayOut as Scaled Drawings than to draw them in SketchUp. Make sure you group the elements of each symbol so they behave as a single object.
I would suggest that you make sure you keep your SketchUp detail model files as lightweight as possible. When you add one of those viewports from the Scrapbook to your CD you are adding the SketchUp file as a reference which can bloat your LayOut file and possibly cause performance issues depending on your hardware. You can see that if you add one of the supplied 3D arrow objects from the Scrapbook.
Another option that may help with file management is to create details in SketchUp and then after rendering the viewports in LayOut as Vector or Hybrid, exploding them so they become LayOut drawing objects instead of SketchUp viewports. This would reduce their overhead in your CDs because they no longer carry the entire SketchUp model.
Different options depending on what you need exactly.
-
RE: Cut through roof
Explode the vertical face, use Edit>Cut to cut it to the clipboard, open the roof group for editing, hit Edit>Paste in place. Then select all, use Intersect Faces>With Selection and erase the unwanted stuff.
-
RE: Cut through roof
No need for a plugin. Just select all of the geometry, right click on it, choose Intersect Faces>With Selection and then erase the part you want to keep.
-
RE: Components do not save
@danna why is your MyComponents folder in the Downloads folder?
What's wrong with using the default location for components?
-
RE: [Plugin][$] ThruPaint - v2.8b - 20 Dec 24
@nickchun Fredo should probably have written "14.7a or higher".
-
RE: Stairway renders
@L-i-am nice images.
I would like to see the first horizontal seams on either side at the same height.
-
RE: Component confusion
@danna Look at the orientation of the axes in my screenshot.
Give the component gluing in the Create Component panel.
-
RE: Component confusion
@danna Rich is correct. Rotating the component would be simplest. You could also set gluing properties for the component and drag copies of it in from the Components panel.
I've set the axes so the component's origin falls on the vertical face of the box.
-
RE: Converting Lines to a shape
@jamesn320 said in Converting Lines to a shape:
I need it to stay flat.
Try Eneroth Upright Extruder from the Extension Warehouse.
-
RE: Scenes not being preserved-showing up incorrectly in Layout
@Aartrace1 you have overridden the Camera property for the viewport which tells LayOut you aren't interested in the Camera property from the scene in the SketchUp Model. Note the Reset buttons and the dark gray background in the Camera section of the SketchUp Model panel.
When you copy a viewport that has had scene proprties overridden the overrides get copied, too.
Best practice is to avoid overriding the Camera properties in LayOut. There should be no reason to double click into a viewport to pan the camera and no need to manually select a Standard view or manually tick the Ortho box.
-
RE: DM_Profilebuilder
@danna start with the website for the extension.
Profile Builder
The MOST USEFUL plugin ever created for SketchUp! Profile Builder takes parametric modelling to the next level!
mind.sight.studios (mindsightstudios.com)
-
RE: Converting Lines to a shape
@jamesn320 what version of SketchUp are you using? What file type are you exporting from 3D Planit? I expect that the file exported from 3D Planit is only showing the centerlines of the track. Other track planning software does the same.
As for the curves, SketchUp represents curves with short edge segments. There no way around that. Depending on what you need you might want to redraw the track centerlines using larger numbers of segments for the curves.
How much detail are you expecting to show in your SketchUp model? If you want to show the track bed, you can use the centerlines as paths for Follow Me. I did that for the N-scale Timesaver T-track module.
@GrimReap said in Converting Lines to a shape:
Does it have a lot of tools to make it easier to work in SketchUp?
The thing that's going to make it easier to work in SketchUp is learning how to use the tools. Extensions can simplify some things but you still need to understand the basic functions of the native tools.
-
RE: Vintage Look
@Gus-R thanks for that. I have been looking for some new sources for stuff to model. I've done a few railroad related models before but it could be time to do more.
-
RE: I am thinking of doing an image looking for comment
@L-i-am if you wanted to make it look less photographic you could use the rendered image as a basis for a hand-shaded sort of look. Combine it with a hidden line export from SketchUp Maybe use a sketchy line style or the straight line styles. Maybe enable extensions for some of the lines
This is just a quickie shaded thing. I'm not sure it's totally right but a start.