SubD examples and models
-
@cuttingedge said:
Cotty how do you display the subquads without the triangulation showing?
QuadFace Tools > Unsmooth Quads
-
@cotty said:
[attachment=1:1vpqla6u]<!-- ia1 -->SCF_Cotty_subd30.png<!-- ia1 -->[/attachment:1vpqla6u]
That's a great example of blending shapes with creases. I'm thinking I should set up a dedicated section on the website for these types of studies.
-
@rich o brien said:
@cuttingedge said:
Cotty how do you display the subquads without the triangulation showing?
QuadFace Tools > Unsmooth Quads
But what about the thicker lines in that render - representing the original edges? How is that done? Multiple passes?
-
@rich o brien said:
@cuttingedge said:
Cotty how do you display the subquads without the triangulation showing?
QuadFace Tools > Unsmooth Quads
Yes, screenshot here: http://sketchucation.com/forums/viewtopic.php?f=397%26amp;t=63826%26amp;start=30#p585747
@thomthom said:
But what about the thicker lines in that render - representing the original edges? How is that done? Multiple passes?
Since two of your plugins are not enough
 :
:- SubD
- Edit group
- Select all
- SeletionToys: Select only -> Edges
- Group selected edges
- Gropued edges without faces are treated as profiles
- Increase profile width in the style settings
- Exit SubD group
- Unsmooth quads
-
-
That wing rocks HornOxx!
-
Can you explain to me, why the first attempt fails. Why I should select one edge of triangulated face, that the second attemt must be fine.
https://youtu.be/XiUtriWV_lo -
@alvis said:
Can you explain to me, why the first attempt fails. Why I should select one edge of triangulated face, that the second attemt must be fine.
https://youtu.be/XiUtriWV_loThe Convert triangulated Mesh to Quads function doesn't always succeed. It's hard, impossible, to reliable determine exactly how the mesh should be converted as it would require AI understanding of the mesh's topology. In your example it's easy for use humans to see what should be a quad, but not for a script. The script doesn't even take into account soft/smooth/hidden properties - it just sees a set of triangles.
In the case of your mesh there it looks like you have hard edges and then some soft+smooth edges between triangles pairs. Then you want to use the Convert SandboxTools Quads to QuadFace Tools quads instead. (left to the monkey icon). If those edges where hidden you you'd want to use the Blender Quads to QFT Quads function (the monkey icon).
-
@thomthom said:
@alvis said:
Can you explain to me, why the first attempt fails. Why I should select one edge of triangulated face, that the second attemt must be fine.
https://youtu.be/XiUtriWV_loThe Convert triangulated Mesh to Quads function doesn't always succeed. It's hard, impossible, to reliable determine exactly how the mesh should be converted as it would require AI understanding of the mesh's topology. In your example it's easy for use humans to see what should be a quad, but not for a script. The script doesn't even take into account soft/smooth/hidden properties - it just sees a set of triangles.
In the case of your mesh there it looks like you have hard edges and then some soft+smooth edges between triangles pairs. Then you want to use the Convert SandboxTools Quads to QuadFace Tools quads instead. (left to the monkey icon). If those edges where hidden you you'd want to use the Blender Quads to QFT Quads function (the monkey icon).
Humm, i was in similar situations... means that either more documentation is needed to make it easier to understand when to use each function, or maybe if you would think appropriate, to make the quad-detection script to be more "intelligent", so it can take into consideration multiple parameters at the same time. For example not all Fredo Tools are good in creating or preserving quads... but they do smoothing. So, would be good to rely better on conversion.
Thank you! Keep up the good work !
-
Yes, better documentation is indeed in need - as well as improving the tools. But docs are on the top of my list when I get home from my travels next week.
I plan to set up a new site for QFT - move away from the BitBucket wiki.
Better text and visuals describing the various features of QFT. GIFs to illustrate common topology pattern.And extend SUbD's site to include more examples of how various topology patterns subdivide.
-
I was thrilled by the panton chair example shared by Ithil3d on youtube. I thought I'll build one trying slightly different method. A good few minutes and here's what i got.


-
@cuttingedge said:
... I thought I'll build one trying slightly different method. A good few minutes and here's what i got...
This is a very good SubD example!
how often and unsuccessfully I tried exactly this chair
-
Yes the difficulty with Subdivision modeling against the Nurbs modeling where you have yet all the curves of the model, is to imagine the "rustic" cubic form before it's transformation!


-
Is there any plugin working like Blender's Add Loop cut, see link below? I think that this would be really useful when using SubD.
https://www.blender.org/manual/modeling/meshes/editing/subdividing/loop_subdivide.html
https://www.youtube.com/watch?v=_f4XKe8lZEU -
If you look back a little you will see that we talk about that too, it's called Quad face tools, you can find it in the plugins library.
-
-
@hornoxx said:
...completed the wing to a plane - certainly not a beauty

Not bad either... but it was a very promising wing
-
-
-
@thomthom said:
There are talks going on with various render engines to allow for them to render high-poly variants from the low-polys.
Nice!

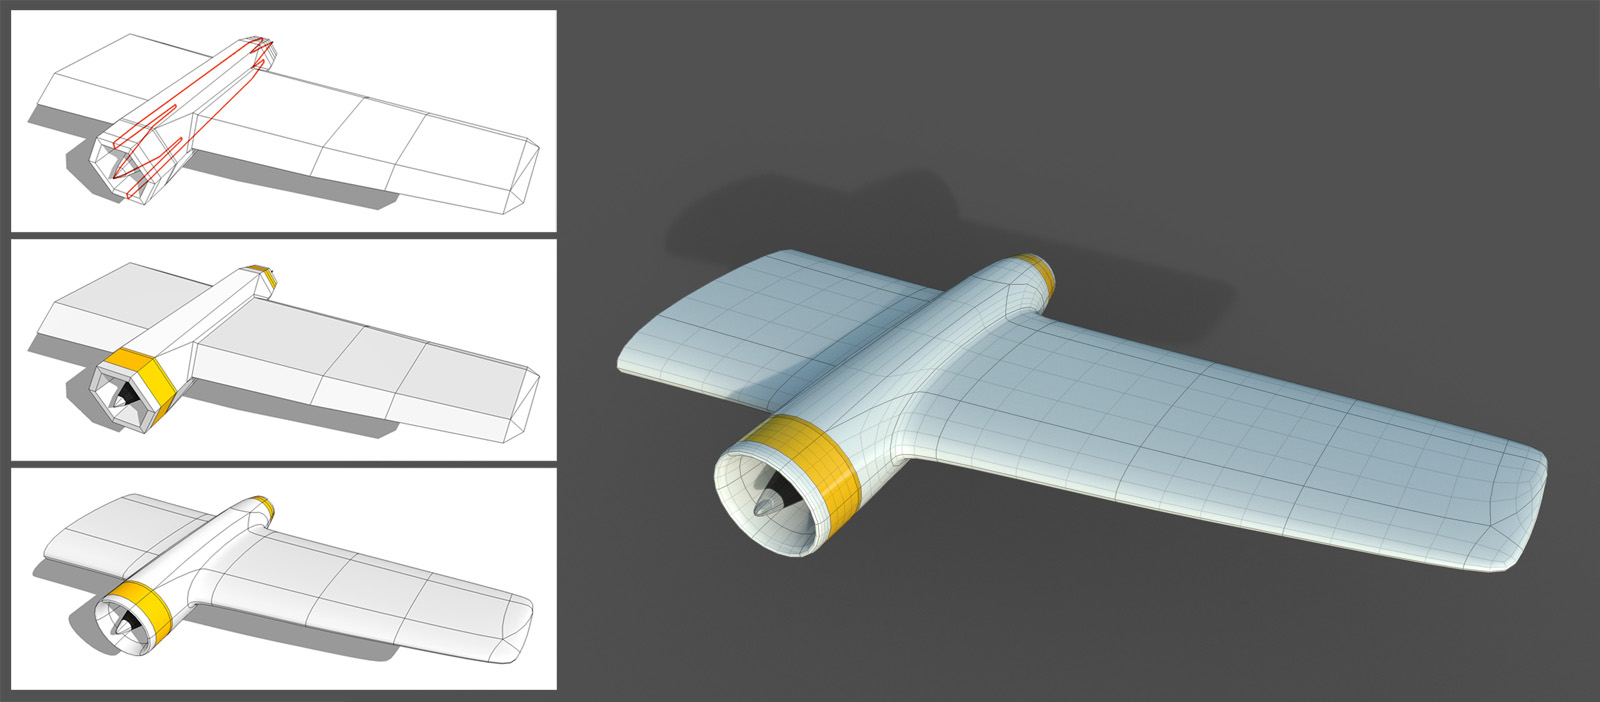

 ok - give this wing an other try
Hello! It looks like you're interested in this conversation, but you don't have an account yet.
Getting fed up of having to scroll through the same posts each visit? When you register for an account, you'll always come back to exactly where you were before, and choose to be notified of new replies (either via email, or push notification). You'll also be able to save bookmarks and upvote posts to show your appreciation to other community members.
With your input, this post could be even better 💗
Register Login


Advertisement