Have you tried scrolling down a bit.

Here's an example with the tape.
You can tap ctrl to remove the little plus icon but it is not essential. That just turns off making guides, but if you go from endpoint to endpoint it won't make a guide anyway.
Use the Tape measure tool.
Click on both ends of a known 12' length, then type 12" and hit enter, it will ask if you want to resize the model, say yes.
Hardware wears out and software updates change things. When using old software that isn't being updated you need to look at the things that are changing.
I'd be testing with a different mouse.
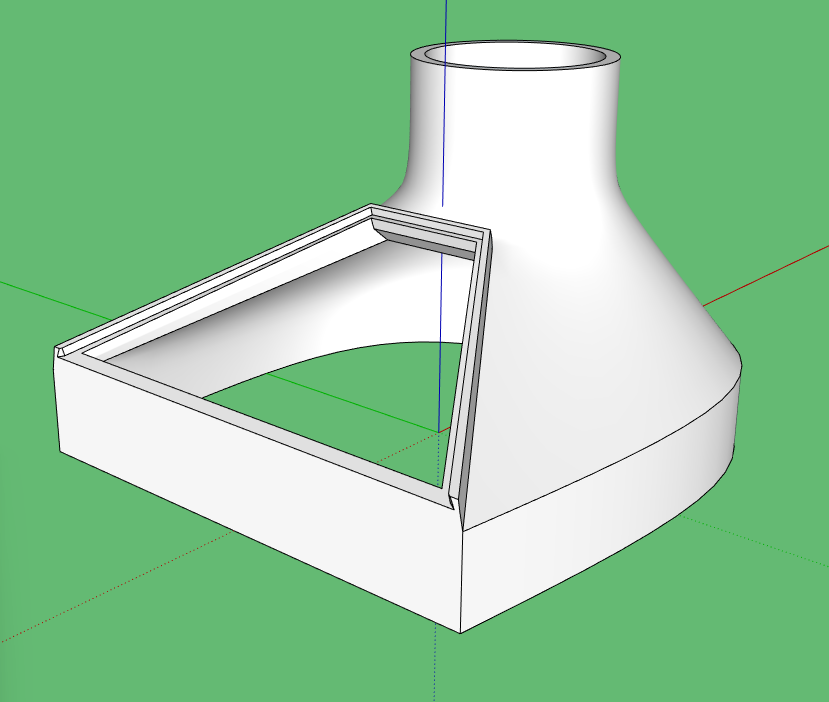
People often think subd is purely for loose organic work and can't be used for specific sizes or accurate models
Here's an example of something that needed to have flat faces and an exact friction fit along with a smooth body to help with airflow.
The purpose.
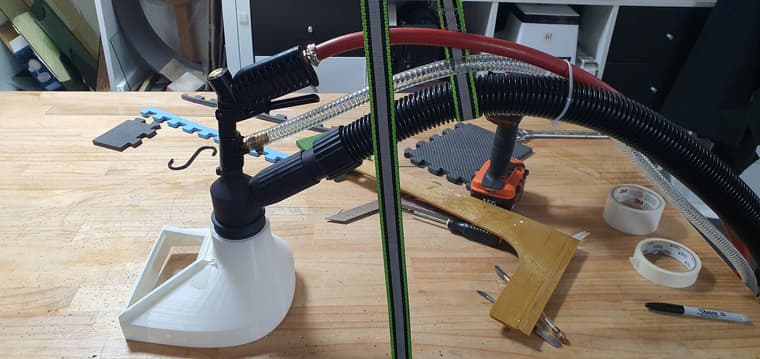
I recently picked up a new sandblaster. This one is a pressure pot extractor system which basically means you put the air into a vacuum cleaner that has sand in it and it is a closed loop. This allow you to use it outside a booth, blasting cars, large panels etc
The downside of the system is it has a brush fitting around the head to contain the blasting media, which means you can’t see what is going on. When sandblasting glass you generally need to see what is going on because it’s a bit more like airbrushing than savage cleaning.
To that end I designed a new head for the thing that lets me look in while still capturing the media. A ‘quick’ 3d print, and a bit of replaceable glass and tape and away we go.
The result.
Use the download option from the top left icon.
Make it a component and save it to a component collection, then select and place it from the component panel whenever you need it.
By the way,I have no idea who Chris is. As to snaps, I don't see them as being useful for what you are doing and they are quite finicky to set up correctly, more work than just laying things out in a way that works to begin with.
Without bothering with snaps.
I don't really get why you don't just make the shape you want and take the shapes from it.
Here's a quick version where all points are the same and although I have used two components, the second is just a mirror of the first.
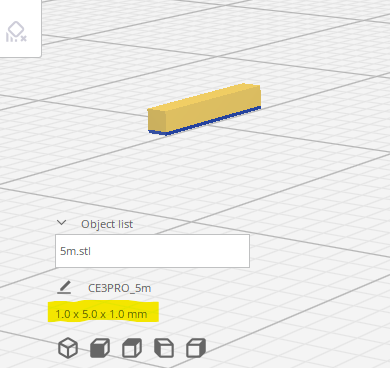
Dave has explained this many times, if you are doing this for 3d printing there is no need to scale down.
In this image you see what was a 1m by 5m shape exported as 'model units' when opened in Cura you see that it has read that as 1mm by 5mm.
EN in the file name tells you it is an english version.
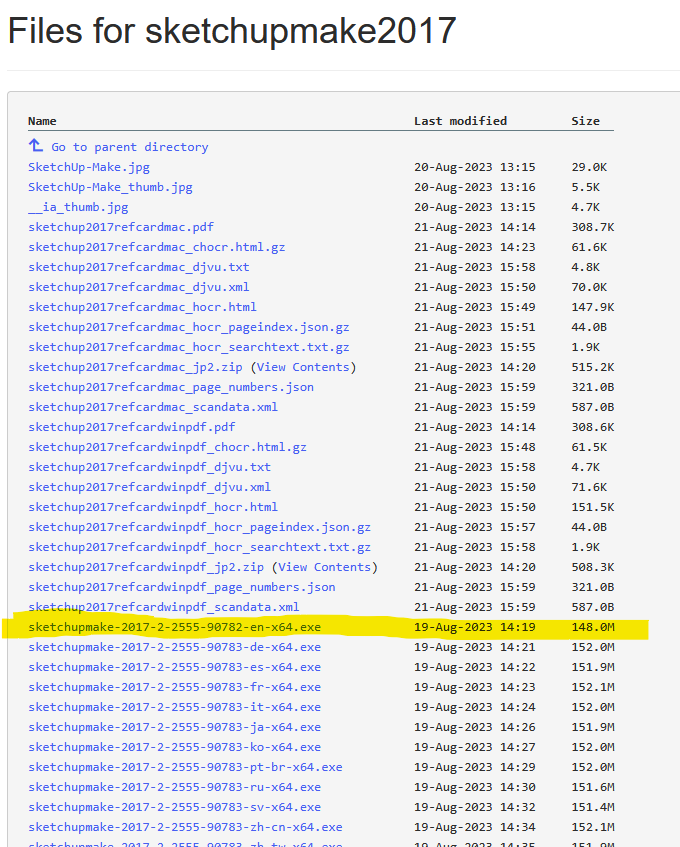
I have no idea if it is a legit file.
The link contains a downloadable .exe for 2017. Simple download and run it, usually best down with right click Run as admin.
I see no reason to use AI to do anything in this situation.
You could also try the confusingly named, Groups to Components.
Hover over an edge to get the center inference to appear and grab it there, then do the same to place it.
It sounds more like a question for a slicer forum. Understanding the ins and outs of infill is not really a sketchup thing.