@jim said:
Post the .plist file - maybe someone will write a converter.
Well that would be great for future use! Now i just ended up manually setting up all the shortcuts. Tedious work, but needed to be done that way i guess 
@jim said:
Post the .plist file - maybe someone will write a converter.
Well that would be great for future use! Now i just ended up manually setting up all the shortcuts. Tedious work, but needed to be done that way i guess 
Hi guys
Running bootcamp for 3ds max, and sometimes i still need to use SU on the windows side. I would just really like to import all of my shortcuts i use in SU on the OSX side, but i can only import shortcuts on windows if its in a .dat format? I cant seem to export the shortcuts on OSX and the shortcut file itself is a .plist format?
Any ideas? Google didn't help me 
Hi sd
I tried the plugin and it worked great for creating a simple staircase the first time i tested it out, when i tried to flip it, SU crashed and now i cant get the plugin to create any stairs what so ever, i get this error in the console:
Error: #<ArgumentError: Cannot convert "8.53018372703412" to Length>
/Library/Application Support/Google SketchUp 8/SketchUp/Plugins/Stair Maker.rb:226:in to_l' /Library/Application Support/Google SketchUp 8/SketchUp/Plugins/Stair Maker.rb:226:in get_defaults'
/Library/Application Support/Google SketchUp 8/SketchUp/Plugins/Stair Maker.rb:75:in reset' /Library/Application Support/Google SketchUp 8/SketchUp/Plugins/Stair Maker.rb:66:in initialize'
/Library/Application Support/Google SketchUp 8/SketchUp/Plugins/Stair Maker.rb:22:in new' /Library/Application Support/Google SketchUp 8/SketchUp/Plugins/Stair Maker.rb:22 /Library/Application Support/Google SketchUp 8/SketchUp/Plugins/Stair Maker.rb:226:in call'
/Library/Application Support/Google SketchUp 8/SketchUp/Plugins/Stair Maker.rb:226
Any tips?
Hi
Im trying to smoothe out a part of my terrain (Sandbox "from contours") with the artisan plugin. My problem is that the terrain has huge triangles which makes the cross over from the field to the flattened site hard to do (flattened part made by substracting a solid from the solid terrain):
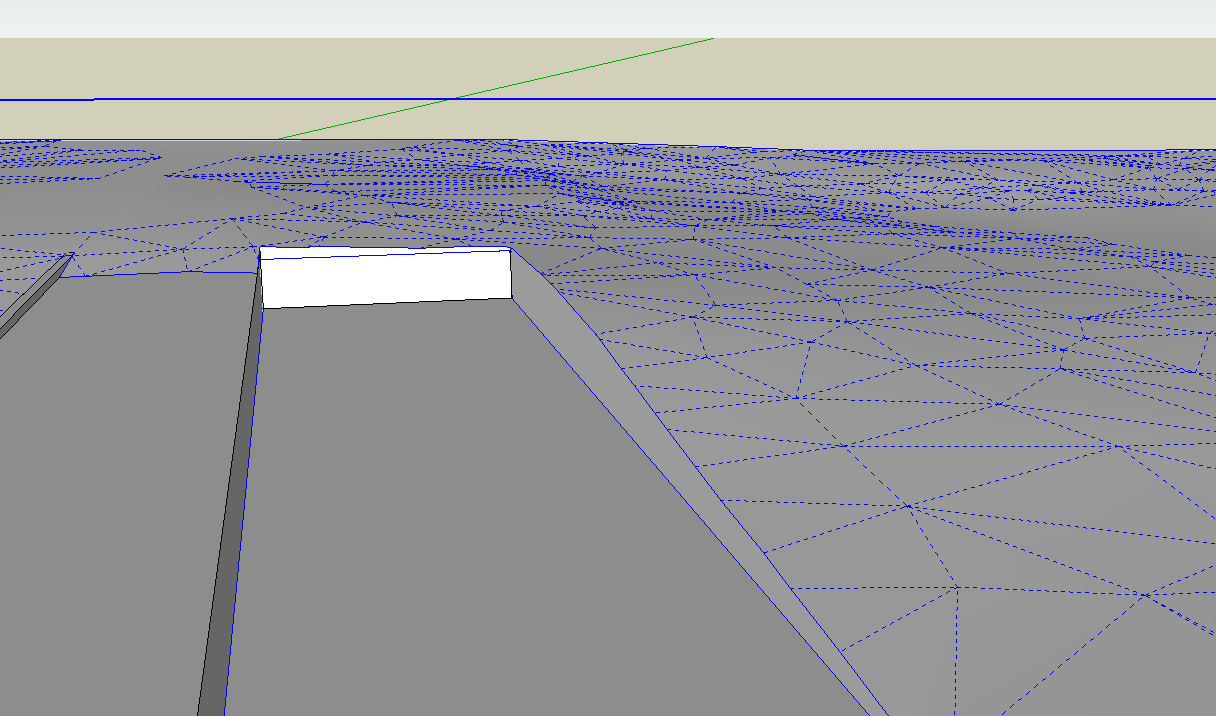
I have tried to split the large triangles into smaller ones with the artisan tool:
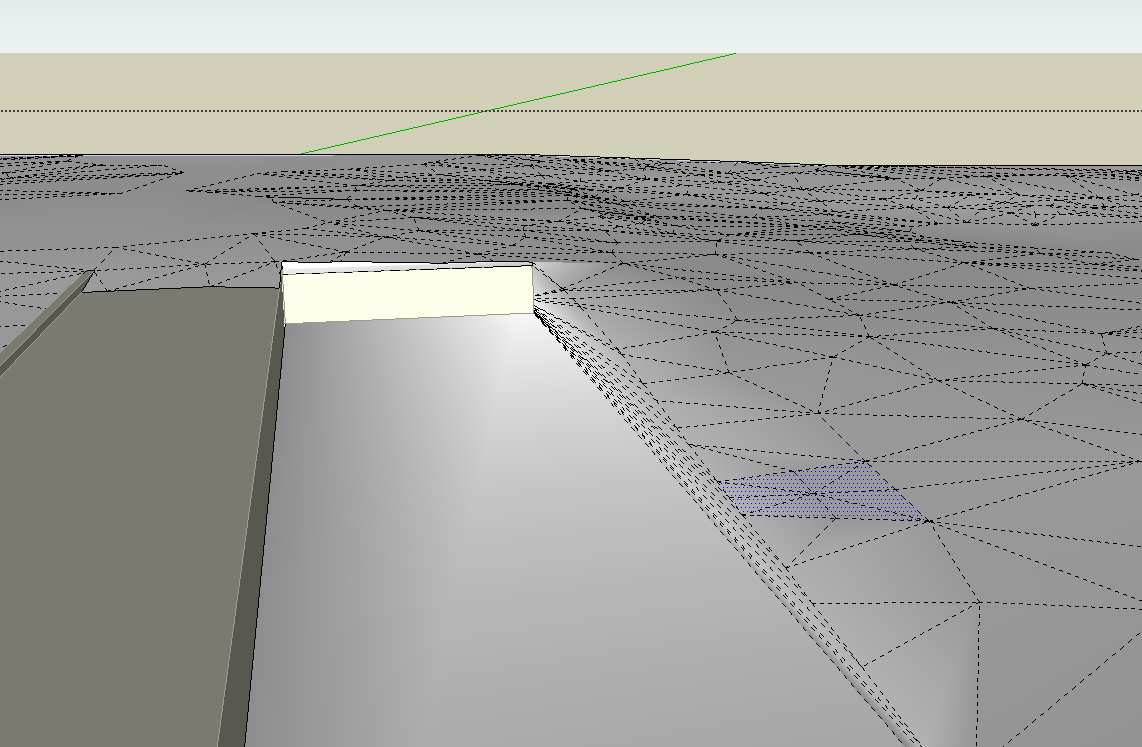
But the result is not satisfying:
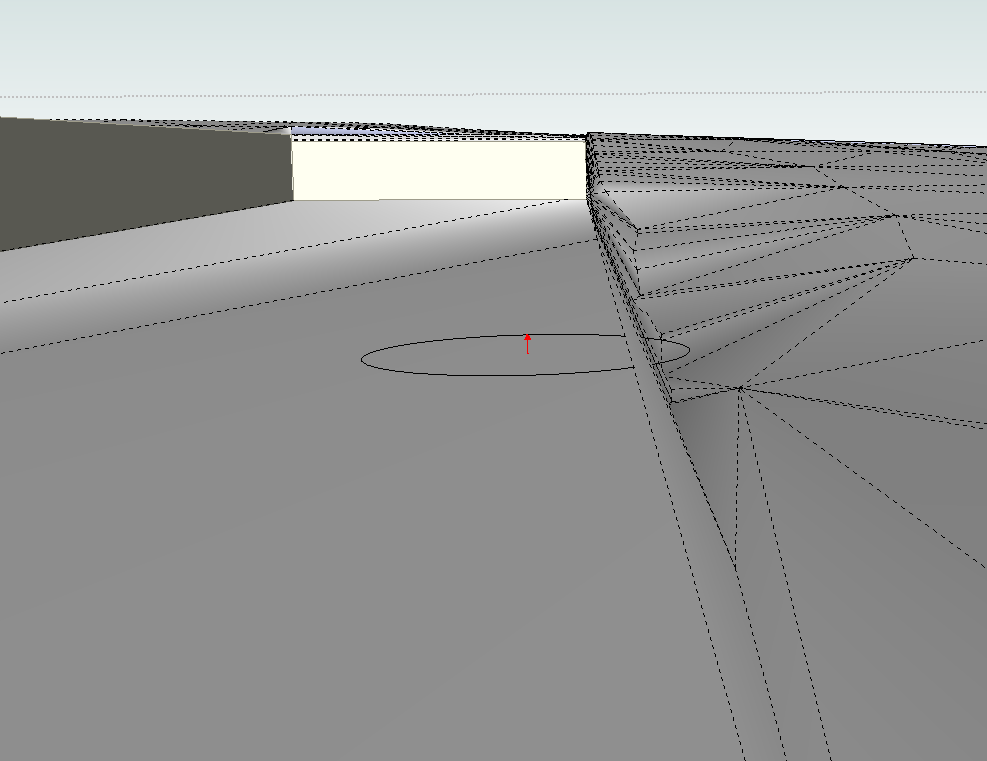
I now wanted to try the SplitUp plugin to get the large faces divided into squares to get a better result using the Artisan "smoove". But SU (v. 8.0.3161 OSX) crashes every time i try to use this plugin in this model. Same result with TIGs Quadrilateralizer plugin. SU just crashes.
I tried to create a small terrain from contours in a new file and here both plugins worked just fine.
In my big model I also tried to explode the surface of the terrain so it wasnt a solid, but that changed nothing. Still crashed.
Interesting enough, I can get SU to crash (this time it just stops responding) if i draw a contour grid from the Sandbox toolset too! But again, its only in my large landscape file. In a new file, that tool works just fine too.
Ive attached the large landscape here if some one wanted to test it out.
@dave r said:
Jens,
You might give some thought to having a single beam component that is is then used in a small number of of nested components in which they are randomly oriented. Then make a bunch of copies of the nested components and randomly orient those. Some of the nests might contain two beams, others, three or more. Doing this would make it quite simple to deal with the materials as you would drill down to the lowest level component (the beam) and apply the materials to its faces.
Thank you once again Dave,
I still have a lot to learn about workflow, hopefully i will remember nested components in my next project 
@dave r said:
Materials are normally applied based on the component's axis orientation, By rotating the axes on some components, you've made more work for yourself. You should have used a single component (not used Make Unique) and randomly rotated instances to get the appearance you're after. Then applying materials to all would be a simple one step process unless you want to use more than one material. You would, of course, open an instance and apply the materials to the faces. By applying the materials to the faces instead of to the components you also get the option to adjust the material's orientation, too.
Thanks Dave, i was afraid that would be your answer 
Just wondering how i would do the placements of some singular beams when my one component consists of 2 beams, without making some of the components unique+exploding? I made the component of 2 beams as it seemed like the fastest way to the random look i wanted (when using Chris Fulmer's scale and rotate tool).
Sorry, but its hard to explain i guess...
Hope you had a great weekend!
@dave r said:
You need to change the component axis and origin for each of the components so they are in the same relative spot. You can right click on an instance and choose Change Axis. Then click to place the origin and to set the red and green axes.
Im got a similar problem as we are currently learning 3ds max and have imported our SU model to place textures and such on it. I have a complex model of many components though the object is exactly the same (a 4x4beam). To get the random placed look i have used a ramdom rotate plugin to get this result:
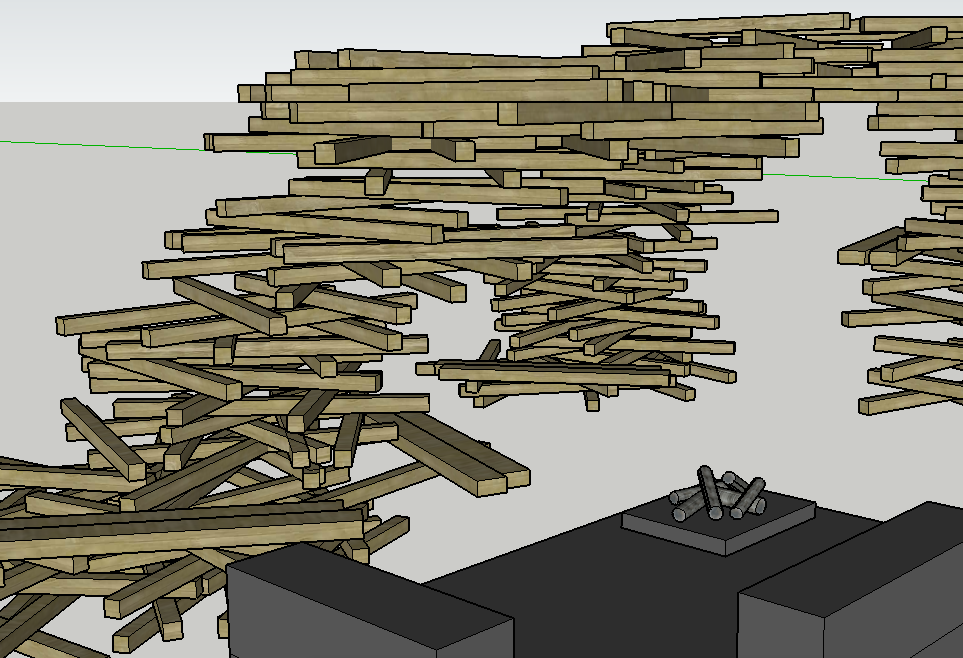
To get the "right" look i had to make some unique versions of the component to rotate and place around the scene, but that has now resultet in many different components and that messes things up in 3ds max when i want to place textures. It places it nicely on lik 80% of the beams, but the ones i made unique wont get the right UV scales and such. So i have to do it manually on them. It is very time consuming and was wondering why i cant replace these "unique" components in SU with the 1 component that "works"? If i try to do that (seems i can only do it 1 by 1) it will replace it nicely, but not on the replaced component's old position?
Is there a plugin to replace multiple components in SU and can you do it so it just swaps out the old one? ie in the exact place (height/rotation).
It might be ok to just "replace" the axes in each of the "unique" components, but this will take ages to do 1 by 1. Plugin for that? 
Thanks!
Hi Chris and the rest of ya
I have been trying out this plugin + your component stringer since i am trying to recreate my little 1:50 model in sketchup. But i cant seem to find a smart way to do it, or maybe i am missing something.
My idea was to draw a path using something like bezier curves or the free hand tool and then use different components in randomized pairs of 2 "rafts" in 1 component. These should then stack on top of each other with a random rotation. Simulating the way i glued all them sticks together in my model:
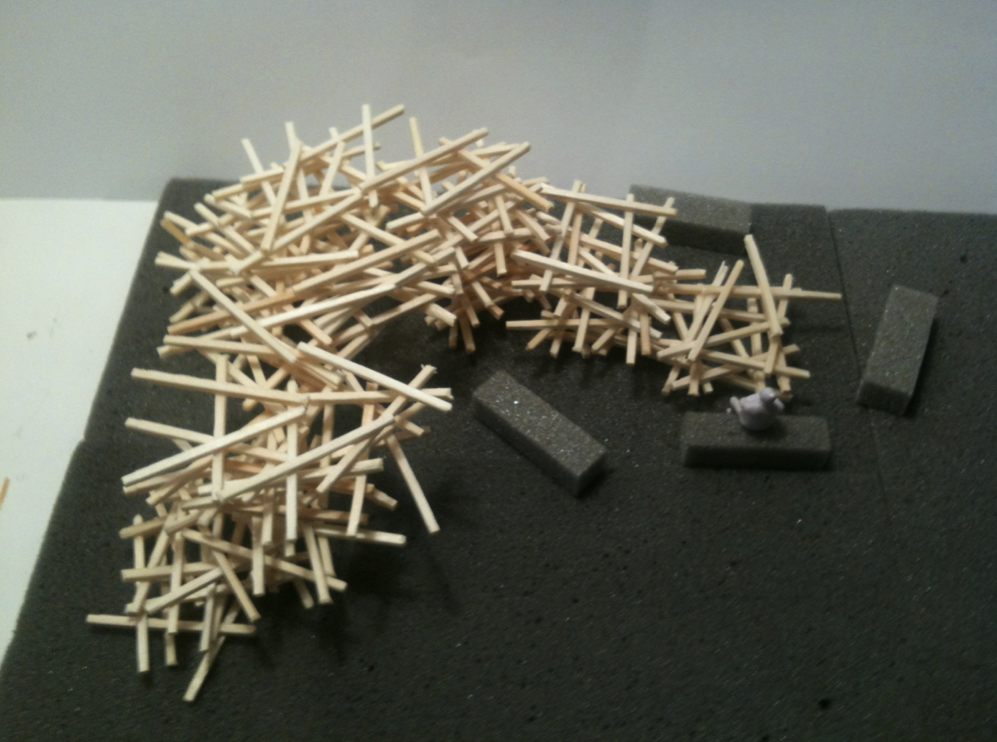
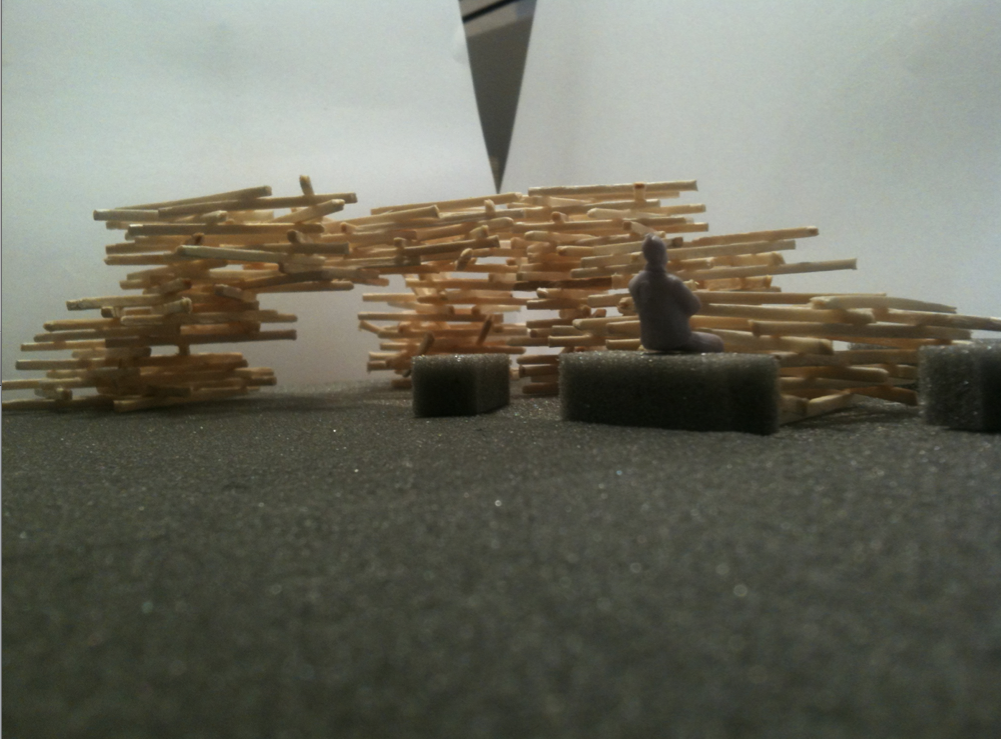
I have tried dividing the "path" for the stringer plugin in to 100mm lines connected in to one long line. That way the wood would seem to rest upon each other - as in stacks. It works great with the axes placed in the middle of the component, but I couldn't figure out how to do this on something like the bezier curve, as the components would then rotate along a wrong axis. Havn't been able to work out how to place the Axes tool to avoid this.
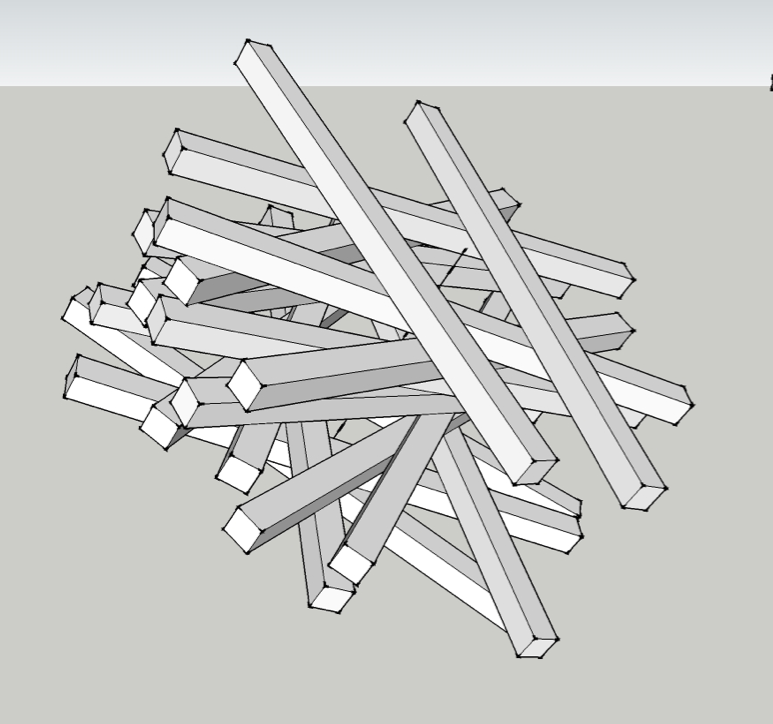
Also, when i just use the same component i wont get the more "spacious" look my model has + sometimes the wood would seem to through each other.
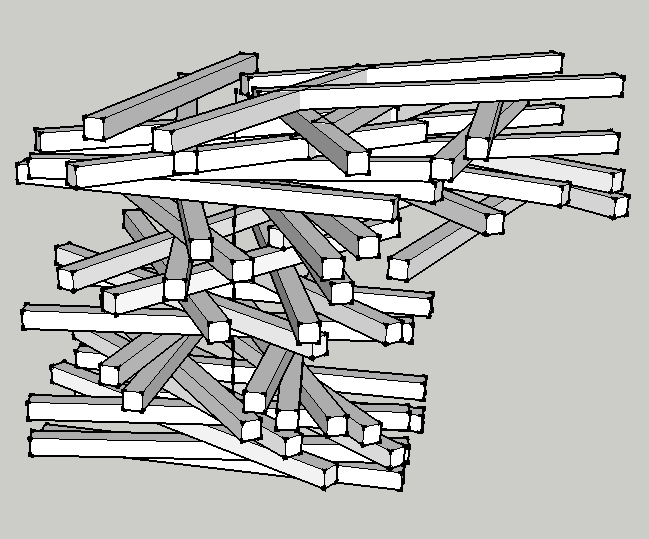
How would you guys approach this?
Thanks for your time and wonderful plugins!
Hi guys
Got a deadline tomorrow and Vue just stopped responding at 97% animation render due to lack of harddisk space after 20hours of rendering 
Is there any way i can save that 97% ? Just cant for the life of me find where the damn temporary file is placed and there is no response on the cornucopia forum.
Thanks, im desperate for finding that damn file !
Nicely done, gives a great idea on what layers can be used for.
Any chance you or any one else have an answer on how to move the order of multiple scenes at once? I really cant be asked to move 20scenes up 30-40 slots one by one with that up arrow...
hehe yeah, i have to get better at sorting stuff in layers instead of hiding them.
btw. is there a smart way to move say, scene 40-55 all the way to the start of the animation? Cant be that you have to click every single one and use that up-arrow-thingy to get them to the top one by one. (cant select them all and move them together).
Tried searching for a script like that on the forum but no luck 
thanks Gaieus
I meant to say i was going to hide the cylinders in each scene - not delete them 
I will give the layers a try (havent even thought about them).
Once again, the quick replies one gets at this forum is just amazingly helpfull!
Hi
Im trying to do a quick animation of how my process for this project has been.
So far i've created like 30+scenes.
I have a bunch of cylinders in a row and in a group and in the next couple of scenes i want to make them appear one by one. But when i ungroup them, they paste themselves to all the previous scenes! Do i really have to go through all my 30+ scenes and delete the cylinders+update every single scene up until the scene where i actually need them?
Thanks for the tip. The result did not change a whole lot though:
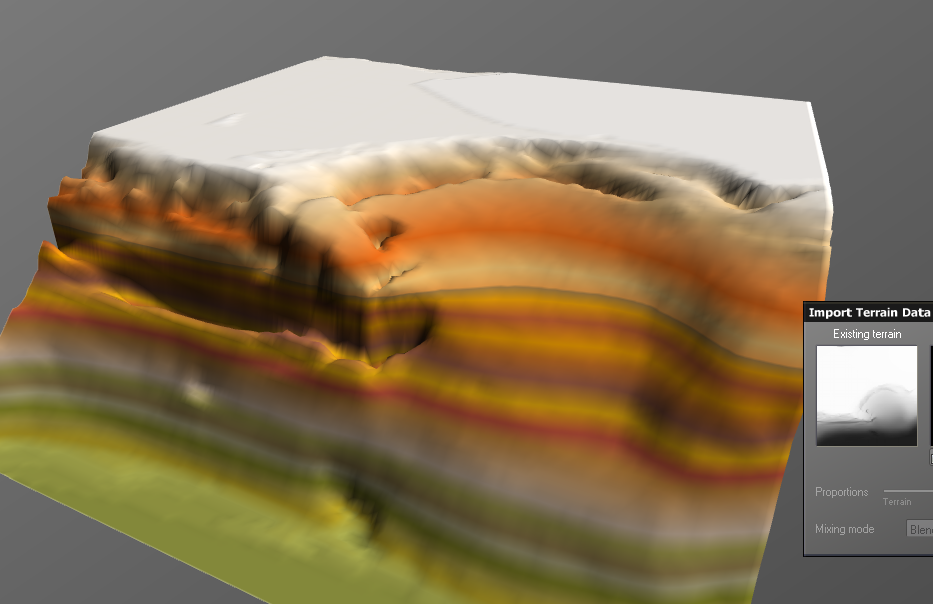
I also tried with the sketchup method you linked to and got the following map:
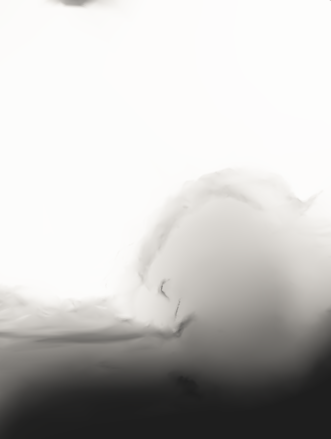
(same result)
I wonder if there is some setting to the gradient i need to change so it will create the "valley" after the top ledge. It seems like it gets where the ledge drops down fine, but then it just boost right up even though the gradient indicates otherwise?
Maybe this is just not meant to happen. I tried to just paint an eco system on the mesh instead as the mesh is pretty detailed and okay as it is i guess. But it does not place the plant on to the mesh directly but some what under it, so only the top of the trees stick through. At the top of the terrain its okay, but on slopes and such its messy + i cant paint on certain places?
Im gonna lay a bit low with all these basic questions, its only because of the time left of this project im asking to save time. Hope it is okay.
Now thats just amazing Solo and a bit of a blow to my skills atm.
I tried creating the terrain from my SU mesh in Vue, but my result is no way near what i wanted:
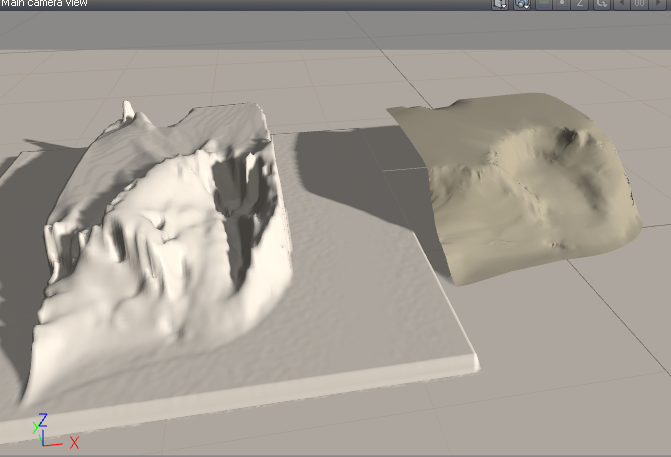
it must have something to do with the mapping image i made in Vue:
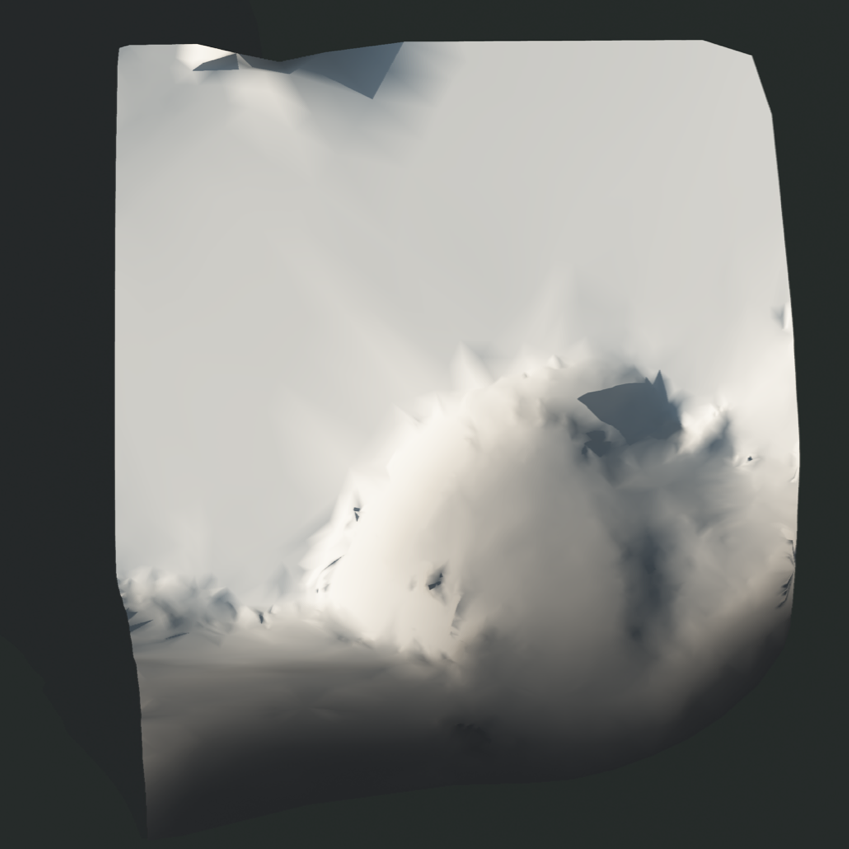
Tried messing a bit with the scale, but that doesn't do much and im having a hard time getting the eco system and even placing plants to work on a mesh (plants cant snap to the surface of the mesh it seems), so would love for this to work!
I know i could probably find the solution with loads of time on geekatplay and just fiddling around, but i have so much needed to be done for tomorrow (plans, sections and what not) to show the teachers (final is on friday). + i almost had a meltdown with SU not being able to export if there were any unique materials at all. I knew i should have stayed with the cardboard models and freehand drawings instead of this...
So where have i gone wrong with the SU mesh -> vue terrain?
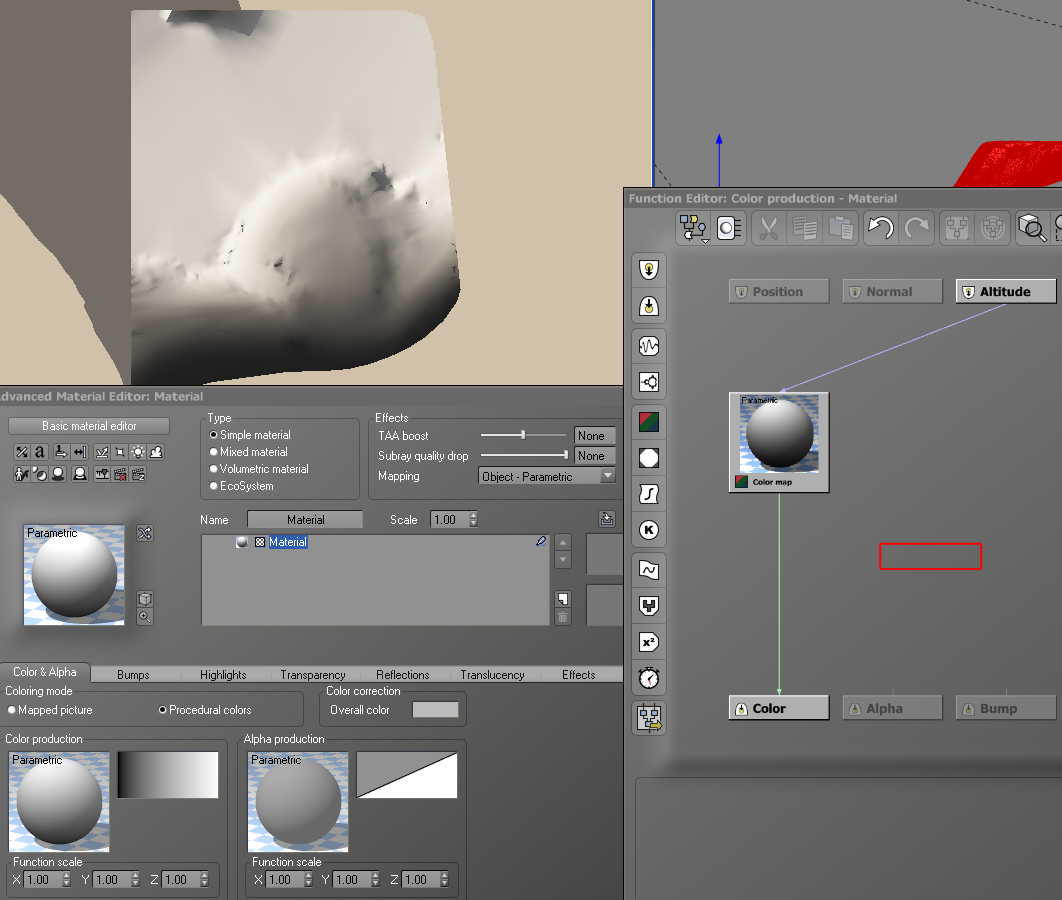
You sir, are a true champ !
Cheers for the screenshot of where the function to render the top view was, have only had my hands on Vue for a few hours in total and the interface takes some time getting used too (the placement of camera is indeed still troubeling when the only other program i've ever worked with is sketchup hehe).
I have infact been watching a few vids on geekatplay, but lord al mighty there are just so many different tuts its hard to choose the basics first as the others seem so interresting too 
Thank you for taking the time explaining this in way a novice like myself can understand. Can't wait till i get of work so i can tinker with this at home.
/jens
Couldnt keep myself away from the computer last night trying out what you wrote Solo. Though had to get to work (where i am now) early, so couldn't play with it a whole lot. With material scaled and applied in SU it makes it much easier to get one of Vue's .mat to replace it and scale that instead. So thank you so much for the tip.
I'm not sure if the bumpmap of Vue's materials needs some different settings as i get some weird patterns on some of the wooden planks. Might be because i had to scale all the way down to like 0.0something (will attach a pic when i get home).
@d12dozr said:
Here's an easy way: http://www.cornucopia3d.com/forum/viewtopic.php?t=12275
Looks perfect ! Thank you d12dozr. I figure i need some photoshopping of the terrainmap to use it as heightmap? I think i can handle that, but the main problem before getting so far is to set Vue to render the top view only and not the perspective camera? Couldn't really find the setting in Vue's render options and can't find it via google 
Hi Solo
I guess i could've created a new topic for my Vue question, but since it was in the same project i didn't.
The idea was to create a more accurate/more detailed terrain in Vue for my project. But since the projects main focus is the models i've created FOR the terrain i also want those to be rendered nicely = i thought i could do both in Vue (terrain+modelrendering).
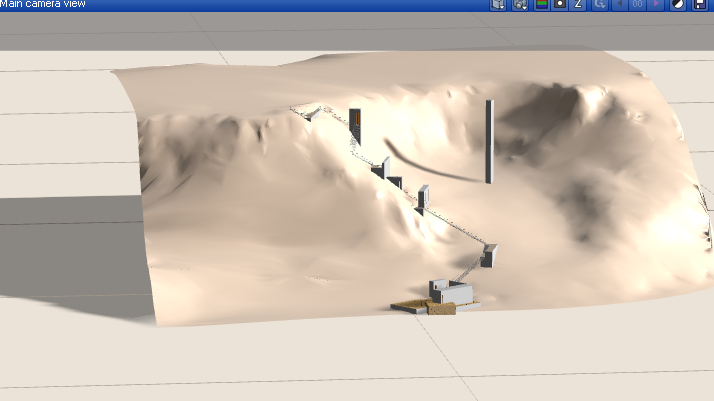
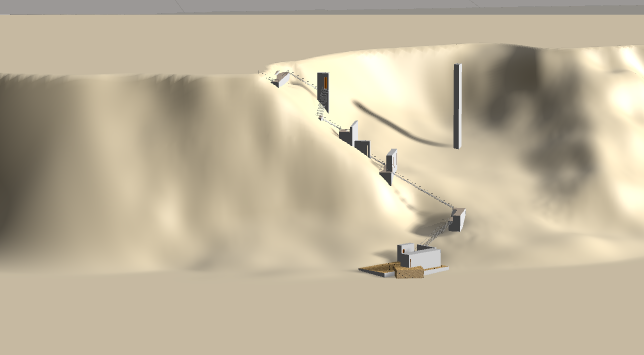
I figured i could export my entire SU model (including the terrain i created from contours+Artisan) into Vue to create a more realistic terrain. I could not find any way to create a terrain in Vue out of the imported SU terrain(img 1), so i just created a standard one(img2) and edited it to look like the imported from SU by "push/pulling" in the terrain editor with the SU terrain viewable.
Im rather new to the whole texture/render scene since this is my first year as an arch student, so when you suggest mapping the wood in SU first, i figure i create a new texture in SU's material list, load the .jpg or what ever img of wood planks/boards and resize/fit that img to my model (goes for every texture i guess). Then i export directly into Vue (via .obj or the SU->Vue plugin). And here i load a Vue material onto the group and it will know the scale? Or does it have to be from the same texture i used in SU?
I'm so sorry for the rather confusing text, but i guess i shouldn't hope to learn everything about this over a period of 2-3days googling...
To sum it up:
How can i create a Vue terrain to match the imported terrain from SU (without doing the manual editing that i've spend hours on now)?
Why does loading Vue materials onto the imported SU object's plane mess up the scale/bump map or what ever is going on?
Thanks again for the time you guys take helping out us newcommers, hope to return the favor some day !
(the assignment is to build a place where people can go for a swim on the small island of Hven between Denmark and Sweden)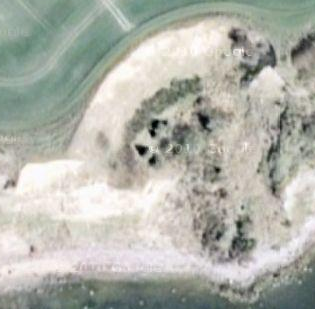
right, so i couldnt get either of the two suggested plugins (thomthom and reshaper) to do me any good. I think i would have to start all over to fix it.
I downloaded the a trial of Artisan and managed to get a better outcome.
I really wanted to make the landscape look good, so i decided to try out Vue. But the importing and uv scaling of textures is driving me mad!
How come it messes up when trying to apply a texture to my imported su model? ie adding wooden planks gives a really ugly bumpy looking smudge (i cant scale/rotate the material to make it look better for some reason, no matter what scale i try its just messed up), though if i place a cube from the Vue toolbar next to the model and place the exact same material (same settings) it works perfectly?
Tried to fiddle with the import settings by making sure that both SU .obj export was sat to cm and Vue's display settings also to cm. Tried to resize when importing (auto resize, i dont know what value to put in manual thought i've read in an old Solo post that there are a 0.254 value if its in inches?).
As you can see the plane i'm trying to place a material on was made as a group in SU before exporting.
So what am i doing wrong?
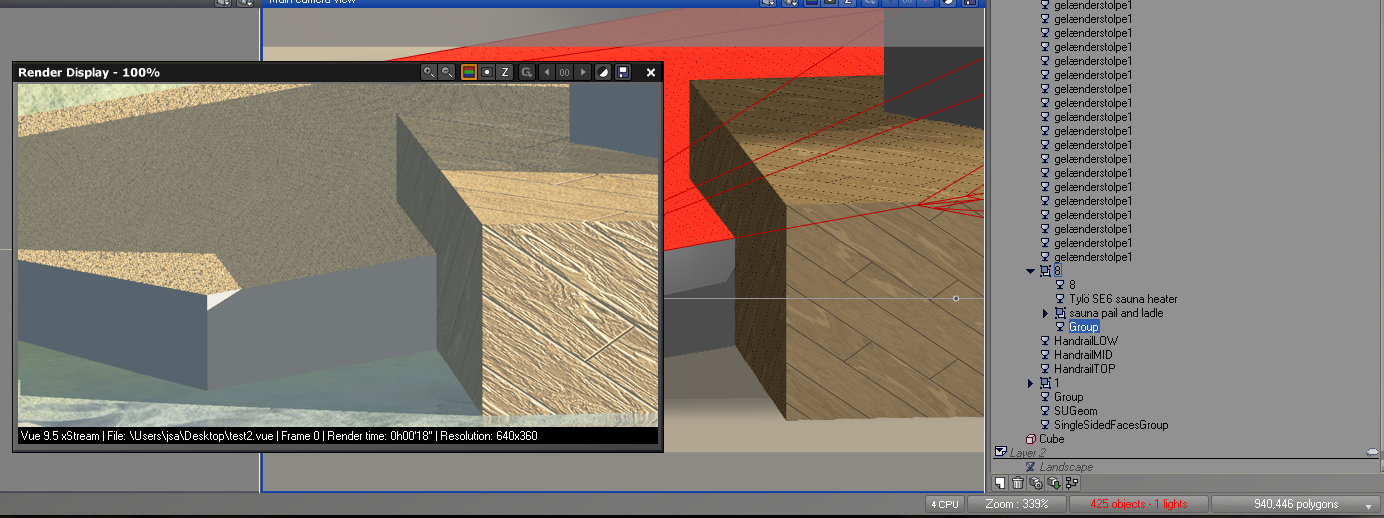
It was indeed the displacement value in the texture (was set to 2%).
I will try out those plugins you've linked to get a better looking landscape later on if time allows it (deadline in 1 week for this assignment).
Thank you so much for the feedback Earthmover.