sketchucation logo sketchucation
    • Login
    1. Home
    2. davidh
    3. Posts
    Oops, your profile's looking a bit empty! To help us tailor your experience, please fill in key details like your SketchUp version, skill level, operating system, and more. Update and save your info on your profile page today!
    🛣️ Road Profile Builder | Generate roads, curbs and pavements easily Download
    D
    Offline
    • Profile
    • Following 0
    • Followers 0
    • Topics 129
    • Posts 500
    • Groups 1

    Posts

    Recent Best Controversial
    • RE: LAKESIDE

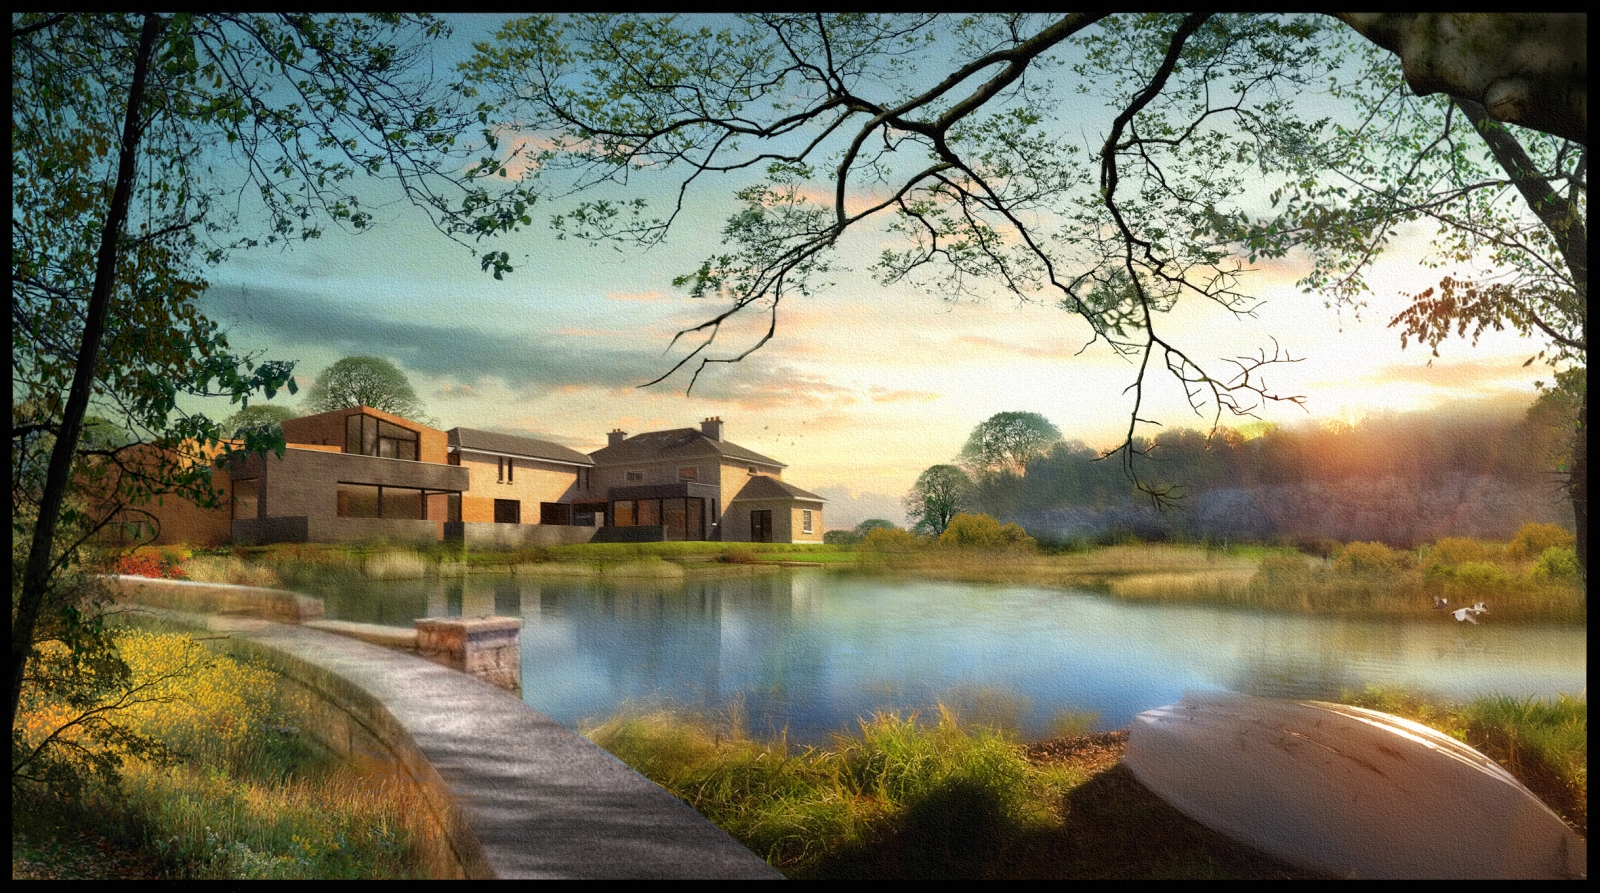
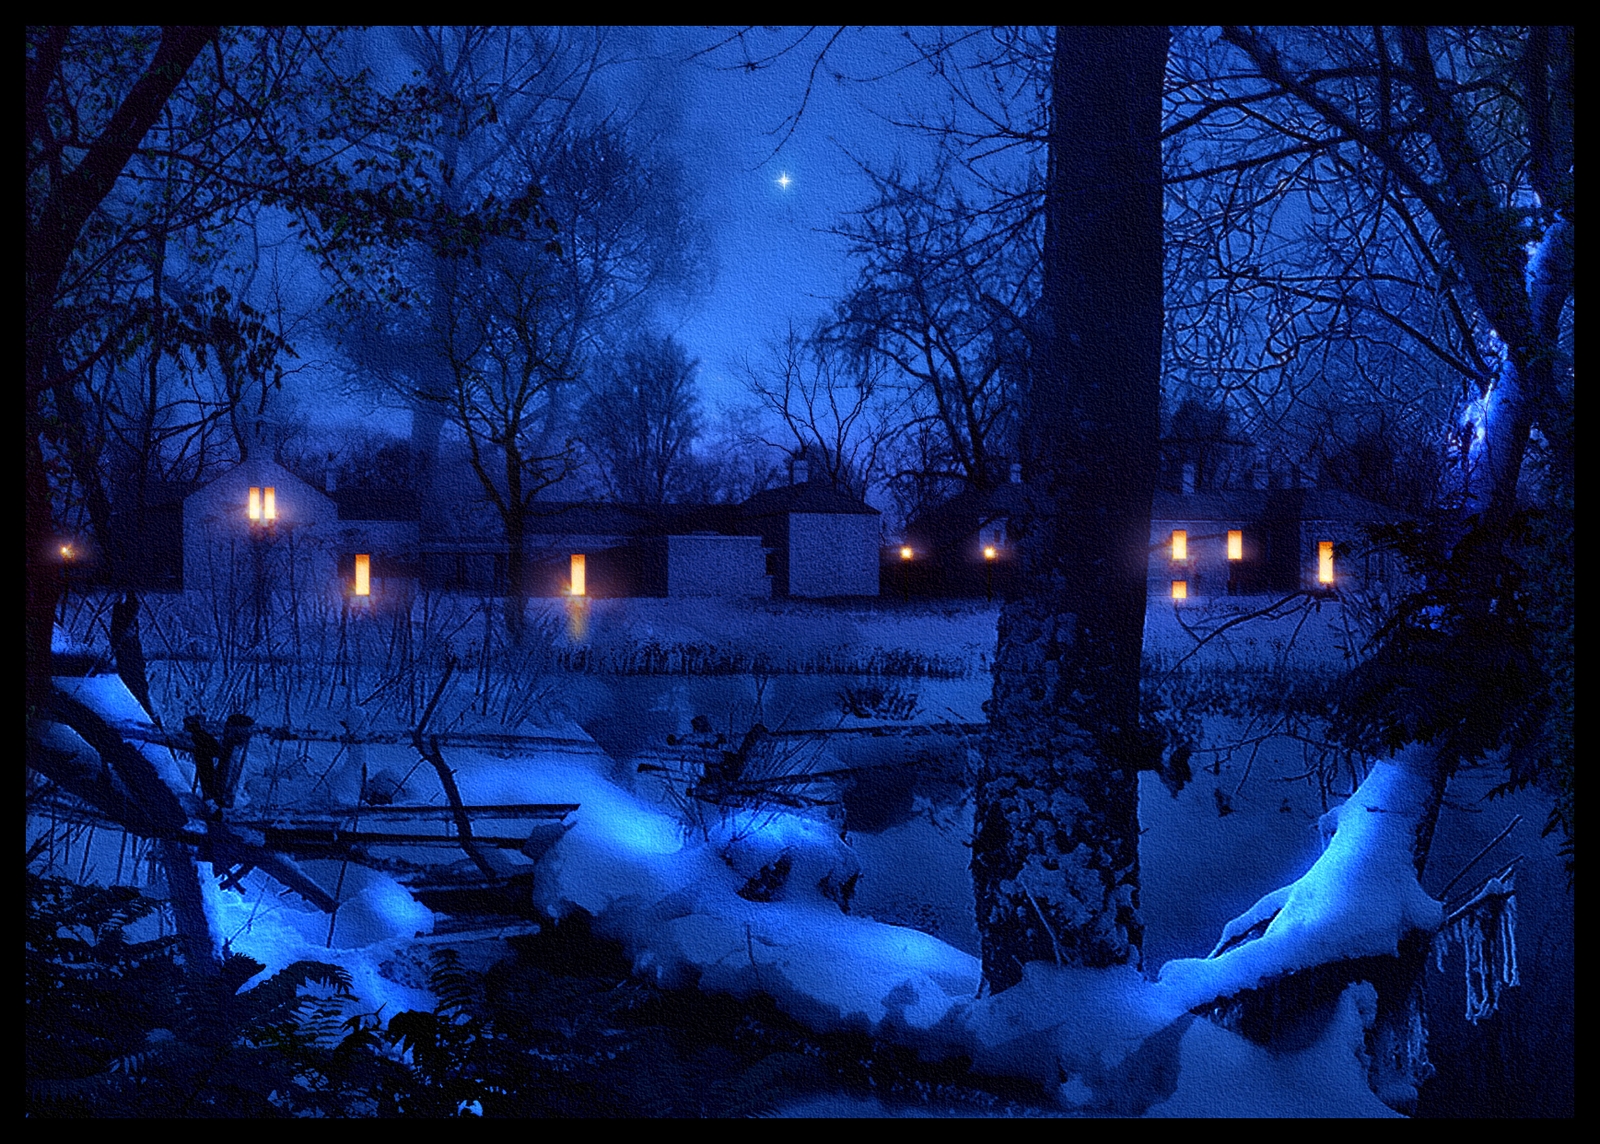
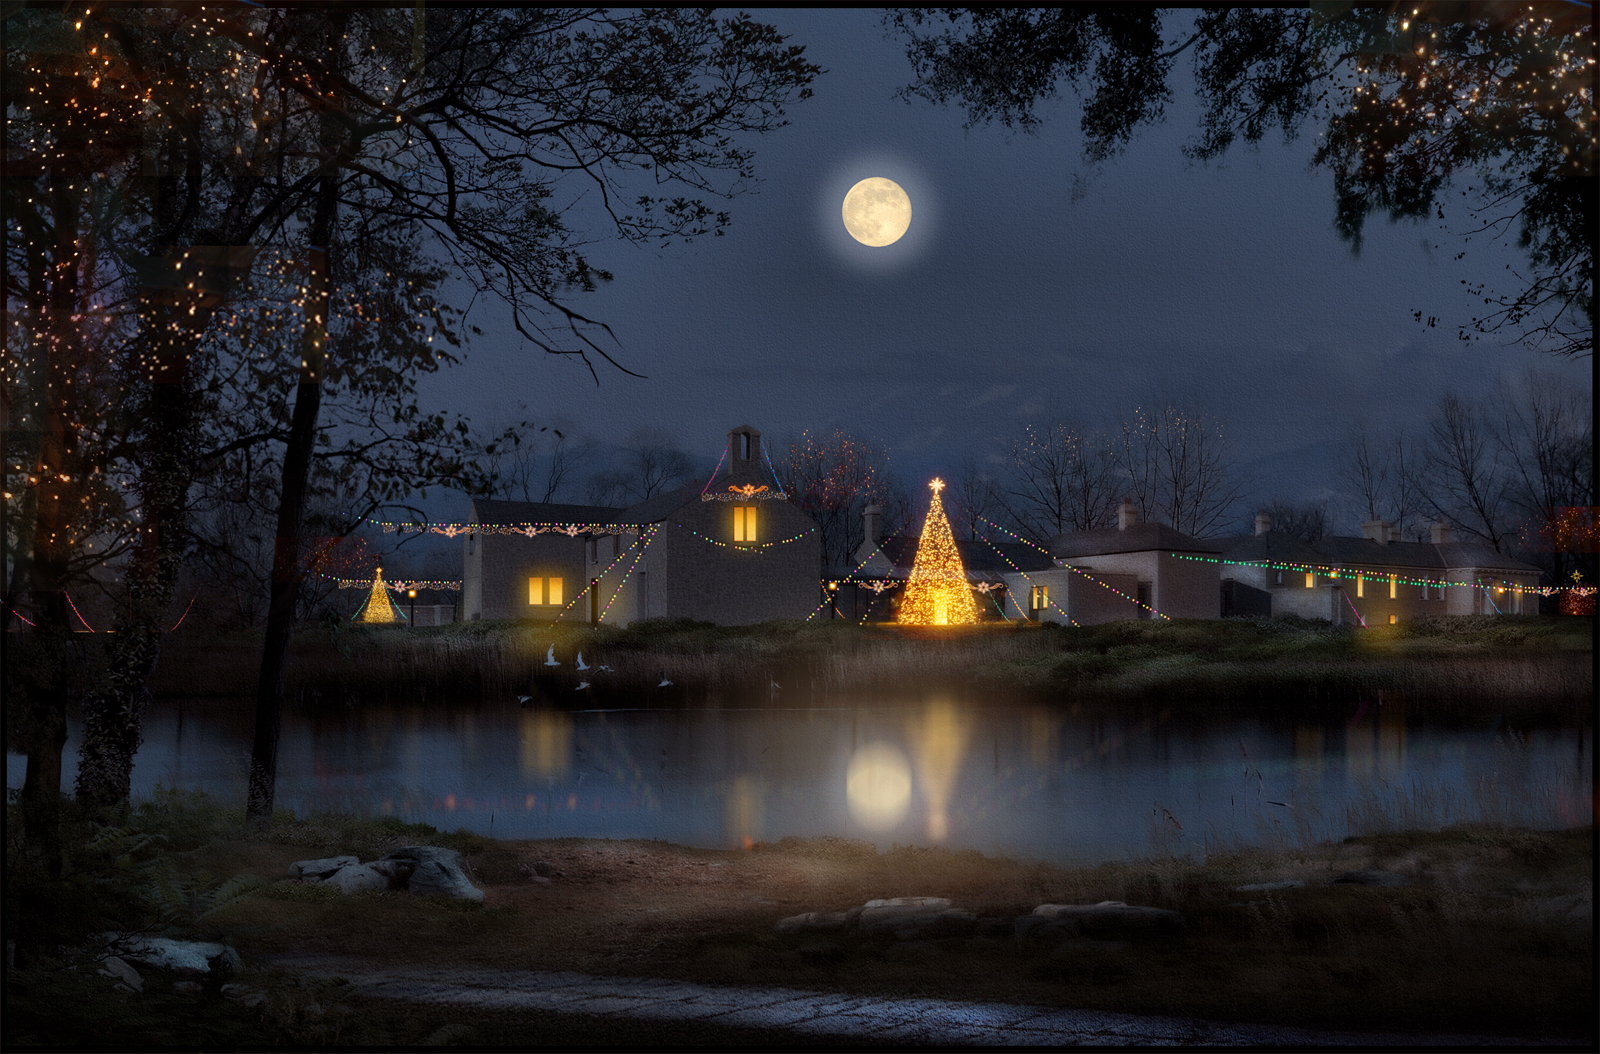
      I thought I was finished with this until after Christmas but I was trying out some new landscape techniques and thought I would upload.The house in the model is actually located in a suburban area but I much prefer more natural/wild landscapes.

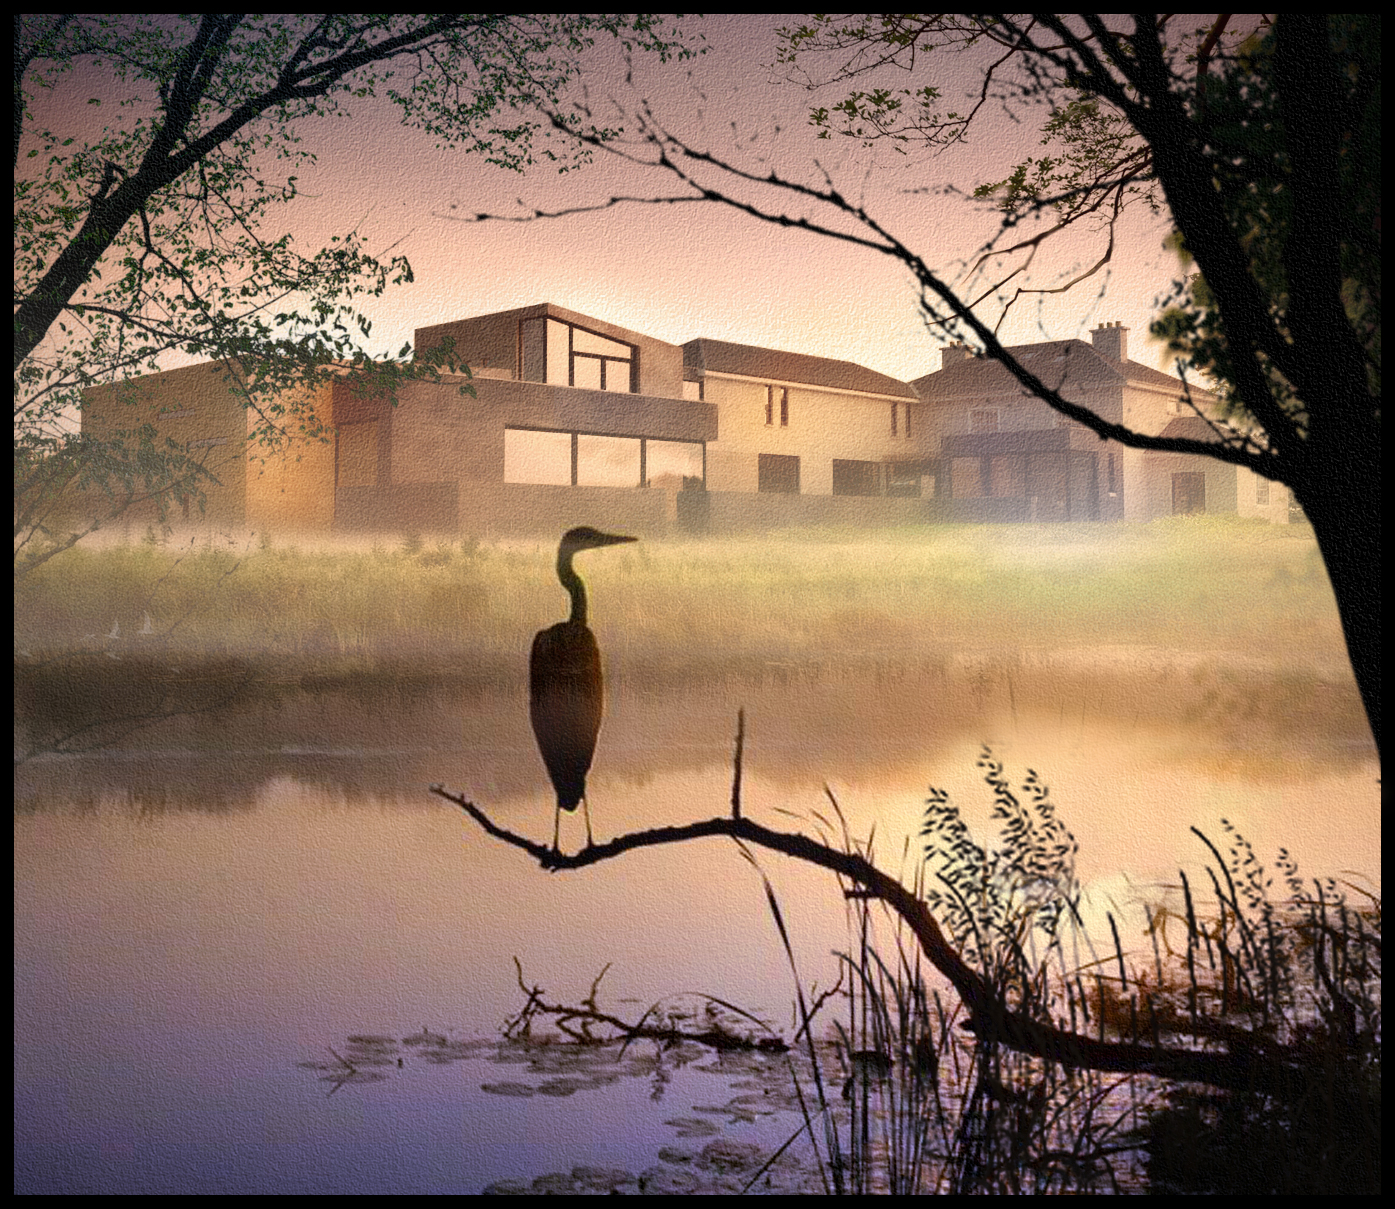
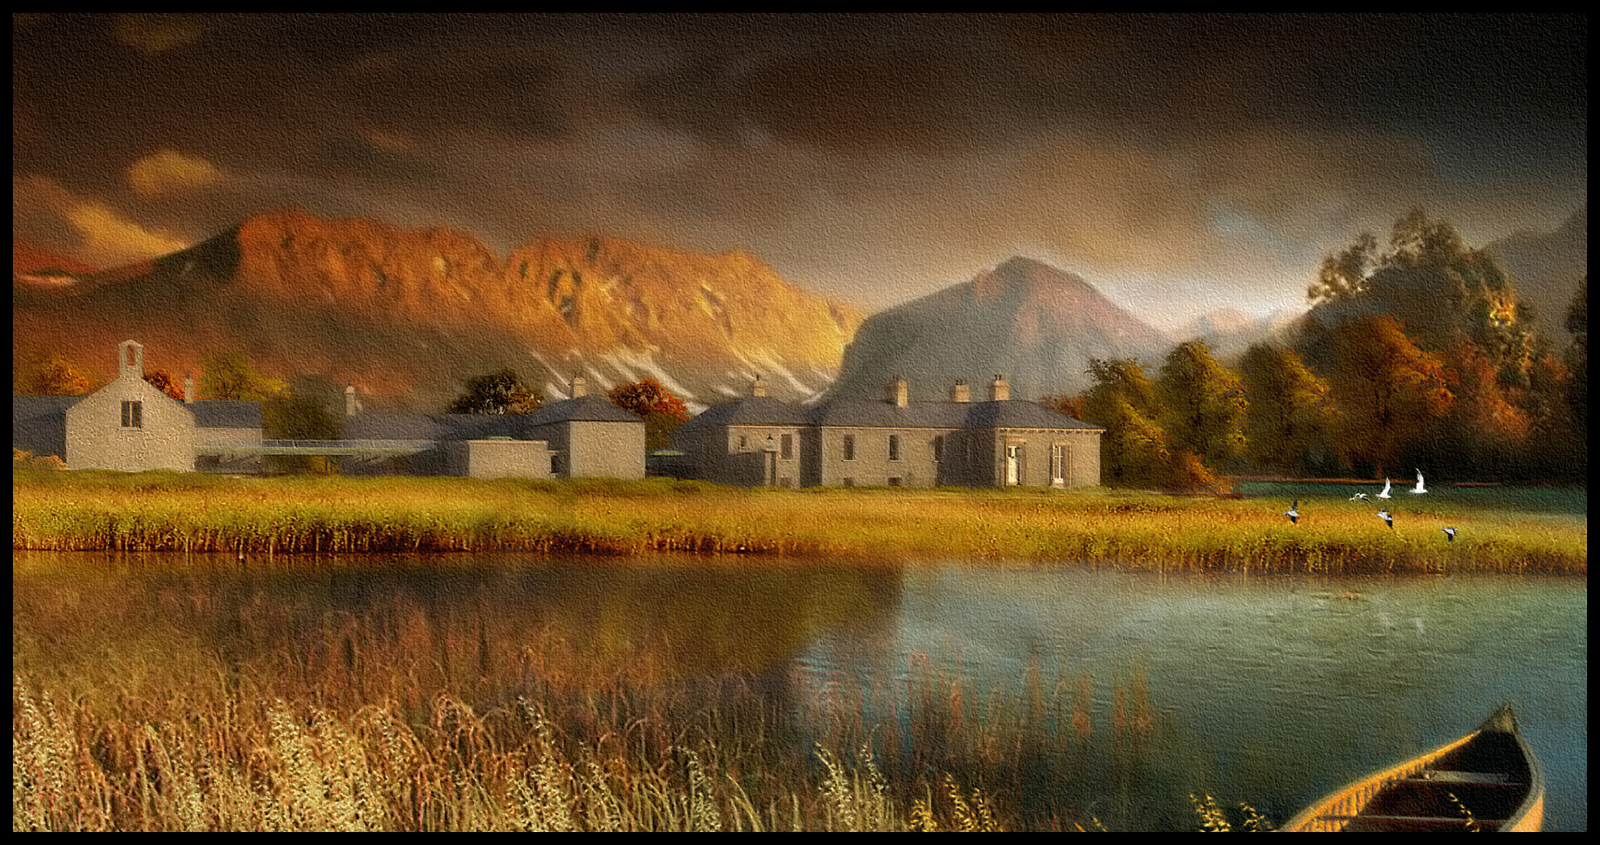
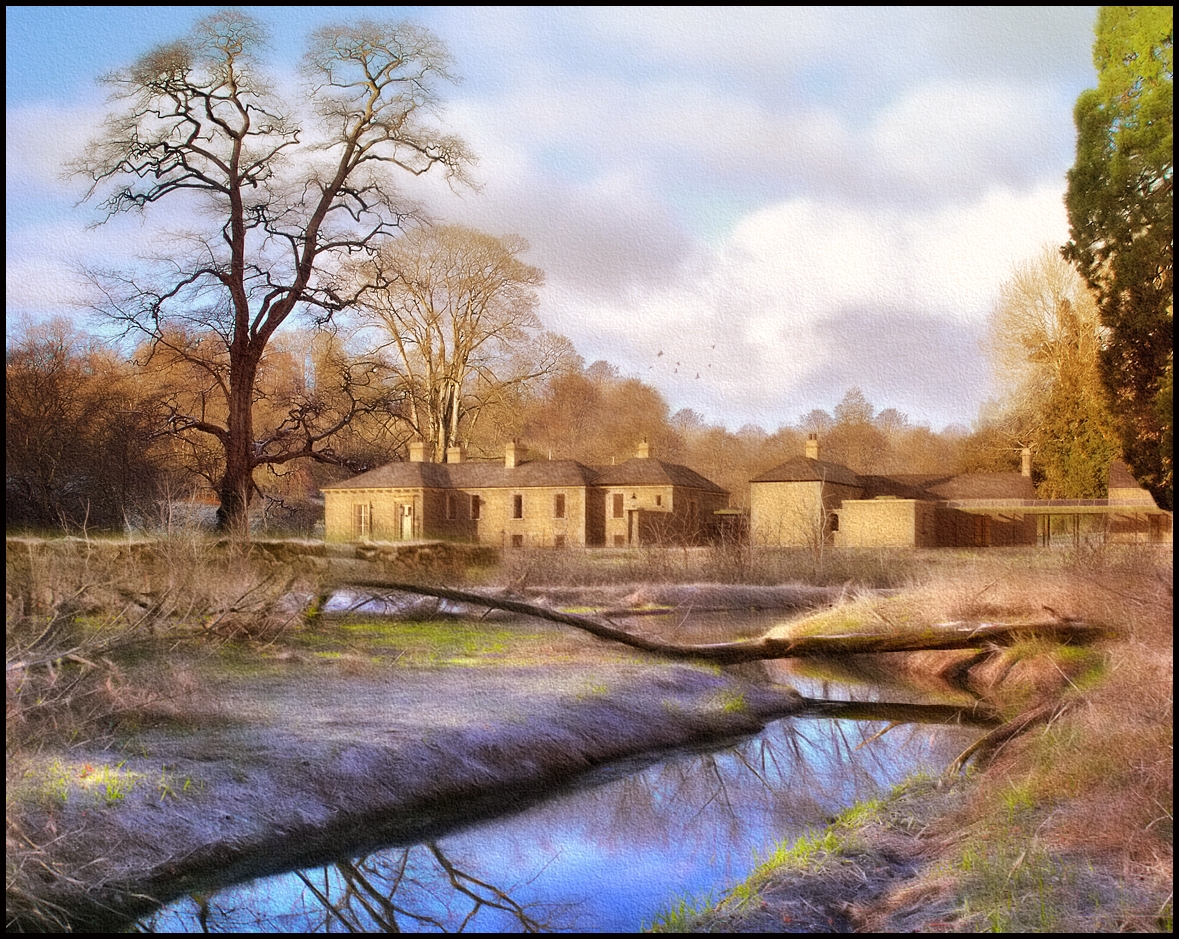
      One of the things about the composition is that most of the major elements are pointing to the house.The boat,cliff face in the background and low wall at front,even the low overhanging branches are all pointing in the direction of the house.This helps to draw your attention towards it.The foreground tree on the right is leaning in ,again ,towards the house.

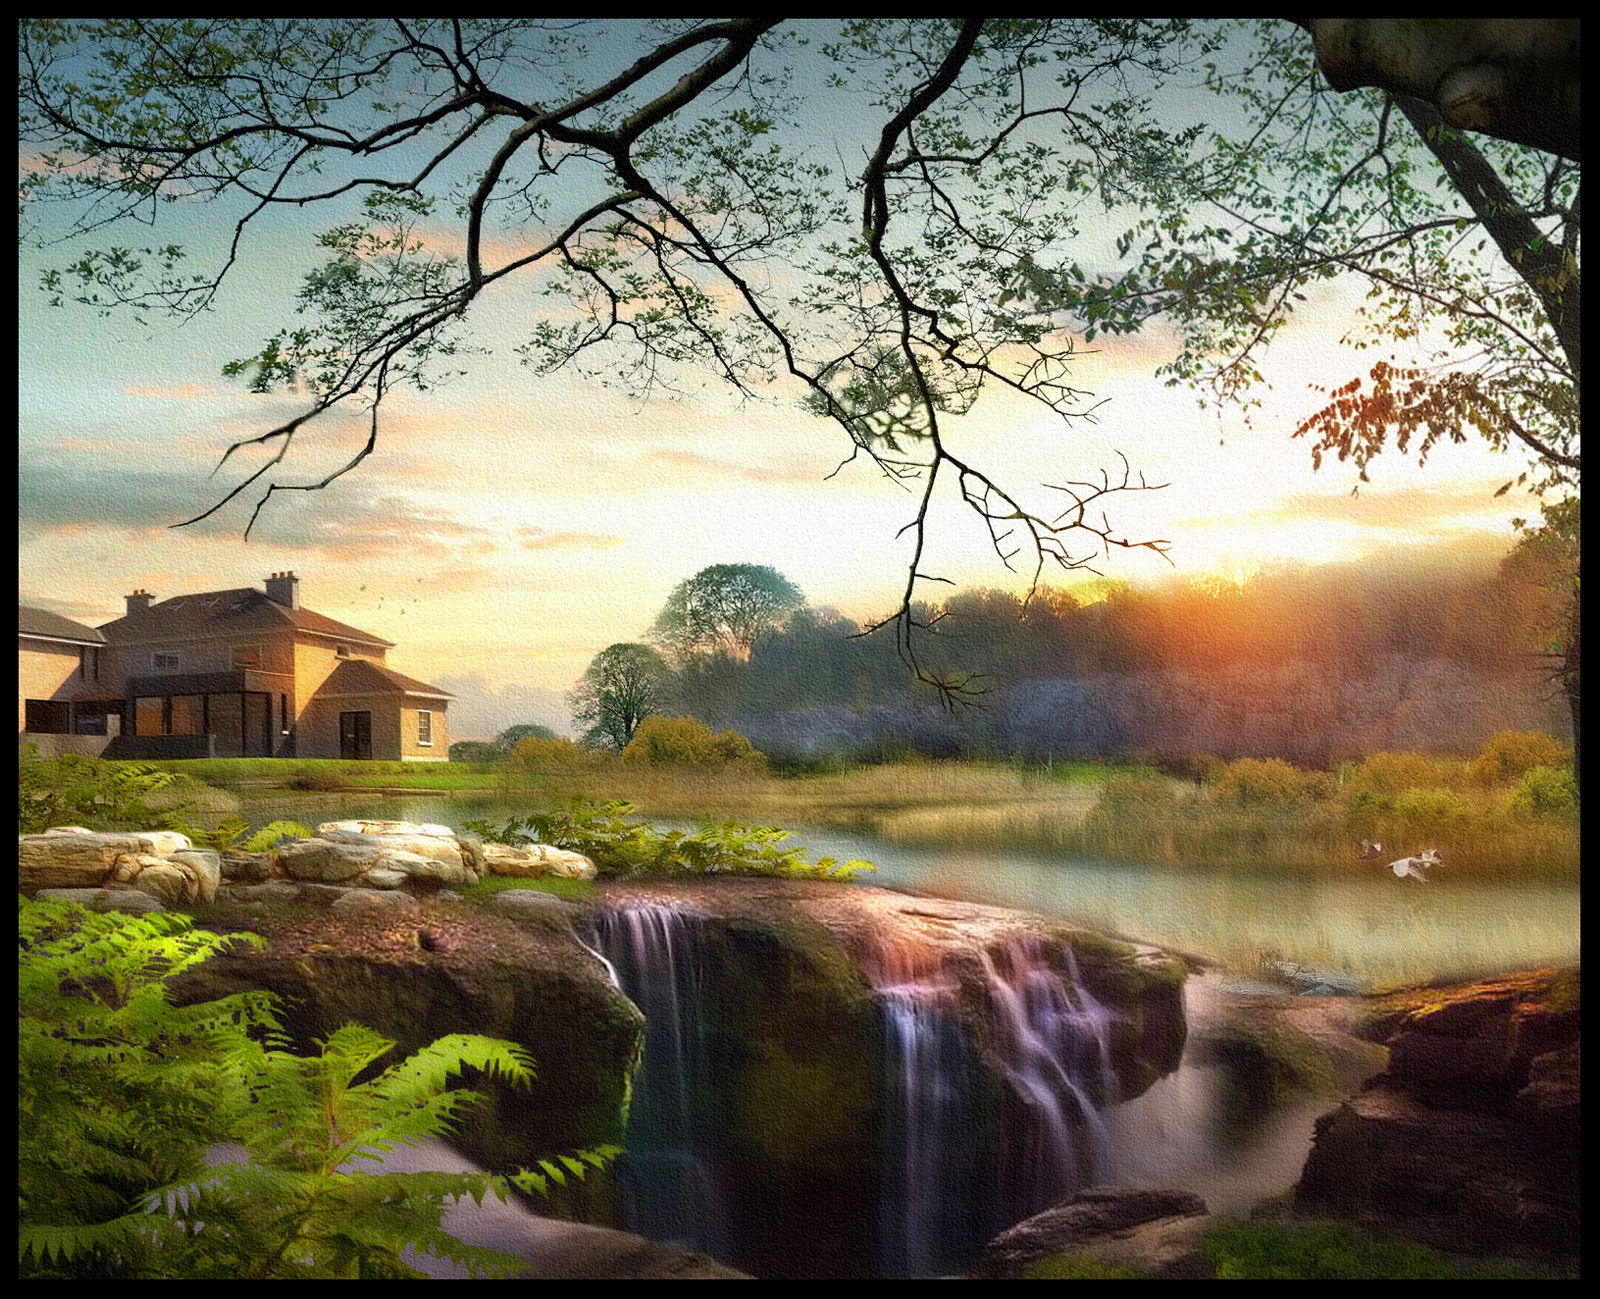
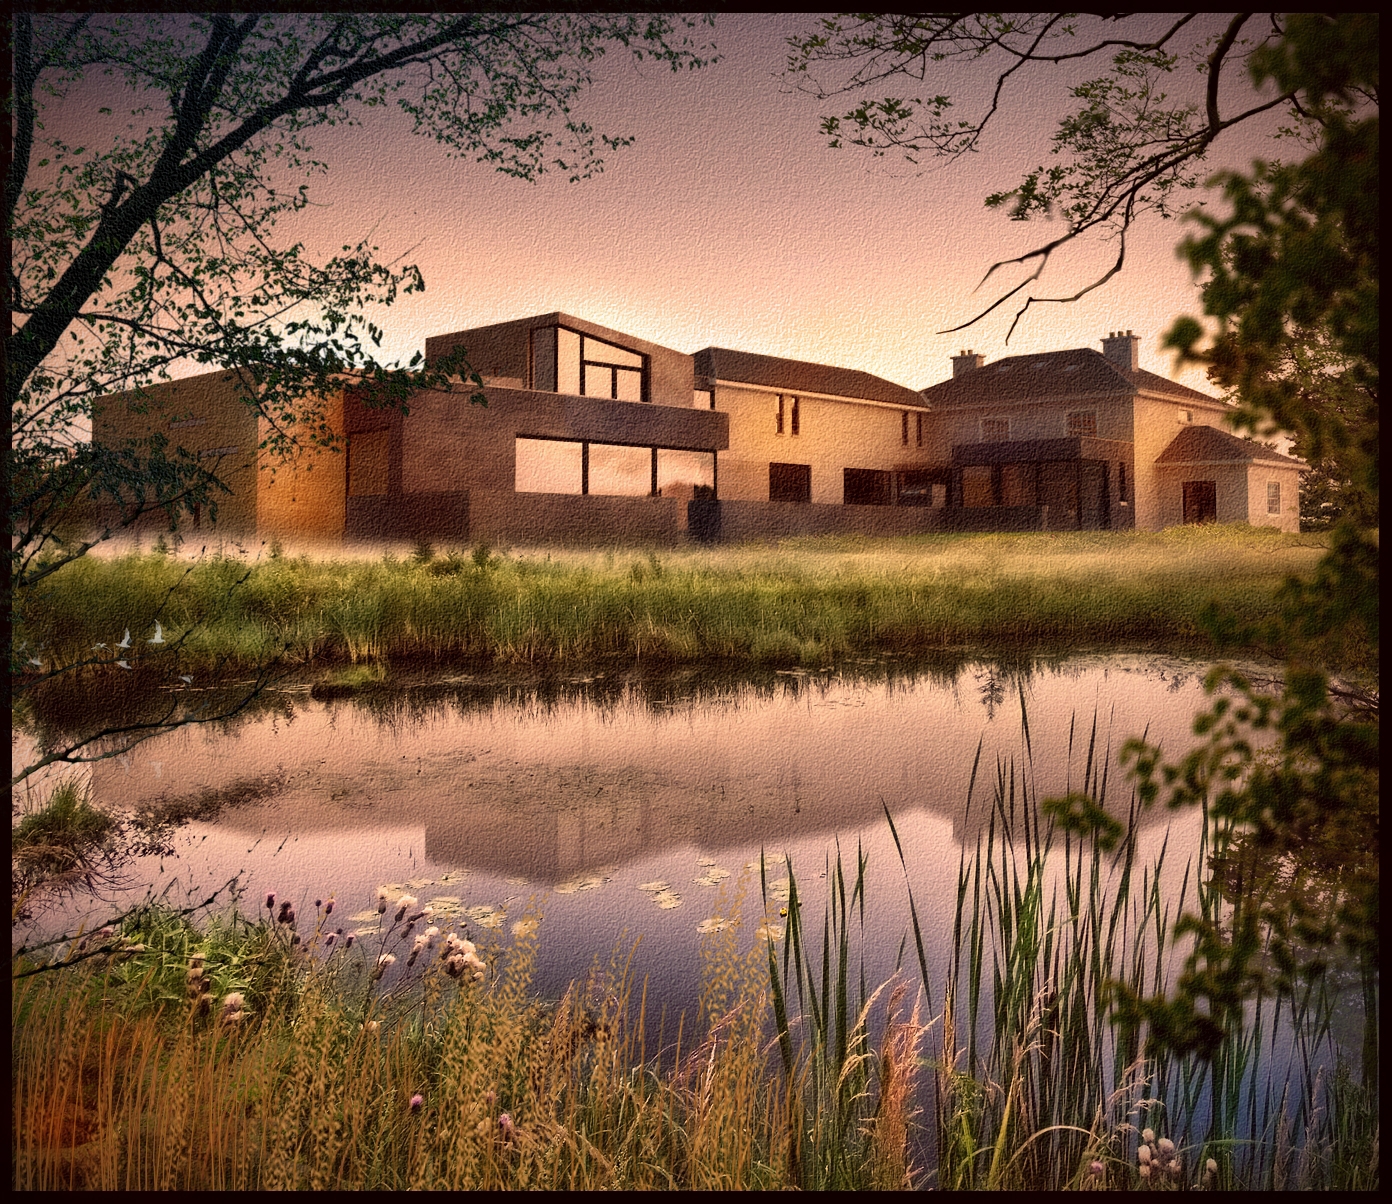
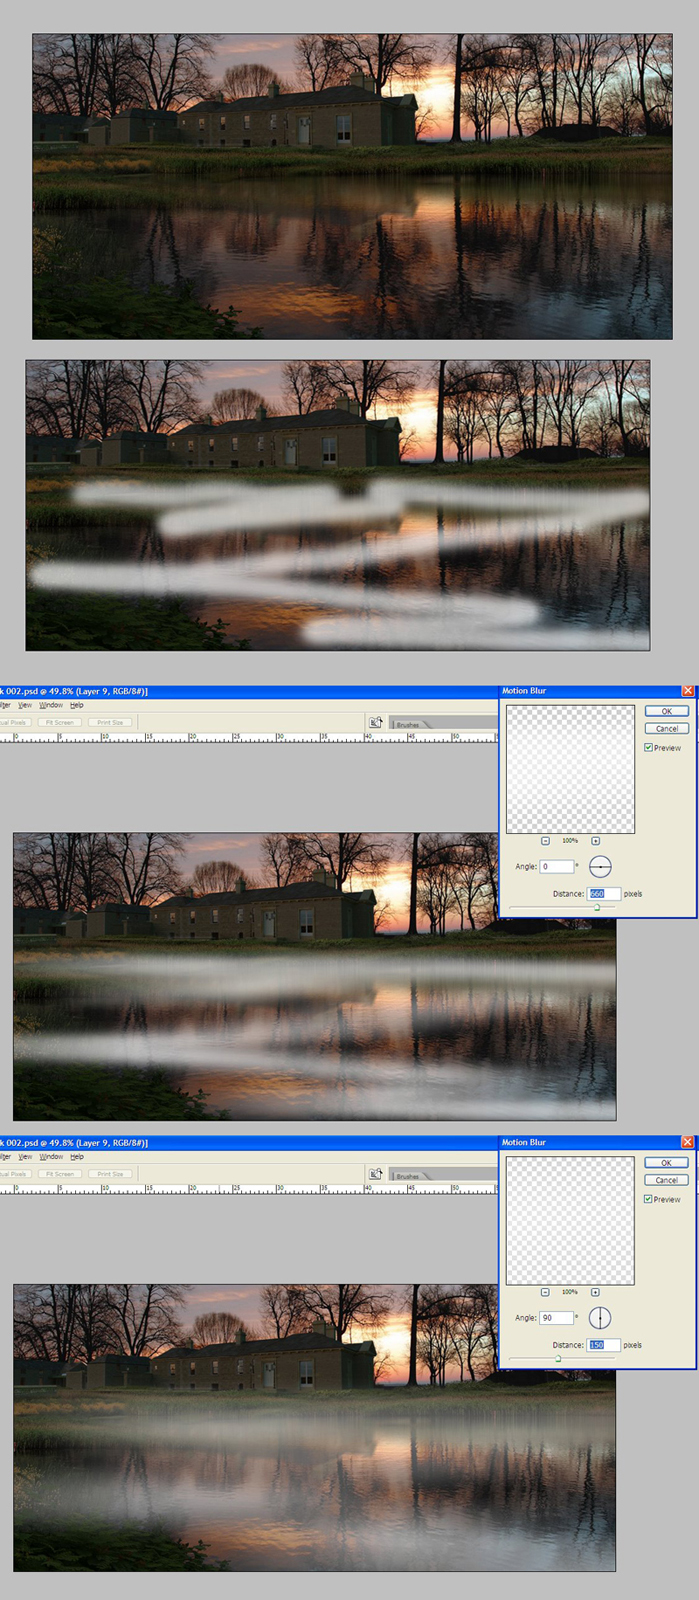
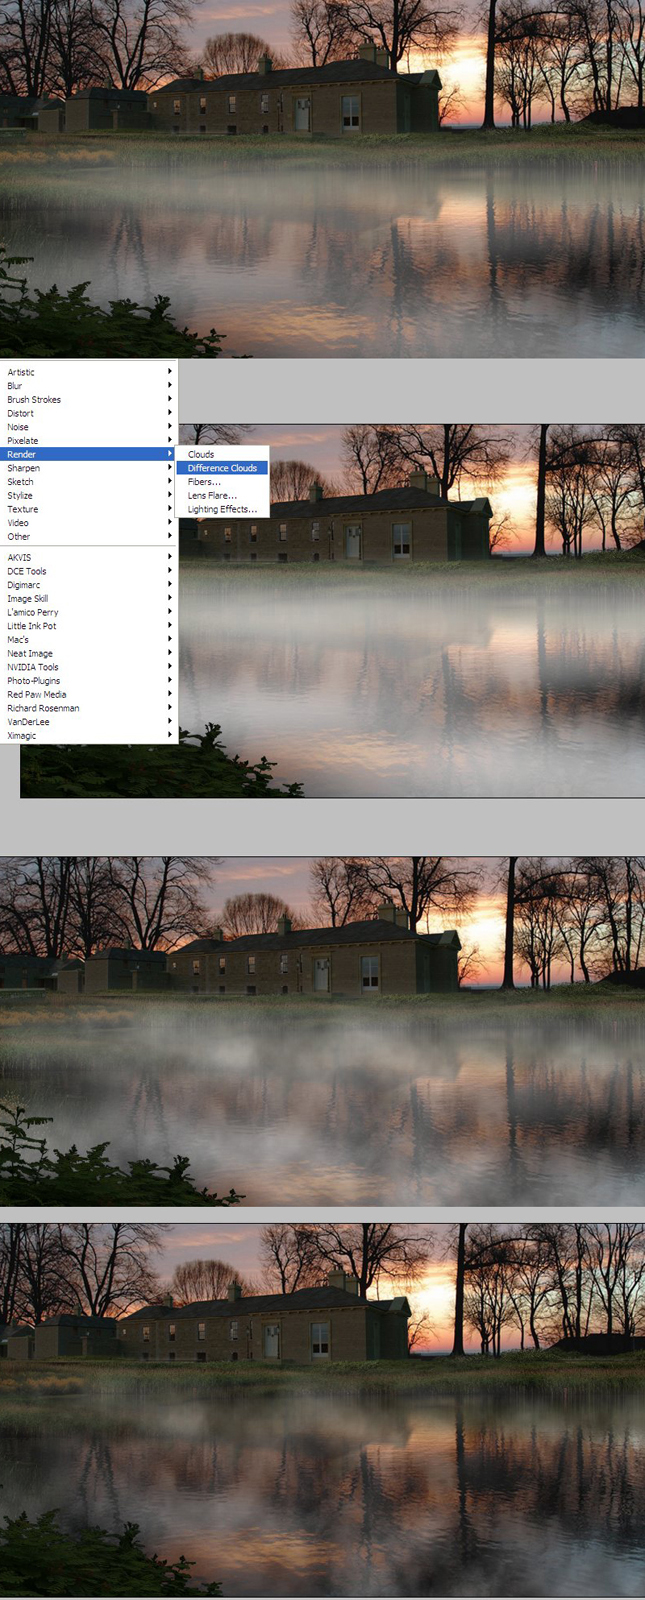
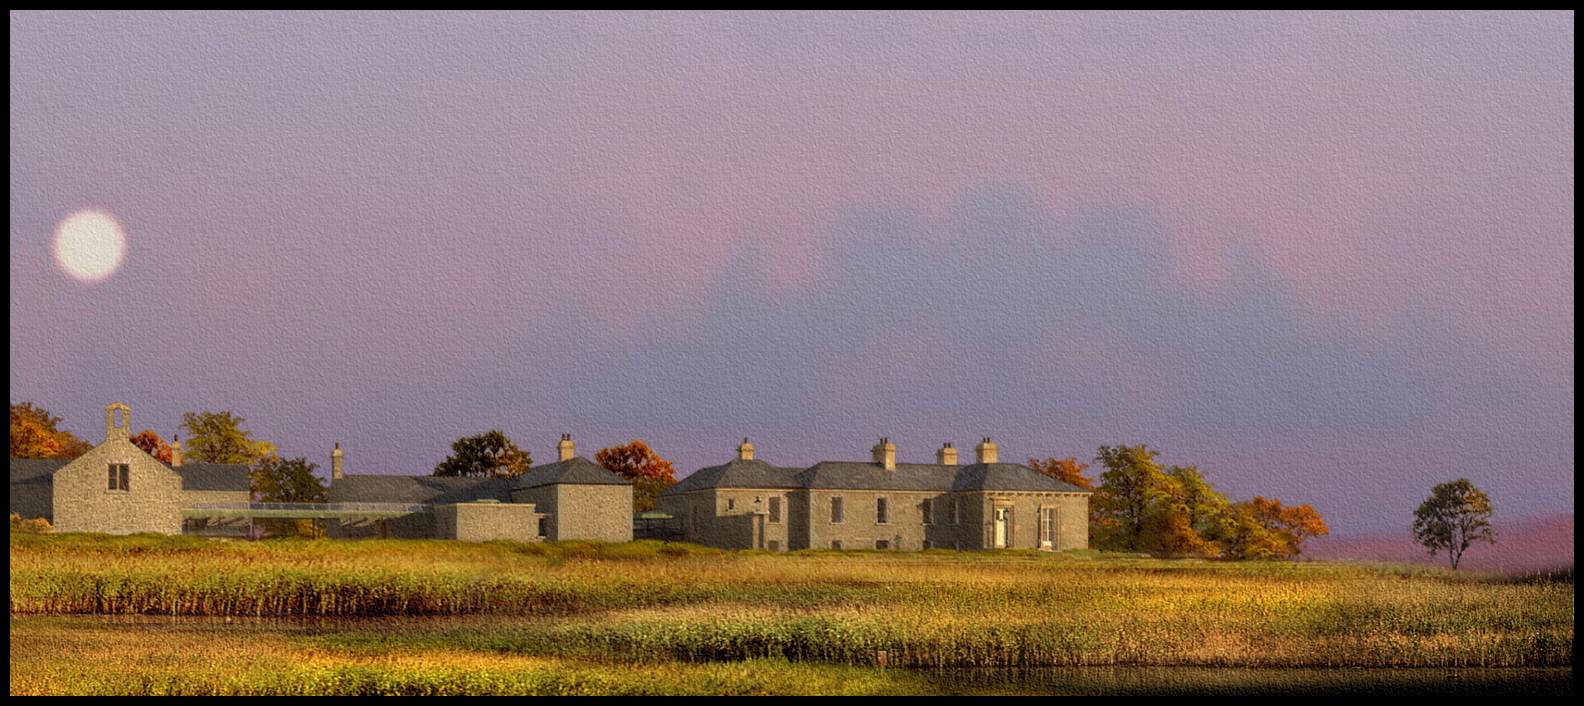
      The second image is more an exercise in adding some movement via the falling water,plus it helps to catch some of the red light from the low evening sun.

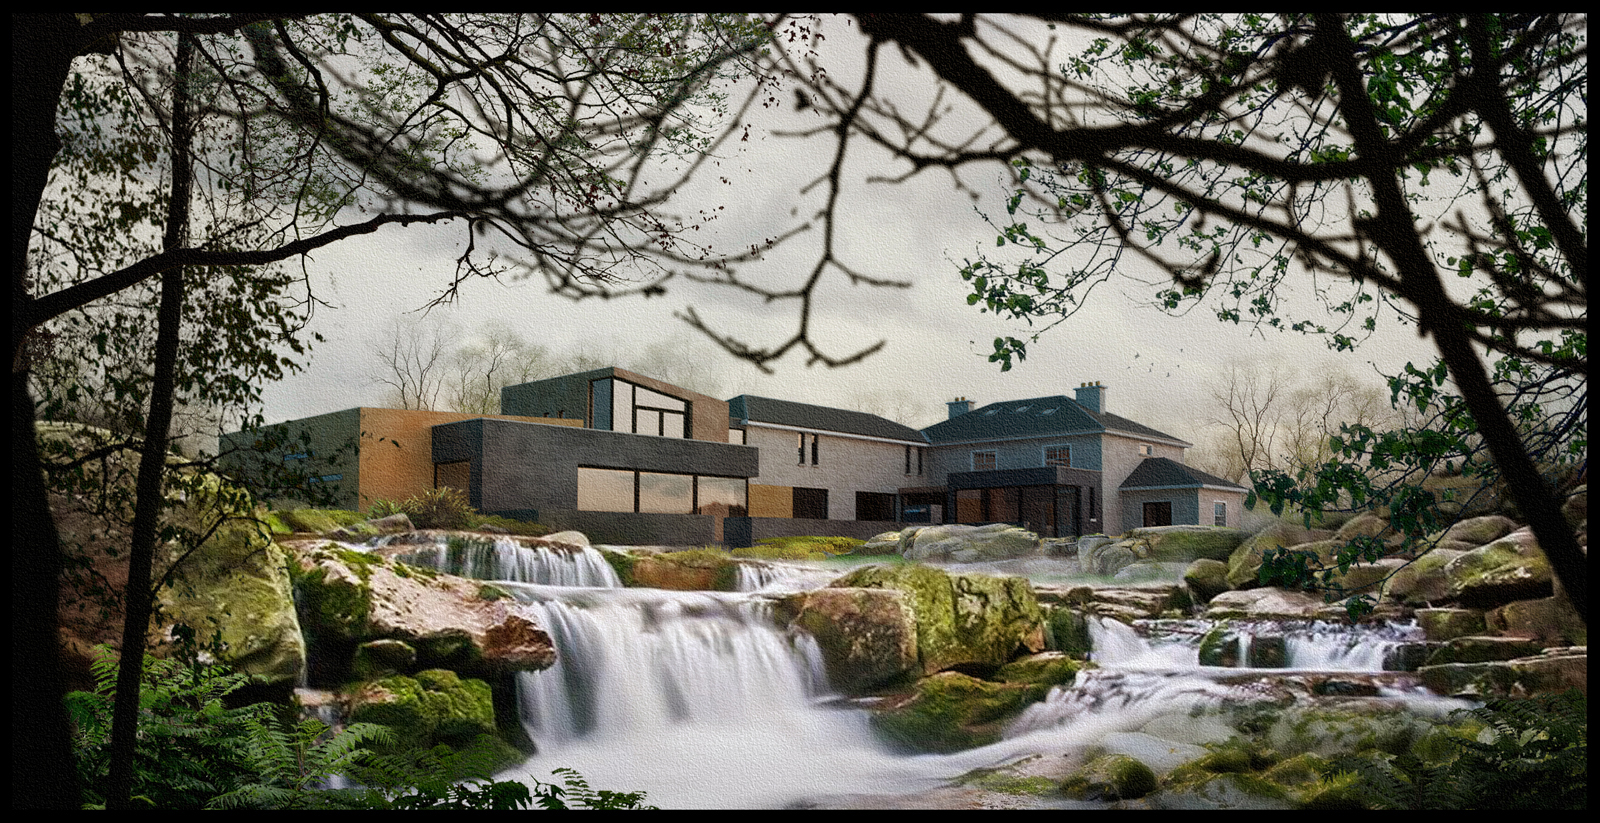
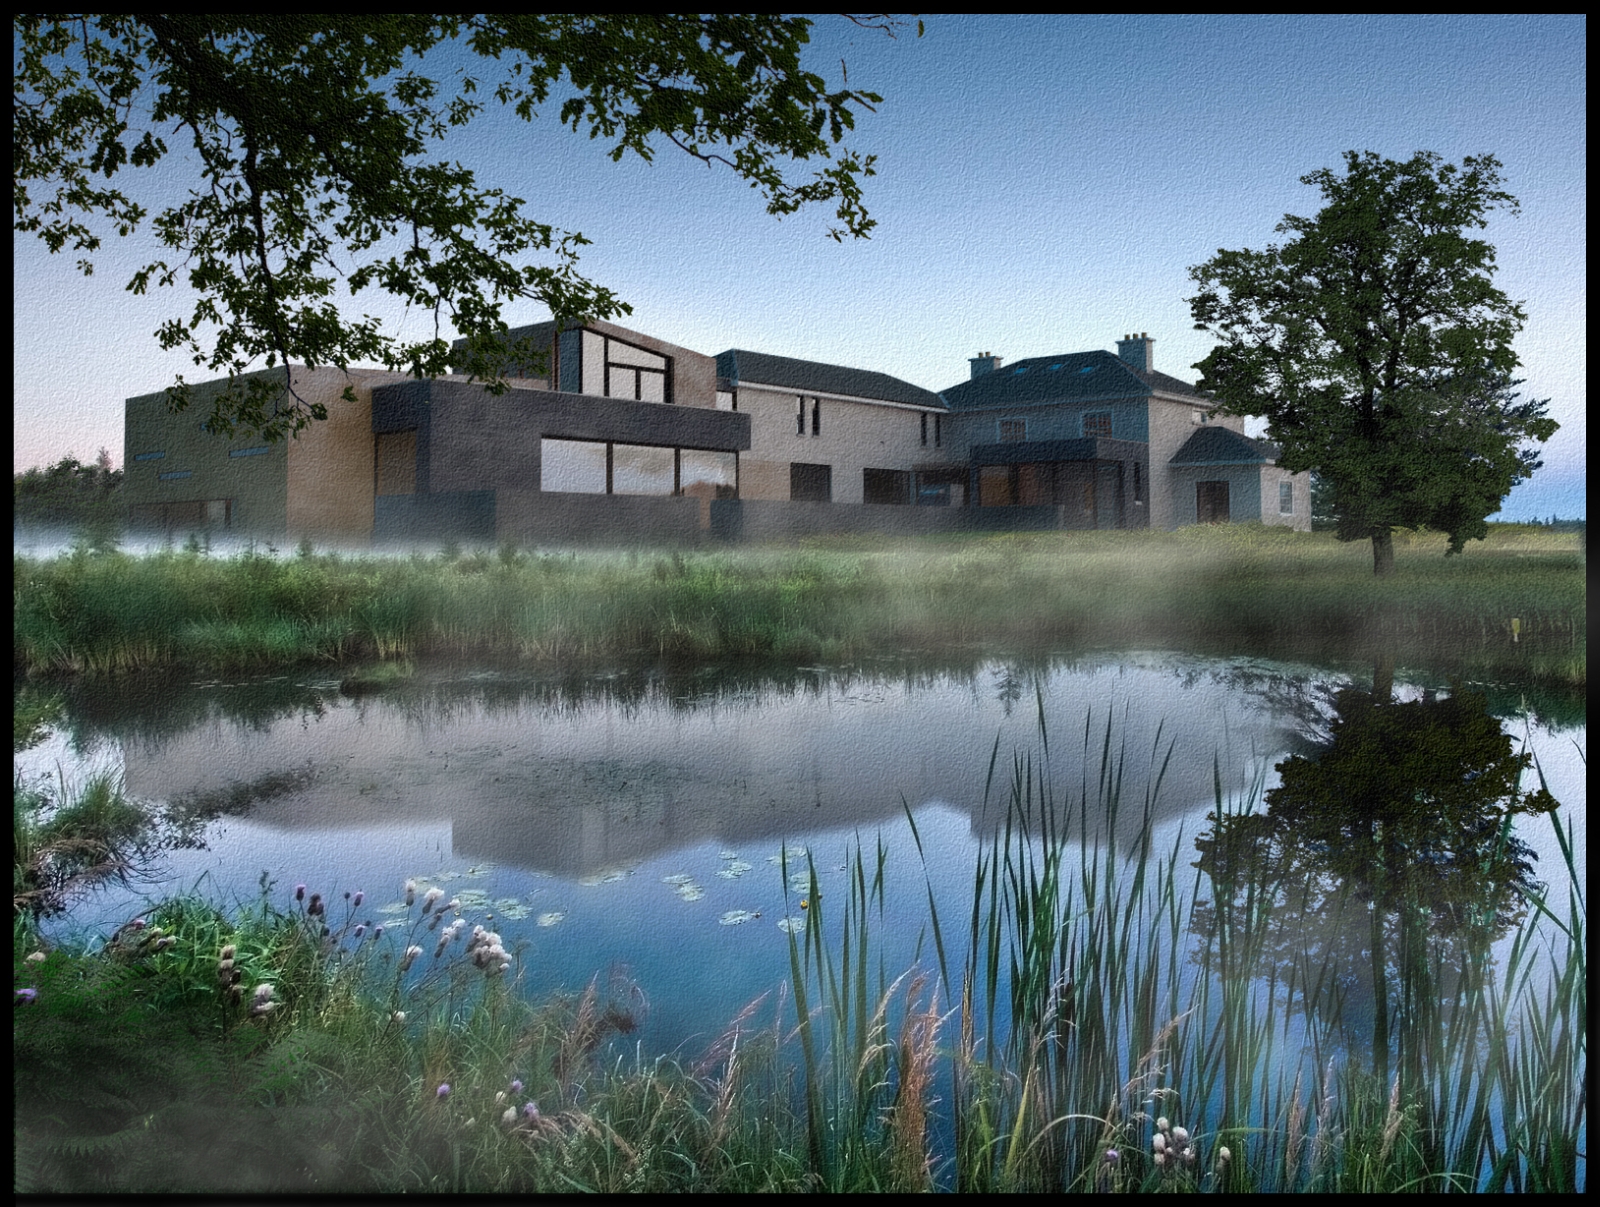
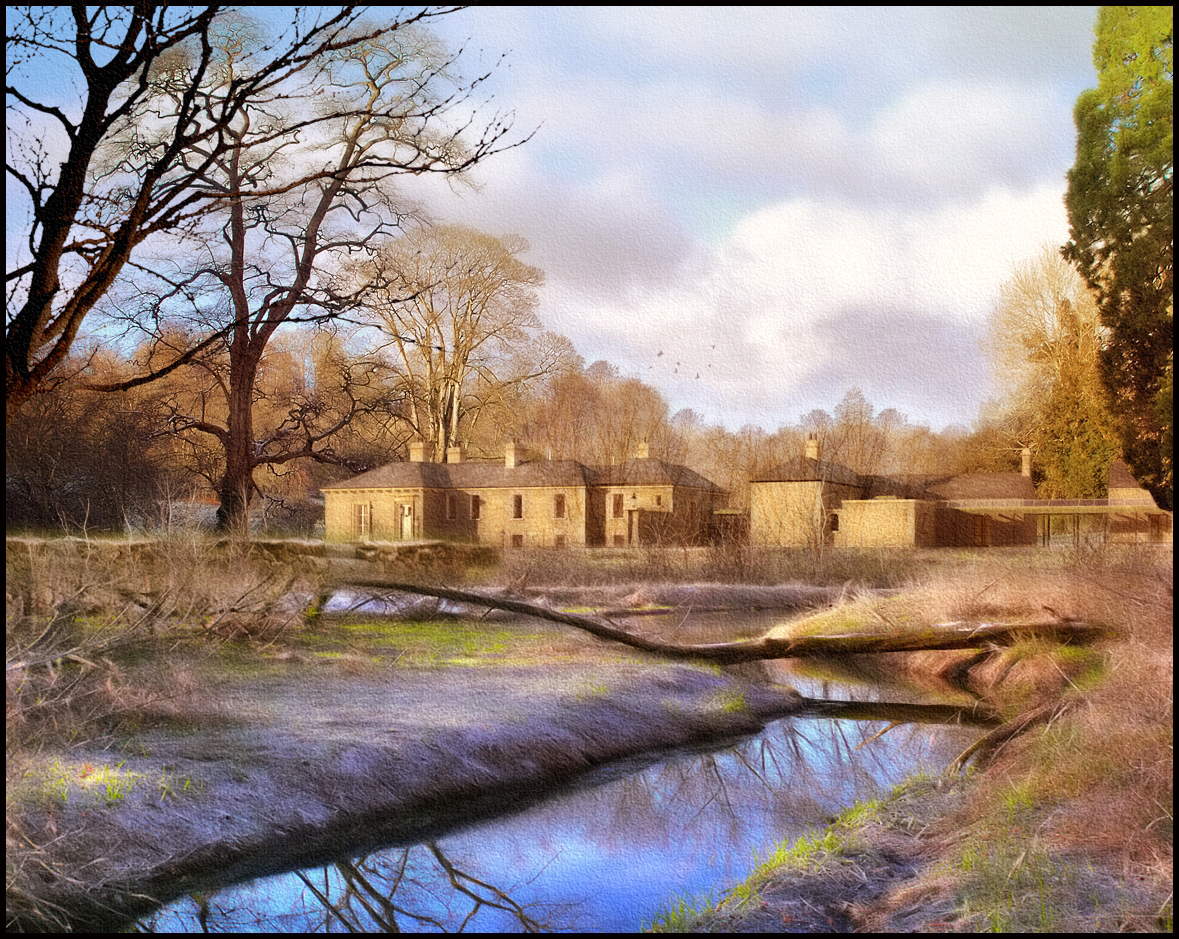
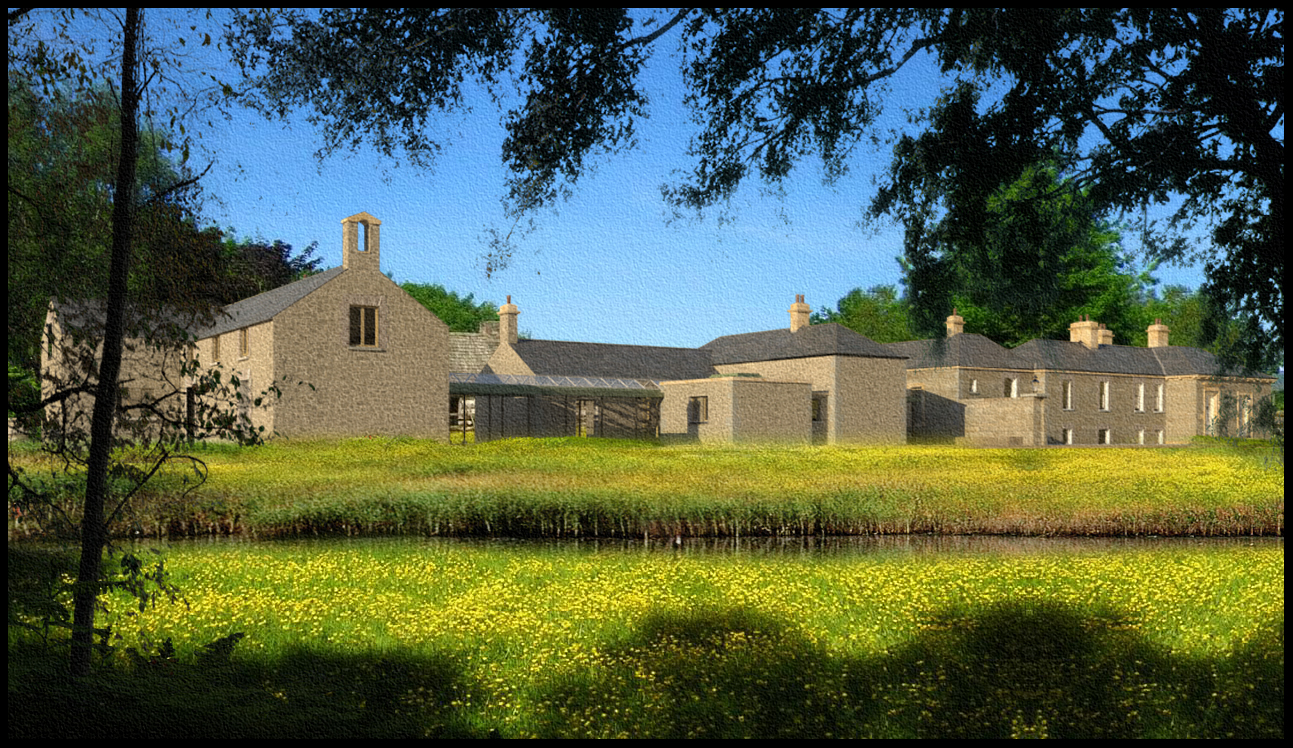
      For the third image I wanted to try a variation on the water with a different light.I think the water is a bit overdone but the overall lighting,in this case an overcast day works quite well.


      Poolhouse lake with wall 02.jpg


      Poolhouse lake with waterfall.jpg


      water 02.jpg

      posted in Gallery
      D
      davidh
    • LAKESIDE

      One final image before Christmas


      Poolhouse lake 001.jpg

      posted in Gallery
      D
      davidh
    • Adding dirt maps

      A very simple step by step for adding dirt maps

      1.Open your raw render.
      2.copy and paste the dirt map you want to use
      3.distort the dirt map image so it aligns with the wall edges
      4.use "SOFT LIGHT" blend set at 70 -80%,you will now see the staining coming thru.
      5.delete the dirt map on areas where it wouldn't normally appear i.e. windows and doors
      6.Add a layer mask to the dirt map and using the gradient tool,pull downwards.This has the effect of feathering out the bottom of the staining.If the staining is not strong enough duplicate the dirt map layer.
      7.Add dirt maps/staining elsewhere by copying back in the original dirt map and scaling to suit.Again its good to add the layer mask/gradient so the staining is more pronounced at the top of the wall.
      8.You can copy this layer around and add colour variations such as red to indicate rust staining,or green to indicate plant run off.

      Its also a good idea to add a couple of different dirt maps to add variety.

      There are some photoshop grunge brushes available for down load but I always find this method quicker.
      (The dirt map used in this image is attached here)

      So thats it.This wil be the last tip until after Christmas,so nothing left to add except Merry Christmas to all.


      PART 1


      PART 2


      DIRT MAP


      FINAL IMAGE

      posted in Post Processing
      D
      davidh
    • RE: The shape of tips to come

      Those were actually done from a VRAY image taken thru foto-sketcher.
      Since then I have created a new method for my final NPR.
      While i would be happy to show how I did that,there are a couple of tips in how I do final images that I would be reluctant to share.

      I am happy to show how I do certain things,but we live in a very competitive world,and some of my processes will have to remain private.
      But I will continue to show how I do individual things.I hope this dosen't come across the wrong way.

      posted in Post Processing
      D
      davidh
    • The shape of tips to come

      Its good that so many people are availing of these tips.When I first had the idea I didnt know if people would be interested but it seems to be going well so far.
      I am trying to put a list together of a few more post processing tips for the new year such as:

      Adding dirt maps(these can be done in the actual rendering engine,but as this is a post-pro forum,I will cover it here)

      Adding sun bursts/God rays as from the sun bursting through a storm cloud

      Adding rain and splashes(Ive done a full storm tutorial which I believe will be uploaded by the Sketchucation team soon)

      Adding grass (I have previously uploaded a small step by step(http://forums.sketchucation.com/viewtopic.php?f=81&t=40517)but I will upload a more concise version with images

      If I can think of any more, I will add to this list later.
      And it goes without saying,so I'll say it,if anybody has any tips to share, feel free.

      posted in Post Processing
      D
      davidh
    • Adding lights to dark winters night

      Below is a step by step to adding lights:

      1.Open your image(if its a daytime shot use this tutorial to change it to night):
      http://forums.sketchucation.com/viewtopic.php?f=351&t=41695

      2.Add a new layer called "Lights" and create a rectangle the same size as the window.Using the 2 colours indicated on the image create a gradient to get the orange to yellow effect.
      3.Copy around and scale,then merge all layers.
      4.Duplicate the layer and adjust the THRESHOLD(IMAGE/ADJUST/THRESHOLD) so only the windows remain.
      5.Blend the layer using "SCREEN".
      6.Use "GAUSSIAN BLUR" to soften the effect
      7.Locate an image with a bright sparkling light.Copy the light using a feathering of 10-20 .
      8.Paste into the night image and use SCREEN blend.(you may have to duplicate the pasted light to get the correct intensity)
      9.Use "GAUSSIAN BLUR" on the pasted light and copy and paste around the image.

      For step 7 you could use the default photoshop lens flare but I find these do not give me the effect I want.
      The finished image can be seen here:
      http://forums.sketchucation.com/viewtopic.php?f=81&t=42087


      adding lights part 1.jpg


      adding lights part 2.jpg


      adding lights part 3.jpg

      posted in Post Processing
      D
      davidh
    • Christmas Image

      I wasn't going to upload any more images from the manor house series but here is one I was playing around with this evening .It has a slight variation on how I did the lights for the last night shot and I think this method works a bit better.I will upload a step by step to the post process forum showing how I added these lights.

      EDIT:Post pro step by step showing how to add the lights now uploaded to post pro forum.


      Snow at night with star 01.jpg

      posted in Gallery
      D
      davidh
    • RE: EARLY MORNING

      A soft version with an onlooker taking the early morning rays


      WARM MORNING THROUGH TREES.jpg

      posted in Gallery
      D
      davidh
    • RE: EARLY MORNING

      Slightly different composition and colour toned version to get that cold morning feel


      BLUE MORNING mist.jpg

      posted in Gallery
      D
      davidh
    • EARLY MORNING

      A new model in an early morning setting.


      WARM MORNING.jpg

      posted in Gallery
      D
      davidh
    • 3d pdf

      A quick question - is there a free pdf sketchup convertor - for a job we have at the moment,I know there are some paid versions but we want to swap with a client asap.I spend most of my time on the gallery/post production,apolgies if this already exists.

      posted in SketchUp Discussions sketchup
      D
      davidh
    • RE: Manor house with early mist

      This is probably the last image in this manor house series.I'm working on a few new projects at the moment and hope to upload something in the new year.
      We're actually quite busy with "real" work at the moment but I always try and spend half an hour each day trying new effects.Some images work better than others and some dont work at all,but its actually quite relaxing creating the scenes.


      manor house _dark mountain.jpg

      posted in Gallery
      D
      davidh
    • Adding mist

      Attached is a step by step for creating mist:

      1.create a new layer called mist and paint on with a white brush the extent of the mist
      2.add a motion blur horizontally
      3.add a motion blur vertically
      4.duplicate the mist layer
      5.use filter render/difference clouds
      6.the second last image shows the difference clouds layer and the mist layer turned on
      7.the last image shows only the difference layer turned on.

      TIP:If you have added vegetation entourage by layers you can move the mist layer up or down to show the mist disappearing behind some elements and covering others.


      STEP 1-4.jpg


      STEP 5-8.jpg

      posted in Post Processing
      D
      davidh
    • RE: Manor house with early mist

      There were actually 2 layers inadvertently turned off before I saved as a .jpg.The first one missing was the foreground tree casting the reflection at the front of the stream,the second is the trees you are referring to.
      They are quite faint but I used artistic licence and reduced the opacity so they wouldn,t obscure the house.The reflection is much stronger though because the trees would in real life have a stronger value against the lighter blue of the water.

      The foreground tree reflection dosent match up exactly withe the actual tree,but in my opinion,it is not a problem. Ideally the foreground tree should be closer to the actual waters edge,but again,this would have obscured both the house and the larger darker tree behind.
      Its really all about what feels right,rather than what is right.


      manor winter 2.jpg

      posted in Gallery
      D
      davidh
    • RE: Manor house with early mist

      A clear winters morning.This iamge has a slightly looser feel with a lot of entourage elements overlayed and running into each other.


      manor winter1.jpg

      posted in Gallery
      D
      davidh
    • RE: Manor house with early mist

      Again,thanks for the comments guys.The materials are a mix of purchased entourage from places such as DOSCH.Some are elements rendered out of Sketchup and saved with an alpha channel, and some straight from photos,manipulated in photoshop.
      I get my inspiration from everywhere,true life,magazines etc.But I am always looking out for something different..
      The photo below is an example of the picture I will look at before starting a night shot.It has blues,yellows and oranges,all 3 of which I would try and envoke.

      Often I will blur the image so I can more easily see the colour values/tones and their relationship.I used to do a lot of painting and one of the tips I learned early on was to squint at the picture because the detail becomes secondary and its easier to see the colour relationships.


      St-Foy-Tarentaise-Chalet-At-Night.jpg


      St-Foy-Tarentaise-Chalet-At-Night blur.jpg

      posted in Gallery
      D
      davidh
    • RE: Manor house with early mist

      2 very different colour values for these 2 images.My preference is for the purple sky over the blue.I always find that blue skies are much harsher whereas soft evening light can create a mood much,much easier.


      manor house _low moon 02.jpg


      manor house_summer.jpg

      posted in Gallery
      D
      davidh
    • RE: Manor house with early mist

      An un-cropped image with the full set of lights except the foreground ones which looked a little too clunky.


      Manor house full christmas lights.jpg

      posted in Gallery
      D
      davidh
    • RE: Manor house with early mist

      Theres no such thing as too many lights...


      Manor house  christmas lights crop.jpg

      posted in Gallery
      D
      davidh
    • Christmas lights

      I recently uploaded a night shot with Christmas lights to the gallery.
      (http://forums.sketchucation.com/viewtopic.php?f=81&t=41810)
      Here I have attached a set of lights I created for the scene,along with how they look against the night sky.
      You can easily change these colours by desaturating the image or by playing around with the HUE setting in photoshop.
      At this size,these are really only suitable for NPR(Non photo real images)or they can be shrunk in size and placed far back on a photo-real night shot where the detail doesn't matter as much.


      CHRISYMAS LIGHTS.png


      christmas lights EXAMPLE.jpg

      posted in Post Processing
      D
      davidh
    • 1
    • 2
    • 10
    • 11
    • 12
    • 13
    • 14
    • 24
    • 25
    • 12 / 25