[Plugin] FredoTools::ThruPaint - v1.3a - 20 Oct 16
-
....O-O-O!
 thank you Fredo!
-
@wolfy said:
@unknownuser said:
Just a few other questions, as I am unable to reproduce it (and apparently it does not happen for the first users of ThruPaint)
-
Which version of SU
-
After you use ThruPaint with a material in the model (so no bugsplat) and you try a material in the Library, do you still get a bugsplat?
-
do you get a bugsplat if instead of a group, you paint a shape at top level of the model, or a true Component?
Thanks
Fredo
Fredo,
It seems to work beautifully on my work computer.

I will reinstall again and hopefully eliminate this bugsplat deal.
Thank you for your responses and I'll be sure to post my reinstall status.Hi Fredo,
Well the bugsplat continues on my laptop. I've installed the new version with the same result.
Again, if the material already lives in the model it works just great. Only when a new material is applied using the plugin do I get a bugsplat.
I've tried all types of shapes, groups, components, materails, you name it, all with the same result.
I'm using the latest version of SU Pro, Windows 7 64 bit if that helps, and all your other plugins run perfectly smooth.
Thanks again Fredo for your excellent work! -
-
It might be a conflict with another plugin, which you would not have in the PC at the office.
Do you have any plugins dealing with materials or UV mapping?For this, ould you type in the Ruby Console
Sketchup::Material.instance_methods.join("\n")and advise on what it returns.Thanks
Fredo
-
This is an Awesome Plugin Mr Fredo,
Just wanna ask, how to get rid or fixing these Red area beside click the Esc button?
And one thing,
If i'm using the Natural UV, material on the Top is look nice, but look a bit mesh at the back.
Is that something i should do

Thanks Mr. Fredo
-
In the case of your cushion, you could maybe split it in 2 symmetrical parts since the upper face and borders looks fine.
The Mesh UV mode looks less adpated because the shape is not generated as a Quadface mesh but with random triangles. Visually, you could however make it a quad mesh if you guide the reconstruction of the mesh by marking diagonals.
Keep in mind that ThruPaint is not at all an UV Mapping tool (you should use SketchUV for that). The natural mode just extend the UVs of the initial face to all adjacent faces with a few corrections. But it cannot solve the geometrical problem that it is not possible to warp an arbitray 3D Shape with a flat piece of paper.
Fredo
-
Fredo this is yet another pearl!
A couple of questions\wishes:
1/ How could I get back the native Alt-key eyedropper?
2/ How to correct the UVW mapping on the surface #1 (see attached)?
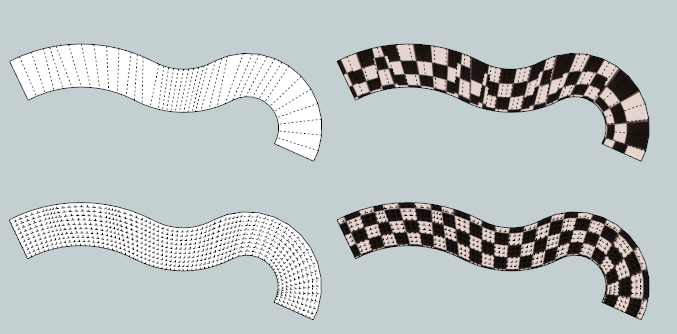
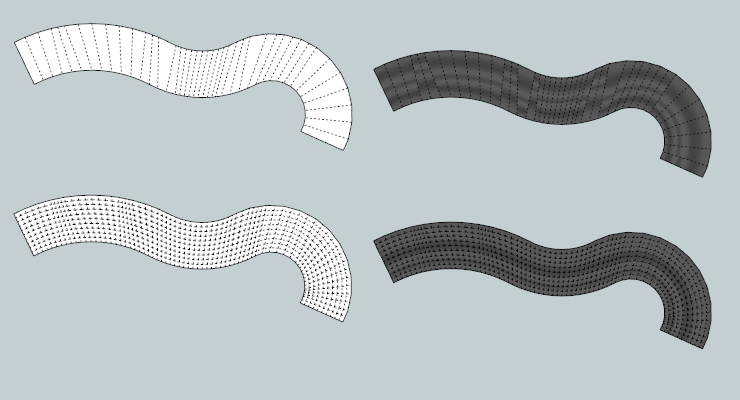
3/ If only the Thrupaint could bend the textures along selected curves (AB) (upon unquadrified surfaces (#2) it'd really amazing!Thank you for your efforts!
-
@rv1974 said:
1/ How could I get back the native Alt-key eyedropper?
You can call the native Paint Tool from ThruPaint (key F9 or small button on the right of palette).

There is a sampler in ThruPaint (press Enter when you mouseover a face), but it is restricted to the model and does not detect projected textures, as this is not available from Ruby.

@rv1974 said:
2/ How to correct the UVW mapping on the surface #1 (see attached)?
Unfortunately, this is not possible, because Sketchup uses only Perspective mapping, not bilinear mapping.

This perspective effect is attenuated if you grid the face into smaller cells (quads or triangles), for instance with Curviloft.

@rv1974 said:
3/ If only the Thrupaint could bend the textures along selected curves (AB) (upon unquadrified surfaces (#2) it'd really amazing!
I will need to find or develop a small algorithm for quadifying a face nicely. Then you are back to case 2) above. But with a mesh which is dense enough it should work.
-
what a comprehensive support! Frankly I don't deserve it )
The last sentence improvement would be a killer!
Thank you so much! -
@unknownuser said:
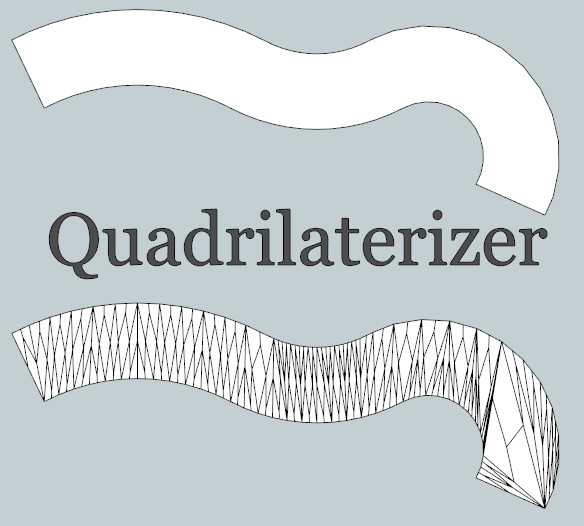
I will need to find or develop a small algorithm for quadifying a face nicely.
QuadfaceTools by Thomthom ?
Or the quadrilaterizer by TiG ? -
La quadrature du cercle alors!

-
@rv1974 said:
what a comprehensive support! Frankly I don't deserve it )
Just to be clearer, the density of the mesh is the only way to get the texture 'reasonably' distorted. When quads are too much like a triangle, the perspective distortion shifts the texture mapping.

In the case of your texture, that may help to do the trick, but it's a pity to have to generate so many faces

@Pilou
It is not so easy to generate the right mesh in the general case (and in this particular case).

...and QuadFaceTools only manages quad meshes which it can triangulate, but not any polygon.
I think Whaat has developed an more adapted algorithm as part of SketchUV.
Fredo
-
Thank you very very very very much.
-
thanks!!!!
-
Absolutely stunning! One of the best plugins I have seen so far (besides your others)! I think I will never use the native paint tool again.
And it's free! You are amazing!
-
@unknownuser said:
It might be a conflict with another plugin, which you would not have in the PC at the office.
Do you have any plugins dealing with materials or UV mapping?For this, ould you type in the Ruby Console
Sketchup::Material.instance_methods.join("\n")and advise on what it returns.Thanks
Fredo
Fredo,
Entered your code into ruby console and it returned the following (sorry in advance for the length):dclone
write_thumbnail
profile_member?
methods
attribute_dictionaries
get_attributes
remove_observer
instance_variable_defined?
taint
name
name=
id
set_attribute
singleton_methods
respond_to?
entityID
nil?
send
protected_methods
get_attribute
tainted?
display_name
untaint
instance_of?
typename
equal?
method
hash
private_methods
attribute_dictionary
send
materialType
kind_of?
freeze
eql?
object_id
has_attributes?
id
public_methods
instance_eval
deleted?
is_a?
delete_attribute
type
valid?
instance_variables
use_alpha?
frozen?
alpha
to_a
alpha=
class
<=>
instance_variable_getbetween?
parent
color
to_s
extend=
<=
color=
clone
instance_variable_set
=~
<model
texture
inspect
texture=
display
add_observer
dup -
Thank You Fredo. This looks like the answer to many of my prayers. Looks like it shall be an interesting week, finally revising some old projects.
-
Amazing plugin Mr. Fredo! Thank you so much for all your plugins and hard work. Can't call you a G.O.D. but you are sitting right next to him

-
Jiiiiiihhhaaaaaaaaaaaaaaa!!!!!!!

-
Played around with it for quite some time now and still I am amazed about what this plugin can do.
If I may ask, would it be possible to add an option that allows to chose the scale of the texture before applying it and then keep that value until it is changed? That would save a lot of time in comparison to changing the scale of each texture manually after it was applied.
-
@pherim said:
Played around with it for quite some time now and still I am amazed about what this plugin can do.
If I may ask, would it be possible to add an option that allows to chose the scale of the texture before applying it and then keep that value until it is changed? That would save a lot of time in comparison to changing the scale of each texture manually after it was applied.
That's a good idea, but I would put it as an option.
Note you can also change the material definition (i.e. the dimensions).Fredo
Hello! It looks like you're interested in this conversation, but you don't have an account yet.
Getting fed up of having to scroll through the same posts each visit? When you register for an account, you'll always come back to exactly where you were before, and choose to be notified of new replies (either via email, or push notification). You'll also be able to save bookmarks and upvote posts to show your appreciation to other community members.
With your input, this post could be even better 💗
Register LoginAdvertisement


