sketchucation logo sketchucation
    • Login
    1. Home
    2. hsrhdrehre5654654
    3. Posts
    ℹ️ Licensed Extensions | FredoBatch, ElevationProfile, FredoSketch, LayOps, MatSim and Pic2Shape will require license from Sept 1st More Info
    H
    Offline
    • Profile
    • Following 0
    • Followers 0
    • Topics 5
    • Posts 43
    • Groups 1

    Posts

    Recent Best Controversial
    • RE: [Plugin] FredoTools::ThruPaint - v1.3a - 20 Oct 16

      Ok, so here is an example of the problem ->

      The only thing to avoid this, is to press CTRL (force re-paint) and start over, but you will lose the uv position and the texture will not be continous. If i try to pick a sample of the material/uv coordinates and try to kept the texture continuity, it wont work either.
      Is there any way to avoid this? thanks in advance.


      Clipboard01r.jpg

      posted in Plugins
      H
      hsrhdrehre5654654
    • RE: [Plugin] FredoTools::ThruPaint - v1.3a - 20 Oct 16

      Hi, im really happy about this tool, but i have a slighty problem.

      Is there any way to disable the "auto join" feature???? i mean, when im painting, everything is great, but when two paths join, the texture scale/direction gets messed up and the whole thing looks really bad. SO i need to paint from scratch in those zones and continue painting. Curious thing is, before thrupaint treats the painted zone, everything looks great, but as i said, when you release the mouse button to join two paths, everything mess up. If i couuld just deactivate that "feature"... it will be perfect. Other wise, there are always seams and different parts in the painted texture πŸ˜•

      posted in Plugins
      H
      hsrhdrehre5654654
    • RE: [Plugin] FredoTools::ThruPaint - v1.3a - 20 Oct 16

      @fredo6 said:

      @hsrhdrehre5654654 said:

      Hi, im really happy about this tool, but i have a slighty problem.

      Is there any way to disable the "auto join" feature???? i mean, when im painting, everything is great, but when two paths join, the texture scale/direction gets messed up and the whole thing looks really bad. SO i need to paint from scratch in those zones and continue painting. Curious thing is, before thrupaint treats the painted zone, everything looks great, but as i said, when you release the mouse button to join two patchs, everything mess up. If i couuld just deactivate that feature... it will be perfect. Other wise, there are always seams and different parts in the painted texture πŸ˜•

      Do you have an example. I am not sure to understand what is the "auto-join" feature and the junctions of 2 paths.

      Fredo

      The problem i probably dont know how to explain better in english. When you are painting, the way thrupaint works is you make a selection of the zone you want to paint (holding themouse while you paint) and when you release the mouse, thrupaint "tries" to correct the texture scale/position in some faces. This produces terrible results in some faces affected by the painted zone, and the whole thing is useless.

      I dunno how to explain it better, i will try to post a screenshot later.

      Its not something weird, im pretty sure everyone is having this problem. At least, im having in using it on complex meshes modelled with artisan. My guess is, in a low-polygon model, you dont get to notice it, but when you paint extensive zones happens very often.

      posted in Plugins
      H
      hsrhdrehre5654654
    • RE: Exporting UVS to blender

      Well. I figured it out. What i was trying to achive can be done with ThruPaint, from Fredo tools. A little tricky and it takes A LOT of time, but this is what i was trying to achieve -> no blender, no uvunwarp no tricky things. It seems that people really never did something like this lol, nobody was able to recommend me ThruPaint..

      Still i will love to know how to smooth the zoom on Blender, since i still want to learn how to unwrap in a proper way. Nobody??


      Test11texturing.jpg

      posted in SketchUp Discussions
      H
      hsrhdrehre5654654
    • RE: Where to start?

      @rich o brien said:

      Sorry your question included rendering so i presumed you wanted info on that.

      If you want a through subd and sculpting type environment then Artisan is your friend.

      If you want something more cutting-edge, more likely to see updates and to give you a better understanding of good modeling practices then Subd.

      I dont think subd is a good option for him, since it crashes and fails a lot and i dont think its a good idea to use it if its the first time doing organic modelling. I started with subd too, and i needed to move to artisan because , first, it crashed a lot and it gave me constant errors that i never was able to figure out. Subd is far inferior to artisan and modelling more complex models artisan provides more stability and more capabilities. The only thing subd is good for, is that it works with quadfaces. More than that, Artisan is the way to go. Until subd is refined somehow, and treats geometry in a more efficient and stable way, Artisan will be always the option to chose.

      For the op, you could try also Kerkythea, its also free. I mean, rendering engines for free there only a couple of options out there.

      posted in SketchUp Discussions
      H
      hsrhdrehre5654654
    • RE: Exporting UVS to blender

      But, the thing i want to know. What is the cause of the terribad aspect of the sketchup image? if i waste hours placing seams along the model in blender (that if i can figure out how to smooth the zoom, without figuring that out, i cant do anything on blender), that will be correct the problem? or is it something else? the model is not that tricky to paint, i only need to get right the transition between the top to the sides, with the exact same texture, because the whole model is going to have the same texture (not like other models that you need to apply different ones in different parts).

      I will understand that the textures will appear stretched in sketchup, i get that, but one thing is that, and another completely different is re-scaled to the point that you cant even see anything at all lol (because of how big it is).

      Also, if i texture the model, can i import back the uvs into sketchup without problem? this is because i want to render with vray, not blender itself.

      posted in SketchUp Discussions
      H
      hsrhdrehre5654654
    • RE: Exporting UVS to blender

      Well. I tried to do some seam work to delimit the mesh in the uv map. And i found a problem.

      How the hell do i smooth the zoom in the 3d view!!???

      I cant place seams in small parts because of this. Using the mouse wheel.

      posted in SketchUp Discussions
      H
      hsrhdrehre5654654
    • RE: Exporting UVS to blender

      @jql said:

      @hsrhdrehre5654654 said:

      dude, at least recommend me something i dont need to pay for.

      πŸ‘Ž

      I'll do that if you pay me! It will be my first paid advice here!

      Because that's exactly what this community is known for!

      @hsrhdrehre5654654 said:

      or are they just trying to grab money in a pluging that does exactly the same as sketchuv? lol.

      The problem is, i already have plans to buy Artisan if i can get texturing to work. I can't also spend money on something i will probably use a couple of times and, i dont have money to spend anyways. Im not rich. I understand for some people that uses sketchup and other things for professional purposes dont "care" to waste thousands of dollars on these things, even if they are not going to use em on a regular basis. But i cant afford it. Tried the trial version of blendup, but then i noticed its limited to 10000 faces lol, so its useless to serve my purposes.

      Anyways, this is the blender uv mapping. I didnt touch anything, i just did a smart uv unwrapping and this is what i got. I dont think it is that bad. Of course i know the texture in some faces will be stretched but, one thing is that and one completely different thing is what i got in sketchup.... And since the only thing i want to do is to apply the same exact texture to the whole model, i should not be in need of do seams and other things. Or i need to do that anyways??


      Clipboard010.jpg

      posted in SketchUp Discussions
      H
      hsrhdrehre5654654
    • RE: Exporting UVS to blender

      @rich o brien said:

      I'd say the most likely problem is the mesh.

      From what I can see that 'thing' (sorry I've no idea what it is) is too poorly modelled to allow an unwrap to occur.

      Most likely that and maybe some user error if your new to unwrapping.

      Sent from my iPhone using Tapatalk

      The model is built with Artisan, and all the faces are clearly defined. I dont think the problem is the mesh, but i could be wrong of course.

      posted in SketchUp Discussions
      H
      hsrhdrehre5654654
    • RE: Exporting UVS to blender

      @jql said:

      @hsrhdrehre5654654 said:

      dude, at least recommend me something i dont need to pay for.

      πŸ‘Ž

      I'll do that if you pay me! It will be my first paid advice here!

      ??

      posted in SketchUp Discussions
      H
      hsrhdrehre5654654
    • RE: Exporting UVS to blender

      @jql said:

      your ship is overall flat, you've been showing to have a hard time UV mapping it. Why don't you project a texture into it. It will serve your purpose.

      If you want to successfully UNwrap a model in blender with no great work inside blender, you should use Blendup plugin.

      The Blendup quick unwrap workflow would be:
      1 - Hide all edges of your model;
      2 - Select the edges you'd like to use as seams and unhide them;
      3 - Export the model using Blendup
      4 - In blender UV unwrap.
      5 - Check that everything's right using Texture mode;
      6 - Export to Collada
      7 - Open in sketchup and don't remodel it in sketchup or you'll loose UV's

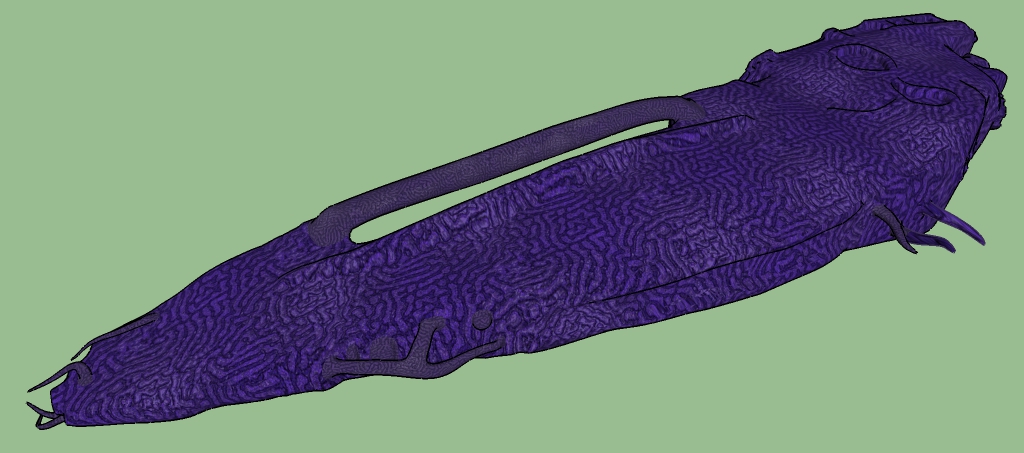
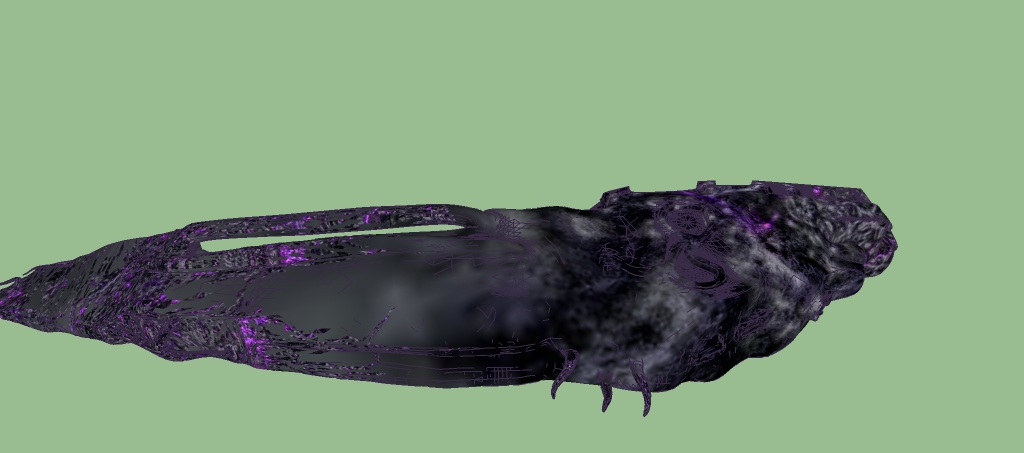
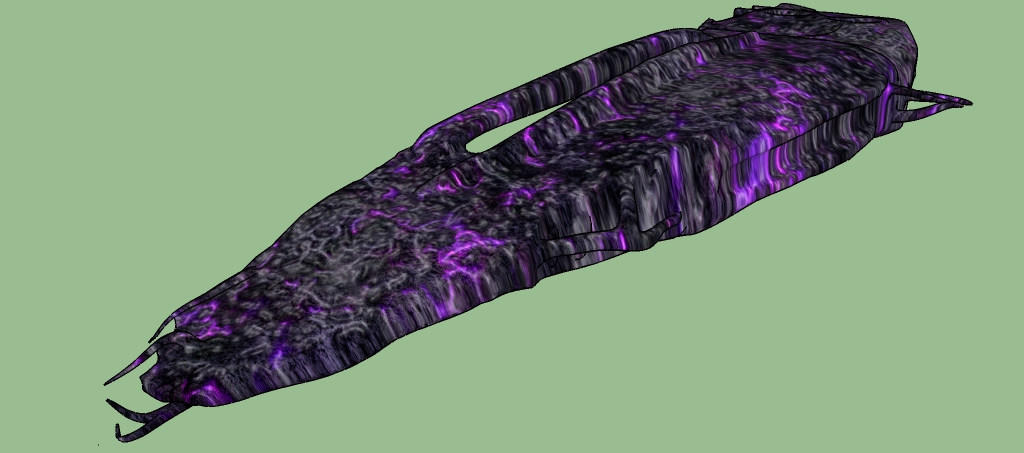
      Nope.. the model seems flat, because of the angle and the image but it isnt. LOL. Not by a long shot. Projecting the texture will throw streched textures everywhere. The model is not "flat" in the sides, or in some parts of the back, etc. The model is supossed to be a spaceship (with semi-organic hull), this is just half of it that i need to clone and join together. It looks terrible because im using a test texture and it is still in development, but i wanted to know first if i am going to be able to texture it before i keep doing progress on the mesh.

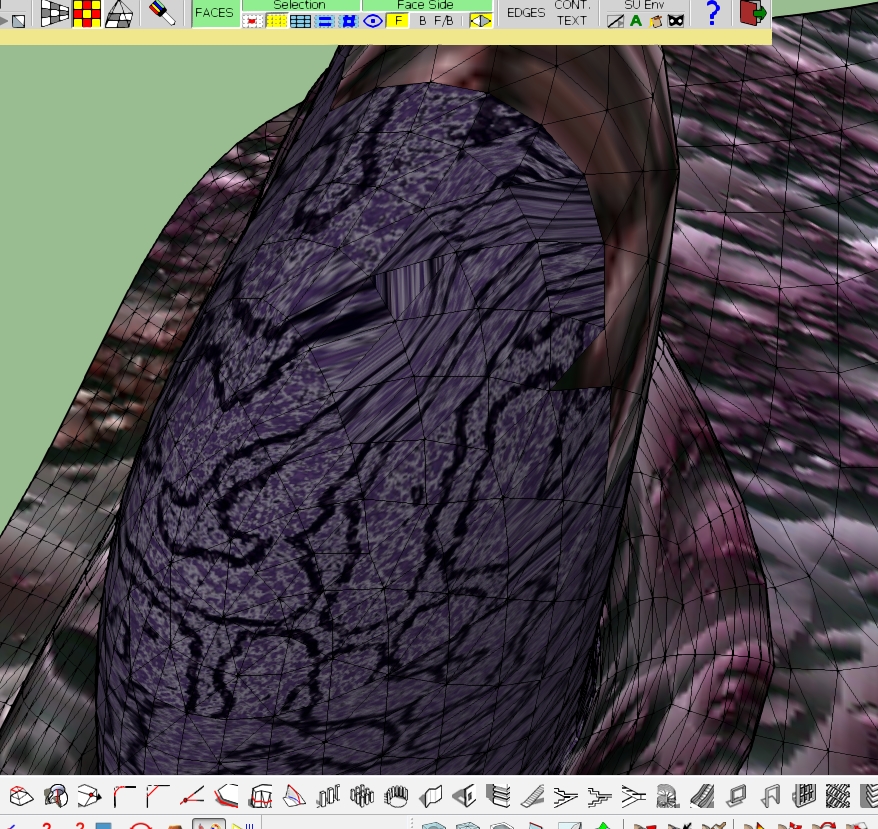
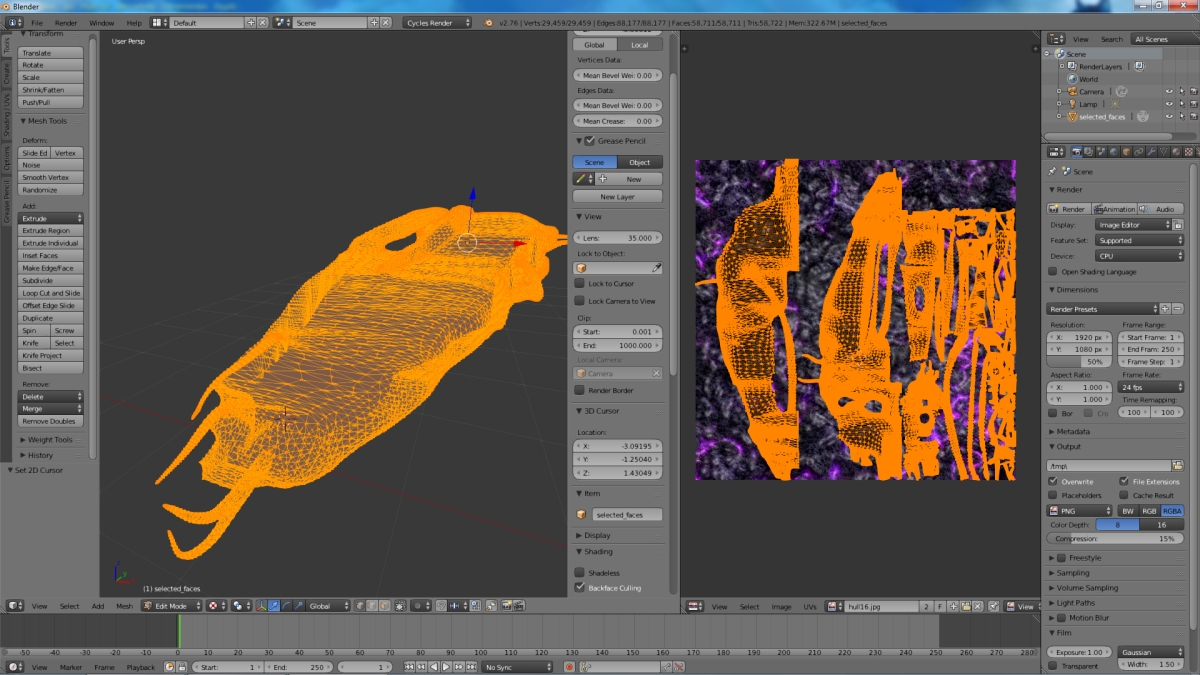
      I must say when i import it on blender, the uv mapping seems really clear and surprising effective (with the smart projection option). But the result back in sketchup is what you see in the image.

      Also, i cant see the texture applied in the correct way within blender, dont have a clue why. I see exactly the same as this image, more or less. The texture fits the whole model, meaning it is not smaller than the boundaries of the model, and the uv islands seem pretty defined.

      What do you mean with "dont remodel it in sketchup" ?????? what will be the purpose then?? if i cant touch the model afterwards???

      And why collada?? why i cant export from blender again in .OBJ??? the sketchup plugin as far as i know needs the original .OBJ file, if i export it on collada, i cant load the uvs again.

      Anyways, isnt the blendup plugin for sketchup commercial?? dude, at least recommend me something i dont need to pay for. Thats the whole reason im using blender in first place.. and thats the reason i use sketchuv to export/import uvs. But probably with complex meshes like this one sketchuv is not good? and whats the difference between exporting with skethuv and the blendup plugin??? or are they just trying to grab money in a pluging that does exactly the same as sketchuv? lol.

      posted in SketchUp Discussions
      H
      hsrhdrehre5654654
    • Exporting UVS to blender

      So i was doing some test trying to adapt a whole texture into a model. To do that i need, the only way is to export the uvs (by sketchuv) to blender, unwrap and import back.

      Well, this is what i get after the process. What i am missing??

      The back (looking to the right) looks right at the start, then it becomes a complete mess towards the model. Ideas???? its like the texture is scaling towards the model, then suddenly it screws up everything.

      PD.: Im using the last version of blender.


      afteruv.jpg

      posted in SketchUp Discussions sketchup
      H
      hsrhdrehre5654654
    • RE: [Plugin] QuadFaceTools

      Well, i used blender to unwrap. But i must be doing something wrong because the results back in sketchup are horrible. The only thing i did was to import the uvs in blender , unwrap the model and import the unwraped uvs into sketchup again. Do i need something else?

      Im going to open a new tread to not keep talking about things that have nothing to do with the quadfaces plugin.

      posted in Plugins
      H
      hsrhdrehre5654654
    • RE: [Plugin] QuadFaceTools

      @thomthom said:

      To have a single texture on the whole mesh is exactly when you do need UV unwrapping because you are trying to map a 2d texture onto a 3d surface. UV unwrapping is the process of unfolding the 3d mesh to 2d space such that it can be textured. This is the process you need to go through with any polygonal 3d modeller.

      Yup, i guess i will need to do that. This is what i get aplying the texture in the whole model. With the paint tool of Artisan i can almost get a great result, but it takes literally ages and it is tricky as hell, so i just cant affor that. And yup i did texture time ago using unwrapping with Blender, but i thought that with just 1 single texture and a simpler surface to paint it will be easier. I was hoping that, selecting the distorted texture somehow, i could make it "planar" and make the projection from that texture. So it will match the top side. But the problem is, sketchup NEVER respects the original size of the texture, and rotating/scaling it to make the perfect match is a great pain in the.. not to mention, most of the times for some reason it doesnt match the postion of the rest of the texture. Conclusion, a mess.

      Anyways, thanks for the help so far. Even if didnt solve the issue (the whole point was to avoid unwrapping) i did learn a couple of things πŸ˜„

      Now, what unwrapp tool can i use?? i cant use roadkill because tried to load the obj and my computer (or the app itself) cant handle the model. I cant even do zoom or rotate it.

      And what about the seams? with thousands of faces, how do i make the seams? can i make the seams in sketchup somehow and exporte em to the uv unwrapping app? is the sketchuv path tool designed for that?

      I could use Blender but i really really hate it :s , is there out there any other FREE unwrap tool i can use besides these two?

      Thanks in advance.


      zzz.jpg

      posted in Plugins
      H
      hsrhdrehre5654654
    • RE: [Plugin] QuadFaceTools

      @ely862me said:

      Well if it is not that difficult to have one texture applied to the whole model, then why don't you just do it !?
      It is hard to ask for things that you don't even understand the concept of..

      Im just saying that im surprised there is no way to do that without the need to do tricky things. I know sketchup is really limited talkng about uv mapping, but i didnt know it was soo limited. Thats all, why you need to be so rude??. Sorry if things i ask seem really newbie-related, not everyone is as experienced as you.

      posted in Plugins
      H
      hsrhdrehre5654654
    • RE: [Plugin] QuadFaceTools

      @thomthom said:

      Given such an organic shape I think a UV unwrapping tool is best for you. Ideally you'd uv map the low-poly version - though as you say currently the subdivisions might distort some of the mapping. I'm hoping OpenSubdiv will address that - but it's still in development.

      That is what i was trying to avoid. I dont want the need to use a uv unwrap tool, why should i?? i dont want different textures in different parts, i just want a whole texture mapped along the whole model.. i dont understand why is so difficult ^^. But yes im afraid that in the end i will need to use a unwrap tool. As i said, if you do the mapping in the low-poly version the textures end up screwed up badly, not "some", but almost every single one of em...

      Also i was wondering if the paths created with sketchuv in the low-poly version are kept when doing the subdivision. I suposse they are not?

      I will try to apply a random example texture and upload an image.

      posted in Plugins
      H
      hsrhdrehre5654654
    • RE: [Plugin] QuadFaceTools

      @thomthom said:

      Again I'd recommend that you post some examples - then we'd have something concrete to look at and might be able to provide specific solutions for you instead of just generic ones.

      This is the model in working on, it is just a really earlier version (the tunning will come once i know that i can effectively texture it), this is going to be half of a spaceship (with a semi-organic hull). Once im done with this half, i clone it, flip it and i mix it with the other half, forming the whole hull (and probably i will need to cut it in 2 or 3 pieces as well).

      http://i.imgur.com/hZlkDfE.jpg

      The screenshot is only a level 2 subdivision with Artisan, i plan to do a level 3 in the final version (i hope my computer and sketchup can handle it).

      So, my question would be, how i texture this? i want to apply just 1 single texture in the whole model (since the small details can be easily textured later), spreading from top to sides. Cant use thrupaint because im using Artisan and most of my faces are triangles (its impossible to build these shapes with just quadfaces, or i dont know how, i dont see how..) and as you know thrupaint only works with quadfaces. Sketchuv also is not useful, because i keep getting distorsioned textures no matter what i try. I could create paths and define the zones where the textures are distorsioned, but then i would need to MANUALLY position and allign/resize each face. And that, well i dont think i can do it lol, not with thousands faces.

      The wip mixing two halfs -> of course, i will texture just 1 half before i make the whole mix. Do you think that this kind of mesh could be done with just quadfaces?

      http://i.imgur.com/ajre7cr.jpg

      Thanks in advance!.

      posted in Plugins
      H
      hsrhdrehre5654654
    • RE: [Plugin] QuadFaceTools

      Thanks Thom, but i think i didnt explain very well (sometimes happens, for not being a english speaker.. :s). Again, i already saw all those tutorials, and they are great but how can i make my cube, to be divided by subdivisions before even i use the subd or artisan plugin??? that is what i want to know in first place. I see models in the tutorials, but again they are already divided by subdivisions in the control mesh. How do i get there?? there is not one single tutorial that explains that. Are those subdivisions created manually??

      About materials. I know artisan and subd can keep materials, but the results are really bad. Distorted textures, streched and so on. So, in the end is completely useless. Its even better to texture AFTER the subdivision, not before. But then again, how???? i mean in simple models and models with simple geometry this is not a problem, but in things like complex space ships, organic modelling like faces and things like that??

      Also mapping the uvs in, for example killroad doesnt help me because the problem i have is not that. The problem i have with textures is, the whole texture must be placed along the whole model, but i dont want it to be distored in the sides, for example. And every single texturing plugin do the mapping based on a plane, so, i always have distorted textures in some places. I just want the same texture in the top of the model and in the side, but continous. Without seamless and without distorted textures. I start thinking thats not possible with sketch up lol. Before you say it, yes i tried the thrupaing from Fredo, and its a great tool, but again, IT ONLY WORKS WITH QUADFACES... so, it is not really useful to me. Already tried, and i cant get what im looking for.

      So, on a side note, im assuming texturing has nothing to do with dealing with quadfaces or triangles? its always the same result?.

      posted in Plugins
      H
      hsrhdrehre5654654
    • RE: [Plugin] SketchUV - now free

      Oh well. NVM. It turns out i was "saving" the uvs, not exporting rofl!!! sorry my bad.

      posted in Plugins
      H
      hsrhdrehre5654654
    • RE: [Plugin] SketchUV - now free

      Great tool. Just one question.. im trying to export the uvs. Here is the problem, i set the extraction path in, for example d:/ , then i go to options - export uvs, and a msg appear saying that the uvs have been exported. Well, i cant find the obj file anywhere. And since in the msg box there is not info about the path itself, im totally lost. My guess is it is exporting the uvs to the default folder instead. So, what is the default folder where the uvs are exported?

      posted in Plugins
      H
      hsrhdrehre5654654
    • 1
    • 2
    • 3
    • 1 / 3