Majid,
If that one was "not too bad", I'd like to see what "good" looks like !!!
Looking forward to seing the last one's update, with nice caustics.
Great, great job 
Majid,
If that one was "not too bad", I'd like to see what "good" looks like !!!
Looking forward to seing the last one's update, with nice caustics.
Great, great job
@frederik said:
@eulgrand said:
In the material editor, uncheck the "Visible" flag in the Model Flags section of your material.
By unchecking the "Visible" flag for the material in the Material Editor, you will also loose the shadows...
The object won't cast any...
Oops, I got confused by the pop-up message. I should have checked, sorry 

Perk,
In the material editor, uncheck the "Visible" flag in the Model Flags section of your material.
[Edit] or just save you time and follow Frederik's recommandation regarding Xfrog's high poly 3D trees !

Thanks for the kind comments
My materials are :
Glass : ref. "G1" from the Basic Glasses library (Donwload section of KT's forum)
Water : ref. "H5" from the same library
For them 2, the material type is Dielectric / Glass, reflection & refraction set to color/Pure white, and IoR resp. 1.52 and 1.33
Whiskey :
Material type : Dielectric / Glass
Refraction : RGB values set to (242,153,61) and IoR 1.359
Reflection : copy/paste the refraction color and set the saturation to 20
The stirrer is a basic plastic, not too glossy (shininess 30 and IoR 1.60)
The scene is illuminated by two emitting umbrellas on each side of the camera, one little emitting square to generate caustics, and a global for more reflections on the glasses.
Now that I have my technical settings, I'll try to make a real scene like those I could see above (Connor, Ande, Andre...) with nicer glasses !
Kerkythea again, and this time I could manage to get caustics...
 195 passes")
Hey Rachid, that's very nice of you
Your red wine looks far better than mine. I like the slight sepia tone of the first picture. The composition of the 2 glasses behind is a bit disturbing (at first I thought there was one glass floating...). I would let them up, so that we could figure the refraction through the ones at the front of the scene.
The view angle of the second picture should allow us to see more caustics, but I guess you've been using large light sources too, so we can't relly see them.
As per your blueish liquid... I'd give it a try to unclog the toilets 
Here's a render I made last week, rendered with Kerkythea - MLT(BPT) 160 passes. Unfortunately, only large light sources, thus almost no caustics on the ground 

Thank you Jean-Franco,
If I had to do it once again from scratch, I would say no more than 30 minutes. The modeling has nothing complicated, the time-consuming part is drawing a nice shape using Bezier curves. Once this is done, you just have to "follow-me" around a 48 segments circle, detach the part witch will be the interface between the glass & content, model the meniscus, and that's all. The process is nicely described in this tutorial by Patrick Nieborg.
Fond de bouteille...
Cela dit, c'est une très bonne remarque : il y a un peu de Fall-off (0.05) dans le matériau
Hi all,
Entering my "glassware" period ! I know, this kind of glass should be filled with Champagne...
 / 160 passes / DOF : post-pro")
@unknownuser said:
Le Uri Geller de SU lol!
(Uri geller tordait des petites cuillères , dans les années 70, par la seule force de sa pensée!!ça me rajeunit pas!)
Faut espérer que Gérard Majax traîne pas dans le coin...
With Indigo, softening the edges seems to be the solution (just until the edge disappears, that is [edge angle + 1] deg)
@unknownuser said:
Subdived and Smooth à Smustard by Rick Wilson 22$
C'est pas plutôt Dale Martens l'auteur (aka Whaat) ?
Ce serait sympa de continuer la discussion sur les colonettes dans le bon fil...
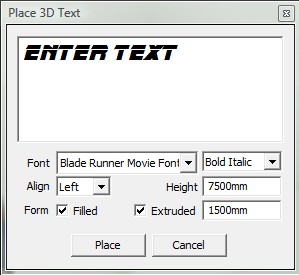
Sergio,
Tu dois pouvoir accéder à toutes les polices installées sur ton ordinateur. A ma connaissance ça ne nécessite aucune manip particulière dans SketchUp, sauf à sélectionner la police en question dans la liste déroulante.
Solo,
Nice try, but your translator needs a fix ! Anyway, nice to see you in the french section.
@linea said:
In the installation notes it says:
@unknownuser said:
Download and unzip the SketchUp preview scenes and copy the 'SUpreviews' folder to your Indigo root directory
Where do I download the scenes from?
In Whaats' first post, the Box.net link :
http://www.indigorenderer.com/joomla/forum/viewtopic.php?t=5324
@vercors said:
It should be possible to continue modelling the model I'm rendering while the renderer is still rendering? Erm... I hope you know what I mean.
Yes you can
@vercors said:
It is possible to let an object glow in an other color like red?
I was also trying a lavalamp and wanted to have red bubbles.
The greater your emitter's power value, the less you'll see its original color. Set a low power, and you should see your red color, provided your emitter is not the sole light source AND you are not using Reinhard tonemapping.
Also, check "color" and not "temperature" in the Emitter Attributes.
@vercors said:
Another question:
There should be a photo in the picture frame and the folder should be colored.
How did the color disappear?
I'd say back face issue or special characters (é è à ç etc.) in the material/image names or folders.
Hi Vercors,
Which version of Indigo and SkIndigo are you using ? The tutorial has been made for v. 0.9. There have been some changes since then, and some features may not be available any more (more precisely the way to achieve them has changed).
Bonjour Bert,
Je verrais bien un petit coup de BoolTool entre l'arête de ton meuble et une forme qui ressemblerait à une gélule allongée (un cylindre avec une demi-sphère à chaque extrémité). Ou à défaut du plugin de Mr Martens, une intersection entre ces deux meshes, puis le nettoyage qui va avec...

