Personal test
-
Cool to see measures change!

-
hi
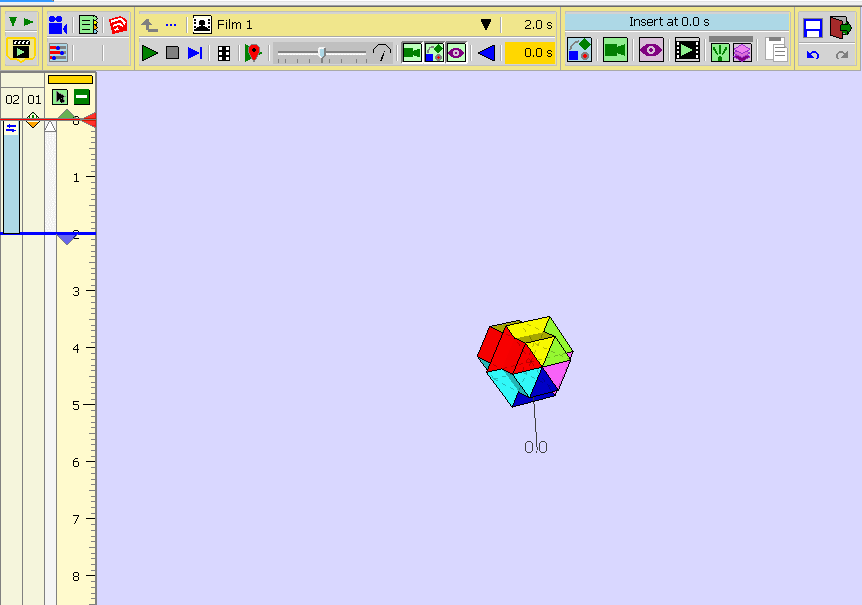
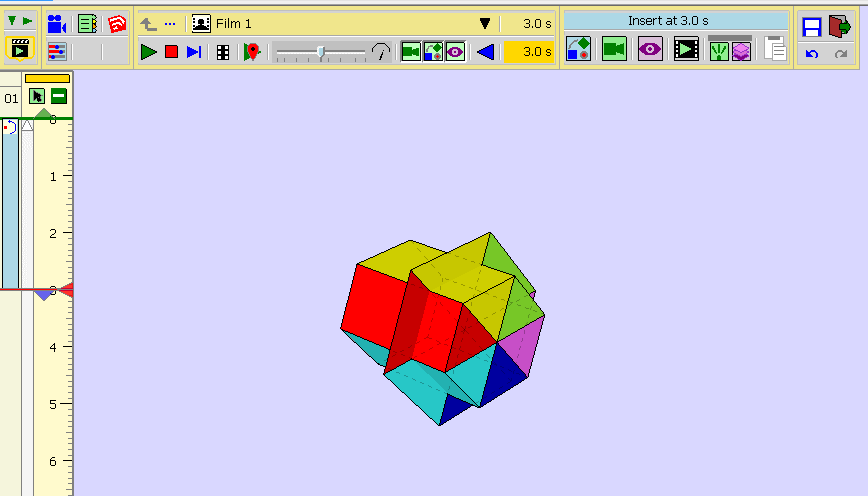
Here are my tests about Dim Factor/Pursue/repeat which allows to precisely adjust/pursue/repeat a movement.
Note that the Dim Factor value is a percentage of the movement.
It can be positive or negative
The first example is about Translation , the second one about Rotation.
(0.16666 allows rotation of 1/6 turn)
(0.5 allows rotation of 1/2 turn)
.
Clic on the pictures to animBonjour
Voici mes tests a propos de "Dim Factor/Pursue/repeat" qui permet d'ajuster / poursuivre / répéter un déplacement.
Notez que la valeur de "Dim Factor" est un pourcentage du mouvement.
Elle peut être positive ou négative
Le premier exemple concerne la translation , le second , la rotation.
( 0.16666 permet la rotation de 1/6 de tour )
( 0.5 permet la rotation de 1/2 de tour )
.
Cliquer sur les images pour les animer.Chri
-
a new test
-
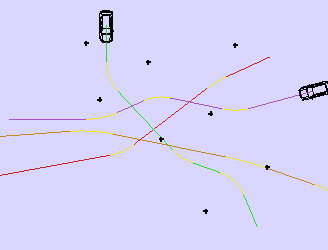
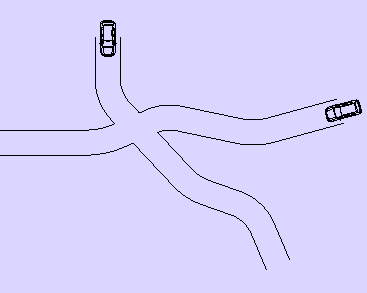
There is a new function "Follow path" ? Or it's just several manual start-end ?
-
@pilou said:
There is a new function "Follow path" ? Or it's just several manual start-end ?
Not a follow path fonction
Each color is a different movement .Chri
-
So the hell!

I believe that is the more important function to implement!
Surely not easy! -
A nice example. It also shows, how complex simple animations can be. Sure you can apply the copy function for the individual sections well. Tricky it is when you have to animate the individual wheels of a 3D car properly for each curve.
A "Path Following" feature would be very helpful. Then would have to be determined an independent path move for the car and for each wheel... -
Thanks!

-
which animation programme is this please?
-
Animator by Fredo 6!
-
Must works also for components!
-
@fredo6 said:
hi
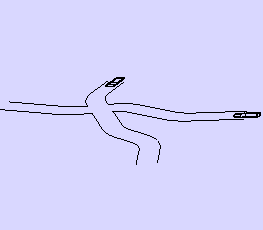
How will you manage to screw the two objects around the same axis?
The trajectory of the 2 objects starts well, finished well, but has a weird trajectory!
Chri
In fact, I have to think about it. Screw mode does not allow you to choose the pivot point, which is the center of gravity of each selected group.
So 2 problems:- change the center of rotation, especially when the solid is not 'centered' naturally.
- Decide what one does for a set of objects. Either an individual screw or a screw grouped with respect to the center of gravity of all objects.
Fredo
--Comment t'y prendrai-tu pour visser les 2 objets autour d'un même axe ?
La trajectoire des 2 objets débute bien , fini bien , mais a une trajectoire bizarre !
ChriEn fait, il faut que j'y réfléchisse. Le mode Screw ne permet pas de choisir le point pivot, qui est le centre de gravité de chaque groupe sélectionné.
Donc 2 problèmes:- changer le centre de rotation, en particulier quand les solide sont non 'centré' naturellement.
- Decider ce qu'on fait pour un ensemble d'objets. Soit un screw individuel, soit un screw groupé par rapport au centre de gravité de tous les objects.
Fredo
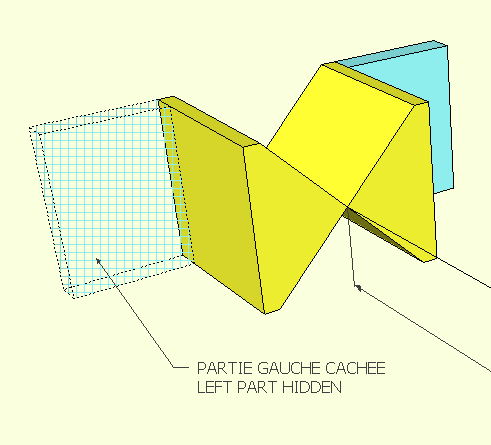
%(#0000FF)[For non symmetrical parts and meanwhile here is a manipulation to simulate the screwing.
Create a symmetry on the blue piece and hide it.Pour les pièces non symétriques et en attendant voici une manip pour simuler le vissage .
Créer une symétrie sur la pièce bleue et la masquer .]
Chri
-
.
-
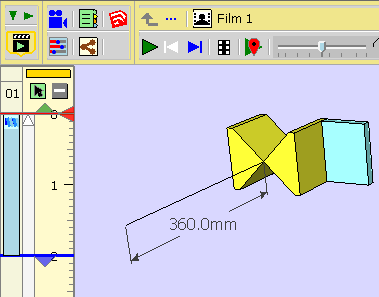
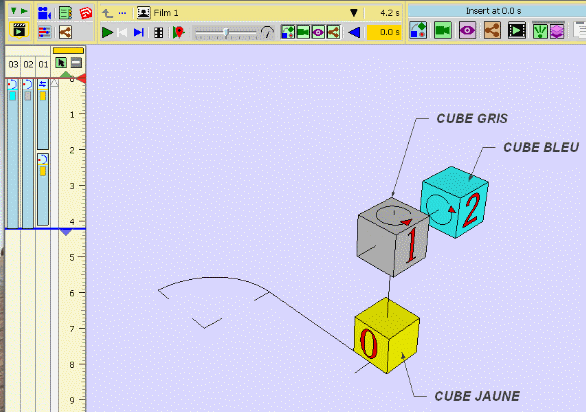
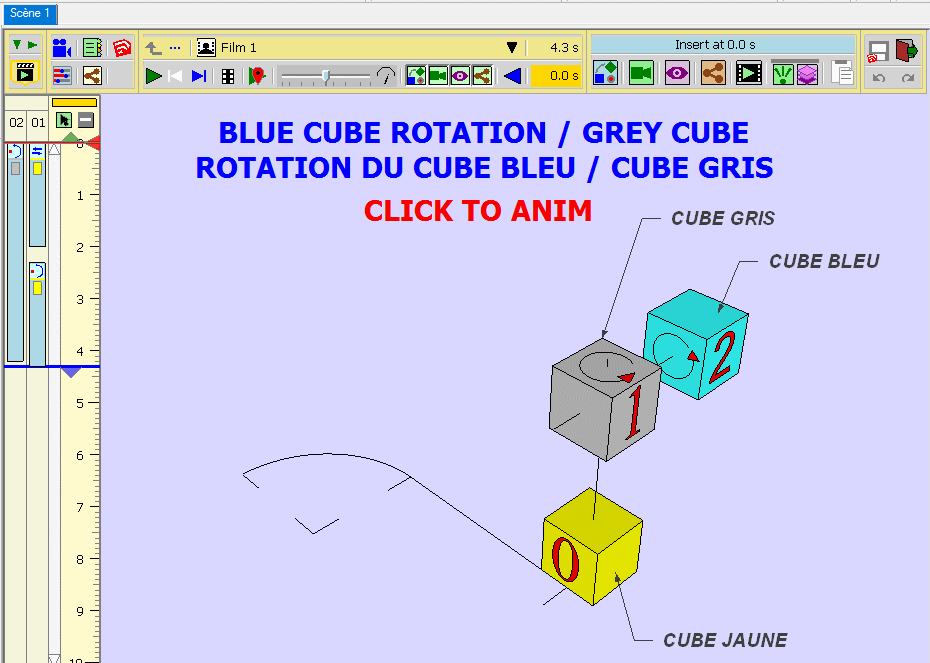
Hi
Here , step by step , how to do a combined movement.
.
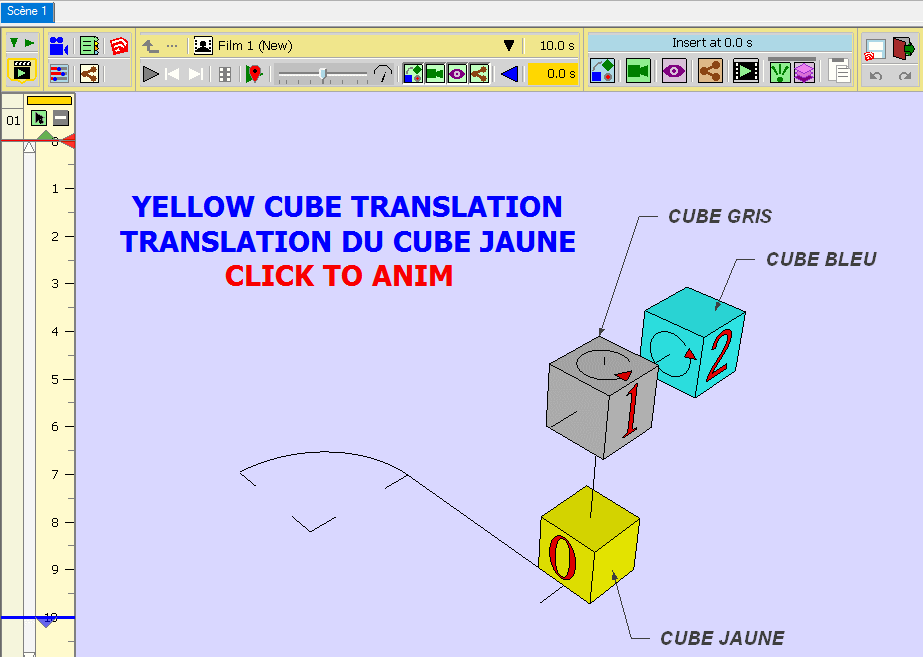
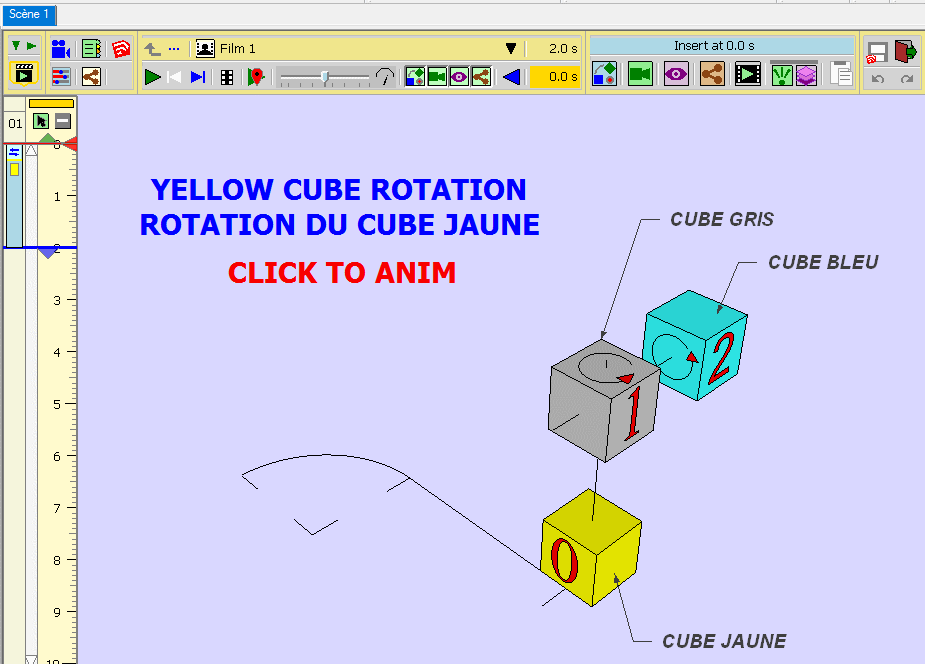
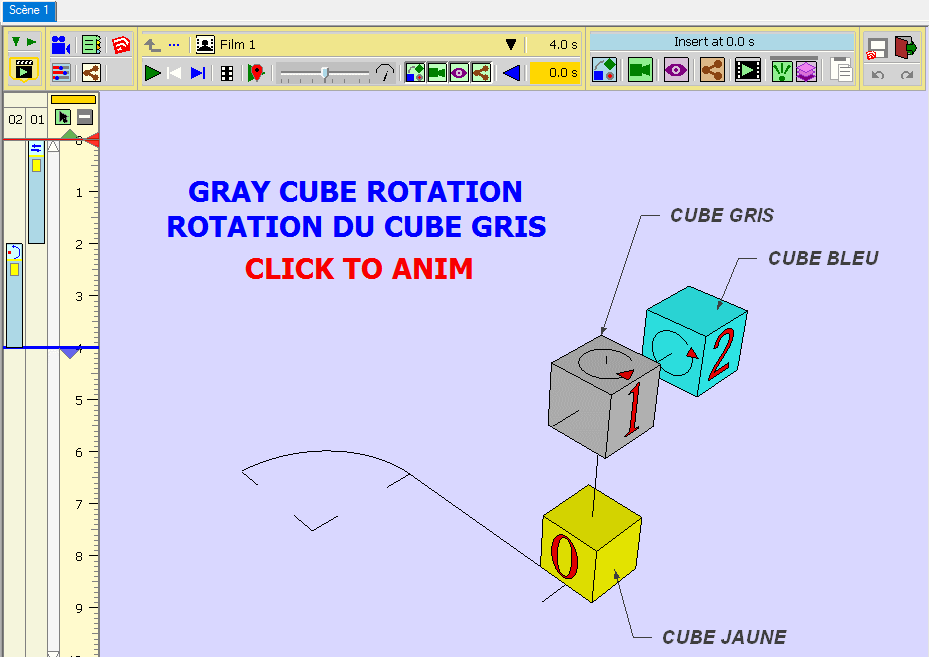
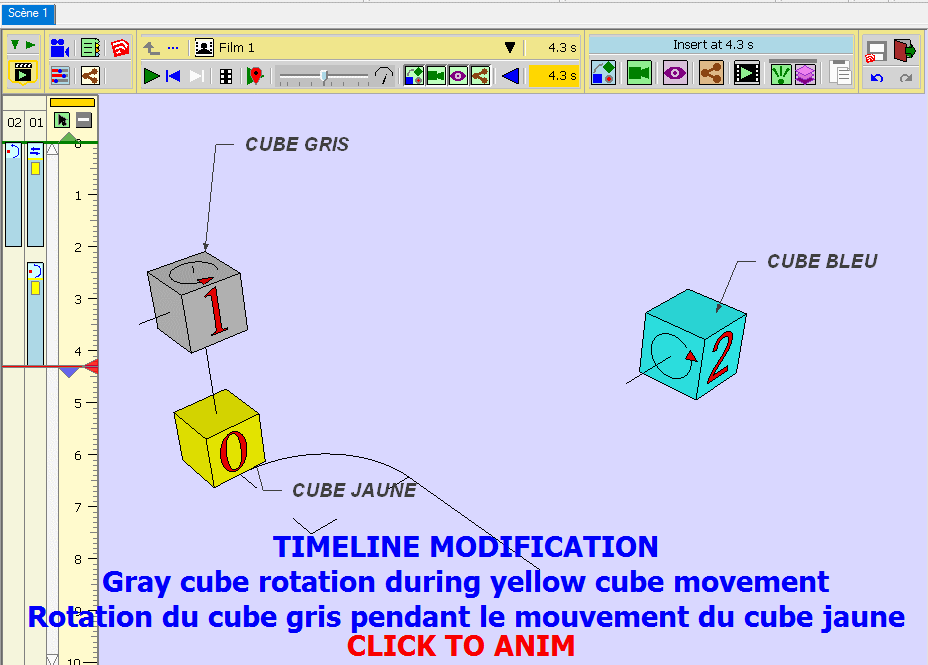
[highlight=#ffff40:11mopzv6]Click on the pictures to animate them[/highlight:11mopzv6]Picture 0: general presentation
Picture 1: translation of the yellow cube
Picture 2: rotation of the yellow cube
Picture 3: rotation of the gray cube / yellow cube
Picture 4: modification of the timeline (rotation of the gray cube during the whole movement of the yellow)
Picture 5: rotation of the blue cube / gray cube and modification of the "timeline"
Voici étape par étape la réalisation d'un mouvement combiné.
.
[highlight=#ffff40:11mopzv6]Cliquer sur les images pour les animer[/highlight:11mopzv6]image 0 : présentation generale
image 1 : translation du cube jaune
image 2 : rotation du cube jaune
image 3 : rotation du cube gris/cube jaune
image 4 : modification de la "timeline" ( rotation du cube gris pendant tout le déplacement du jaune )
image 5 : rotation du cube bleu/cube gris et modification de la "timeline"Chri
-
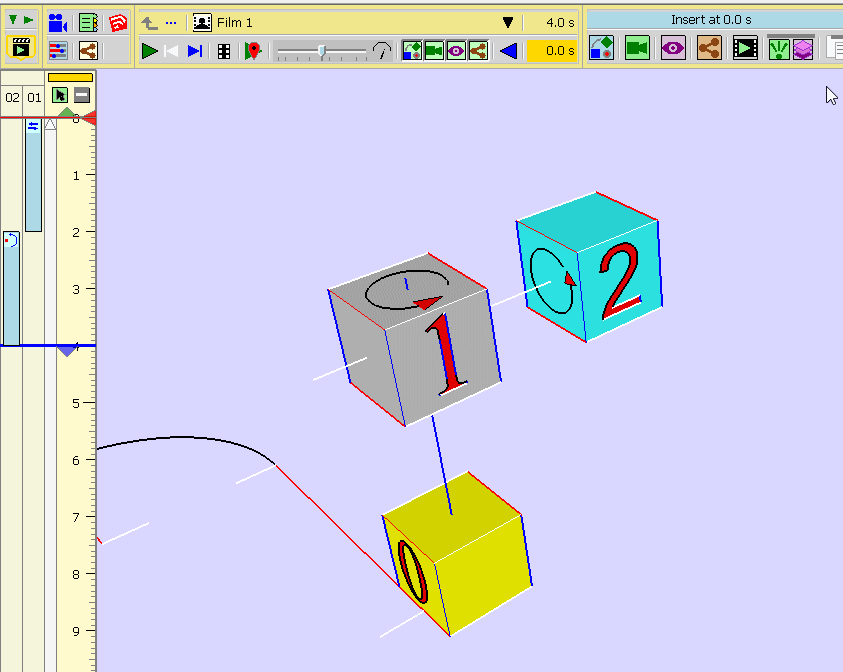
Hi Fredo
There is something wrong in my workflow ... but what ?
click on the following pictures to anim.
Il y a quelque chose qui cloche dans ma manip, mais quoi ?
Cliquer sur les images pour les animer.Chri
-
-
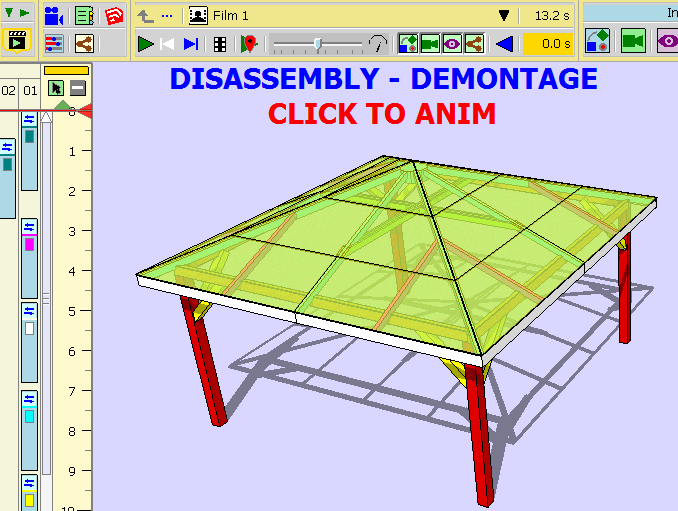
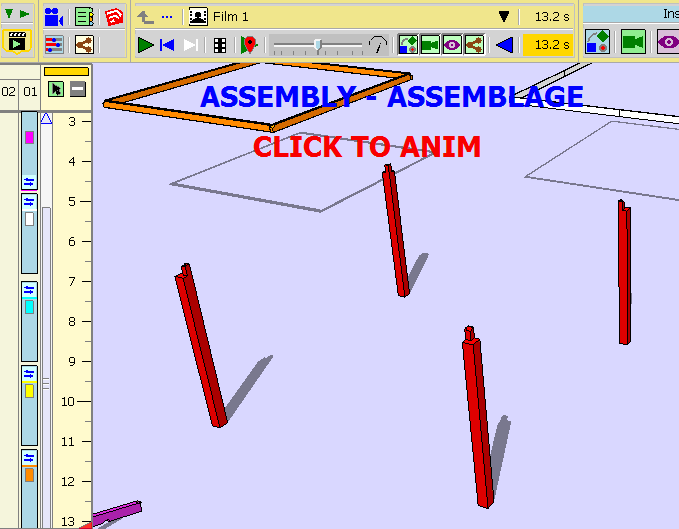
Hi
Please find attached , a short tutorial to show how to do an assembly / disassembly animation with ANIMATOR.On the basis of a mounted assembly consisting of groups,
1 - Moves the objects in the disassembly order
2 - make à raz ( timeline to 0)
3 - Save the ANIMATOR sequence
4 - Choose "Play the clip From End to Start"
5 - Start the animation and ... miracle, the job is done![highlight=#ffff40:2g2lmq7k]Click on images to animate[/highlight:2g2lmq7k]
Recall:
A click suspends an animation - a double click restart.Thank you Fredo
Bonjour
Veuillez trouver ci-joint un petit tuto pour montrer comment réaliser une animation MONTAGE/DEMONTAGE avec ANIMATOR.
Sur la base d'un ensemble monté constitué de groupes , on :
1 - déplace les objets dans l'ordre du démontage
2 - On met à 0.
3 - on enregistre la séquence ANIMATOR
4 - on choisi l'option "Play the clip From End to Start"
( jouer le clip depuis la fin jusqu’à son début )
5 - On lance l'animation et ... miracle , le job est fait ![highlight=#ffff40:2g2lmq7k]Cliquer sur les images pour animer[/highlight:2g2lmq7k]
Rappel:
un clic suspend une animation - un double clic , la relance.Merci Fredo
Chri

Hello! It looks like you're interested in this conversation, but you don't have an account yet.
Getting fed up of having to scroll through the same posts each visit? When you register for an account, you'll always come back to exactly where you were before, and choose to be notified of new replies (either via email, or push notification). You'll also be able to save bookmarks and upvote posts to show your appreciation to other community members.
With your input, this post could be even better 💗
Register Login


Advertisement