Model for Rendering Samples - Green Dragon
-
@al hart said:
without spending a lot if time trying to achieve a more profound studio effect.
That's indeed time consuming, but you have a lot more control on the effects and, at the end, indeed a "more profound effect" as you said.
@al hart said:
Woukd you mind if i included your schematic and rendering in another article I am writing about basic rendering concepts. I will be glad to credit you your contribution.
No problem. Anyway I took the basic set-up from here. It's in italian, but you have a lot of images to look at.
@al hart said:
Did you actually use a model like the schematic
Yes, what I've posted is the Thea's workspace view from above.
@al hart said:
...and if so, where dud the eye go?
Sorry, not sure to understand this. You mean where is placed the camera?
-
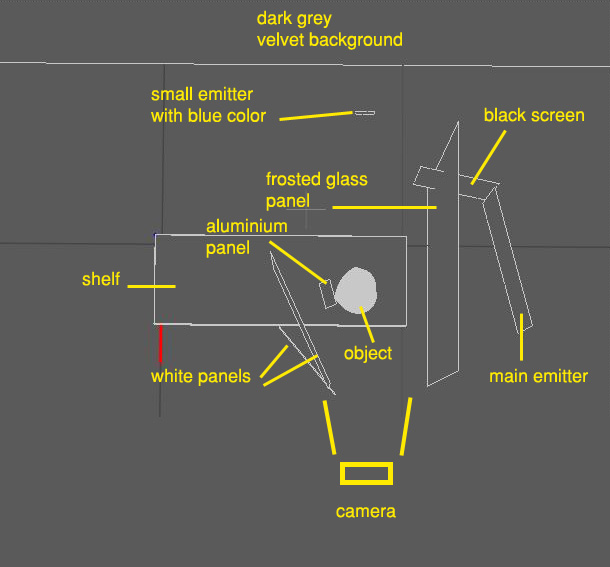
Renditioner V3.
Advanced glass.
Background for small object.
studio neutral 2 lighting.
Quality medium.
Render time 9 minutes.
Photo chopped for light levels.

-
-
As far as I know Lightup can't do SSS so I used some liquid material settings instead because the glass didn't look nice. Rendering time 2 minutes 30 seconds. Maybe Adam himself has a trick for making it look more like glass?
-

-

now put some fire in its mouth please. -
Rich - is that Blender cycles?
Ah, guessing from the animation, I presume it is Blender...
-
-
@massimo said:
Sorry, not sure to understand this. You mean where is placed the camera?
Yes - I meant: "Where is the camera with regard to the schematic"
Al Hart

IRender nXt from Render Plus -
-
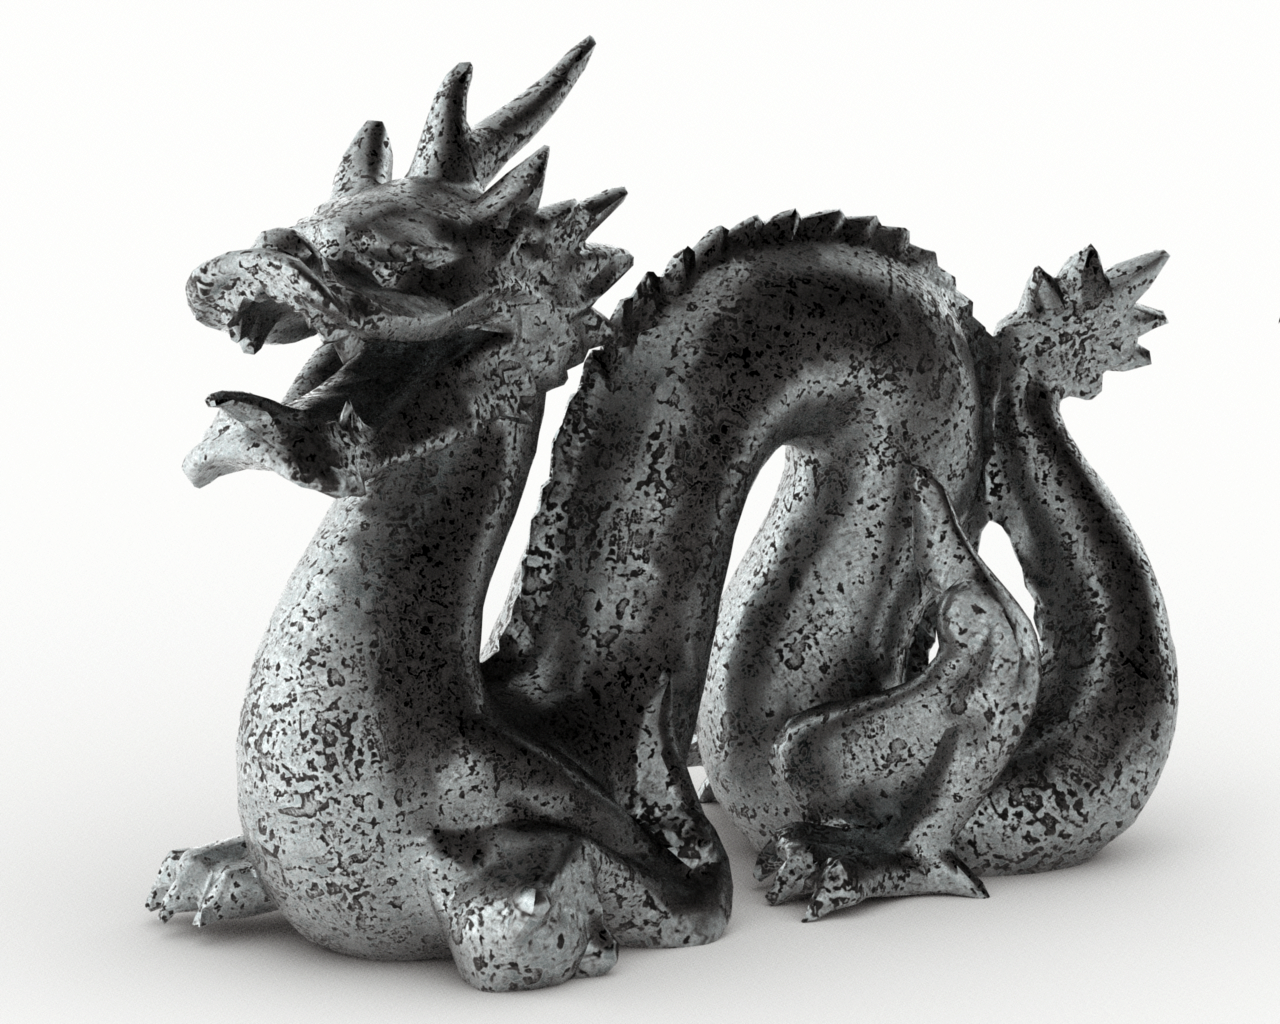
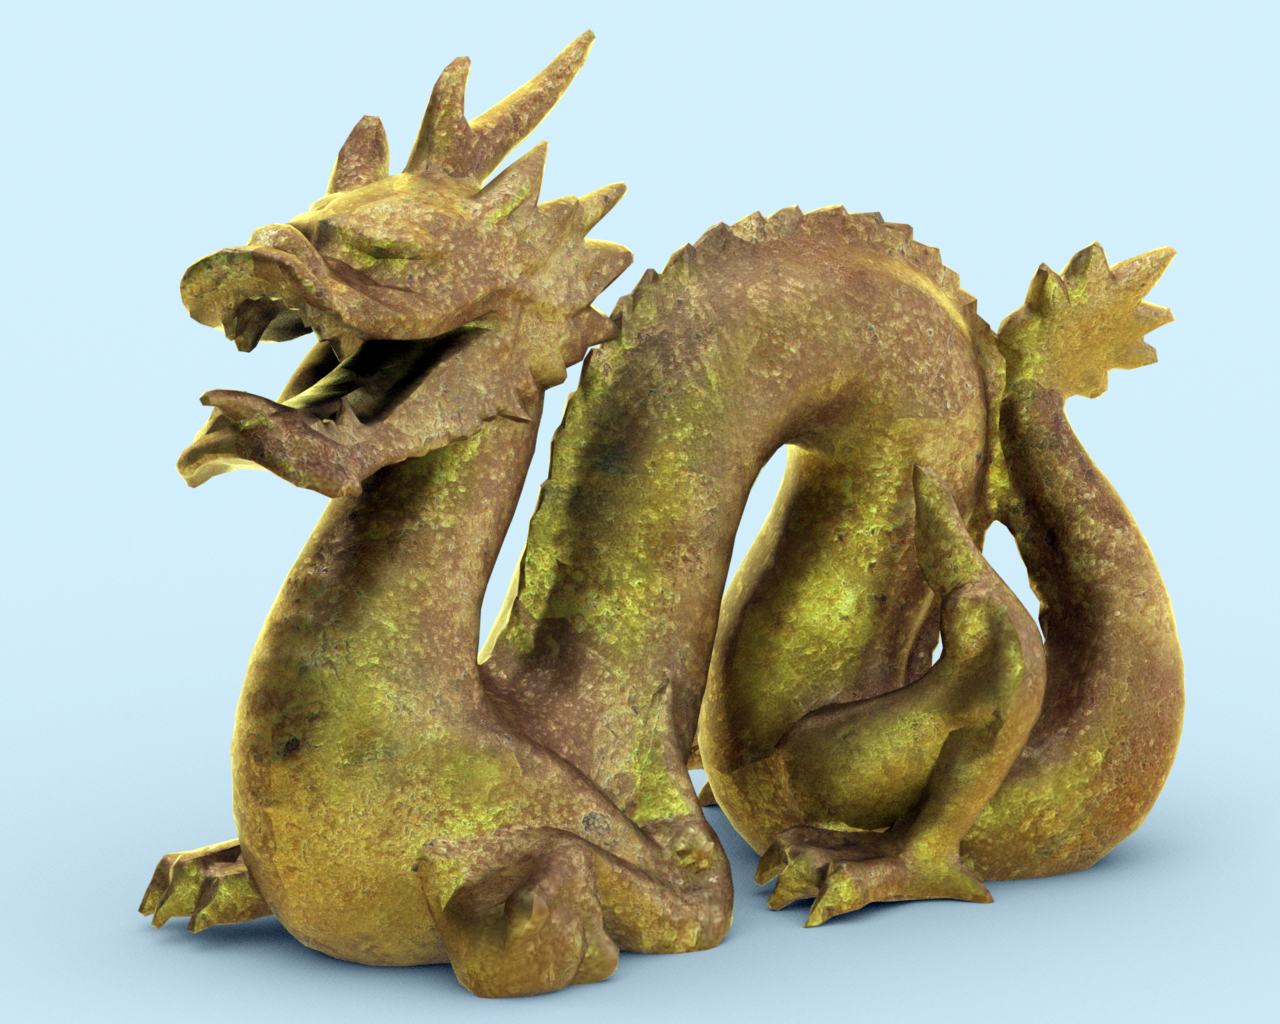
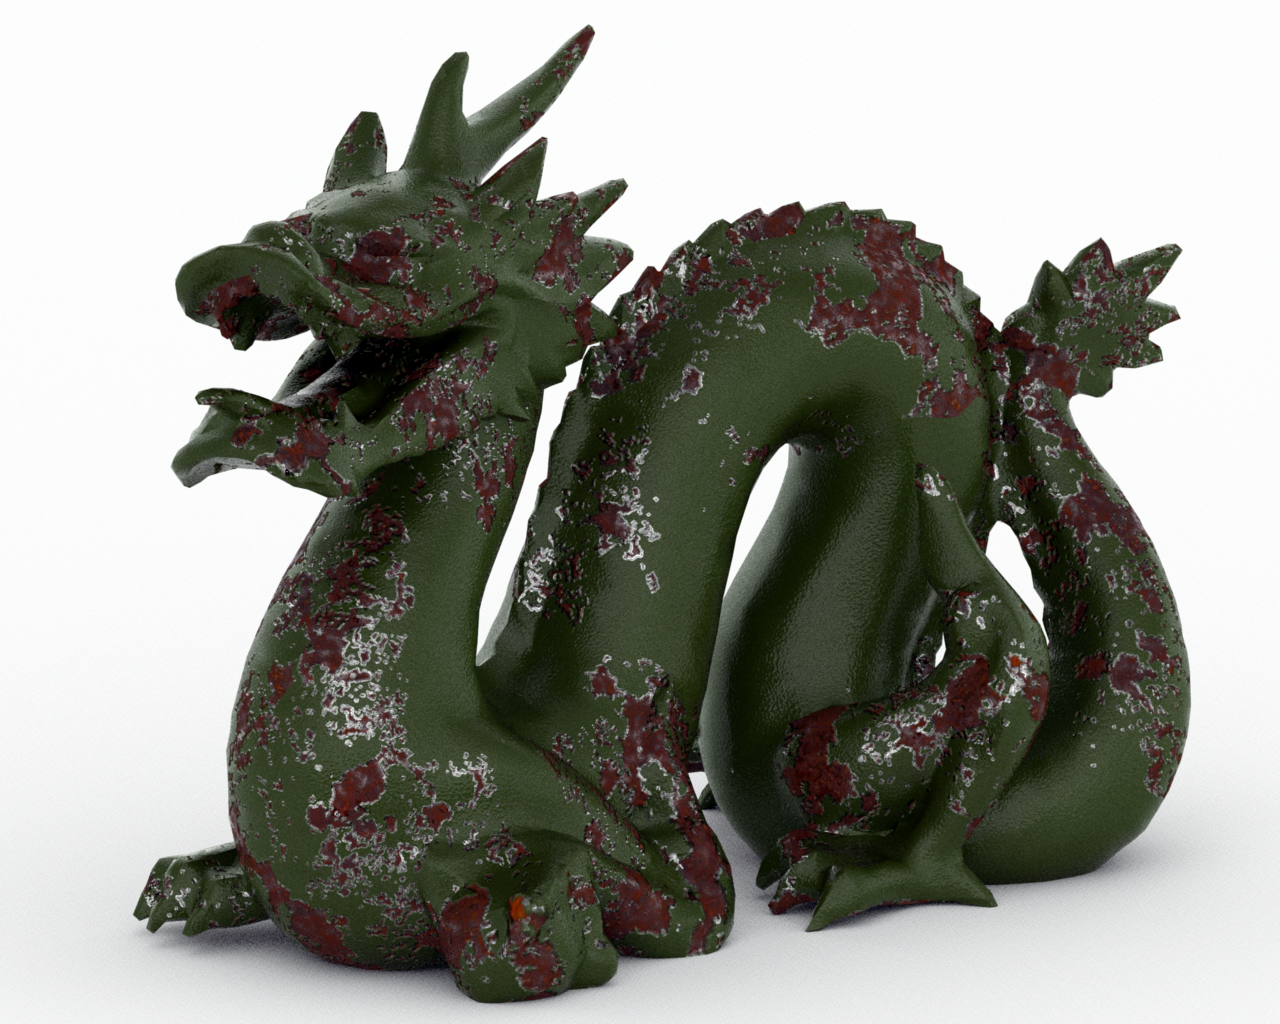
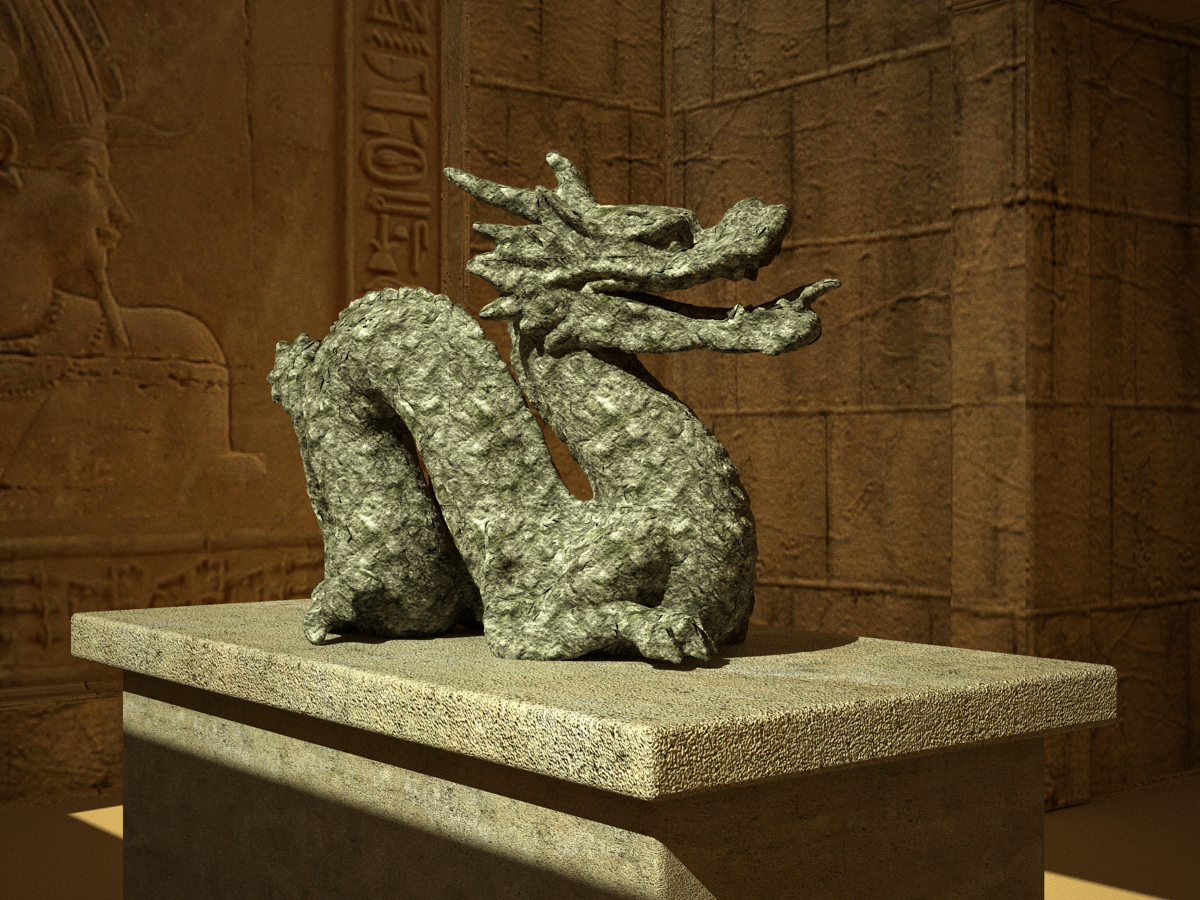
Stone dragon
-
How does my simulation look?
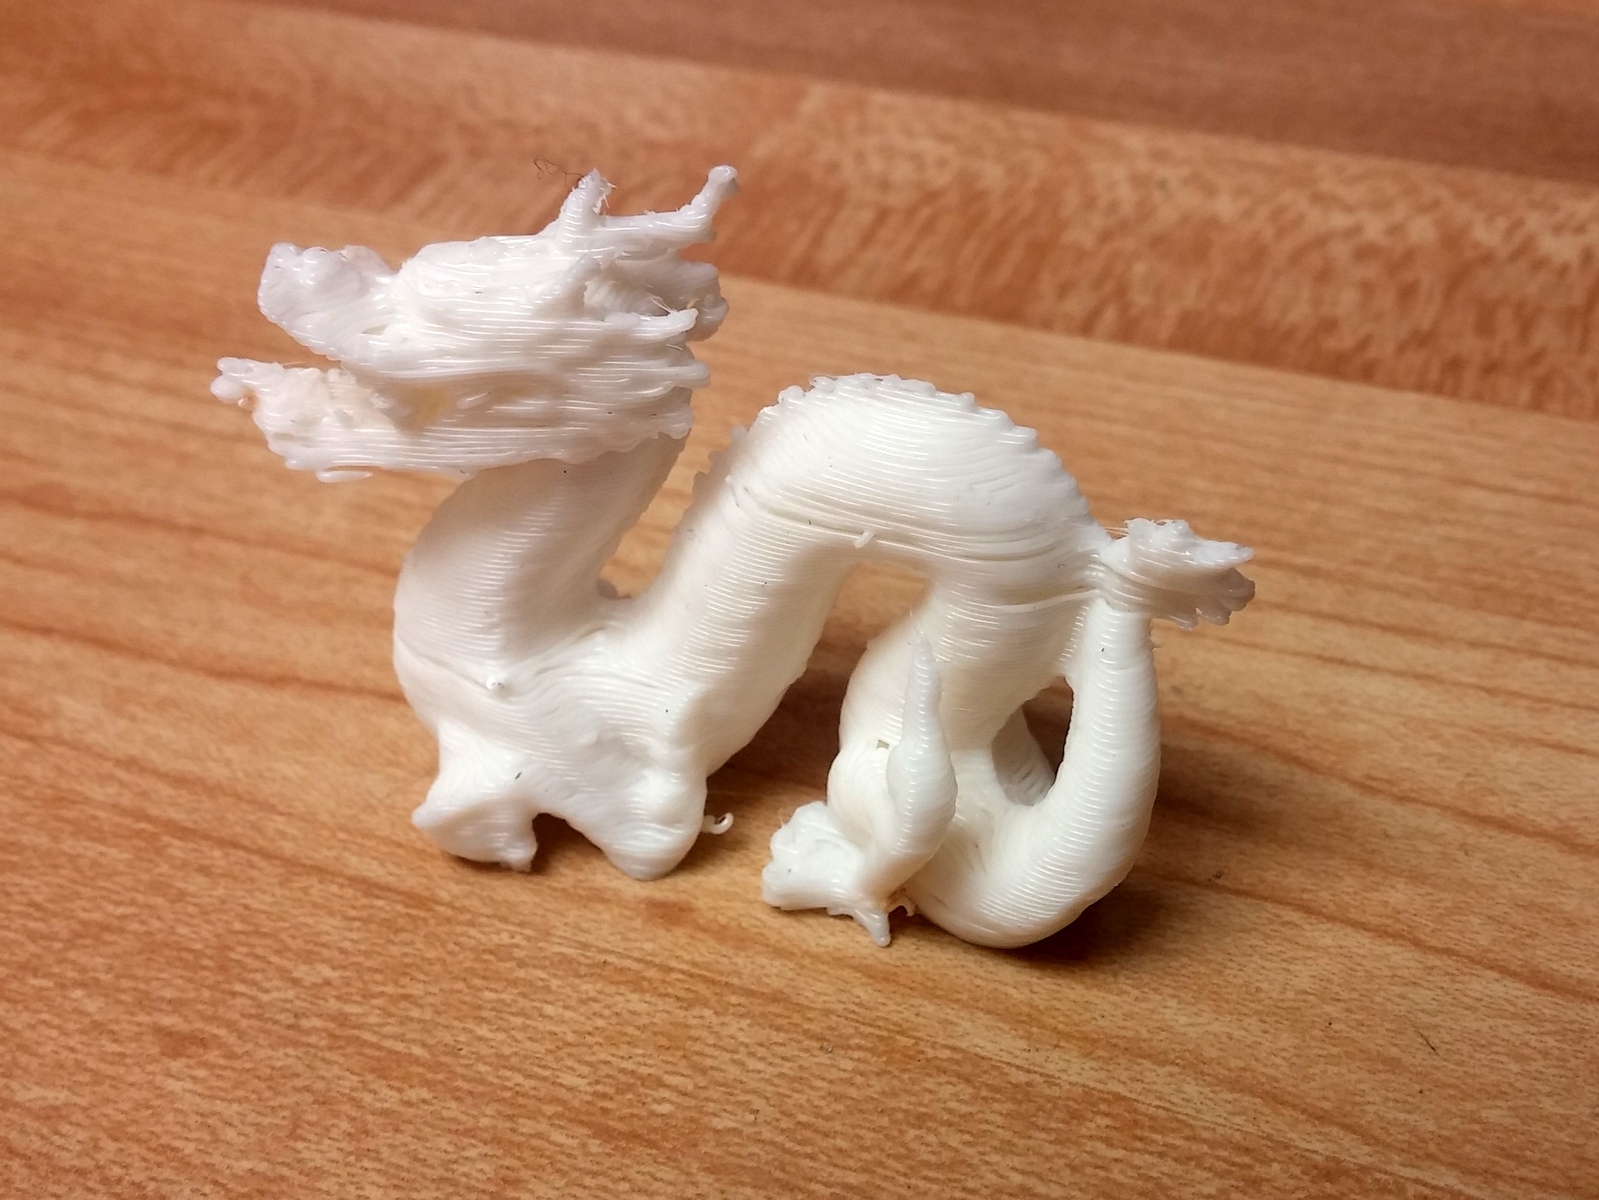
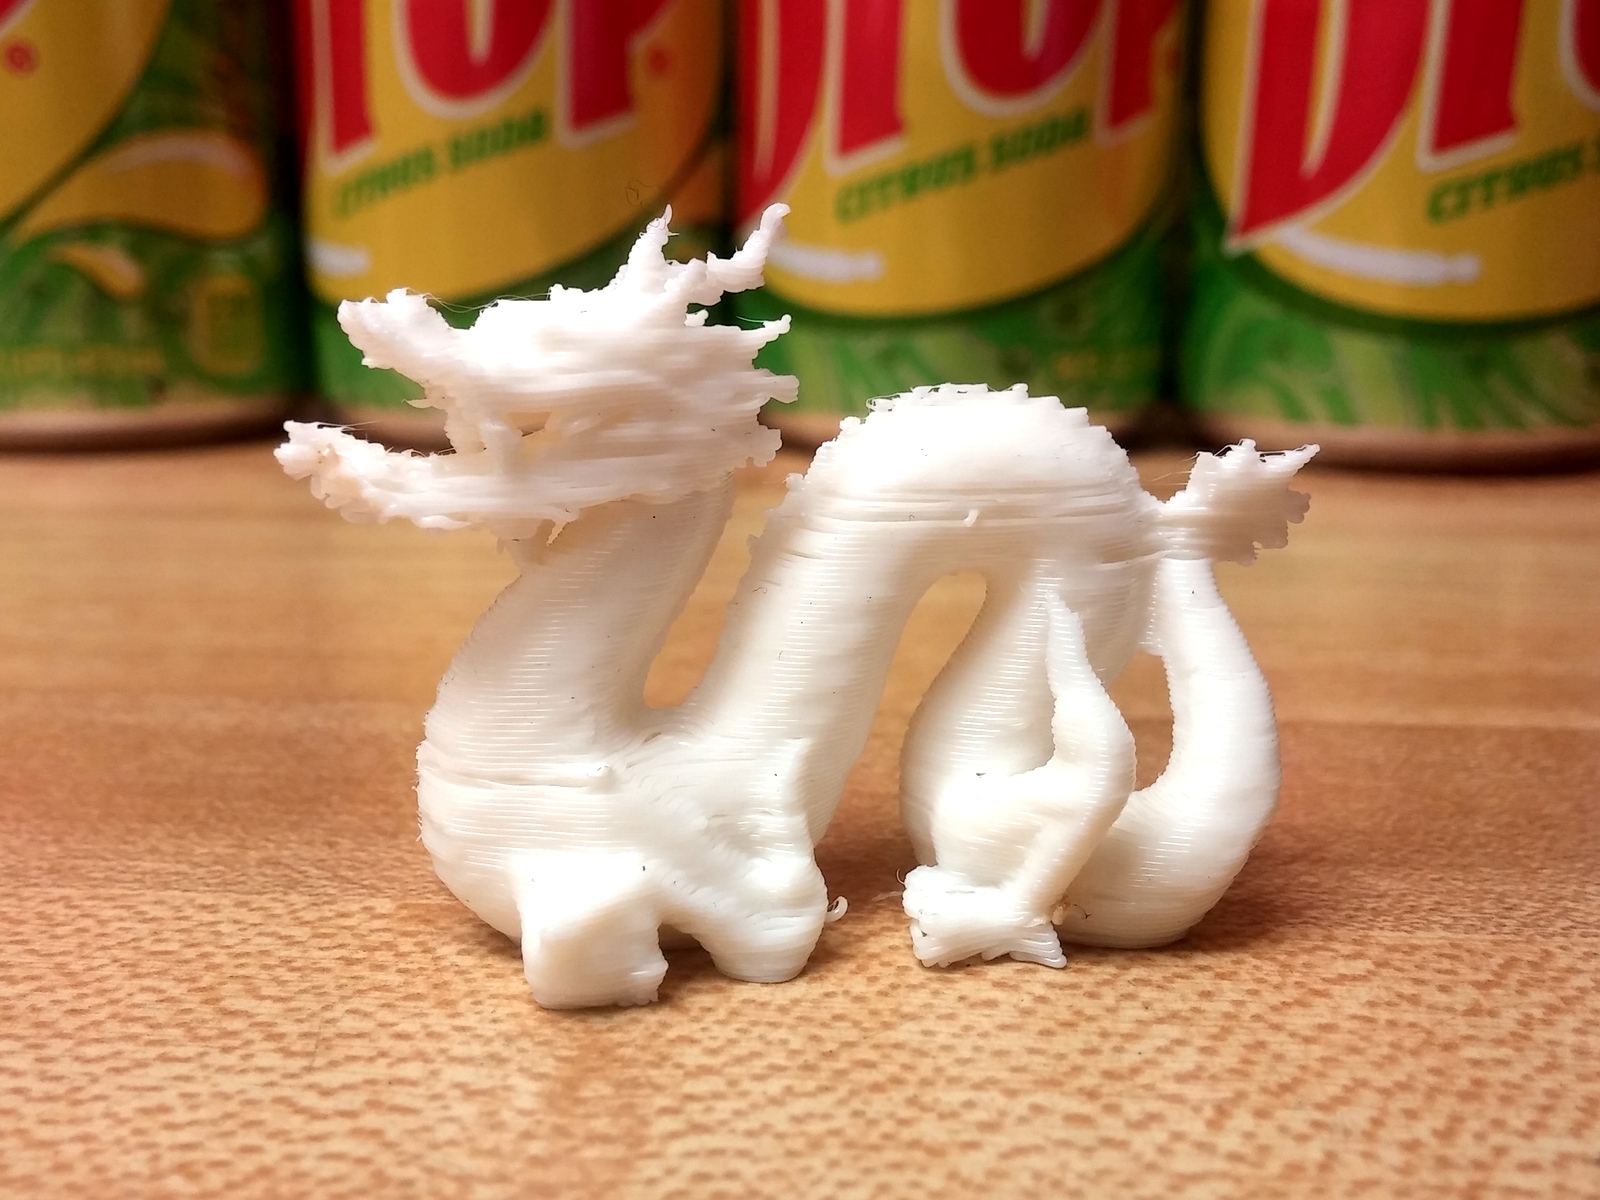
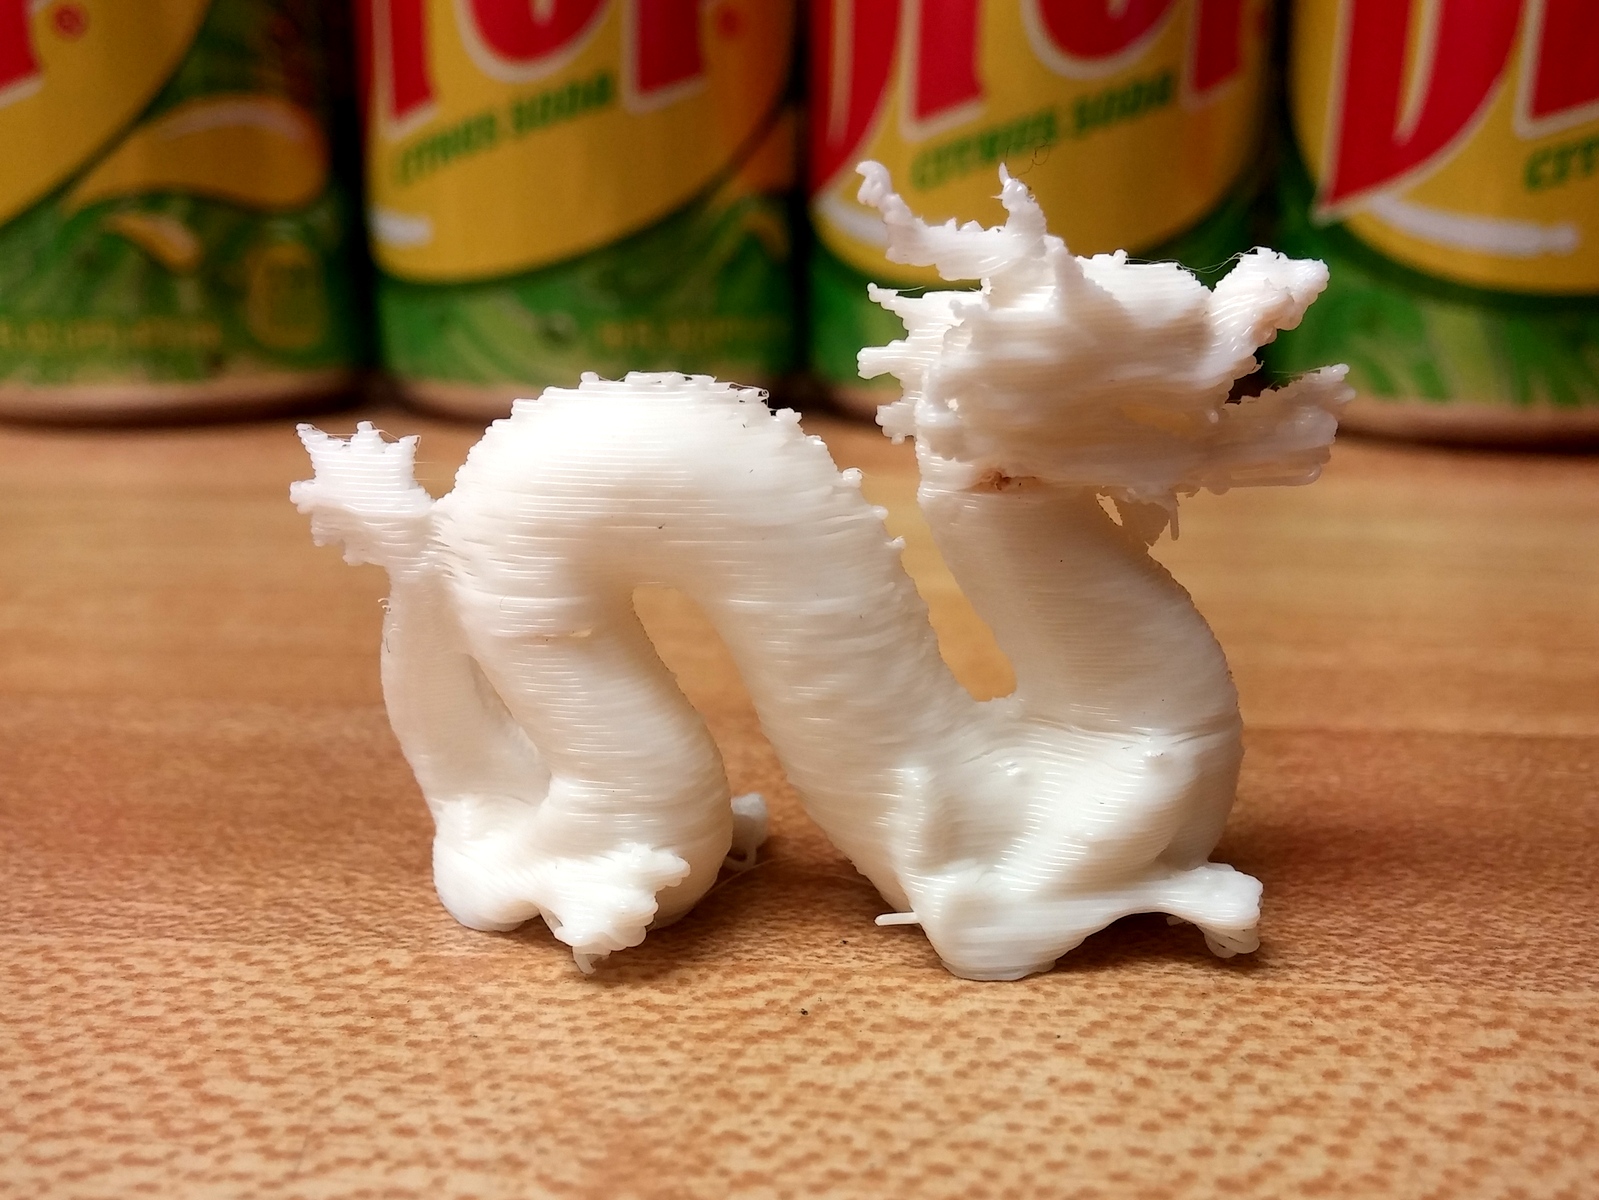
Ok, these are real photos, if you couldn't tell.
 I scaled the model down to 2" long and printed it on my little Solidoodle 3D printer. My printer needs some calibration, as you can tell from the stringy bits and uneven layers, but at least the photos can be used as reference for real world lighting conditions.
 -
-
Too funny, Kim!
It IS one of those fake wood countertops. -
-
I used IRender nXt...
I was first going to do a simple light around the table, but then I decided to MODEL a room as opposed to using an HDRI image. Then I decided to complicate matters by making the material 48% transparent, w/ 1.5 refraction, 73%+/- Translucency, and then checked Thick and Gather (this gives it the speckles when light goes through it). Attenuation at about 35%, 10% Dispersion and about 70% Saturation. I made the reflection intensity over 70% and Sharpness about 50%. Because of this, it took a while to render! The chairs lamps and vase are from the 3D Warehouse. The room is a rectangle with 5 windows into it. There is a lamp in each corner. I with the nXt image editor I did one render and created 6 images with the lighting channels. There is a Sun channel, a Sky channel, and a Lighting channel. I can add color variations too. I had too way much fun here. Thanks all for posting this thread Al.
Elibjr - EB

-
@d12dozr said:
How does my simulation look?
[attachment=2:1q2508sj]<!-- ia2 -->dragon01.jpg<!-- ia2 -->[/attachment:1q2508sj]
[attachment=1:1q2508sj]<!-- ia1 -->dragon02.jpg<!-- ia1 -->[/attachment:1q2508sj]
[attachment=0:1q2508sj]<!-- ia0 -->dragon03.jpg<!-- ia0 -->[/attachment:1q2508sj]Ok, these are real photos, if you couldn't tell.
I scaled the model down to 2" long and printed it on my little Solidoodle 3D printer. My printer needs some calibration, as you can tell from the stringy bits and uneven layers, but at least the photos can be used as reference for real world lighting conditions.This is awesome! How long did it take this thing to finish? What is it made out of? Cool! I want one!
-
Hi Eli, it took 55 minutes to print at this scale (2" long). It's made of ABS plastic, the same stuff Lego blocks are made of.
If you want to get one made, I have attached the file I used to print. It is converted to an STL file and fixed up so that it's solid for 3D printing. You can send it to a print service like Shapeways, or even better find someone near you with a 3D printer. Here's a good place to look: http://hackerspaces.org/wiki/List_of_Hacker_Spaces
As a bonus, I found a photo of a the same dragon made on a $200,000 printer
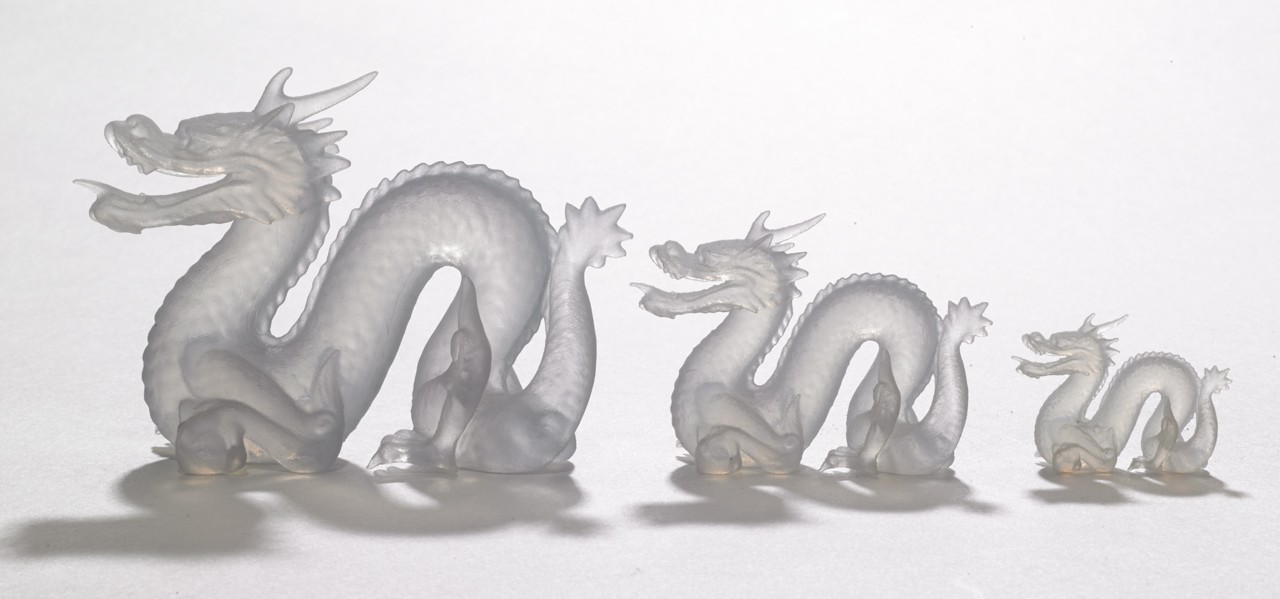
Talk about fine detail and SSS!
-
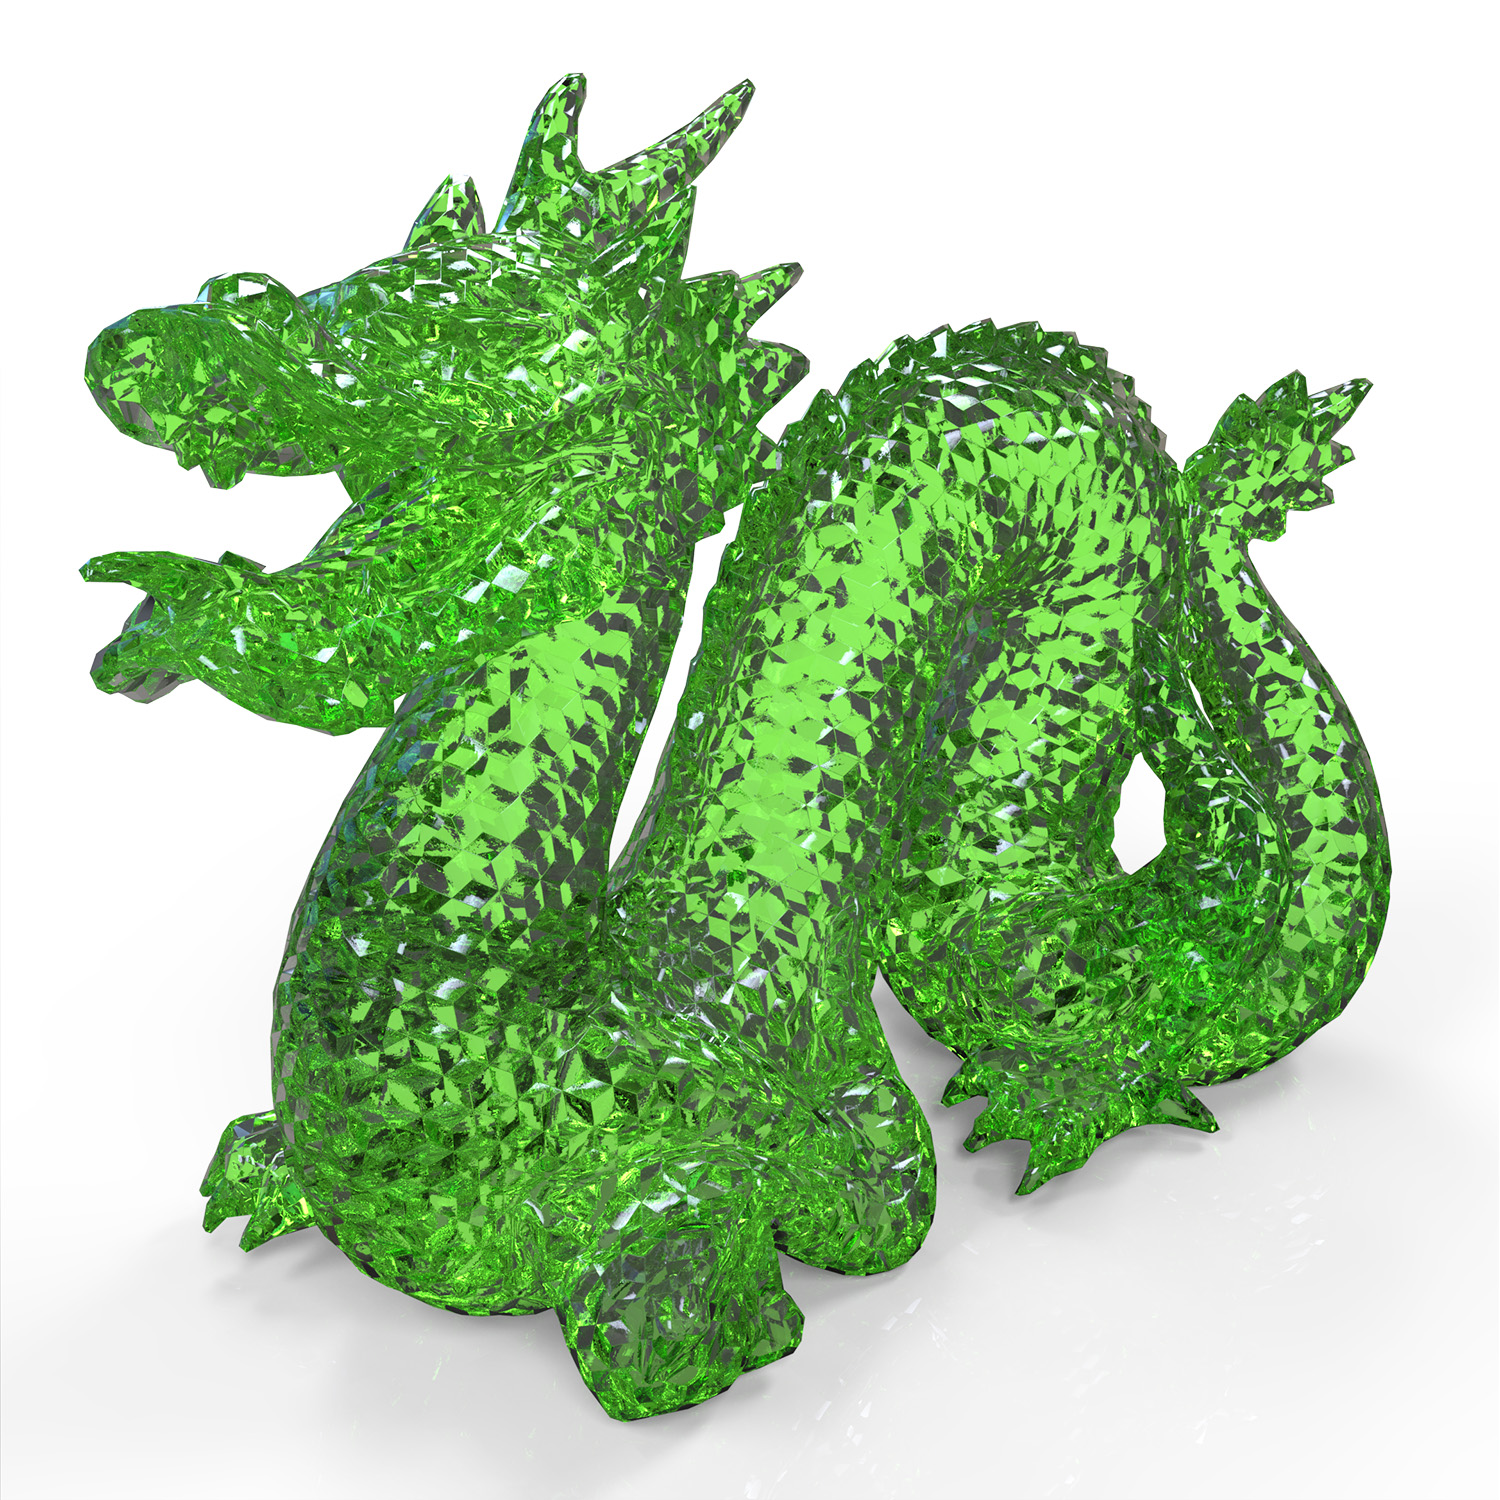
messed around with KeyShot this weekend...here's a quick render. 10 second setup time.
-
had to test a material importer so i used the dragon..
then fredo's thruPaint > Natural did a pretty good job at laying out the tiles in the way they'd go down if you were to really attempt tiling this thing.. anybody got a diamond saw?


Hello! It looks like you're interested in this conversation, but you don't have an account yet.
Getting fed up of having to scroll through the same posts each visit? When you register for an account, you'll always come back to exactly where you were before, and choose to be notified of new replies (either via email, or push notification). You'll also be able to save bookmarks and upvote posts to show your appreciation to other community members.
With your input, this post could be even better 💗
Register Login


Advertisement