I'm glad this guy isn't working in SU.
Posts
-
How do I import terrain
I am having a problem getting SU to import GE terrain and also to get SU to find its way to the 3DWH. I don't know how to set the paths in SU to communicate with either of these resources. I have looked at the tuts, but they assume you already have the proper paths set. So where do I start?
-
RE: 2d continous line on a face
Paolo, if you are zoomed out SU will snap to grid. If you zoom in very closely either the grid becomes smaller or it lets you snap off grid.
-
RE: Chidori furniture joint
@dave r said:
I'd cut the joints with this:
A simple fixture as TIG mentions would make it simple to create accurate joints.
I would too if I had one.
-
RE: Chidori furniture joint
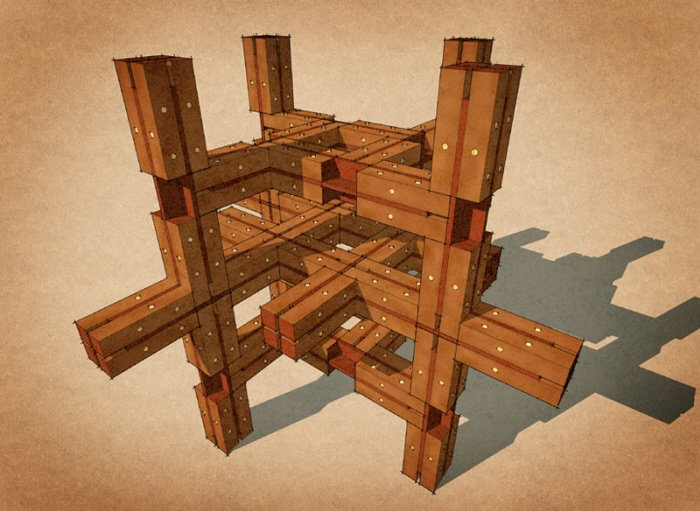
@woodarc said:Is anybody familiar with this system. I'm looking for details of the joints. The system apparently consists of 12 sticks with different junction details which connect without the aid of glues, nails or screws. I've checked out Amazon but with no joy. Any leads would be greatly appreciated. Many thanks in advance.

Reminds me of a system that I came up with in architecture school.
-
RE: Let there be light and there was a lamp
@d12dozr said:
Haha, I used the online 123D catch app, so I don't have a file to send, and I can't see any way to link to an online model directly. Here are some screen grabs of the model (linked so they don't hijack your images).
Overview
Closeup of eagle sculptureI put the sculpture on a box to make it easier to take pics of the underside, and I thought the tape measure might help scale it later. 123D converted a lot of background in the model, but the sculpture model itself wasn't that great. The other side has a big hole in it.
Do I need to download the program to my computer to edit the model and get better results?
Fill the frame with the eagle and also increase your exposure by 3/4 of a stop. Moving in a circle around the eagle, take one picture about every 24 degrees. That would be 15 photos. Do this once around the center of the eagle with the camera base parallel to the floor. Do 15 more with the camera looking down at about 45 degrees and once again with the camera looking up at 45 degrees. Get some little geometric colored stickers and place them at key points on the sculpture. The program will recognize the red circle and the blue square and the yellow triangle and will be more certain when pairing matching points in the photo sets.
I don't think you can download the program, perhaps you can but I think they want to keep you hooked so they can sell you their CAD programs. What you do is use the export option to make an object file. Then use TIG's "OBJ Importer" plugin to bring the mesh into SU. Once you have it in SU, you should be on familiar ground. I am also testing MESHlab (free)but it is choking on the file for some reason. MESHlab is supposed to let me selectively simplify parts of the mesh and also map textures to the surface.
Anyhow:
1 better lighting
2 More photos
3 Closer photos with plenty of overlap
4 Up photos, down photos, and level photos
5 try adding a few unique target point at seleted points of the eagle.Try it and let me see the results.
-
RE: Let there be light and there was a lamp
@d12dozr said:
I like it, Roger, especially how you got the stump date into Sketchup.

I've tried 123D catch a couple times without success. I find the background always messes up my model. Did you do anything special when you were taking the photos to help get a better result?
Is there anything else you did during the process that may have help you achieve a good result?
The "stump date". Yeah I just counted the tree rings. As to 123 messing up, I am not sure how to answer your question. If you could send me a messed up 123D Catch file I would be better able to comment. Flat lighting seems to help. Try to circle the object with 30 to 60 photos with lots of overlap. If the program seems to be confused by featureless surfaces, pin geometric shapes of different colors to the surface to make locator points. Try to move in a circle around your object keeping the angles between shots and the distance to the object consistent. Glass and shiny surfaces confuse the algorithm. You might try covering a shiny area with talcum powder, sand or a towel. Think of using 123 to capture an object and delete backgrounds. Then reinsert the background as a flat or perhaps do separate captures for important background 3D objects.
-
RE: A Thread for Fine Design
@martink said:
@mitcorb said:
Actually there may be madness in their method. sic
I read somewhere that they invert them so that it does not look like a face so that toddlers won't fool with them.I think it's actually done so it's harder for the plug to fall out if it's a little loose.
What key combination do you use to invert them?
-
Let there be light and there was a lamp
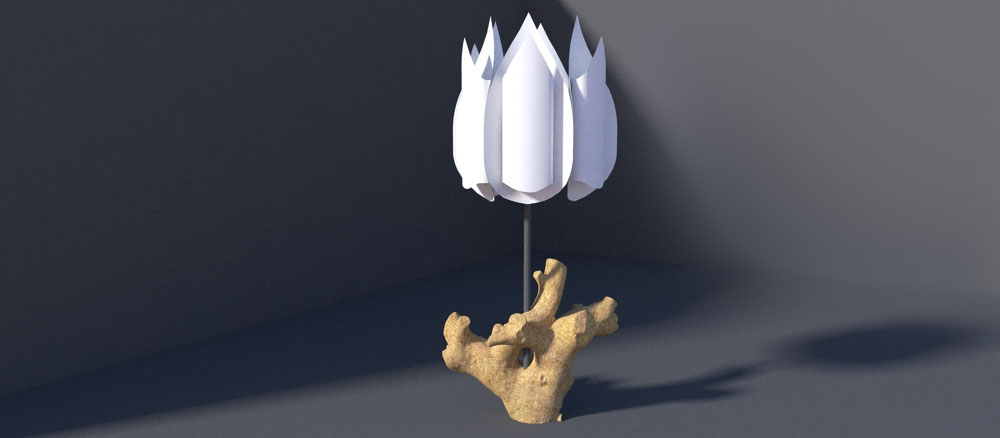
I had this stump that I didn't want to throw away and this IKEA lamp that needed a more natural element. To test the combo I used 123dCatch to get the mesh for the stump from about 30 photos. I ran that data through TIG's objExporter. Then I found a Tulpan lamp in in the 3D warehouse. After combining the two files, I ran the result through twilight render. On TIG's suggestion I am also experimenting with some image improvments in MESHlab.
-
RE: 3D Scanning on the cheap
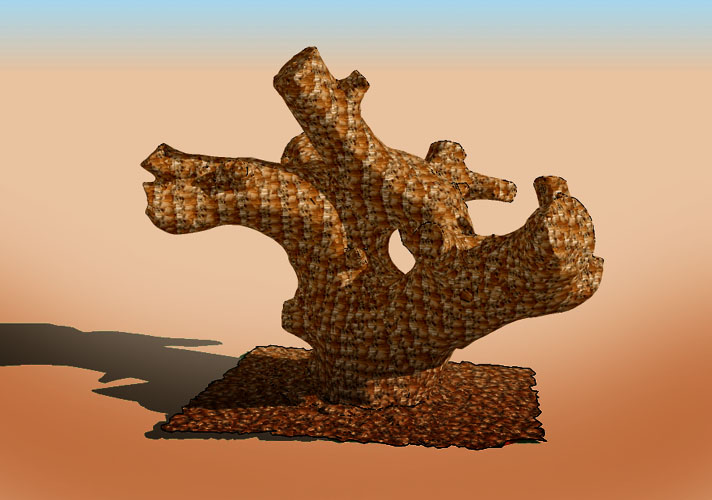
And here is what the file looks like exported to SKP minus some credible texturing. -
RE: Shapemagic-free-
@tig said:
There is 'OBJimporter'... BUT an OBJ file from this app will almost certainly 'have issues'... you might need to import it into something else that can cope... then re-export as a compliant OBJ to move over into Sketchup...
Didn't you do a plugin called OBJ2SKP ?
-
RE: 3D Scanning on the cheap
This mornings experiments with 123 catch:
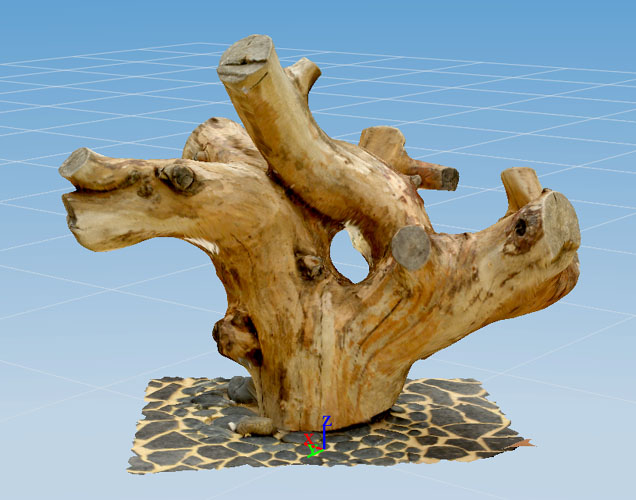
I am starting to live in a more rural area requiring a greater degree of self sufficiency than I am used to. For instance the closest grocery store is about 30 miles away. Although, I am not planning to go off the grid, but do plan to loosen the grid's grip on my wallet. Do do this, I am taking advantage of what nature offers for free like this tree fork I cut from a fallen tree. It will soon become a lamp base and be merged with the upper section of an old IKEA lamp. I need to convert the mesh from OBJ to SKP to I can model the project. -
RE: Old woods
David, how do you separate the tree leaves so they overlay so successfully on the background? Are those your trees or are they part of an entourage package?
-
RE: Make an imported TIF 3D and curved?
One you have completed the Illustrator course, see: http://www.youtube.com/watch?v=YER82N30vc8 which is part one of a two-part tutorial.
-
RE: Surface between two irregular arcs
Push/pull the one arc and then scale just the newly created face? Seems like the most direct solution or am I missing something?
-
RE: Make an imported TIF 3D and curved?
If you use Adobe Illustrator, it has a trace outline tool that will copy the outline of the writing and save it as bezier curves. These can then be exported as dwg files and imported into SU. You can then run the WELD plugin which connects the line segments so you can use push/pull.
-
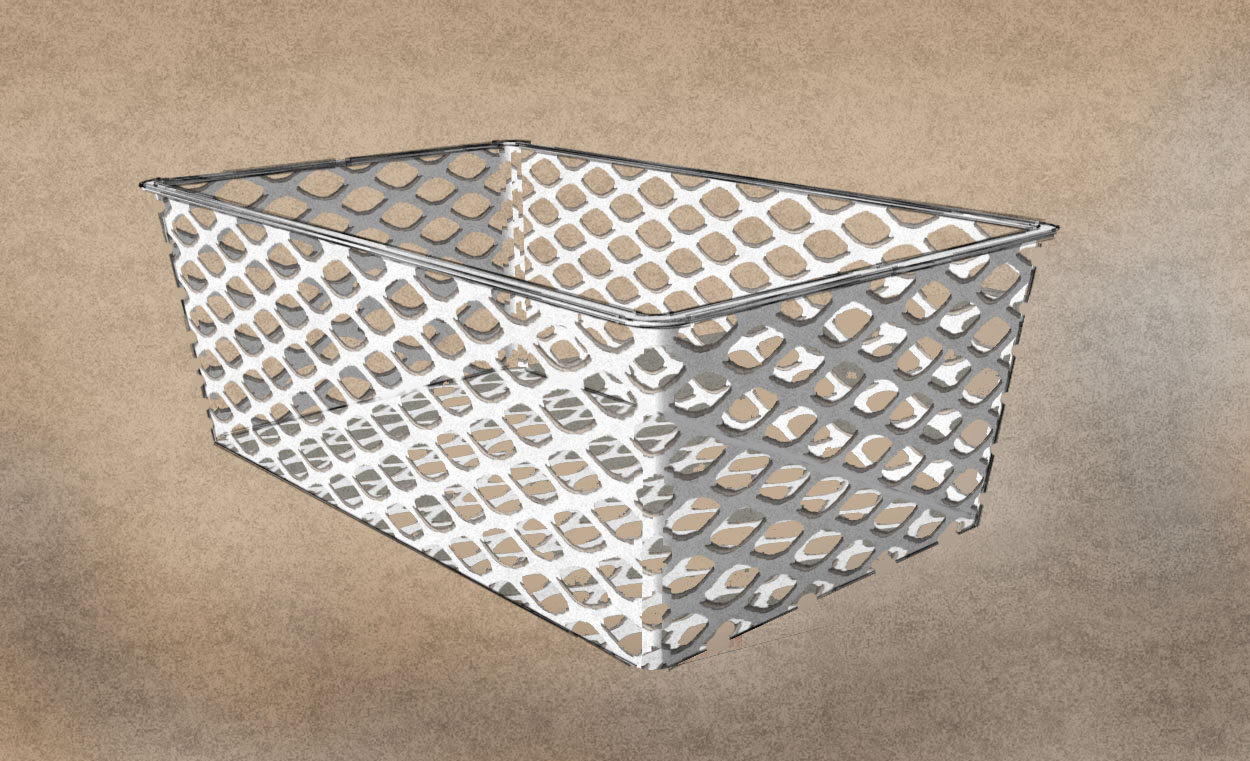
RE: Help with making my wire mesh material white.
Now that you have it solved could you show the result?
-
RE: Help with making my wire mesh material white.
Just fooling around with some textures. Was this the direction you were thinking of going? Were you going to stay in SU or run it through a render engine? The problem is that mats cast a solid shadow or no shadow, but it would take a lot of post to cast the actual shadow of the mesh.
