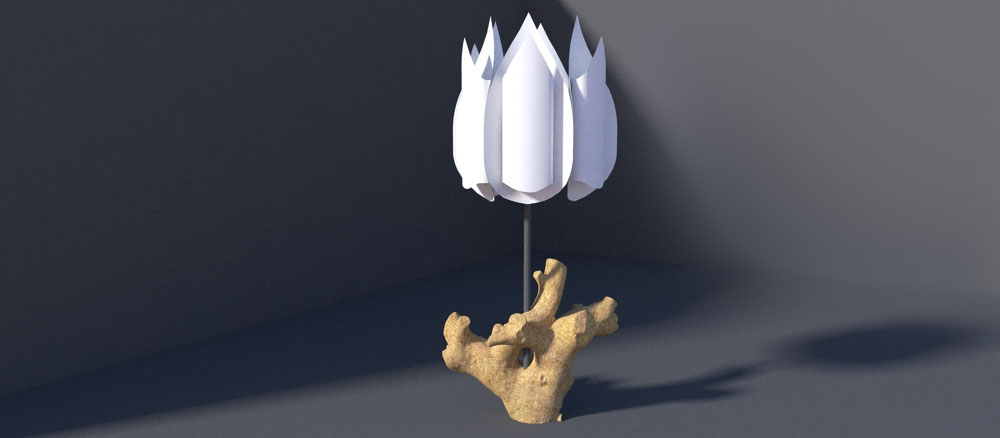
Let there be light and there was a lamp
-

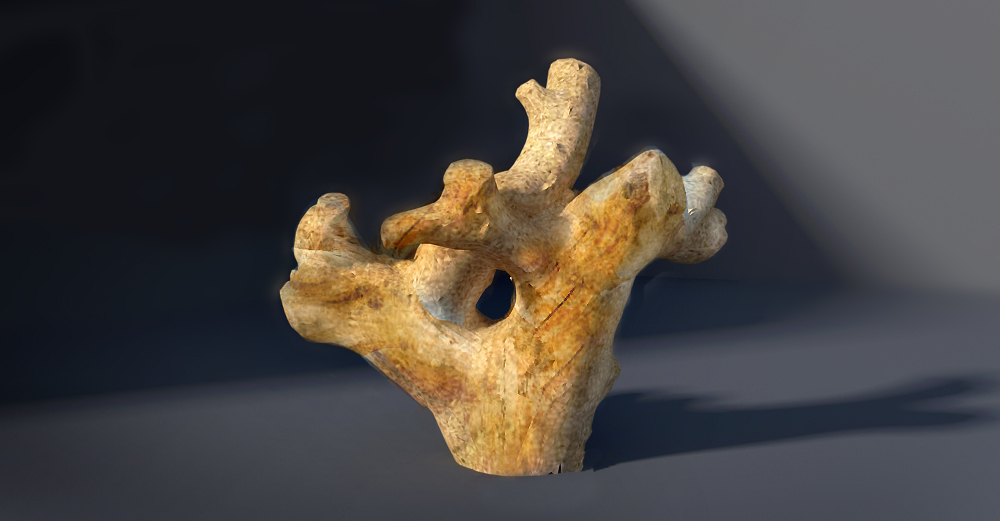
I had this stump that I didn't want to throw away and this IKEA lamp that needed a more natural element. To test the combo I used 123dCatch to get the mesh for the stump from about 30 photos. I ran that data through TIG's objExporter. Then I found a Tulpan lamp in in the 3D warehouse. After combining the two files, I ran the result through twilight render. On TIG's suggestion I am also experimenting with some image improvments in MESHlab.
-
I like it, Roger, especially how you got the stump date into Sketchup.

I've tried 123D catch a couple times without success. I find the background always messes up my model. Did you do anything special when you were taking the photos to help get a better result?
Is there anything else you did during the process that may have help you achieve a good result?
-
@d12dozr said:
I like it, Roger, especially how you got the stump date into Sketchup.

I've tried 123D catch a couple times without success. I find the background always messes up my model. Did you do anything special when you were taking the photos to help get a better result?
Is there anything else you did during the process that may have help you achieve a good result?
The "stump date". Yeah I just counted the tree rings. As to 123 messing up, I am not sure how to answer your question. If you could send me a messed up 123D Catch file I would be better able to comment. Flat lighting seems to help. Try to circle the object with 30 to 60 photos with lots of overlap. If the program seems to be confused by featureless surfaces, pin geometric shapes of different colors to the surface to make locator points. Try to move in a circle around your object keeping the angles between shots and the distance to the object consistent. Glass and shiny surfaces confuse the algorithm. You might try covering a shiny area with talcum powder, sand or a towel. Think of using 123 to capture an object and delete backgrounds. Then reinsert the background as a flat or perhaps do separate captures for important background 3D objects.
-
Haha, I used the online 123D catch app, so I don't have a file to send, and I can't see any way to link to an online model directly. Here are some screen grabs of the model (linked so they don't hijack your images).
Overview
Closeup of eagle sculptureI put the sculpture on a box to make it easier to take pics of the underside, and I thought the tape measure might help scale it later. 123D converted a lot of background in the model, but the sculpture model itself wasn't that great. The other side has a big hole in it.
Do I need to download the program to my computer to edit the model and get better results?
-
@d12dozr said:
Haha, I used the online 123D catch app, so I don't have a file to send, and I can't see any way to link to an online model directly. Here are some screen grabs of the model (linked so they don't hijack your images).
Overview
Closeup of eagle sculptureI put the sculpture on a box to make it easier to take pics of the underside, and I thought the tape measure might help scale it later. 123D converted a lot of background in the model, but the sculpture model itself wasn't that great. The other side has a big hole in it.
Do I need to download the program to my computer to edit the model and get better results?
Fill the frame with the eagle and also increase your exposure by 3/4 of a stop. Moving in a circle around the eagle, take one picture about every 24 degrees. That would be 15 photos. Do this once around the center of the eagle with the camera base parallel to the floor. Do 15 more with the camera looking down at about 45 degrees and once again with the camera looking up at 45 degrees. Get some little geometric colored stickers and place them at key points on the sculpture. The program will recognize the red circle and the blue square and the yellow triangle and will be more certain when pairing matching points in the photo sets.
I don't think you can download the program, perhaps you can but I think they want to keep you hooked so they can sell you their CAD programs. What you do is use the export option to make an object file. Then use TIG's "OBJ Importer" plugin to bring the mesh into SU. Once you have it in SU, you should be on familiar ground. I am also testing MESHlab (free)but it is choking on the file for some reason. MESHlab is supposed to let me selectively simplify parts of the mesh and also map textures to the surface.
Anyhow:
1 better lighting
2 More photos
3 Closer photos with plenty of overlap
4 Up photos, down photos, and level photos
5 try adding a few unique target point at seleted points of the eagle.Try it and let me see the results.
-
Thank you for the detailed info, Roger! Page bookmarked.

This was a side project to help me see how the 123D software worked. I hope to have time soon to try it out.
-

After converting my series of photos into 3D data in AutoDesk's 123dCatch, I exported an object file into sketchup. Since the photos have no absolute scale info in them, I took a ruler and measured the two most widely separated points in this branch. Then I made a computer measurement between those points and overwrote it with the real world measurement. When I do this, the computer asked me if I wanted to rescale the model. I responded "yes." Then I measured separation between various points on the physical branch and compared that to corresponding points on the computer model. They matched with surprising accuracy. I would say the accuracy was good enough for a wood shop but not good enough for a machine shop if that gives you any frame of reference. For most of my uses this is good enough. Later I will push myself to give a better measure of accuracy, but for now, I am impressed.When I rescaled I used the two most widely points I could conveniently measure with a ruler (a distance of 43CM. After calibrating the model with this measurement I took a computer measurement across two identifiable points on the cutoff face of one of the branches on the virtual model. This measurement on the virtual model was 7.5CM. In the real world the cut off face also showed 7.5CM. Other computer measurements corresponded very closely to the measurements from the physical object. I won't go into all the possible issues surrounding hyper accuracy, but since I am encouraged by the utility and accuracy of this tool I will do further research on the subject of computer aided measurement.
-
I just found some info on rigorous testing of the limits of 123d Sketch accuracy. It indicated that accuracy or inaccuracy if you prefer is about 1:600. Not bad considering the ease and cost effectiveness of the system. I also suspect there are some simple methods to correct the inaccuracy both before and after the data collection. If you are measuring a rectilinear object, then you can rescale along all the major axes and this should pull increase the accuracy of the model. In fact, your model has no scale until you give it one. So if you pick a line with a known dimension of 10 inches and set the line to 10 inches then at least than that one line has a precise value in your model. The question then becomes how accurate are all other lines in relation to your reference line. Also the test was done with a zoom lens so we don't know the accuracy of the calibration or the accuracy of the exif data regarding focal length along the entire range of the zoom. Camera base captures are also often done with very random camera positions (the array of picture taking positions). If the array is very regular and systematized I suspect accuracy goes up and perhaps dramatically. Also before stitching of the photos for the model you can intervene manually to set any number of know distances. This can be problematic as the control points you set manually are dependent on your own manual and visual dexterity (you can do as much harm as you do good. I suspect you could write a whole thesis paper on the limits to the systems accuracy. And, of course, we know SU curves are approximations which means that a randomly chosen point on a SU curve can be on dimension, over dimension or under dimension and the differences will vary with the number of segments in your curve and the size of the curve. I think it is safe to say that a $30,000 Leica laser point cloud generater will be more accurate for most applications. But, I also think you can say for many or most applications so what? And, I am certain you can raise the accuracy of 123d catch data significantly by using a carefully calibrated prime lens, many control points, regularly and accurately spaced camera positions. Of course as you force the accuracy up, cost and effort also go up. Anyhow tomorrow I will be trying to survey a small vacant hill at my new house and use the terrain model data as the basis for conceptualization of a small studio building.
-
Yeow! Nice!
Advertisement


