Here is an image of the second effort with a fabric texture applied. I forgot to mention that I did apply Loop Subdivision after running the simulation. If I can get a more uniform bunching I think I'll be very happy with the result. I'm quite in awe with what ClothWorks can do and in the hands of a relative newbie. I'm sure this only just scratches the surface.
Posts
-
RE: [Plugin] ClothWorks v1.8.0 - 28 Apr 2024
-
RE: [Plugin] ClothWorks v1.8.0 - 28 Apr 2024
Anton -
I tried the method you suggested but it didn't give a result that looked quite like the bunched chain sleeve as in the reference image. I played around with adjusting the scale of the cloth but it looked more like it was "shrink-wrapped" as opposed to bunched. I'm sure if I knew more about how adjusting different properties affects the end result I would have gotten a little closer.
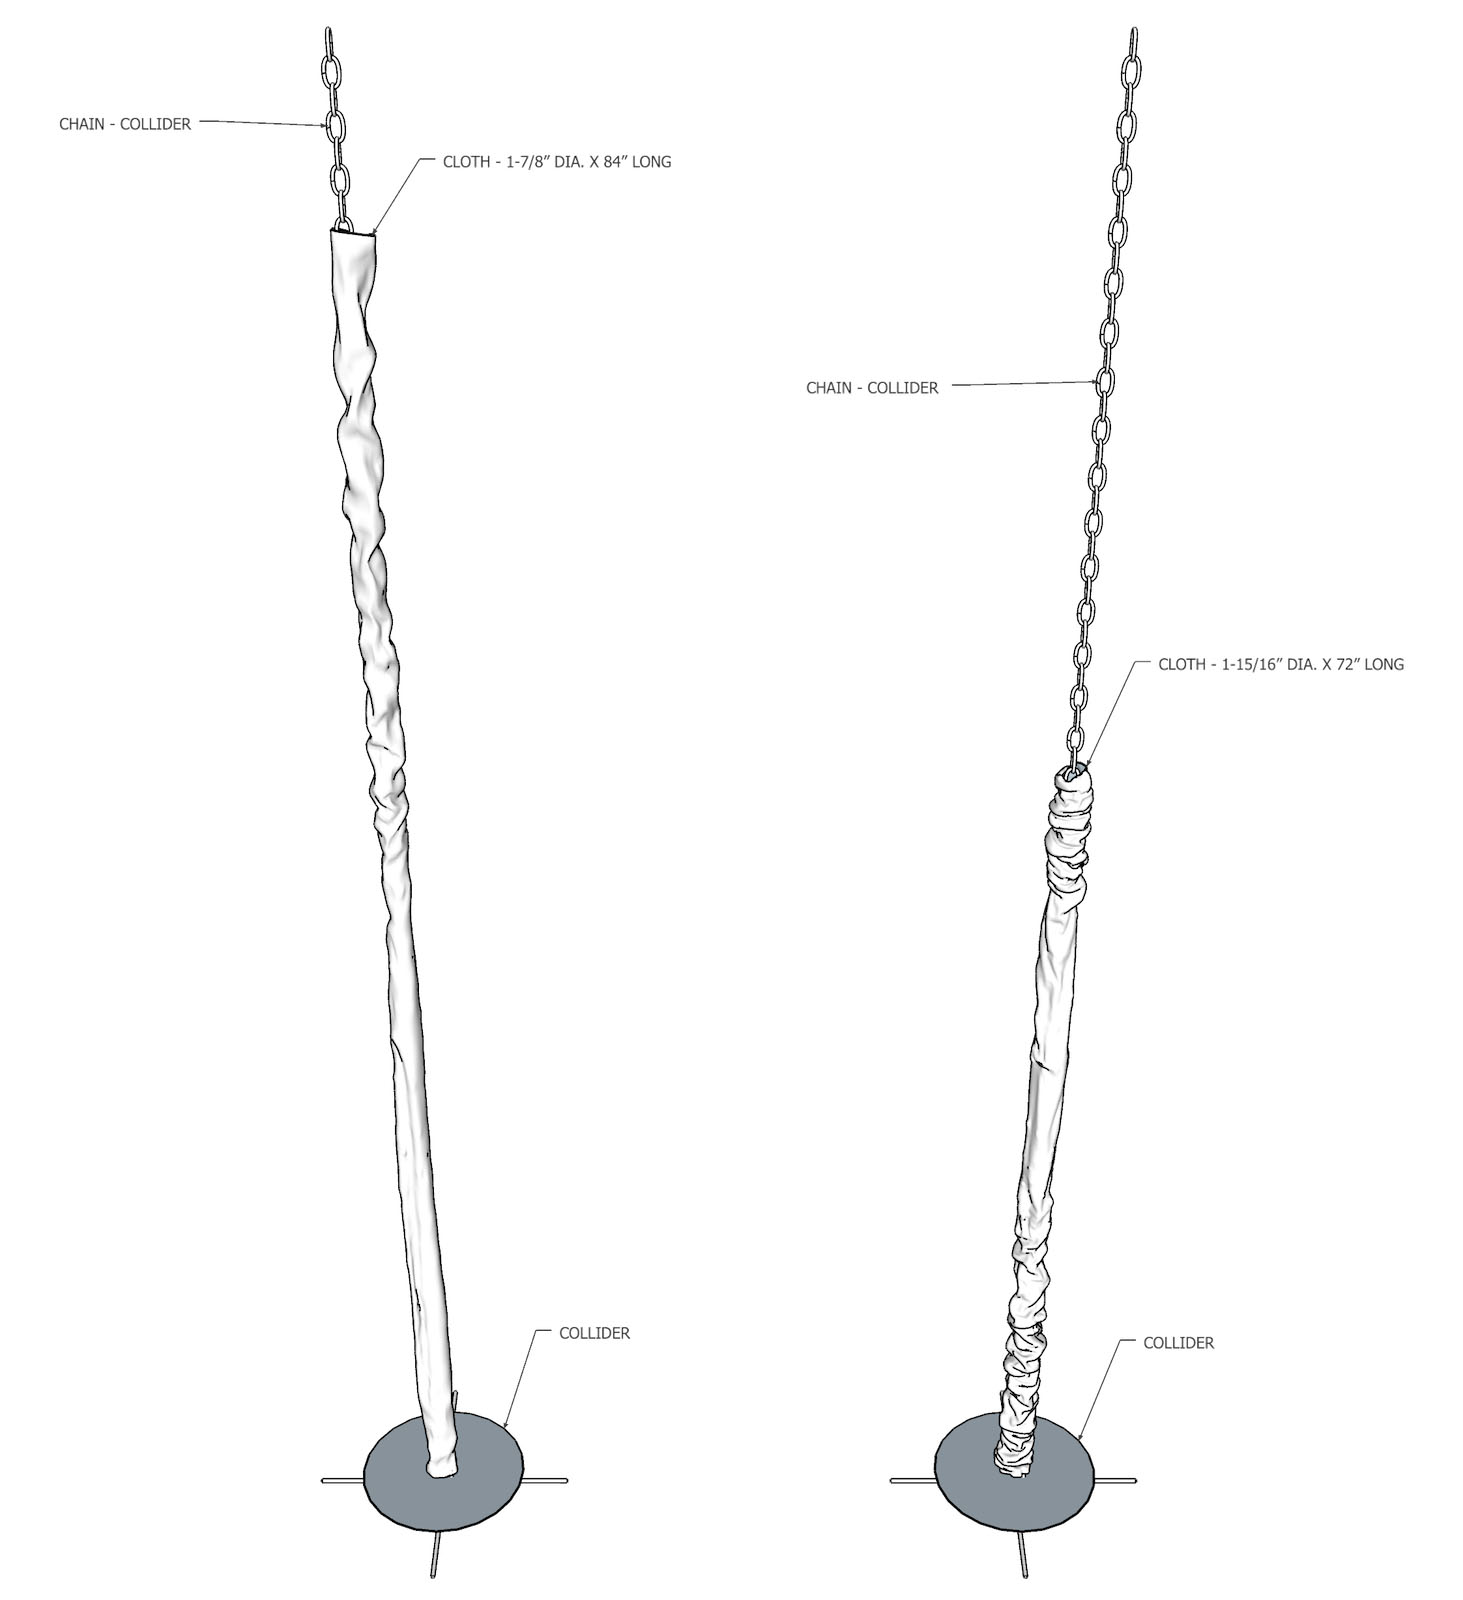
Being impatient I tried a different method, but still using the cylinder as you suggested.I removed both the top and bottom so it is essentially just like the real cloth sleeve. I made the cylinder a cloth and applied adaptive grid. I created a circle at the bottom, at a point just below where the chain connects to the top of the fixture, grouped it and made it a collider. The chain is also grouped and is a collider. I then ran the simulator. [/list]
At first it looked promising but I had made the cloth sleeve longer than the chain (by quite a bit) so the sleeve bunched and fell away to the side of the chain. I tried again after making the chain longer than the sleeve. Result was much better, but after just a little bit the bunching seemed to slow significantly. I created a copy of the original components but replaced the original sleeve with a shorter one and slightly larger diameter. This made a big improvement. I think I also reduced the grid of the cloth from 1" to 0.5". I'll keep testing with making various adjustments to the properties in the UI. I'd like to get a more uniform amount of bunching the full length of the sleeve. There is a section along the upper third of that seemed to not bunch as much.
What are some of the properties I should look at adjusting?
-
RE: [Plugin] ClothWorks v1.8.0 - 28 Apr 2024
Hi Anton. Thanks for the suggested procedure. I'll give that a try. I just purchased the license last night so I'll be able to play around some this morning.
-
RE: [Plugin] ClothWorks v1.8.0 - 28 Apr 2024
I haven't tried ClothWorks yet but it looks amazing with so many different applications. I'm curious whether I could use it to create a fabric chain sleeve for a hanging lamp as shown in the attached image. To help explain I've included 2 images - first one shows the usual chain and wire going through the chain into the canopy, and second one shows the fabric sleeve which would be slid over the chain. The sleeve is longer than the chain so that it "gathers" as it's full length is bunched up between the canopy and the top of the lamp fixture. I've read through the this thread and found one method posted by Oxer - https://sketchucation.com/forums/viewtopic.php?f=323&t=69485&start=210#p634892 - that seems like it could be adapted to make this work. I'd appreciate any suggestions before I dive in and start playing around. Thanks!
-
RE: [Plugin] Physically-Based Rendering - v1.5.9 - 19 Apr. 2020
It should open in a Chrome browser?
-
RE: [Plugin] Physically-Based Rendering - v1.5.9 - 19 Apr. 2020
Here is a screenshot of the resulting text.
-
RE: [Plugin] Physically-Based Rendering - v1.5.9 - 19 Apr. 2020
Yes, sorry I forgot to mention that, but the glTF exporter is also installed.
-
RE: [Plugin] Physically-Based Rendering - v1.5.9 - 19 Apr. 2020
I've downloaded the plugin and seems successfully installed but I'm unable to get a viewport to open. I've applied a PBR material and click on Reopen Viewport from the toolbar. I get a dialog box with "Propagate materials to whole model (Recommended)". Whether I select Yes or No, nothing happens. It's likely I'm not following the correct procedure?
-
RE: Missing profile lines
Dave R - Thanks for the suggestions. I know I should be better about using components! But knowing and doing are too very different things...I'll try harder.
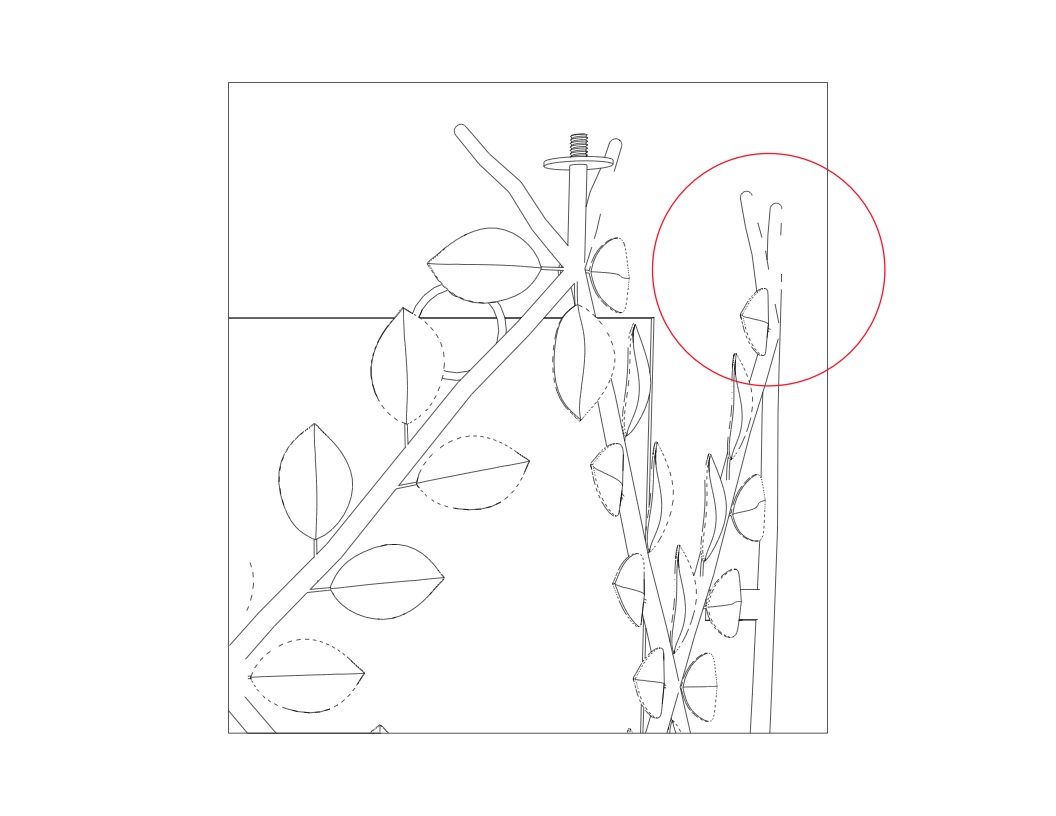
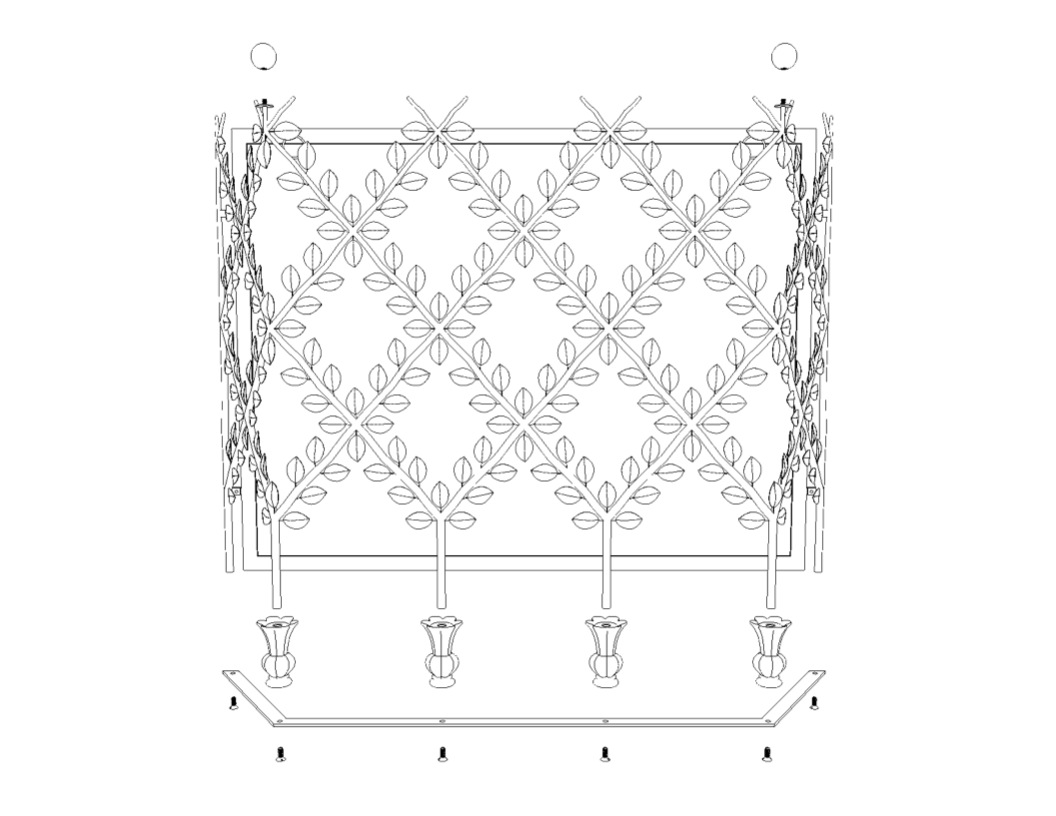
I can see where the narrow edges of the leaves could be an issue, but there are still areas that have plenty of "face" that are disappearing. An example is the frame for the spark screen in the background. You can see that the top edge goes away once LayOut converts the image to vector. The same for the edges of the tips at the top of the model (circled in red in the attached jpg.).
-
RE: Missing profile lines
Here is the skp file. The model is scaled up 100x as I found that it is easier to work with some of the geometry. Not sure if that is lending to the issue, however, I don't think so as I've found that this problem occurs whether it's scaled up or full size.
jhauswirth: I should update my status. I'm presently using SU8.
-
RE: Missing profile lines
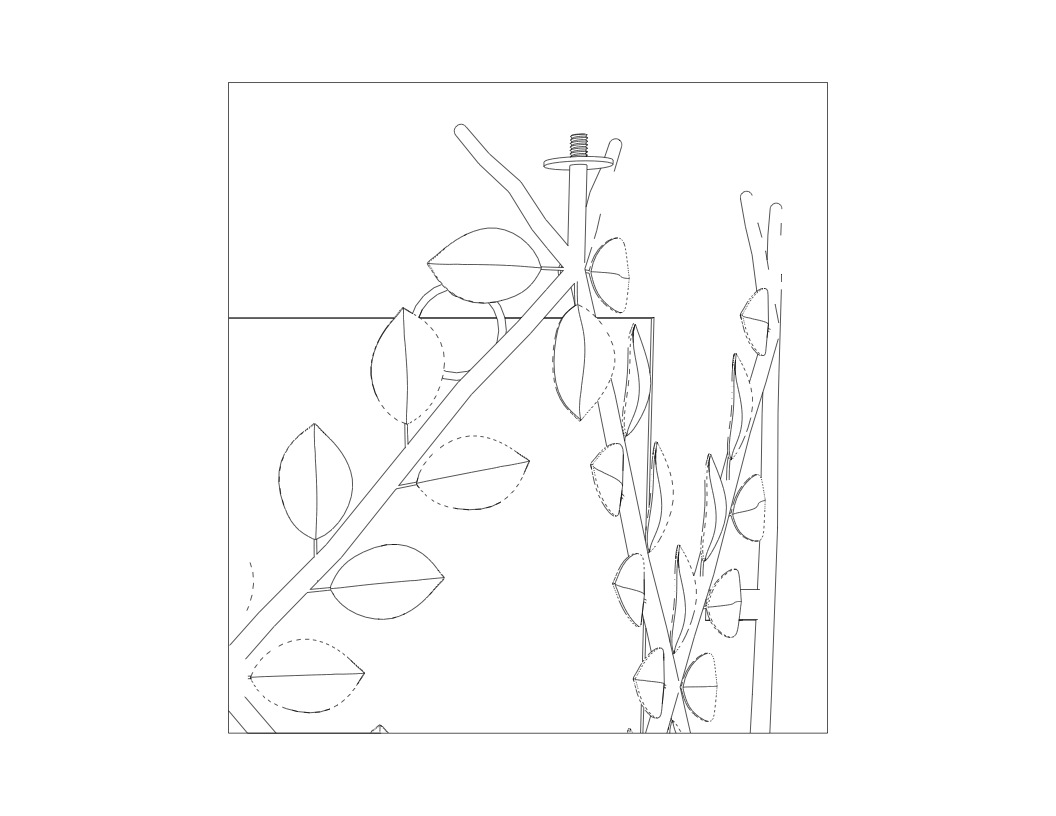
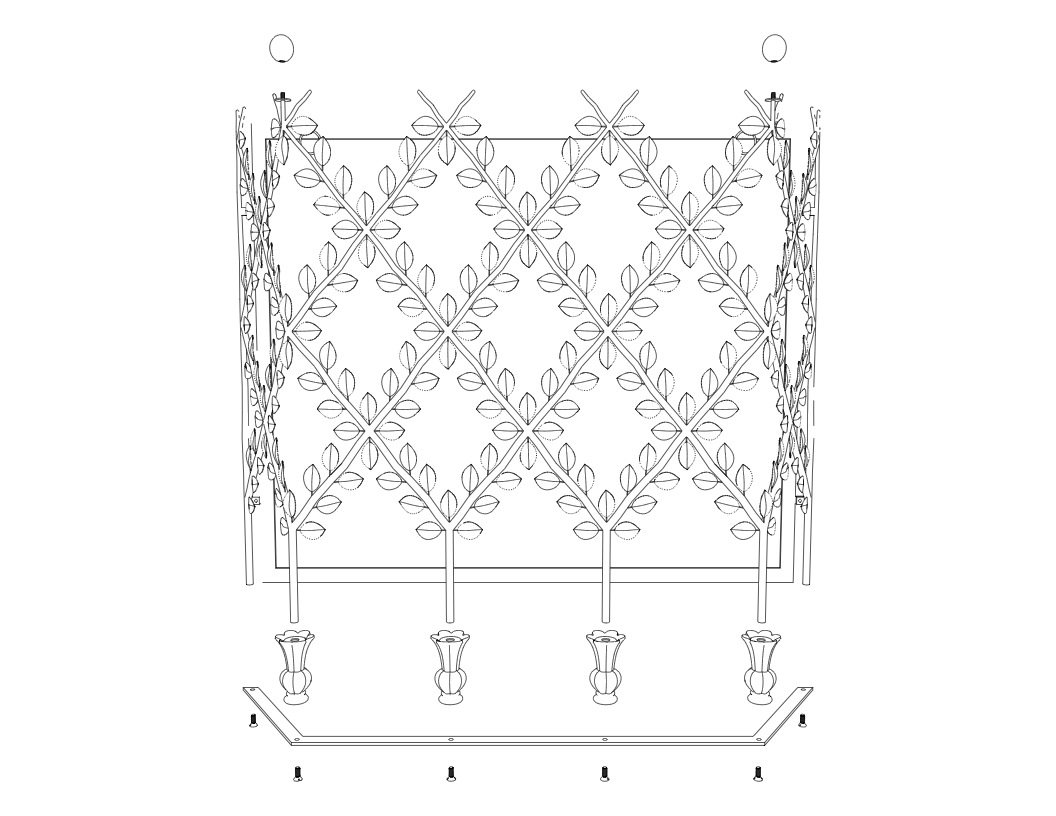
Here is the vector output. Of course, rasterized as jpg. but you can start to see where some of the lines disappear.
-
RE: Missing profile lines
Here are jpgs of the LayOut file both as raster and vector along with a detail of one area showing the missing profile lines more clearly.
-
Missing profile lines
I sometimes run into an issue where a model brought in to LayOut is missing some of its profile lines, as if actual segments were gone. This is especially true in Hidden Line style. I often select vector output and export as pdf so I can work with the resulting image in Illustrator. I can "fill in" the missing lines, but it's a pain on more detailed models. I would love to know why this occurs and if I'm doing something to cause it when sending between SU and LayOut.
-
RE: Rope along path
Thanks for responding, Chris. I'm attempting to attach my .skp file. I'm new at posting at this forum so hope I do it right.
Again, I was making the assumption that because my original helical path made a full 24 turns along the path around the cylinder, that it would result in an extrusion that would automatically repeat.
-
Rope along path
I've reviewed some of the posts on how to model rope by using the Follow Me tool along a "helical" path. I think I've understood the process and can get a satisfactory result.
What I'm unable to figure out is, once I've created my length of rope, how to make it a repeatable shape. I thought that as long as I was using the same number of segments in my cylinder, around which the path wraps, as number of segments in the circle used to create the tube, it would automatically align when I moved the resulting shape the distance of the cylinder. But it doesn't. What am I missing?