I wonder what I'd come up with if I did drugs. 

Spilled Black Ink Style
I wonder what I'd come up with if I did drugs.
Spilled Black Ink Style
Ah, nevermind. I went to Smustard and bought it (again?) and this time it works fine. Don't know what the difference is but that's OK. As long as it works, I'm happy.
Dave
Chris, some time ago I got Ttimetrack from you. I finally have a use for it with SU6 and installed it into the Plugins folder. I get the following error message on SU stratup:
"Error Loading File timetrack.rb
cannot convert nil into String"
What's the fix?
I see a ToolBar entry but there were no icon PNGs included with the file.
Thanks for the help.
Dave
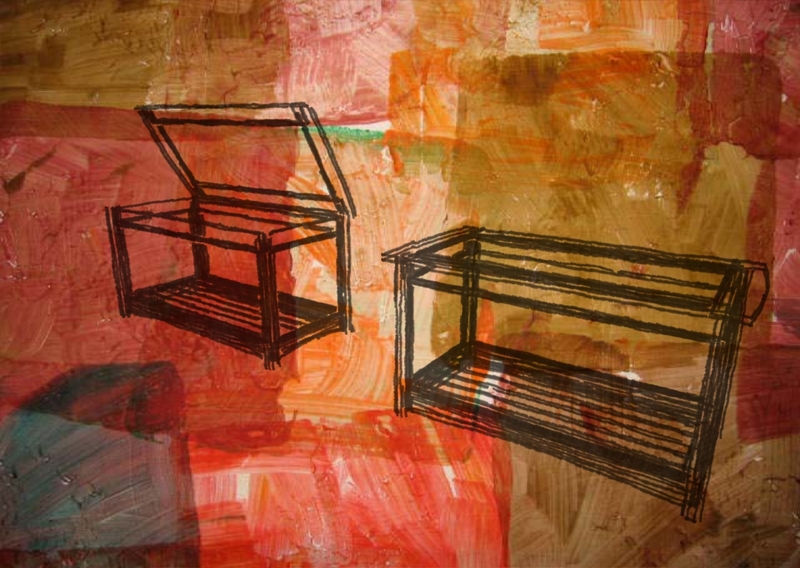
Two more oddball styles from found textures.
[attachment=0:ldypq3a6]<!-- ia0 -->Painted Fabric 1.style<!-- ia0 -->[/attachment:ldypq3a6]
Just goofing around with new styles again. Here's a weird one that probably isn't really all that useful. Still, maybe it'll give someone else a good idea for a style.

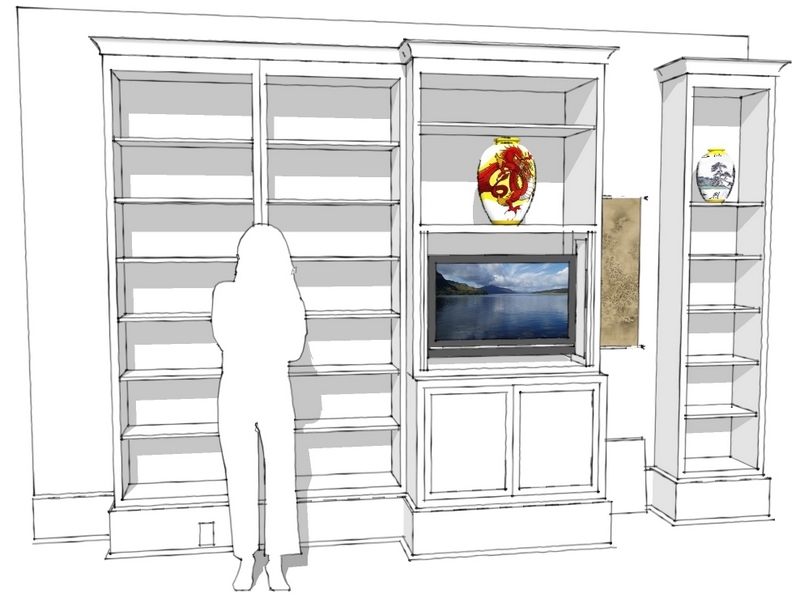
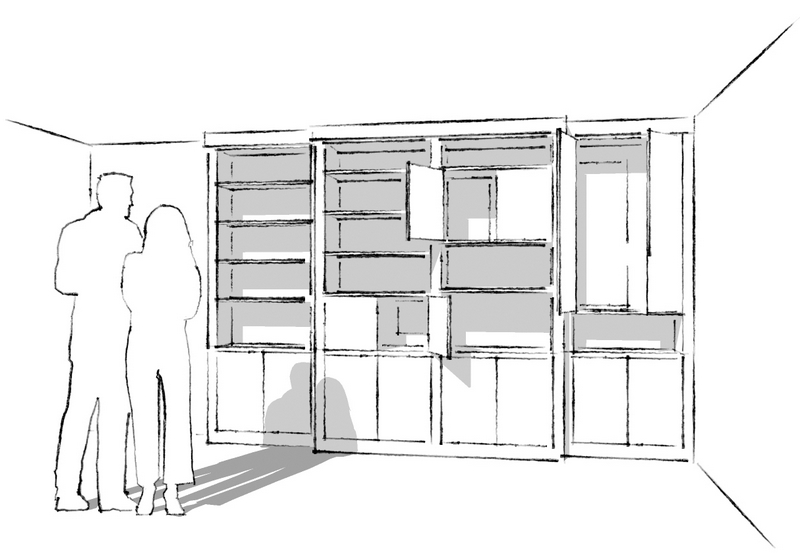
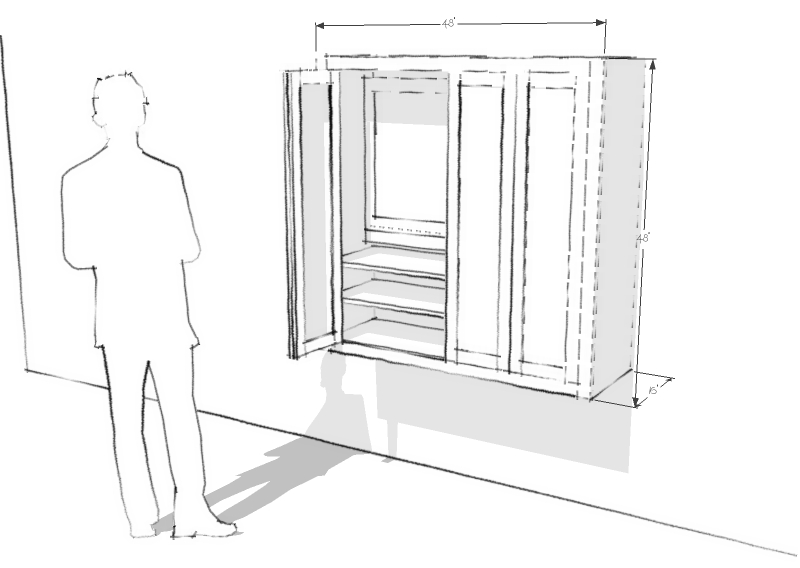
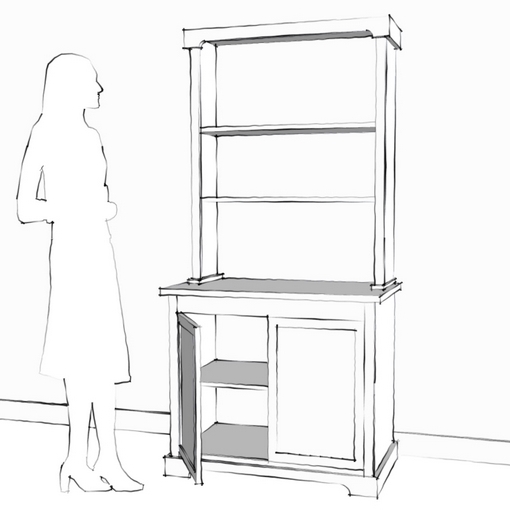
I started working with a cabinet maker a week or so ago. He wanted to learn SketchUp so we began that way. Turns out he's too busy making cabinets to draw so he's retained my services. Here are the prelims for the first four projects. All are subject to change but one the finals are decided upon, I'll be creating construction drawings from them.
Thanks for looking.
Mike, it's a good lamp. I went to the default style and purged the one you had set. It saved out at 59Kb. 
Actually, your idea of automatic cutting and grouping could be very handy for symmetrical things. I imagine a plugin that has an option such as Divide Along>Red Axis, Green Axis, Blue Axis. After making the choice the script looks to find the centerline, deletes one half of the geometry, hides the seam line edges, makes a component, copies it, mirrors the copy and places it next to the first half. I would imagine you could get some rather unpredictable results from trying to run it on assymmetrical components.
I frequently cut components in half but they are symmetrical so I make the remaining half a component, copy it, mirror it and so on. I am imagining in your case that the halves would not be symmetrical. My inclination would be to get through the Intersect stage and then make a copy of the apple. Then delete the unwanted half of each copy. I find switching to parallel projecting and a view that shows the cutting planes on edge works best. I use a right to left selection box around the geometry I want to delete but stay clear of the cutting plane.
A plugin that could do this automatically would be nice but until sucha critter exists, I think this works well enough.
Hope that's helpful.
dave
That is absolutely perfect!  Thank you TIG. I'm very grateful for your help. Next time you come to Mnnesota, you should stop in. I'll buy you dinner.
Thank you TIG for bearing with me on this.
The following is from the SketchUp Support Center. It is the foundation of what I'm thinking about. Bolding is mine. Color is my addition
"First things first: by default, a SketchUp model has one layer, Layer 0 (zero), which is the base layer. You can't delete or rename Layer 0, and you should always draw your individual entities on Layer 0 and leave them there. Many beginners don't follow this advice which leads to problems. They have the wrong layers active when editing which results in a mess when they want to change the visibility of components in scenes by controlling which layers are turned on.
The main difference you'll notice is that entities associated with different layers in SketchUp still intersect each other. For this reason, it's almost always best to draw all your individual entities on Layer 0 and leave them there. Then, if you want to use layers to organize your model, you can turn individual entities into groups or components, and then associate different layers with those groups or components.
Optionally, you can make another layer active by clicking its option button. When you draw individual entities, they are always drawn on the active layer, so you should typically have Layer 0 selected, unless you need to hide it, in which case, you need to select a different layer.
Important note: Groups and components are also entities, and, just like with individual entities, you control their layer properties in the Entity Info dialog box. To try to keep things clear, this article refers to individual entities (things like edges and faces) versus groups and components. To try to make things even clearer, since groups and components behave the same with respect to layers, only groups are mentioned from now on in this article. Finally, the idea of drawing individual entities on Layer 0 and leaving them there is so important that this article doesn't even address the option of associating other layers with individual entities. If you want to experiment with that, you'll need to take along your own search and rescue team!
%(#FF0000)[So, considering the above and the importance the writers put on this, what I would like to be able to do is go through all the groups and component instances in a model and associate everything except the group/component definitions with Layer 0. I suppose screen text, leader text and dimensions would need an option to be exempt from having their associations reset.
Currently, the quickest way to restore geometry associations to Layer 0 is to delete the other layers and force all associations back to Layer 0. But then one would have to start over with creating the layers and associating the groups and components with them.
I'm looking for a way to correct the model without having to delete the layers and remake them. If you'd like I can make a simple example showing the sort of problem I want to fix.]
I hope that is unambiguos. I really am not trying to be vague about this. Perhaps, if someone else reading this would like to take a swing at explaining what I'm evidently doing a poor job of, please jump in.
Thank you again. I appreciate your help.
Thanks. I didn't want to break any roules. I'll edit to add an image.
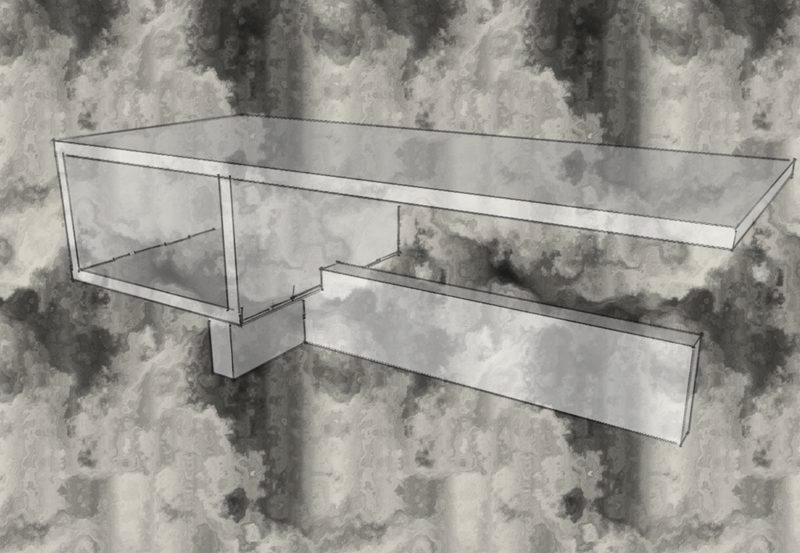
I don't know if it is cricket to do this but here's a link to a thing I did showing how to draw a table leg with curves and tapers. I used Darren's Skin.rb script for it. Thank you for that.
If I'm breaking any rules by posting this as a link, moderators please feel free to delete it.

TIG, thank you for that plugin. I hate to ask but is it possible to make it move all geometry to Layer 0 but leave the component or group association where it is? That's the sort of thing I was hoping for with my previous request.
thank you.
Dave
Very nice brackets. Thank you for posting them.
Just out of curiosity, I thought I'd try my hand at your corner bracket. Here it is. A wee bit lighter at 17Kb. 
tricorner bracket.skp
Thank you gentlemen.
Hot tips? Hmmm....get the chocolate cake with mint ice cream. Much better than the flan. 
Oh, sorry. I don't know if they are hot tips. I set the focal length of the camera to 75mm, the aperture to 2.8 and because I think the aperture should be polygonal, I set it that way with 8 blades. Don't really know if that makes much difference in this case. Probably not.
Just play with it and be patient. Reduced DOF seems to increase render times substantially.
Good luck.
Dave
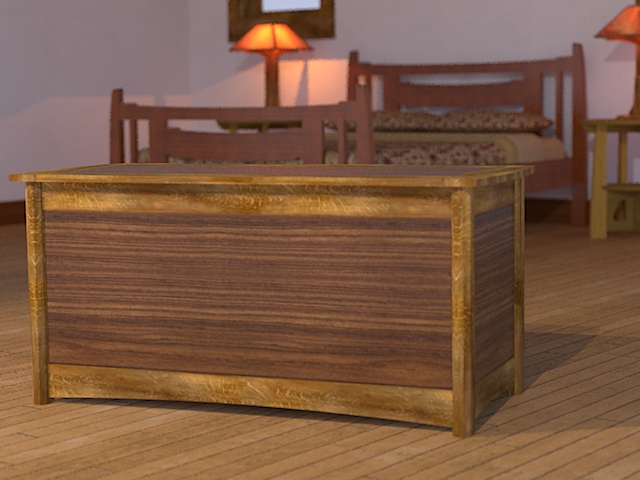
Here's something I've been playing with today. First experiment with limited DOF in KT2008.
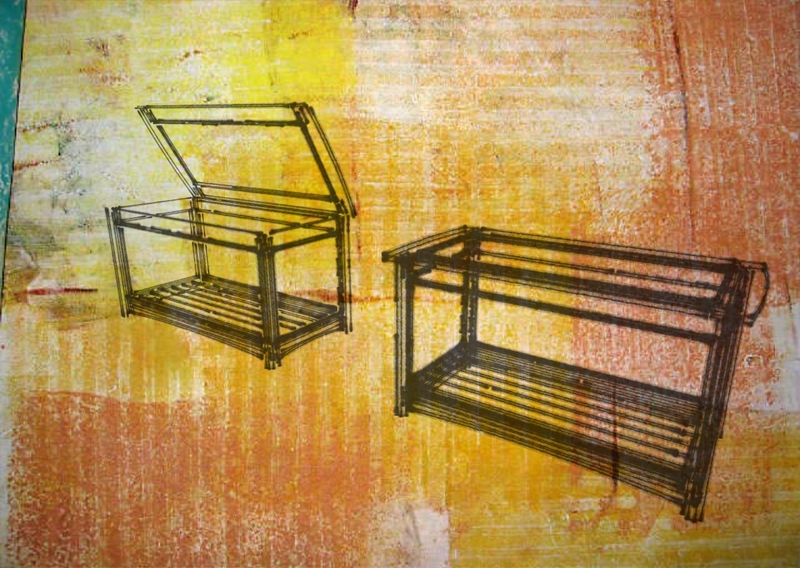
I'm working on a real version of the cedar chest for my wife. It'll be in white oak and walnut. The Arts & Crafts bed, by Gary Rogowski is drawn, ready for dimensioning as are the Limbert tables. The lamps are modified versions of a lamp I found on 3DWH. Should probably have a thick, wool rug on the floor.
Thanks for looking.