SubD examples and models
-
love that tyre!
-
impressive!
did you model one groove, component it and copy it in revolving fashion, then explode them before subdividing?? -
@optimaforever said:
did you model one groove, component it and copy it in revolving fashion, then explode them before subdividing??
You nailed it. That's exactly what I did

-
How many time the subdivision itself ? Negligible or...
-
@pilou said:
How many time the subdivision itself ? Negligible or...
There's two subdivisions and it took about 2 mins to complete the process.
-
@alsomar said:
and after a little bit of Thea and Photoshop, this is the result:
Great model - and I love that presentation style. Reminded me of the LEGO instructions.
-
@alsomar said:
There's two subdivisions and it took about 2 mins to complete the process.

I really hope Trimble is following this thread and finally realizes that there is something wrong - 2 mins for such a small model is a joke and one reason why i still do my subd work in Max.
Something like this should be generated instantly. -
Yes and about a half second in Wings 3D (which is pretty much redundant) and a half second in meshlab. SU is really bad at subdivision times; makes you wonder if you can integrate a subdivision app via a plugin so that SU doesn't even have to calculate the subdivision at all.
-
@olishea said:
SU is really bad at subdivision times; makes you wonder if you can integrate a subdivision app via a plugin so that SU doesn't even have to calculate the subdivision at all.
At the moment; no. The current API require me to generate new model entities in the model DOM. Where as the ideal way would be to be able to override the viewport presentation of an object. Basically highjack the render-pipeline for a given object. That would allowed me to avoid the biggest bottleneck: generating SU entities which each needs to merge with each other for the special SU stickyness.
The SU magic isn't ideal for extensions like SUbD where you aren't supposed to be editing the final result in the viewport. Had SU known only about the control mesh then any tool could edit the mesh while the viewport displayed the subdivided result.
-
@thomthom said:
Had SU known only about the control mesh then any tool could edit the mesh while the viewport displayed the subdivided result.
You explain things better than I do!

This is what I mean; is there a way to show the subdivided mesh in a small window that runs real-time with the SU model?
You would simply play with the control mesh in SU and a window shows a subdivided version that moves in real time with the SU model? When you rotate, zoom and orbit the subdivided "render" does so too.
Then when you are happy you can do the final subdivision inside SU right at the end.
-
@olishea said:
This is what I mean; is there a way to show the subdivided mesh in a small window that runs real-time with the SU model?
Oh, well, that surely is the next thing I'd poke into once OpenSubdiv is implemented! I was thinking of it in two stages:
- A preview window on the side.
- Make the background of that preview window transparent and overlay it the SU viewport. (not sure how well that'll work since it'd be a separate 3d spacxe on top of SU's view...)
-
Nice!!
I thought I was talking jibber jabber but you catch my drift!
Can't you already do something similar with Maxwell? It renders a subdivided version of your control mesh? I'm not maxwell user so unsure. Also needs to be realtime, simple shader.
If you could switch between SU viewport and a SubD render overlay that would be better.....kinda like Thea where you can see the render in the viewport. If you could press a hotkey and the screen changes to the subdivided render that would be a total game changer for SU.
Even if it was a preview window I would be happy to be fair.
-
@olishea said:
Can't you already do something similar with Maxwell?
Yea I wonder if I saw a YouTube video on that. Though I'm not a Maxwell user...
-
@thomthom said:
- A preview window on the side.
- Make the background of that preview window transparent and overlay it the SU viewport. (not sure how well that'll work since it'd be a separate 3d spacxe on top of SU's view...)
Please, no separate window!

@olishea said:
Can't you already do something similar with Maxwell? It renders a subdivided version of your control mesh? I'm not maxwell user so unsure. Also needs to be realtime, simple shader.
Yes, Maxwell has render time subdivision. It's not a shader, it's a modifier, that produces real subdivision geometry.
http://support.nextlimit.com/display/mxdocsv3/Pixar+OpenSubdiv -
@numerobis said:
Please, no separate window!
Not much way around that - since the SU API doesn't give access to the pipe-line. It'd off course be optional to use it.
-
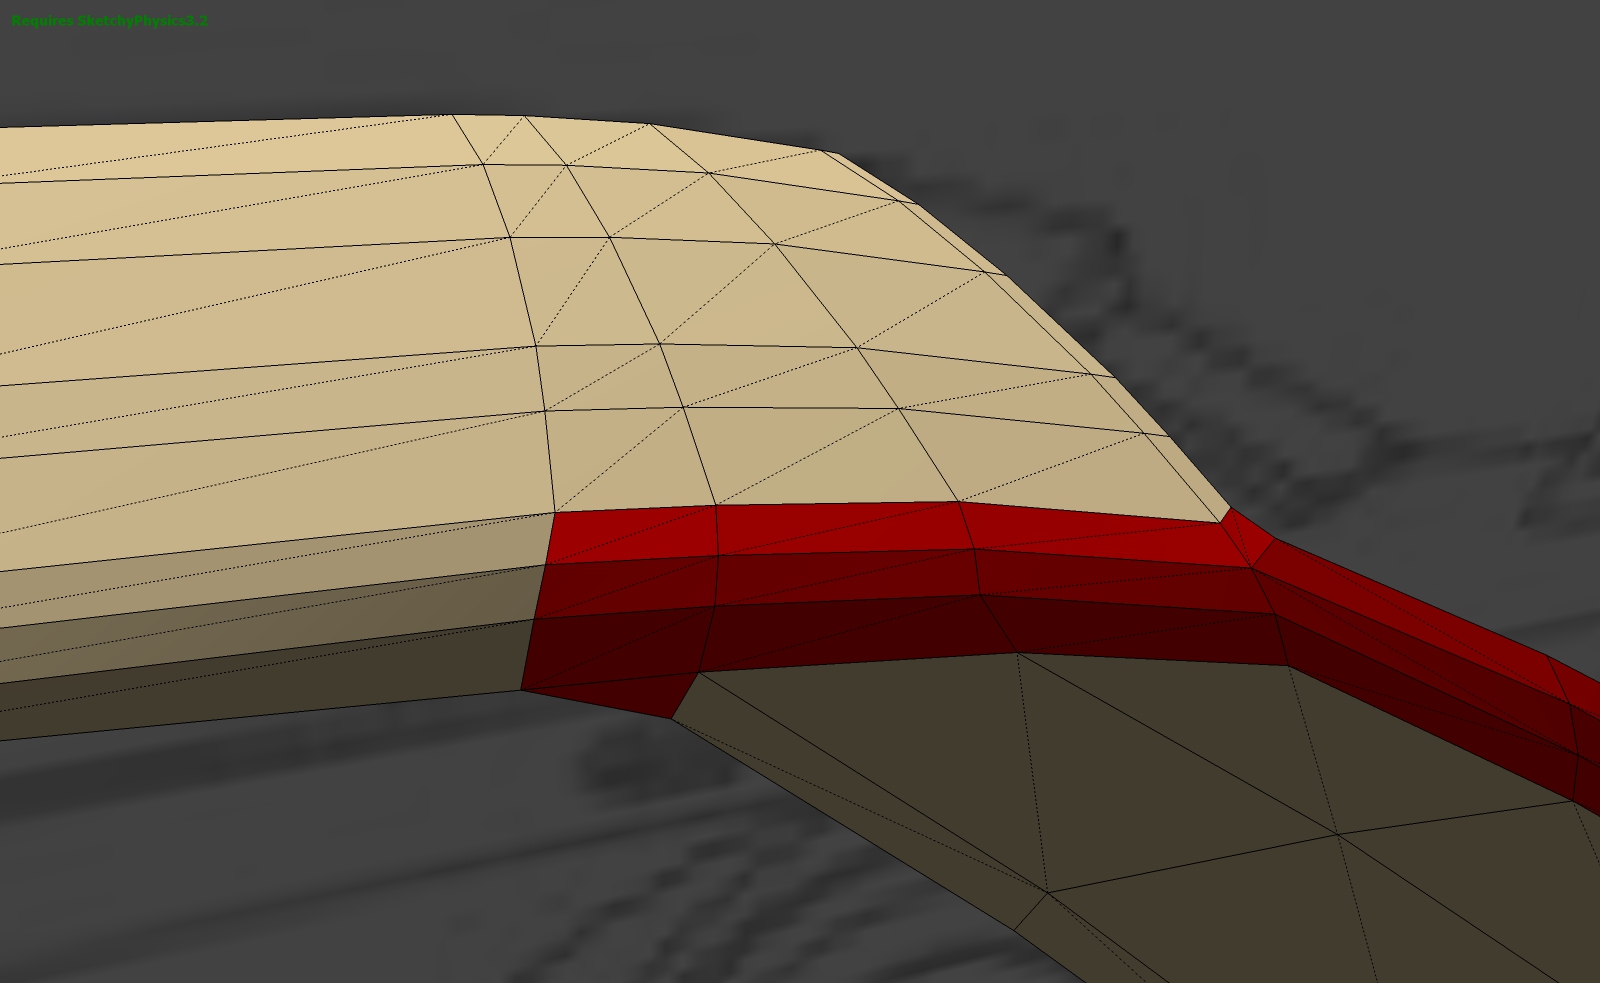
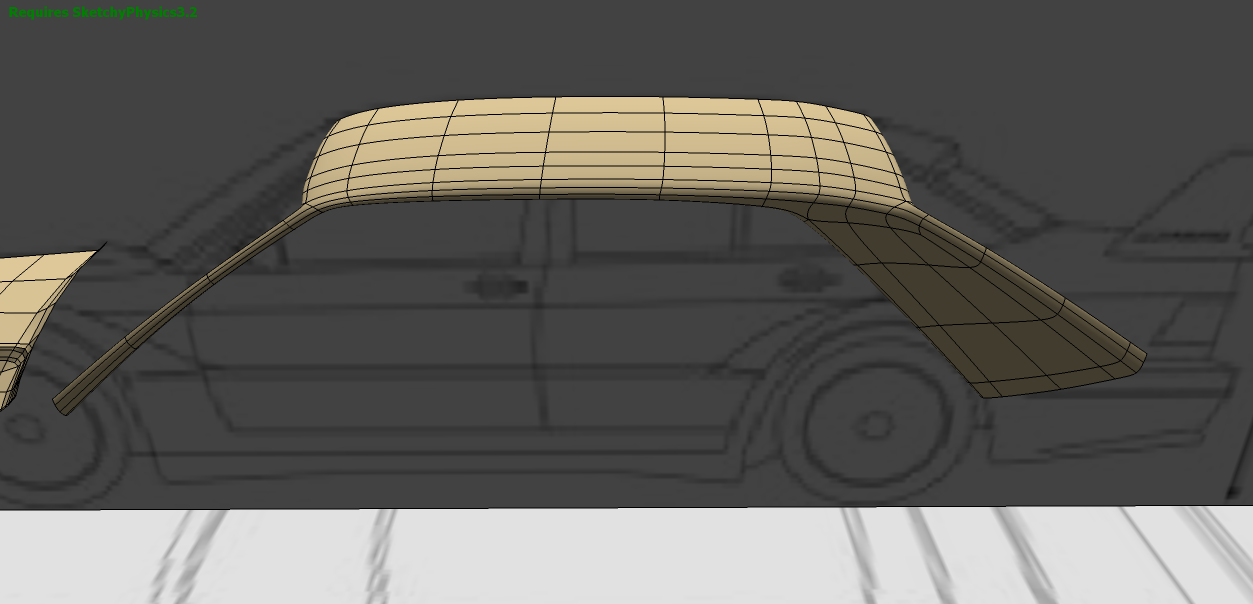
Not quite sure where to post this but, since I'll be applying SubD on it, I'll ask here: any ideas how to fix the topology of the red section in this model?
Benz+190+Evo.skp -
Maybe add another loop.

-
My biggest concern is the rear glass' frame - the corner looks a bit weird when I subdivide it because the ring from there goes along the roof all the way to the front instead of connecting somehow to the door's corner or something. I mean, I'm trying to solve the way I did on the corresponding front section(A-pillar?)

-
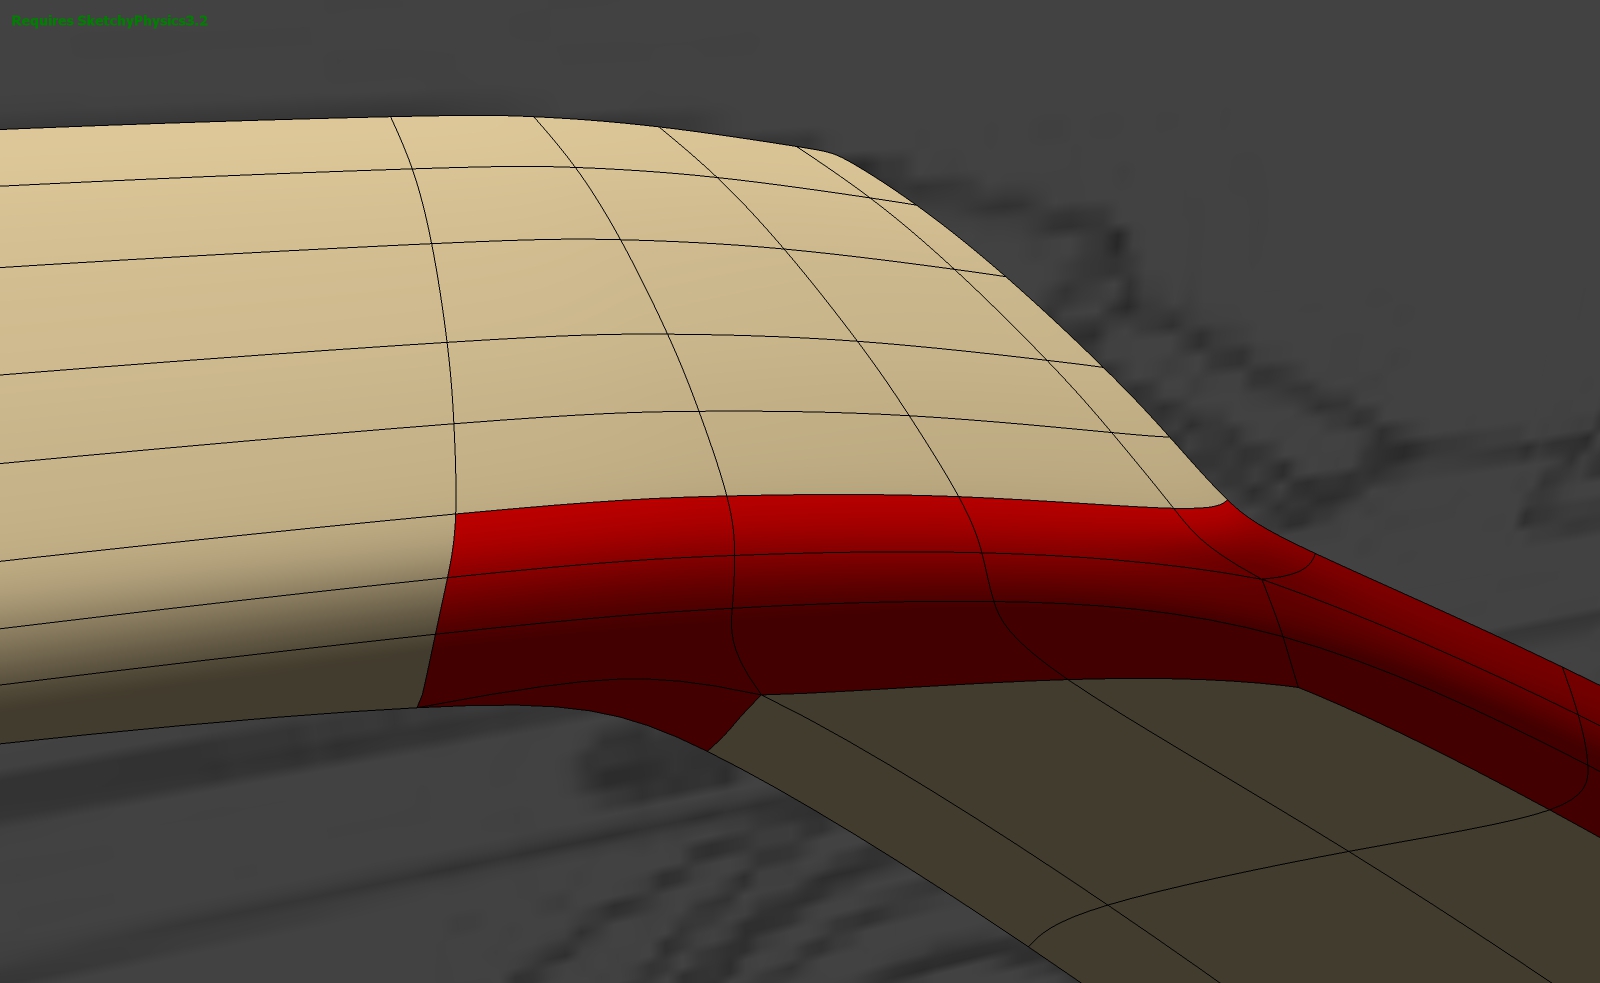
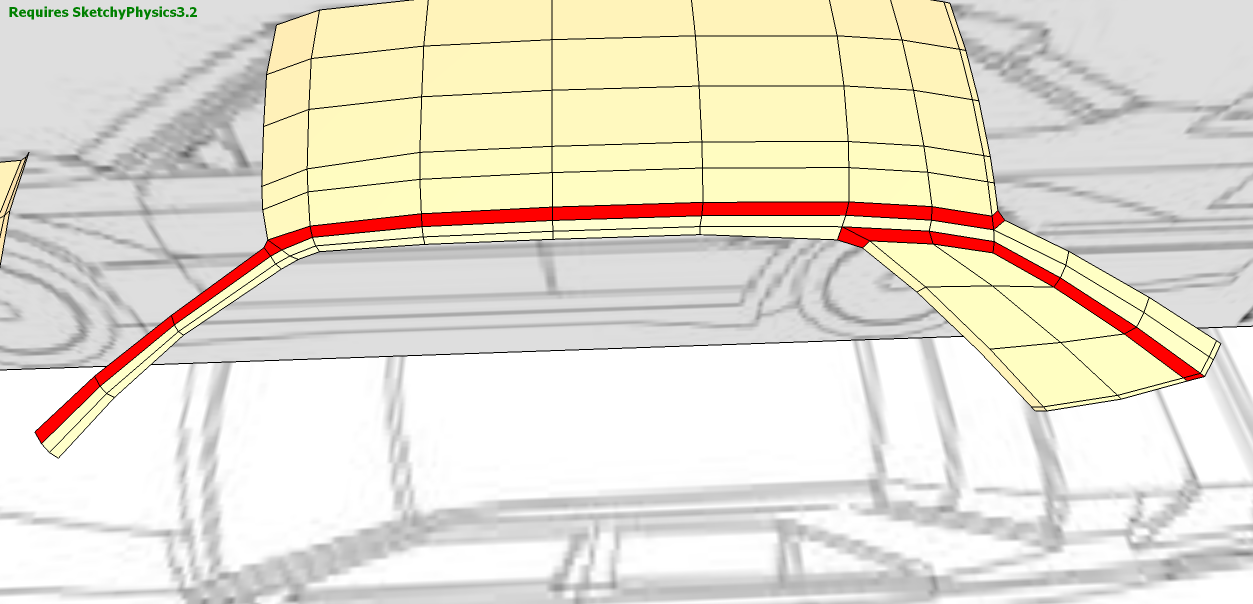
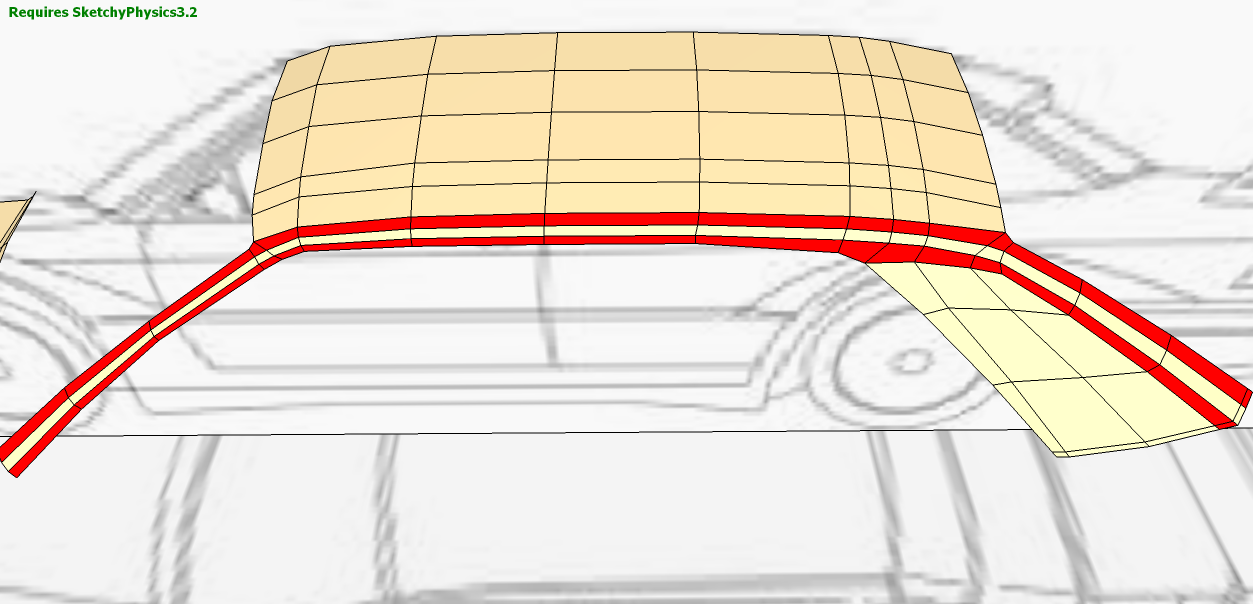
Fixed! I color-coded the problematic section again so I can better explain what was running through my head: I'm looking at the whole front-to-back edge as a group of rings that go along through the whole car. The issues shown on the "before" picture caused the corners between the roof and the C-pillar to kind of flick open. Now that I rearranged those rings and added a little extrusion to all contours, the problem's gone
Before:
After:
Smooth:
-
@alsomar said:
Well, here comes mine:

and after a little bit of Thea and Photoshop, this is the result:

Very clean high poly modeling!
Hello! It looks like you're interested in this conversation, but you don't have an account yet.
Getting fed up of having to scroll through the same posts each visit? When you register for an account, you'll always come back to exactly where you were before, and choose to be notified of new replies (either via email, or push notification). You'll also be able to save bookmarks and upvote posts to show your appreciation to other community members.
With your input, this post could be even better 💗
Register Login


Advertisement