SubD examples and models
-
 flawless
Download the free D'oh Book for SketchUp 📖
-
@Rich-O-Brien flowify is the key for this sort of stuff..
-
It would help to see the workflow for that last especially, if/when you have time.
-
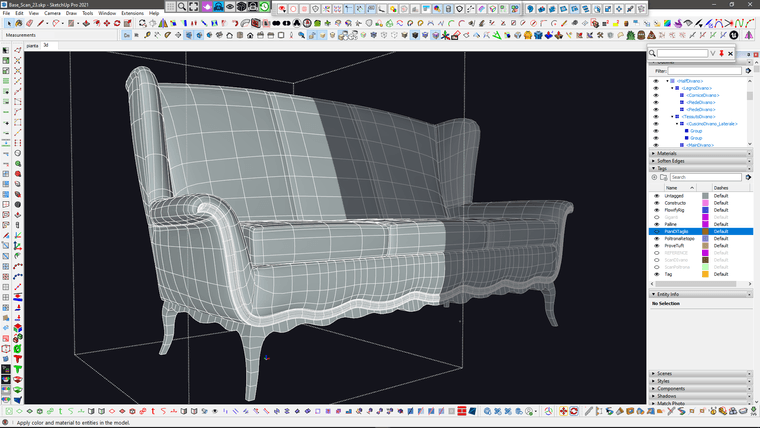
@Mike-Amos well, in this case i started with a basic trace of photo references, I use components, so that I can use different photos for different pieces but then the components are nested in the main assembly so they end up in the right place..
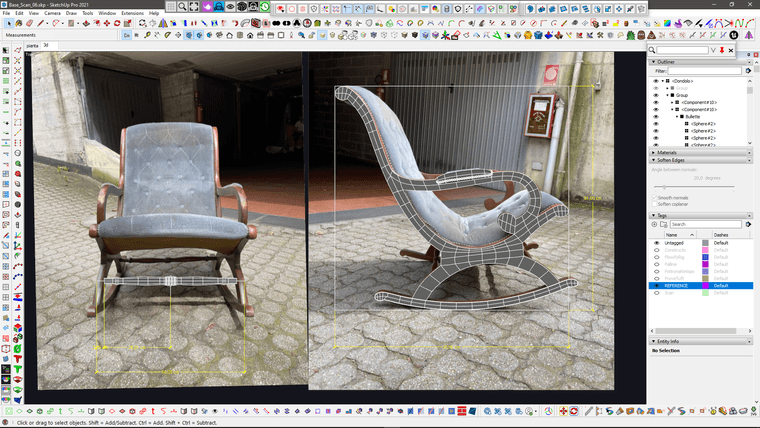
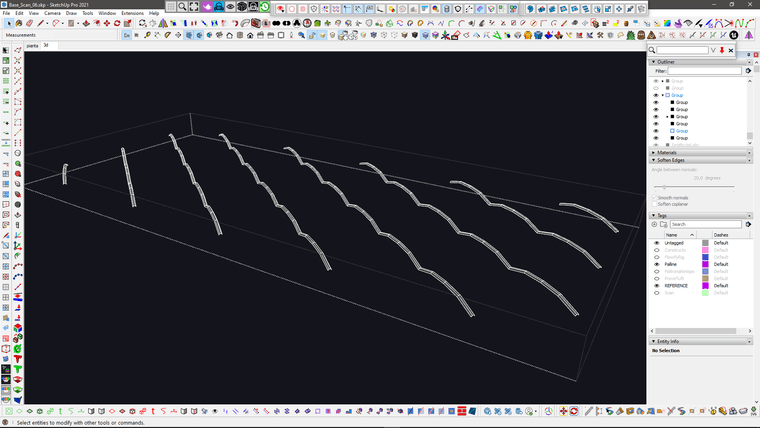
They also gave me a pretty bad photoscan, so I used that just to intersect it with a plane and extract the basic profile of the seating.
I then smoothed the extracted curve with Curvizard and normalized it with Polyline Segmentor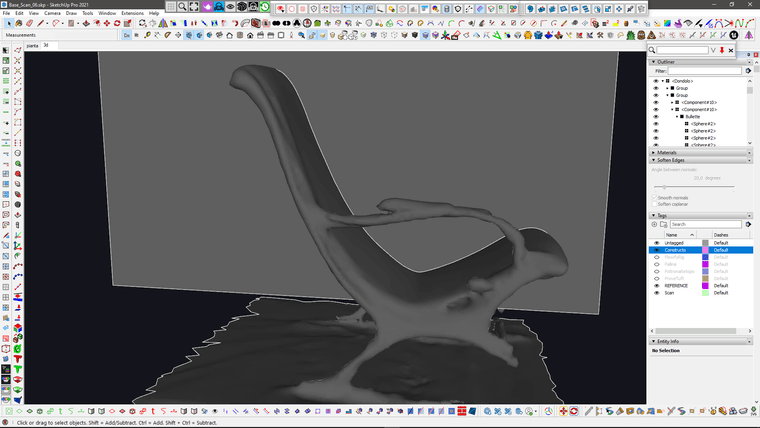
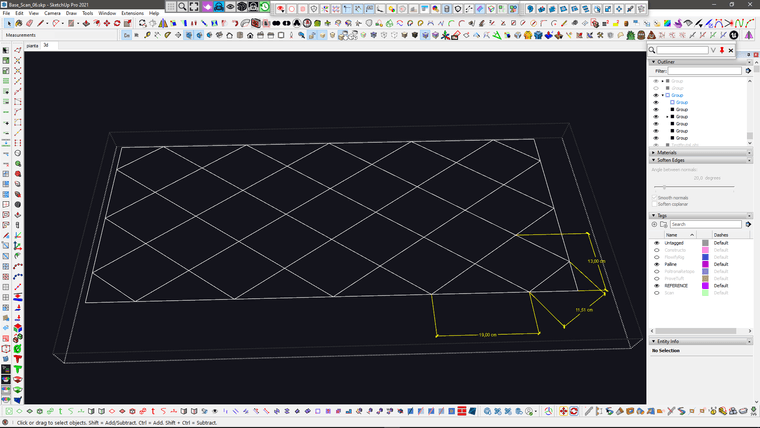
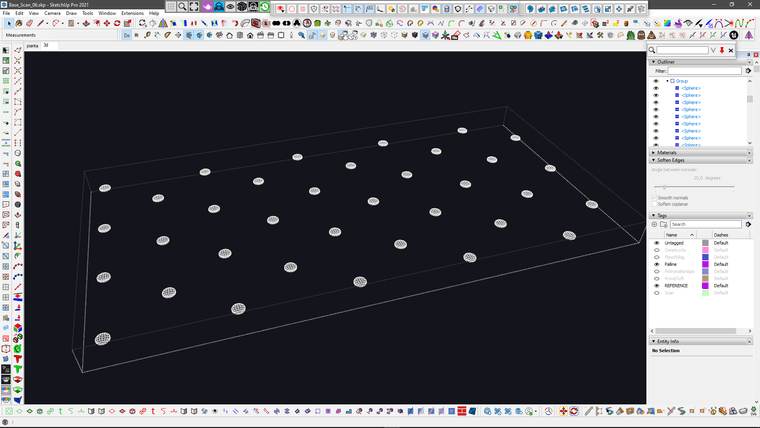
Then I created a base grid for the pattern with the proper real world measurements.
I then created a repeated component with Curviloft Skin
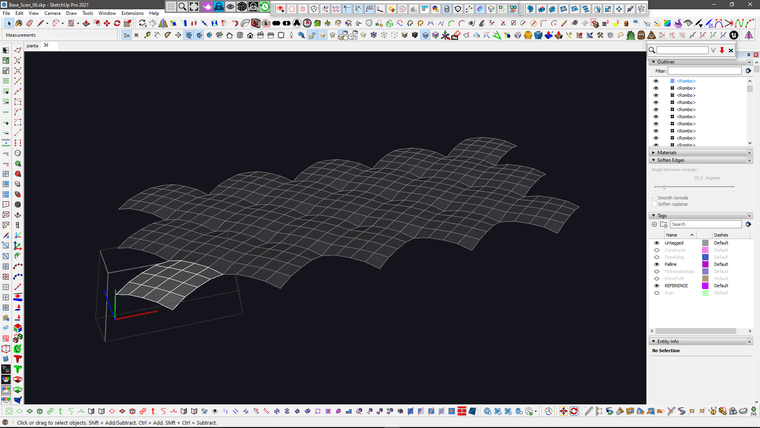
Same for the buttons
And then create a different variation of that component for the sides
And another variation for the corners
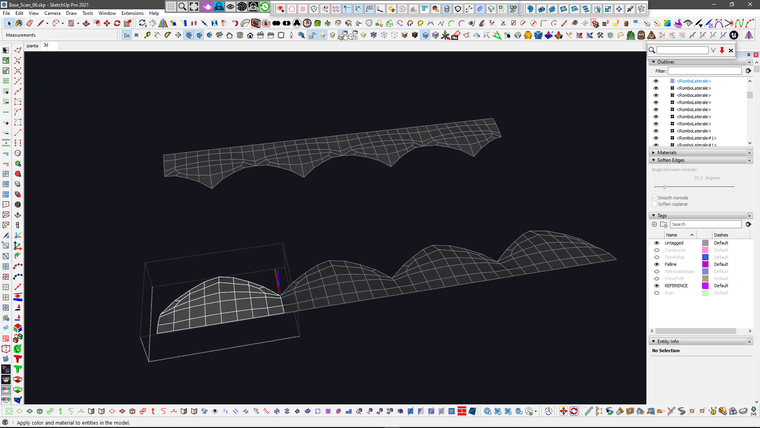
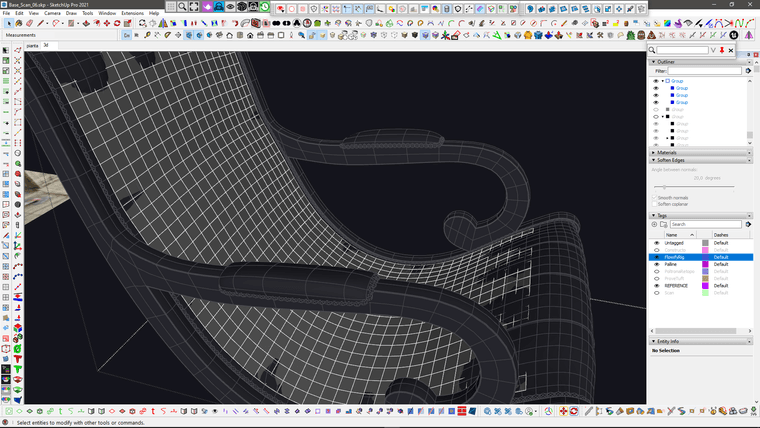
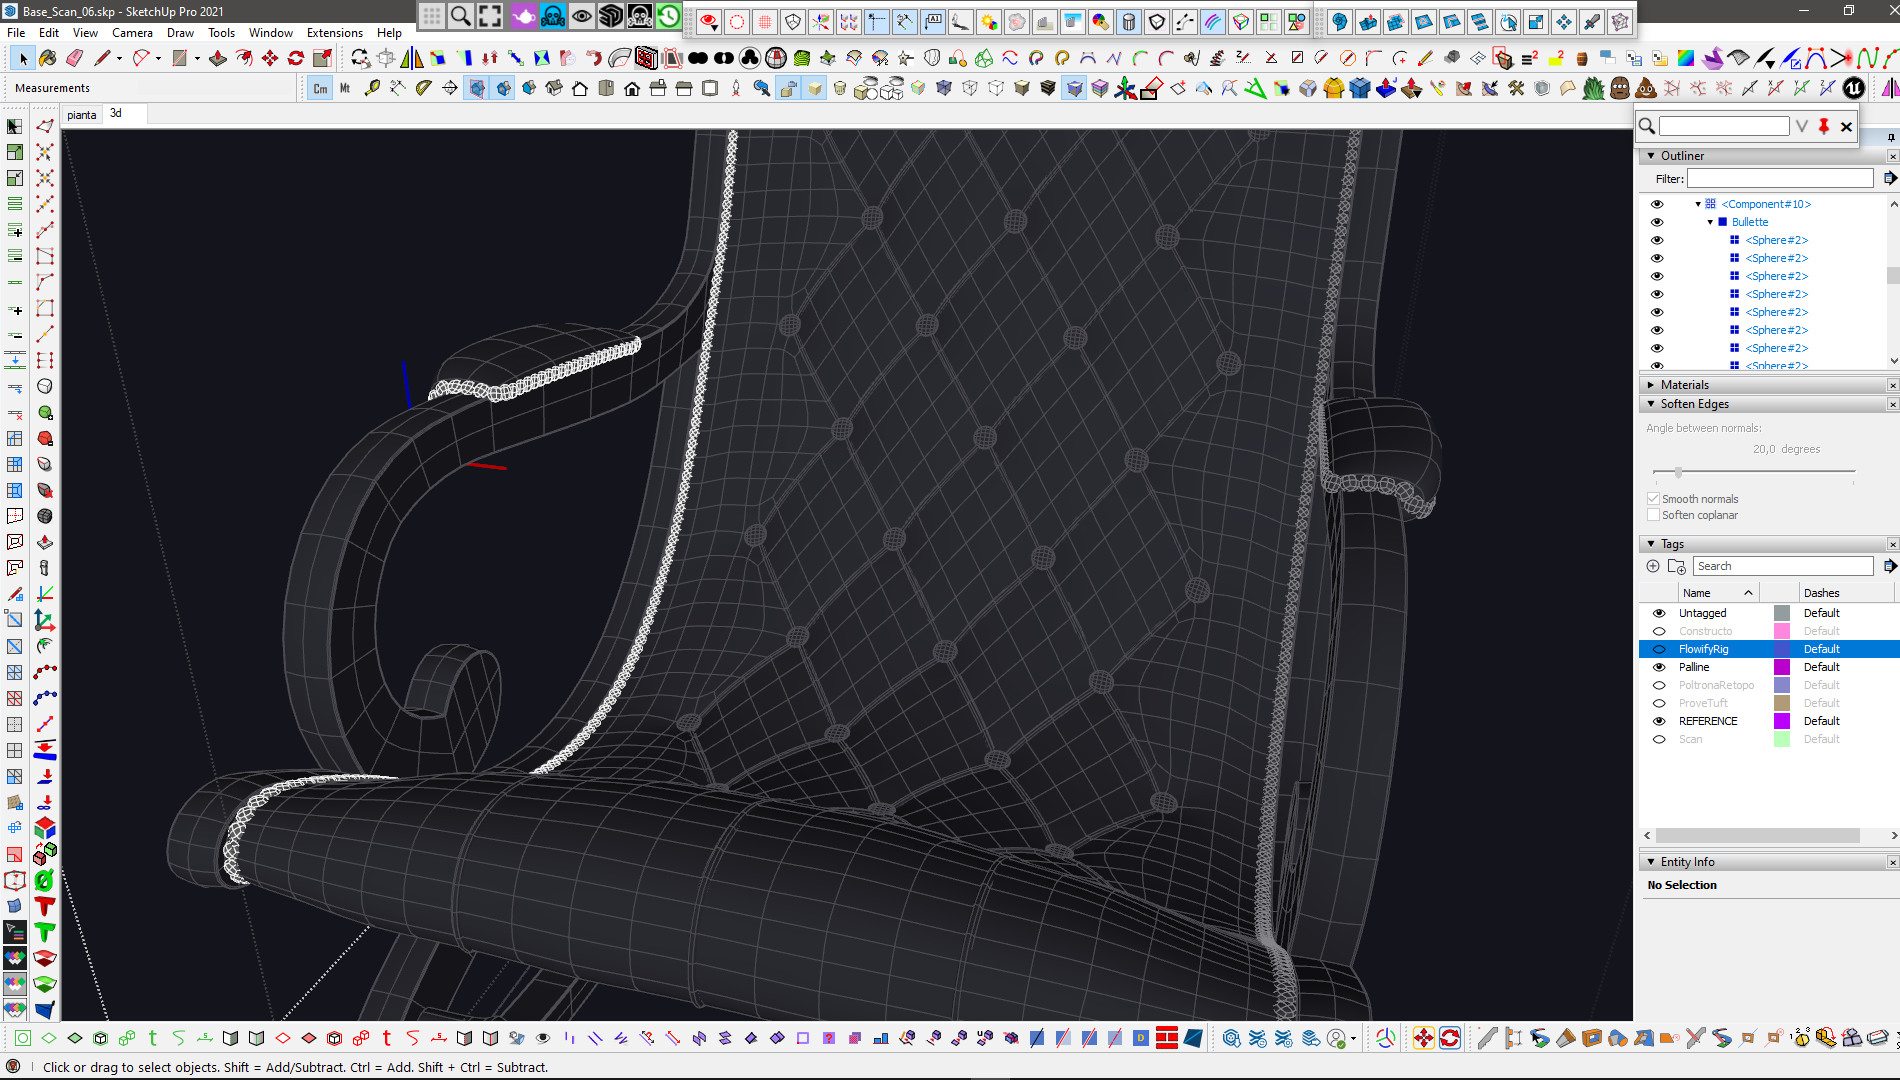
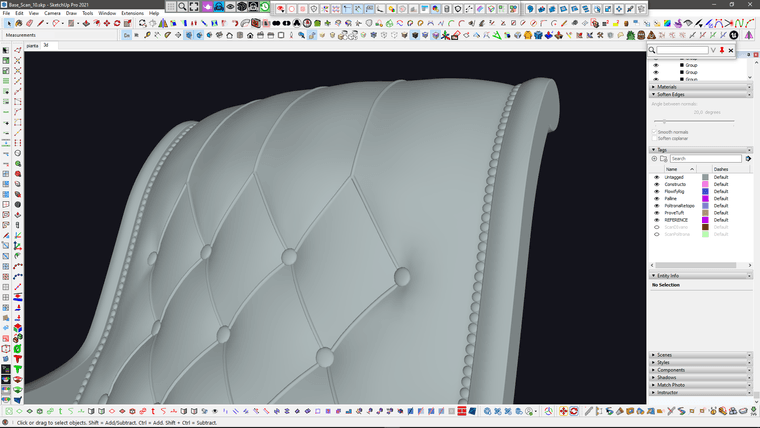
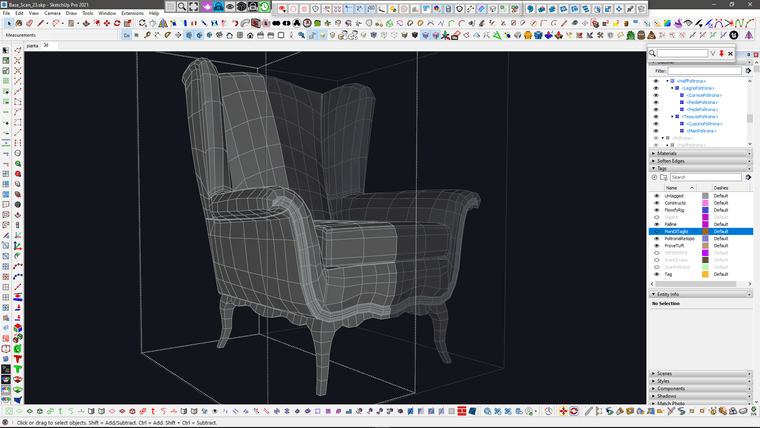
then I joined all of them together.. please notice that In this stage I try to keep the quads as even as possible, because I'm gonna deform this stuff
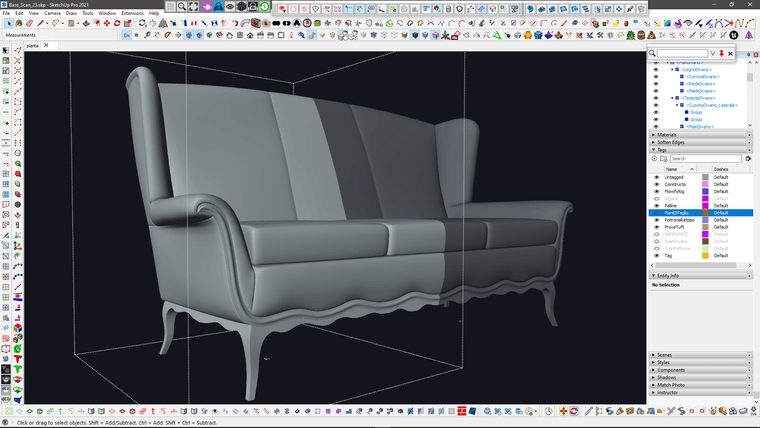
Then I extracted the diagonals for the sewing and used "Lines to Tubes" with quite low poly geometry.. and of course I did some cleanup with quadface tools for the overlapping geometry which will not be seen.
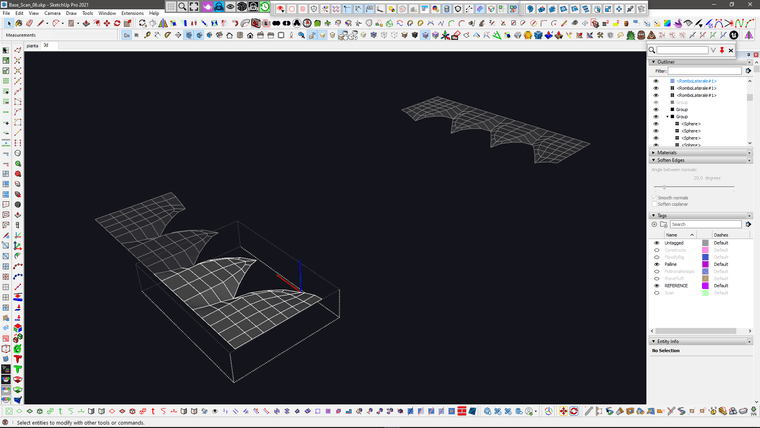
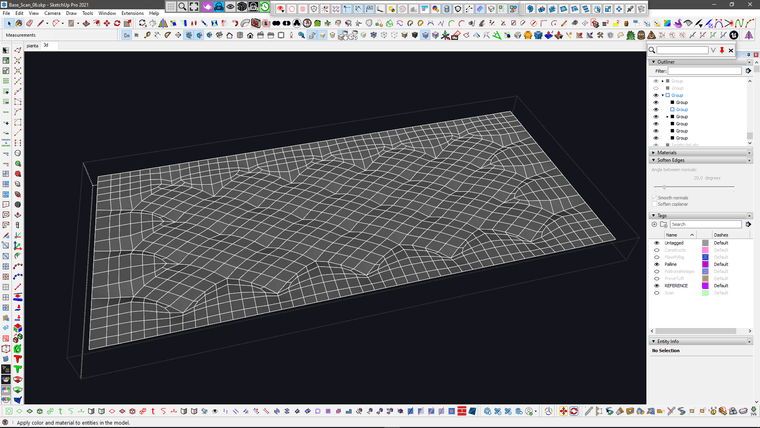
I then created the base shape of the seating using Curviloft ad Quadface tools.. and extracted the grid were I need the upolstered thing..
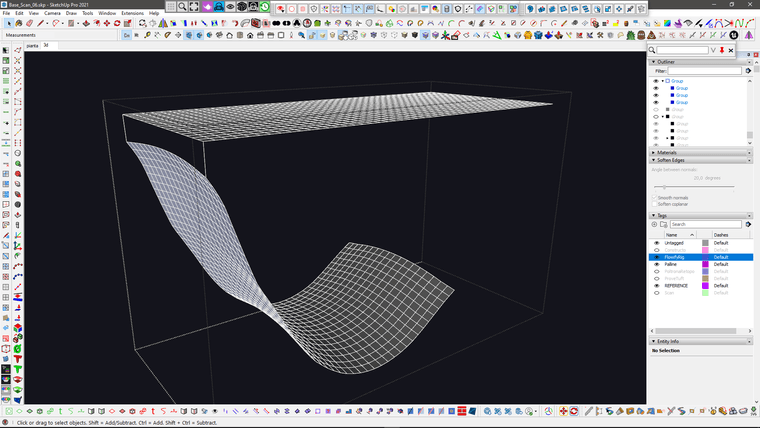
Then I use the QuadfaceTools "Unwrap Grid" feature to extract a flat grid from that.. which has the exact same lenght and topology of the seating that I'm going to replace.. and here is the flowify rig setup that I used to send the geometry to the curved surface.
WARNING: you need to use "flowify without cuts" to avoid messy topolgy and keep quads.
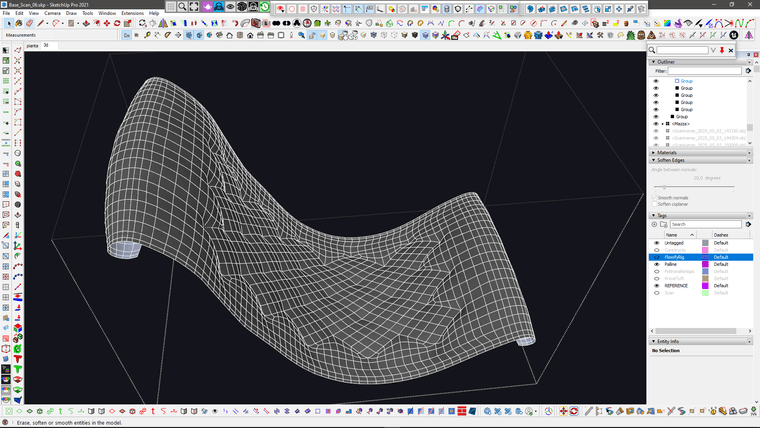
From this stage, it was just a matter of stitching and tweaking.. with the usual VertexTools, QFT, Artisan shenanigans
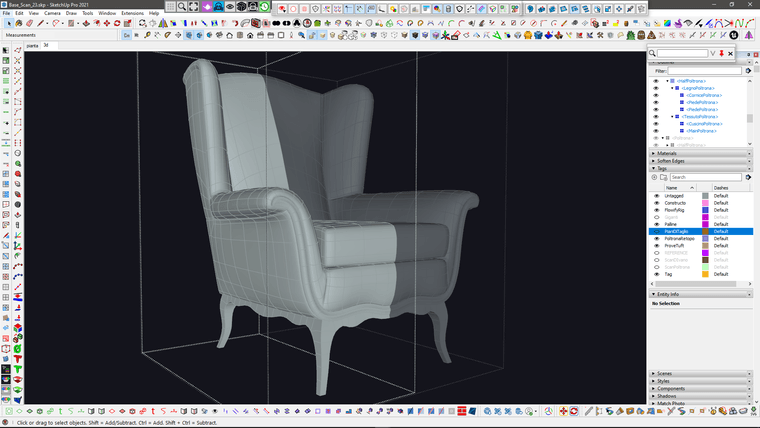
Meanwhile I also added the studs.. I used profile builder assembly to place them and then manually repositioned some bits in the problematic areas
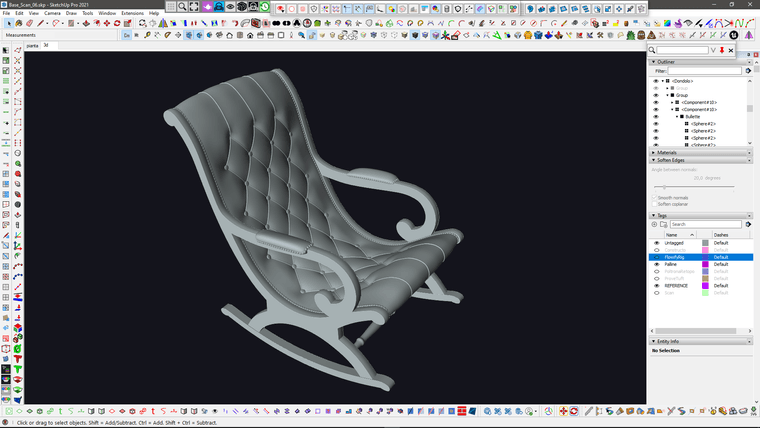
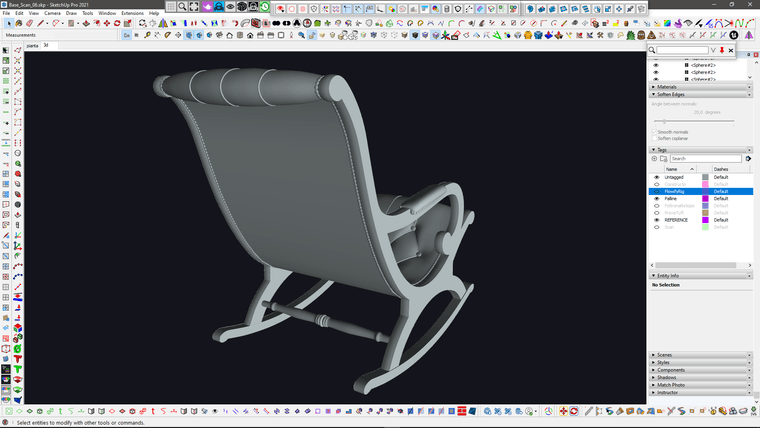
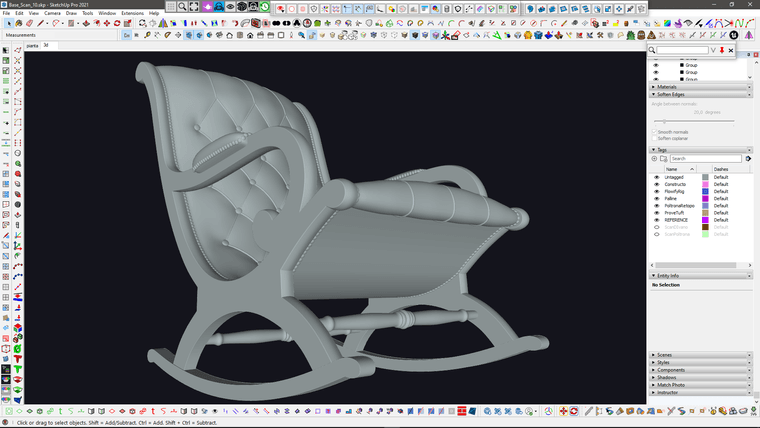
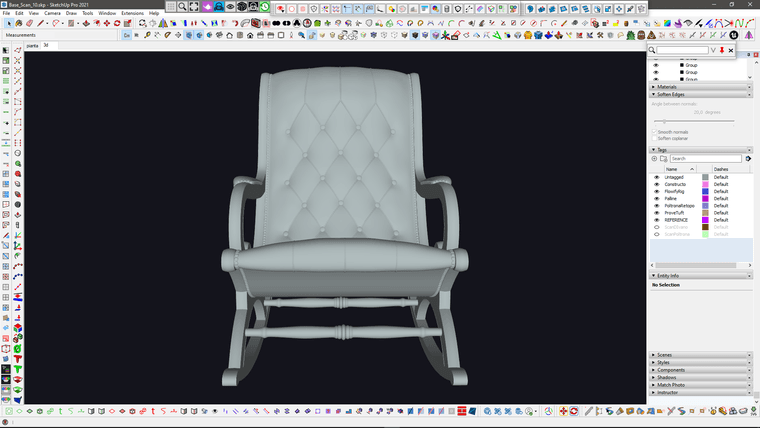
And this is the updated version with the studs..
I hope this was helpful to better understand the process..It's a bit different every time.. the shoe and the skatepark used a quite different process.. and the other sofas I posted before of that, is another different story..

-
A Great work! – & thanks for the many pictures of the doing process.
-
Agreed, a great resource. Thanks very much for that.
-
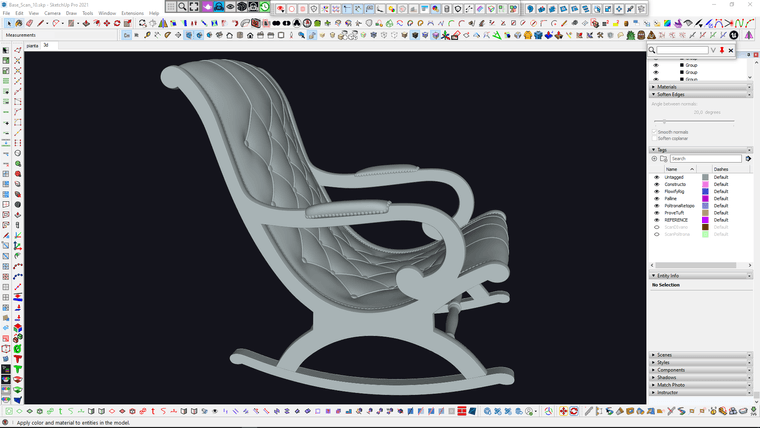
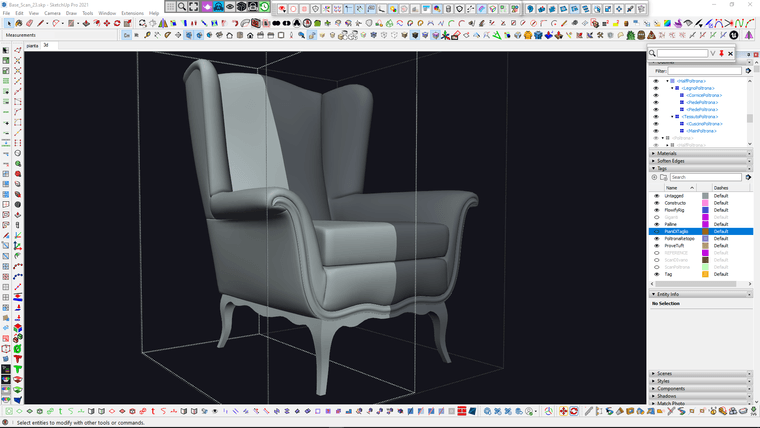
I improved the upper stitching (which was too hard compared to the reference) with Vertex tools and the upper part of the tuft (which was too thin) using Artisan2 FFD (with a couple of tricks to make it work on multiple subgroups).
I also increased the rounding of the frame profile using Artisan Move tool "normal" constraint.
I think I'm done with this one.
Time to unwrap it
-
"Work smarter not harder"

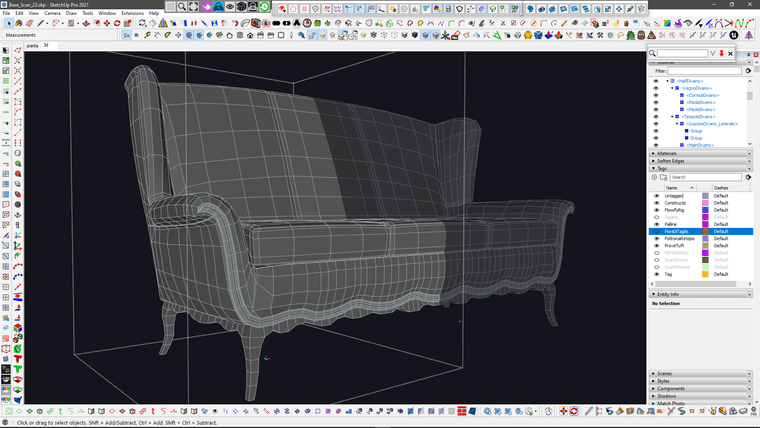
Another WIP from the same vintage furniture job, leveraging the power of components..
Most of the armchair details are reusable for the sofa.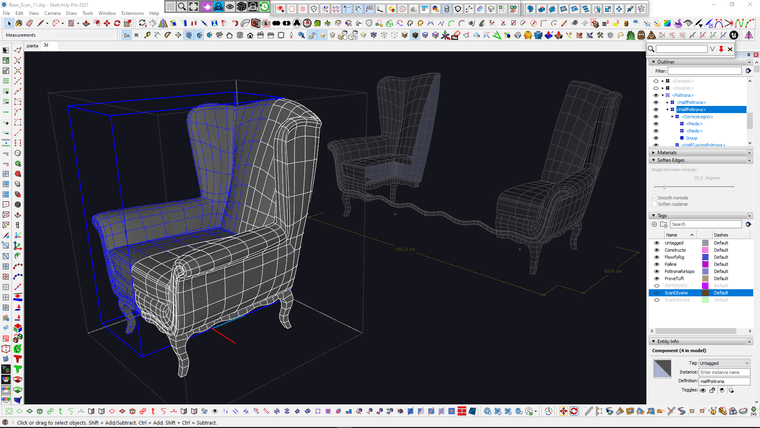
-
It's nice to see an orderly work process. And it seems like I'm already losing my position.
-
@alvis said in SubD examples and models:
it seems like I'm already losing my position
Your work has always been a source of great inspiration and will always be.
-
I did some progress with this couple of models..

-
Download the free D'oh Book for SketchUp 📖
-
@Rich-O-Brien LOL

I plan to unwrap separate meshes at mid poly stage and keep them consistent with the "tile trick"
then I'll do the final SubD -
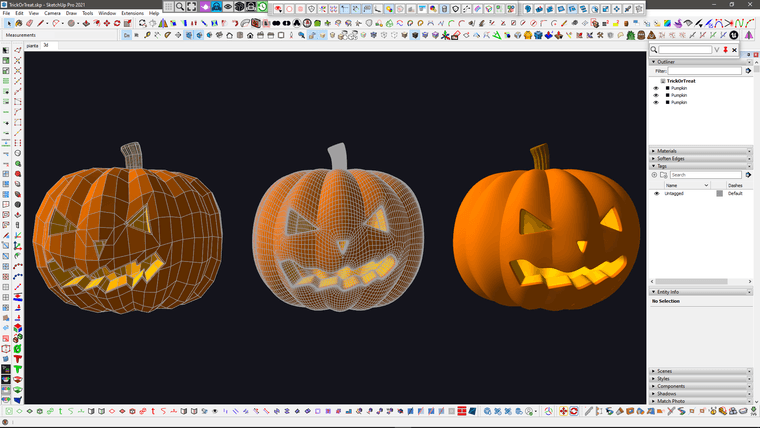
Trick or treat

-
@panixia Wunderbar! – such a beautiful model is a must-have at the moment

-
^ agreed, more to this method than meets the MK 1.
-
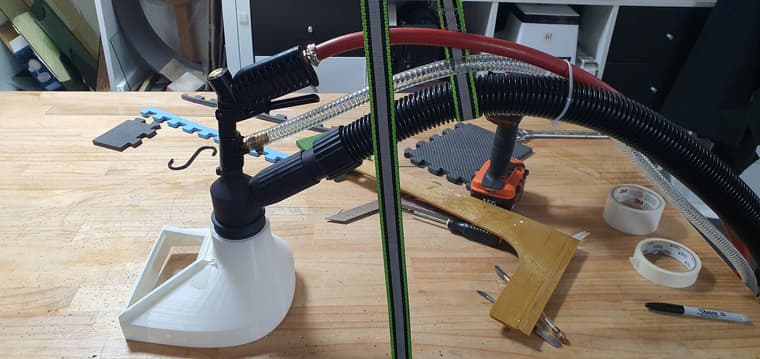
People often think subd is purely for loose organic work and can't be used for specific sizes or accurate models
Here's an example of something that needed to have flat faces and an exact friction fit along with a smooth body to help with airflow.
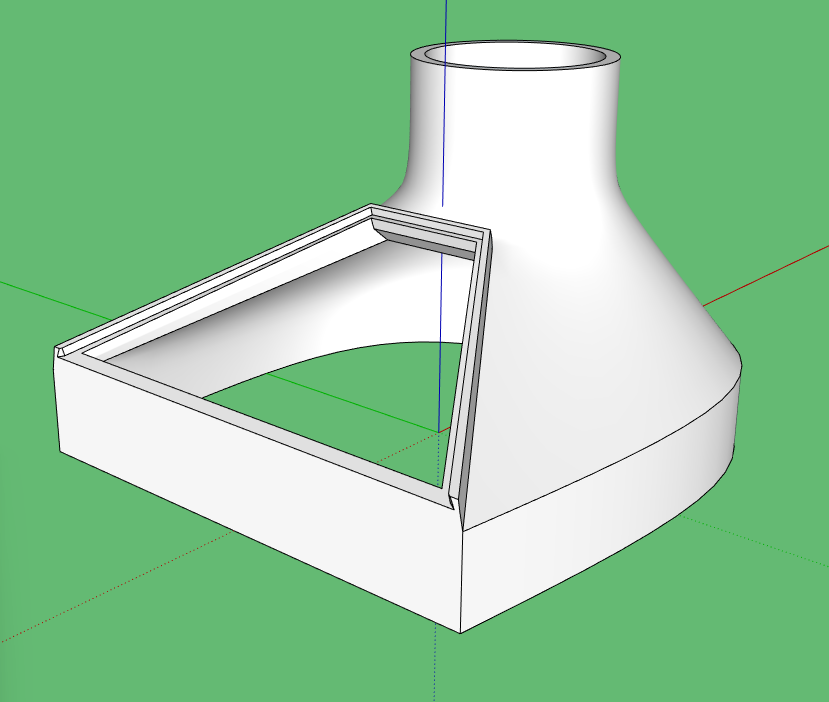
The purpose.
I recently picked up a new sandblaster. This one is a pressure pot extractor system which basically means you put the air into a vacuum cleaner that has sand in it and it is a closed loop. This allow you to use it outside a booth, blasting cars, large panels etc
The downside of the system is it has a brush fitting around the head to contain the blasting media, which means you can’t see what is going on. When sandblasting glass you generally need to see what is going on because it’s a bit more like airbrushing than savage cleaning.
To that end I designed a new head for the thing that lets me look in while still capturing the media. A ‘quick’ 3d print, and a bit of replaceable glass and tape and away we go.The result.
-
I agree, subdivision works for both organic forms and hard surface forms. You can be incredibly accurate in term of dimensions
But at least tell the truth. This is for painting your toenails.

Download the free D'oh Book for SketchUp 📖
-
-
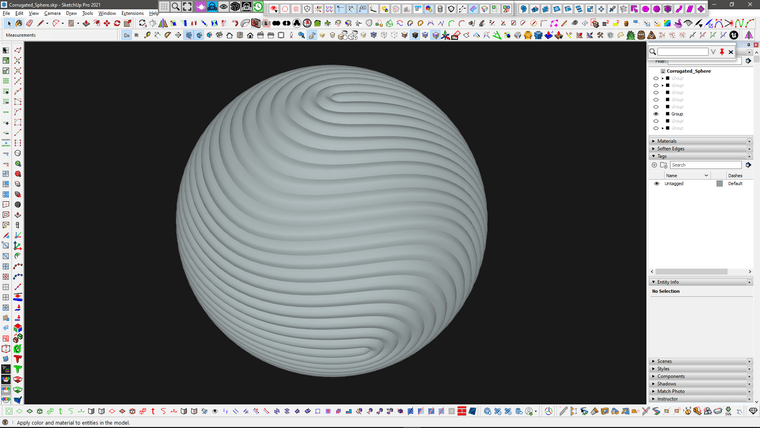
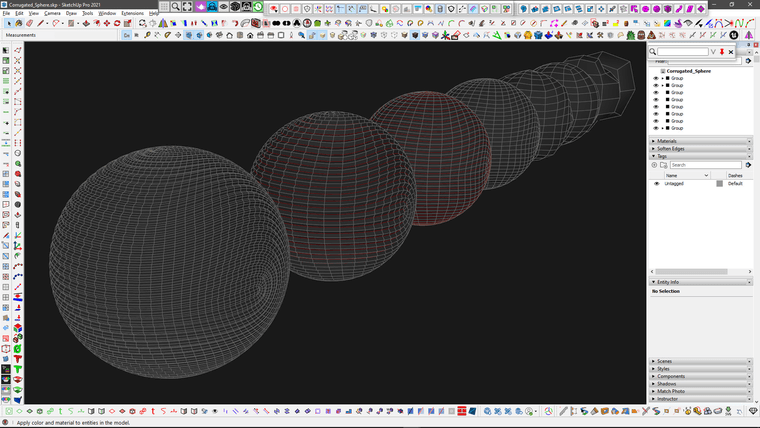
@panixia said in SubD examples and models:
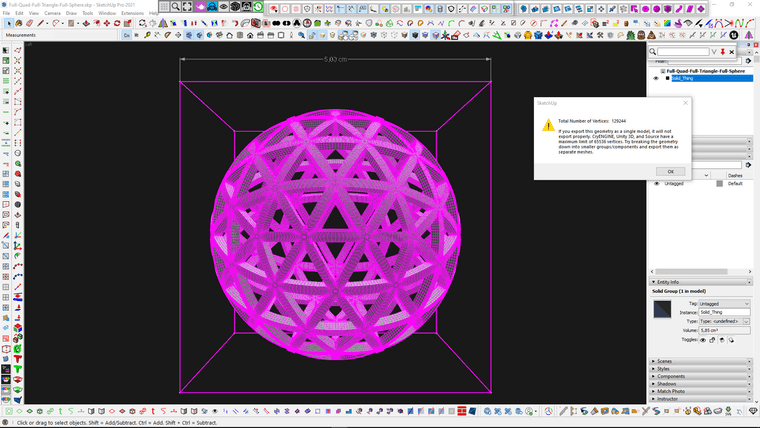
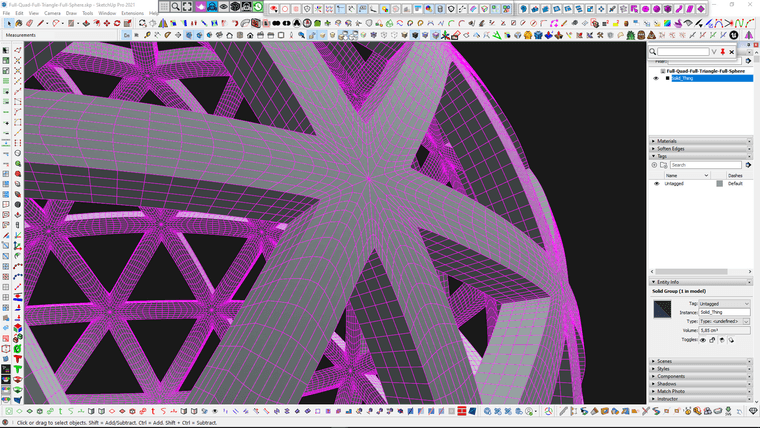
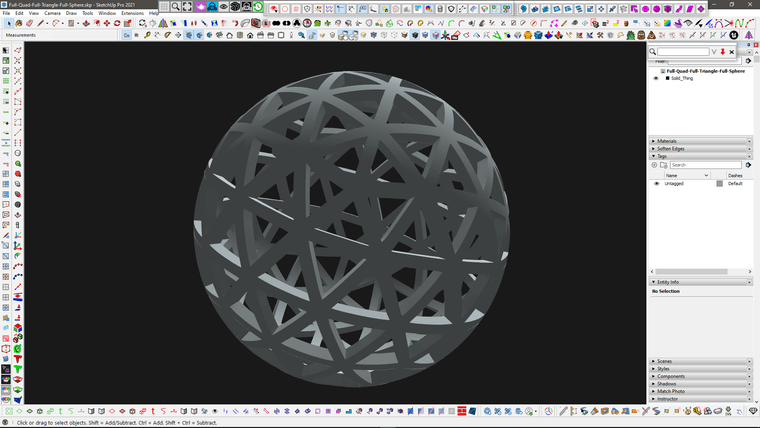
A couple of spherical topology experiments)
...all of which are great!!! (I wonder how you made that second, very tricky ball)
never trust a skinny cook


Hello! It looks like you're interested in this conversation, but you don't have an account yet.
Getting fed up of having to scroll through the same posts each visit? When you register for an account, you'll always come back to exactly where you were before, and choose to be notified of new replies (either via email, or push notification). You'll also be able to save bookmarks and upvote posts to show your appreciation to other community members.
With your input, this post could be even better 💗
Register Login


Advertisement