sketchucation logo sketchucation
    • Login
    ℹ️ Licensed Extensions | FredoBatch, ElevationProfile, FredoSketch, LayOps, MatSim and Pic2Shape will require license from Sept 1st More Info

    SubD examples and models

    Scheduled Pinned Locked Moved SUbD
    renderpluginsextensions
    1.7k Posts 81 Posters 962.2k Views 79 Watching
    Loading More Posts
    • Oldest to Newest
    • Newest to Oldest
    • Most Votes
    Reply
    • Reply as topic
    Log in to reply
    This topic has been deleted. Only users with topic management privileges can see it.
    • Rich O BrienR Online
      Rich O Brien Moderator
      last edited by

      Could you imagine if SU had these type of tools!

      I'd love it. But it would completely cripple the viewport and user experience.

      Download the free D'oh Book for SketchUp πŸ“–

      panixiaP 1 Reply Last reply Reply Quote 2
      • panixiaP Offline
        panixia @Rich O Brien
        last edited by panixia

        @Rich-O-Brien yeah, in Sketchup is hard to imagine this kind of stuff working in realtime.

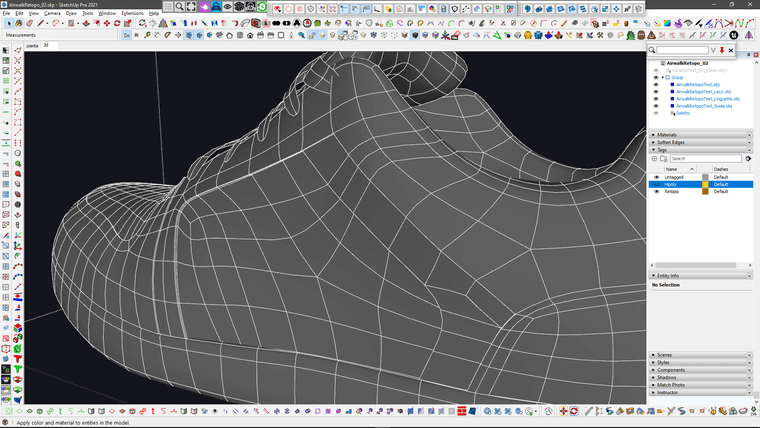
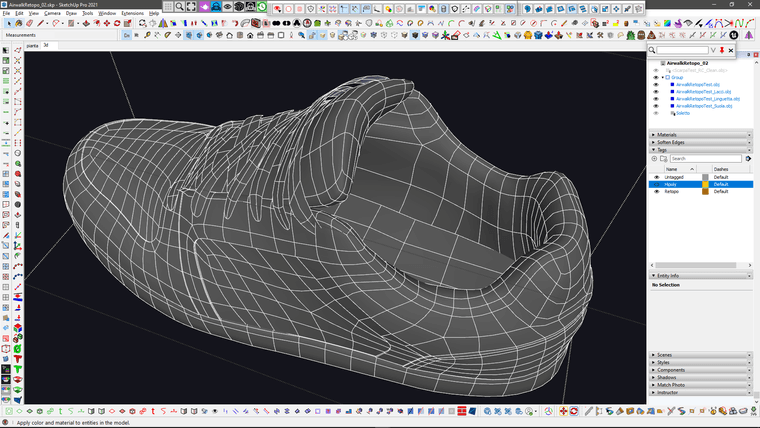
        For simple objects sometime I do some basic retopology using Tools on Surface, or Artisan Knife or Intersecting geometry, then extract the edges, weld and run QFT "create quadfaces from wireframes".
        Another workaround is to pre-triangurate (with qft diagonals) small patches and then use the "Drop To" plugin to trow/conform them over objects.
        I usually do those tricks for smaller portions of models.

        For massive retopology on heavy meshes like this (this model is 120k+ vertices) I usually run Topogun (whith QFT oj import/export) then import back the base topology to refine and detail it using VT, Artisan, Edge tools, Qft, fredo corner, JPP, Flowify and basically every plugin compatible with quads (and basically whatever tool and plugin as long as I use the pretriangulation trick).

        I did a quick video to demonstrate this tecnique a few time ago..

        1 Reply Last reply Reply Quote 2
        • R Offline
          rv1974
          last edited by

          @panixia there are some awesome Vietnaniese plugins to copy\paste from\to SU\Max.
          you could just paste to max and apply Retopo modifier (fully parametric, as we love it). Then continue in max or paste it back to SU

          panixiaP 1 Reply Last reply Reply Quote 1
          • panixiaP Offline
            panixia @rv1974
            last edited by

            @rv1974 of course you have that Retopo modifier if you have a new version of Max..
            But I'm still on older perpetual version.. πŸ˜€
            Btw I have quadremesher, which is quite similar (but not as good as the modifier) and of course the "classic" manual retopology tools from 3dsMax in the "freeform" panel.

            There's no need for Vietnamese Plugin because with QFT exporter/importer to move quad models back and forth between SU and Max.

            The reason why I use Topogun most of the time instead of Max, is actually that the dynamic patches are sort of halfway between the speed of auto-retopo and the full control of manual retopo.
            If I reacall correctly, only Blender has something similar in retopoflow, but the patches are limited to 3 or 4 sides.
            In topogun you can have patches from 2 to whatewer-you-need sides, and they can be changed interactively.

            tuna1957T R 2 Replies Last reply Reply Quote 2
            • tuna1957T Offline
              tuna1957 @panixia
              last edited by

              @panixia Fantastic shoe ! Always amazed by your modeling. πŸ‘

              panixiaP 1 Reply Last reply Reply Quote 1
              • panixiaP Offline
                panixia @tuna1957
                last edited by

                @tuna1957 thank you so much!
                I'm glad you enjoy this stuff 😊

                1 Reply Last reply Reply Quote 1
                • R Offline
                  rv1974 @panixia
                  last edited by rv1974

                  @panixia

                  yeah they significantly improved Retopo Mod:
                  https://youtu.be/qtj3rvL2pUI?si=fgKIm9kbfUwoqCY_&t=1
                  also Conform is insanely good:
                  https://youtu.be/gQXM76Xy0qY?si=T-FUu8PxPFfmgU53

                  panixiaP 1 Reply Last reply Reply Quote 1
                  • panixiaP Offline
                    panixia @rv1974
                    last edited by

                    @rv1974 said in SubD examples and models:

                    yeah they significantly improved Retopo Mod:

                    yeah.. I saw that.. amazing.

                    @rv1974 said in SubD examples and models:

                    also Conform is insanely good:

                    I also saw the new conform modifier, but I believe this video shows an updated/improved version.. looks good.

                    1 Reply Last reply Reply Quote 0
                    • panixiaP Offline
                      panixia
                      last edited by

                      Let's go 😬

                      95849d87-f148-4b4c-838d-943ceeac84d7-image.png

                      1 Reply Last reply Reply Quote 2
                      • Rich O BrienR Online
                        Rich O Brien Moderator
                        last edited by

                        Yay! Wrap-R

                        Looks like a fun texturing project too!

                        Download the free D'oh Book for SketchUp πŸ“–

                        panixiaP 1 Reply Last reply Reply Quote 1
                        • panixiaP Offline
                          panixia @Rich O Brien
                          last edited by panixia

                          @Rich-O-Brien indeed 😍

                          I believe I've just found a new trick to speed up that IDmask baking thing
                          (just some SelectionToy trick to quickly detect hard edges and split up surfaces without having to select too many loops manually)

                          00874627-66ba-4aba-ae7e-d60517ae30c7-image.png

                          1 Reply Last reply Reply Quote 1
                          • panixiaP Offline
                            panixia
                            last edited by

                            Addictive.. πŸ˜…

                            e5bbd0a3-8880-422f-b469-053346c81225-image.png

                            a712f722-a5ad-4c50-9900-9acb755ce0a1-image.png

                            1 Reply Last reply Reply Quote 2
                            • Mike AmosM Offline
                              Mike Amos
                              last edited by

                              Brilliant and inspiring. Thanks for posting this.

                              panixiaP 1 Reply Last reply Reply Quote 2
                              • panixiaP Offline
                                panixia @Mike Amos
                                last edited by panixia

                                @Mike-Amos thank you.. I'll share the last couple of models when I'm done πŸ‘

                                1 Reply Last reply Reply Quote 1
                                • panixiaP Offline
                                  panixia
                                  last edited by

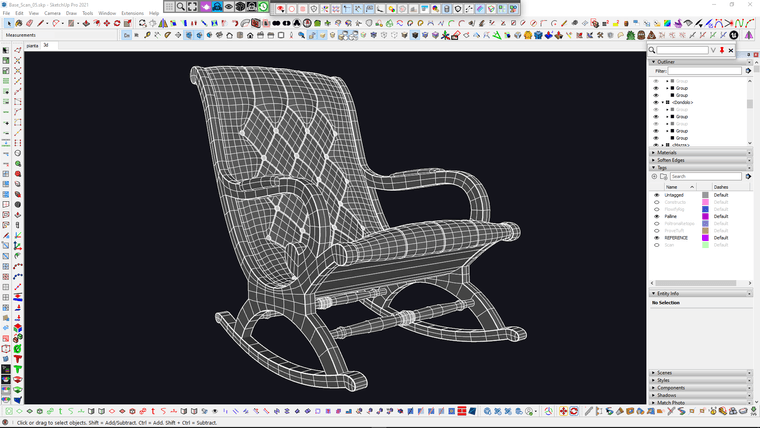
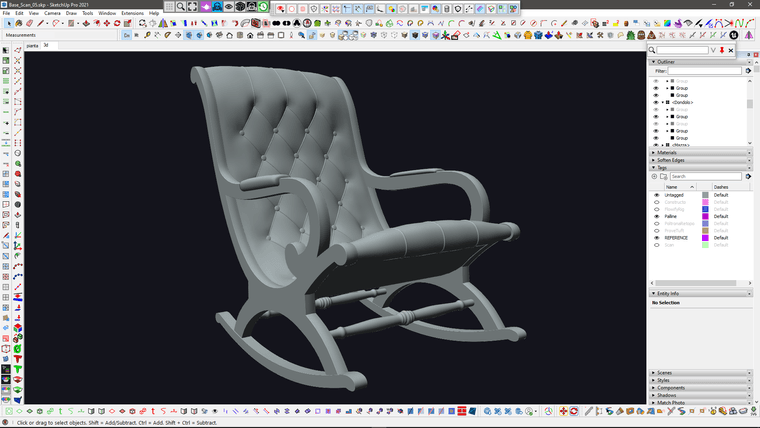
                                  I had to put the shoe modeling on hold because I had to do this for work today 😰

                                  image.png

                                  2bd2cbf0-dd83-4adf-99cf-0f7e413268b2-image.png

                                  72d86671-dcf4-4ebf-9f2b-367d71327963-image.png

                                  90ed9fa2-4f31-42e9-a1ab-97cd5df471b5-image.png

                                  1 Reply Last reply Reply Quote 3
                                  • Rich O BrienR Online
                                    Rich O Brien Moderator
                                    last edited by

                                    🀀 flawless

                                    Download the free D'oh Book for SketchUp πŸ“–

                                    panixiaP 1 Reply Last reply Reply Quote 1
                                    • panixiaP Offline
                                      panixia @Rich O Brien
                                      last edited by

                                      @Rich-O-Brien flowify is the key for this sort of stuff..

                                      1 Reply Last reply Reply Quote 0
                                      • Mike AmosM Offline
                                        Mike Amos
                                        last edited by

                                        It would help to see the workflow for that last especially, if/when you have time.

                                        panixiaP 1 Reply Last reply Reply Quote 0
                                        • panixiaP Offline
                                          panixia @Mike Amos
                                          last edited by panixia

                                          @Mike-Amos well, in this case i started with a basic trace of photo references, I use components, so that I can use different photos for different pieces but then the components are nested in the main assembly so they end up in the right place..

                                          d95b62c9-46ac-4799-b803-3d2f5b9eec03-image.png

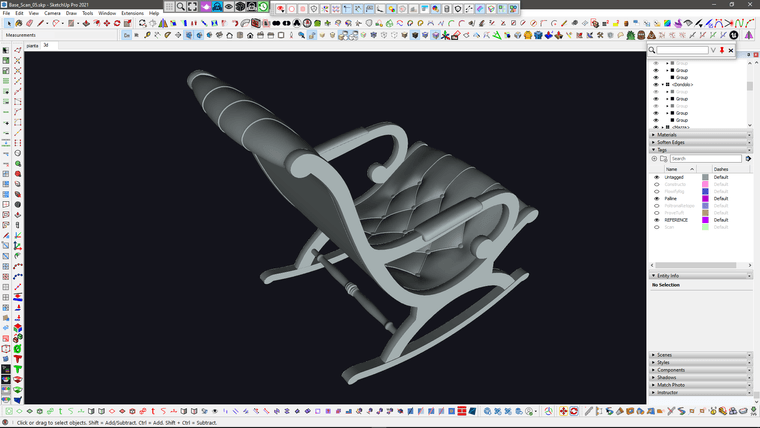
                                          They also gave me a pretty bad photoscan, so I used that just to intersect it with a plane and extract the basic profile of the seating.
                                          I then smoothed the extracted curve with Curvizard and normalized it with Polyline Segmentor

                                          b0a8cfe7-430a-46ea-be84-f722c9fe33e0-image.png

                                          Then I created a base grid for the pattern with the proper real world measurements.

                                          bbe40d2d-2546-41c5-84e0-e72b59566502-image.png

                                          I then created a repeated component with Curviloft Skin

                                          d8ca9777-62a2-48b7-9321-78e84b768235-image.png

                                          Same for the buttons

                                          bc98b8fa-e31a-4008-aa98-4c705304643b-image.png

                                          And then create a different variation of that component for the sides

                                          5367f69e-59b7-4d1f-b9a4-91d2dbf7e969-image.png

                                          And another variation for the corners

                                          ce4afeb1-b3c7-4ae6-bb19-eae2bd1c9fef-image.png

                                          then I joined all of them together.. please notice that In this stage I try to keep the quads as even as possible, because I'm gonna deform this stuff

                                          f6d3a48c-76b9-4d65-bbcc-4428b46805e4-image.png

                                          Then I extracted the diagonals for the sewing and used "Lines to Tubes" with quite low poly geometry.. and of course I did some cleanup with quadface tools for the overlapping geometry which will not be seen.

                                          6651b280-99e4-4498-8ecc-899c48eb69f5-image.png

                                          I then created the base shape of the seating using Curviloft ad Quadface tools.. and extracted the grid were I need the upolstered thing..

                                          c7dd30da-e331-4c23-9c4c-0ae23a450692-image.png

                                          Then I use the QuadfaceTools "Unwrap Grid" feature to extract a flat grid from that.. which has the exact same lenght and topology of the seating that I'm going to replace.. and here is the flowify rig setup that I used to send the geometry to the curved surface.

                                          WARNING: you need to use "flowify without cuts" to avoid messy topolgy and keep quads.

                                          fe9a8352-1ae8-4f2a-84cf-3abc81f10a84-image.png

                                          From this stage, it was just a matter of stitching and tweaking.. with the usual VertexTools, QFT, Artisan shenanigans

                                          4d18852f-b09c-427e-90ca-880c94cb269a-image.png

                                          Meanwhile I also added the studs.. I used profile builder assembly to place them and then manually repositioned some bits in the problematic areas

                                          5cfc4487-b562-441f-90fd-3fa3a5a0c0aa-image.png

                                          And this is the updated version with the studs..
                                          I hope this was helpful to better understand the process..

                                          It's a bit different every time.. the shoe and the skatepark used a quite different process.. and the other sofas I posted before of that, is another different story.. 😬

                                          a70452d9-4580-4570-b236-6f55f314d6f7-image.png

                                          4dc1ce46-dc95-4fd2-9c11-ab469335bf04-image.png

                                          1 Reply Last reply Reply Quote 4
                                          • HornOxxH Offline
                                            HornOxx
                                            last edited by

                                            A Great work! – & thanks for the many pictures of the doing process.

                                            never trust a skinny cook

                                            1 Reply Last reply Reply Quote 2
                                            • 1
                                            • 2
                                            • 79
                                            • 80
                                            • 81
                                            • 82
                                            • 83
                                            • 82 / 83
                                            • First post
                                              Last post
                                            Buy SketchPlus
                                            Buy SUbD
                                            Buy WrapR
                                            Buy eBook
                                            Buy Modelur
                                            Buy Vertex Tools
                                            Buy SketchCuisine
                                            Buy FormFonts

                                            Advertisement