SubD examples and models
-
@Rich-O-Brien said:
Thats really nice. Would love to play Tony Hawk's around that
You actually can, because Marseille/Prado is included in the game.
here is the model from early version of the game which some guy uploaded to warehouse.
At first glance I thought that he did a sloppy job at replicating the game model, but I checked on Youtube and they actually used this remarkably bad version in the first edition of the game.. .They did a way better job in the newer version of the game, but it's still unrealistic. The whole model is still a bit out of scale in order to make the flat bottom way more stretched than it actually is in real world.
I can tell that with no doubt, because I'm a former BMX rider and a skatepark builder (I actually designed both the concrete skateparks in my city alongside multiple other wooden ramps and dirt jumping trails) and I rode myself the Prado bowl multiple times.
It's a legendary skatepark, so about 20 years ago we used to travel all the way up from south Italy to Marseille to ride that beauty.Absolutely killer skatepark.. it would not ride that fast in real world if the flat bottom was overstretched like the one in game.. it would loose all the lines and rhythm that made that park so fun to ride.
I don't know why they did the 3d model that bad.. I guess it has to do with game logic and "playability".@Rich-O-Brien said:
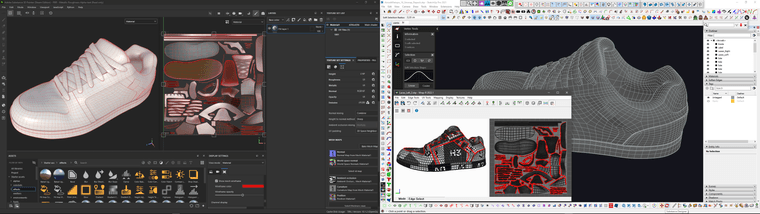
Really appreciate the UDIM workflow. I thinks it something we need to have a think about implementing in WrapR
What you would like to implement? Is actually already working quite well and it's pretty straightforward once you grasp the base logic.
They should consider to implement that UDIM logic in Sketchup itself, so that one can import a single material with multiple UDIMs, while according to the current logic you need to export with a single material and import back multiple different materials like I showed here.
Considering how long they took to implement (half baked) PBR support, I guess they'll include UDIM tiles in Sketchup 2038 or something..Maybe you could make the tiles edge more obvious in the WrapR UV grid/background?
But again.. you can consider each 4 by 4 color square (in the default WrapR texture) as a reference for the tile. Or simply use a UV checker texture with a really eye catching border like I showed here.
Using that texture, whenever I see magenta showing up on the mesh, I can quickly visually tell that something is wrong in the UV layout and Substance will reject the model because of some nasty UV island overlapping across UDIM spaces, so.. not a big deal. -
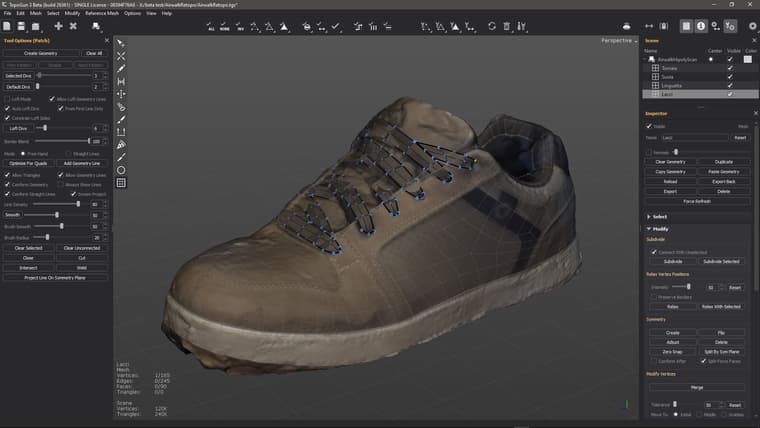
WIP - Day one
Reality Capture - Topogun - SubD
-
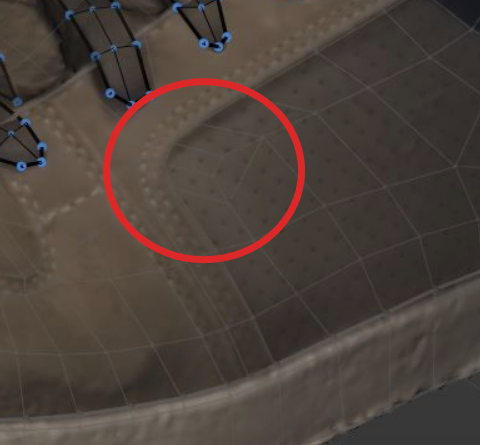
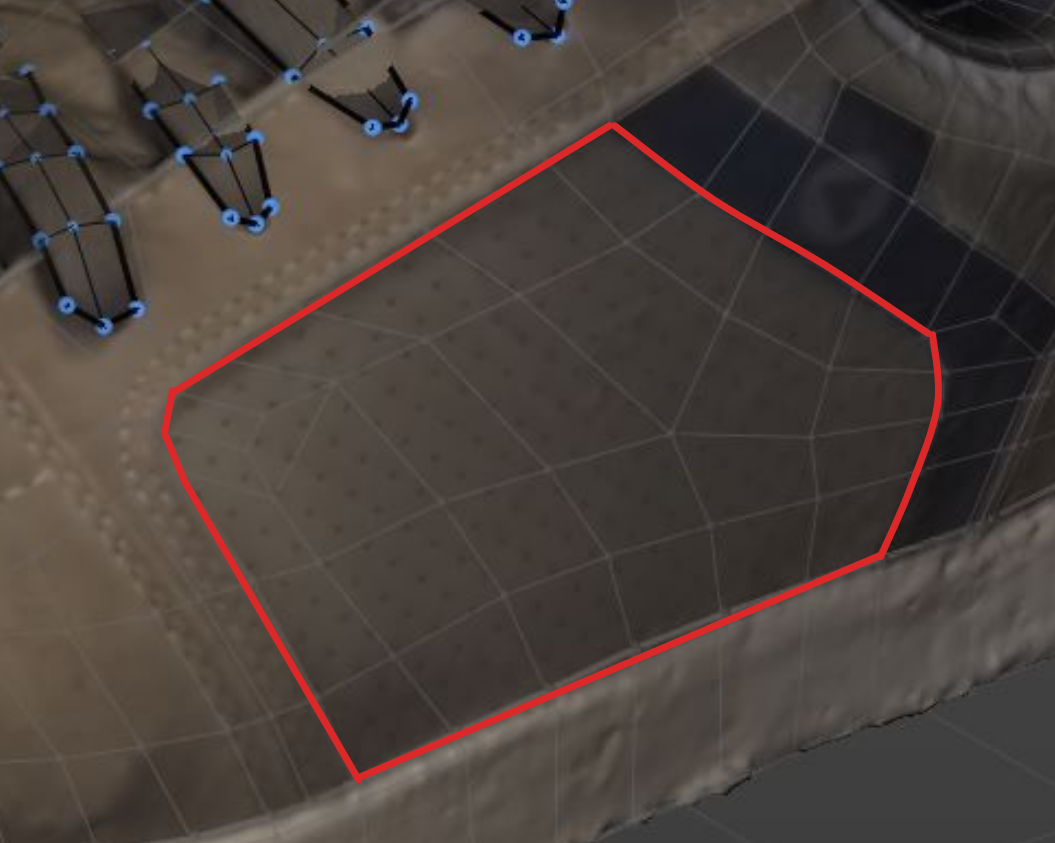
Yummy, I'd try to resolve this area to be more uniform
Does Topogun allow you to do quad patches?
Download the free D'oh Book for SketchUp 📖
-
@Rich-O-Brien said in SubD examples and models:
Yummy, I'd try to resolve this area to be more uniform
Yeah definetly, I was still fiddling around with loops, but I already did yesterday after posting those screenshots, because that 3 to 1 was causing a noticeable bump after subdividing.
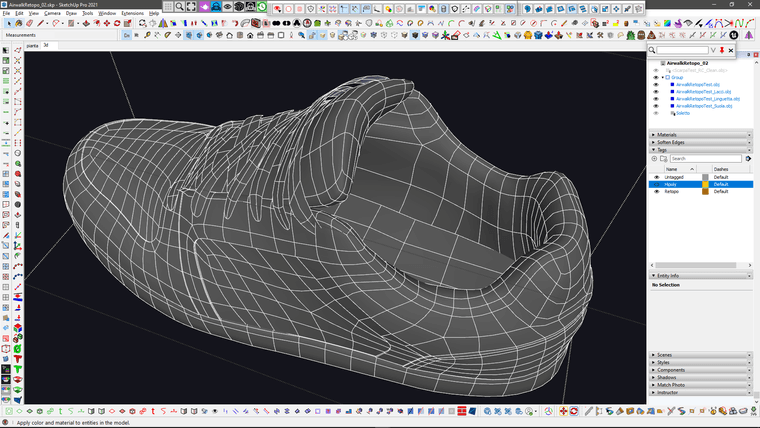
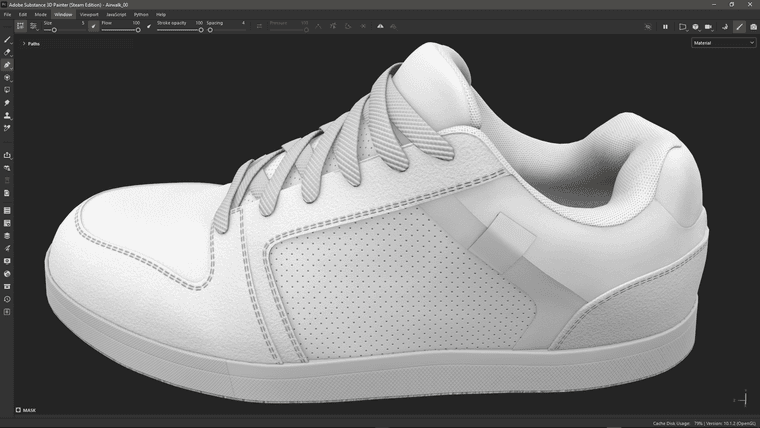
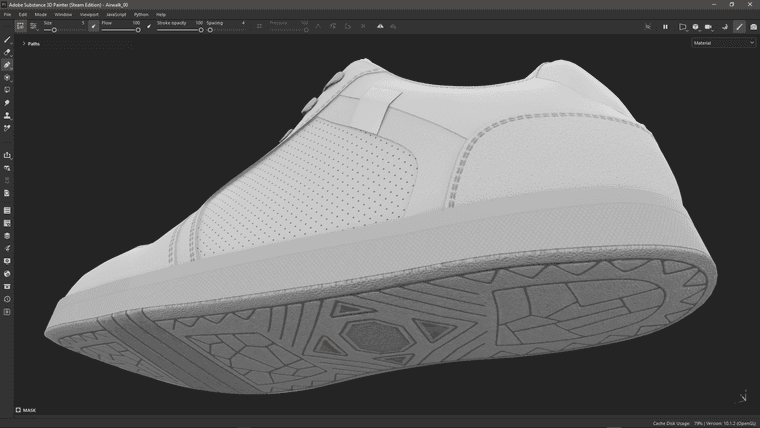
I also modeled the inside of the shoe, started to reshape the sole better, figured out a bit about the lace pattern and started to add tickness to the various layers of the main body.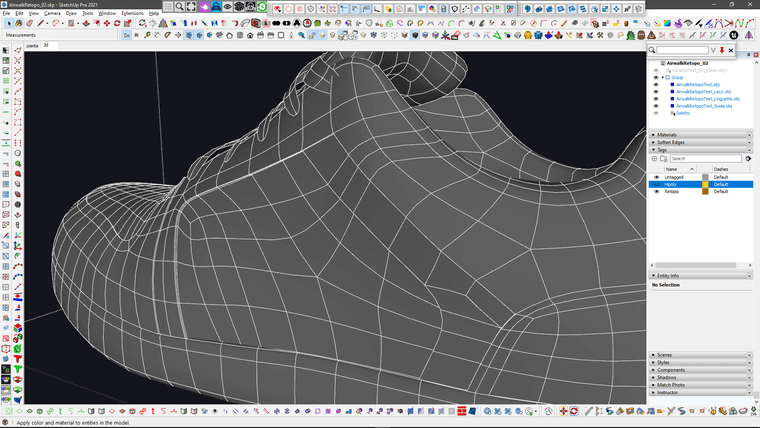
@Rich-O-Brien said in SubD examples and models:
Does Topogun allow you to do quad patches?
It does and they are interactive, you can preview them and dynamically change the number of segments for each curve and change how the topology is arranged. You can create multiple patches at once, with 2,3,4 or more splines, join them and so on and so forth.
Once created you can't change them anymore, but you can edit them with the usual topology tools like move, extrude, draw, cut, collapse, brushes for soft move and relax and the usual stuff. -
Very sharp.......................
-
Could you imagine if SU had these type of tools!
I'd love it. But it would completely cripple the viewport and user experience.
Download the free D'oh Book for SketchUp 📖
-
@Rich-O-Brien yeah, in Sketchup is hard to imagine this kind of stuff working in realtime.
For simple objects sometime I do some basic retopology using Tools on Surface, or Artisan Knife or Intersecting geometry, then extract the edges, weld and run QFT "create quadfaces from wireframes".
Another workaround is to pre-triangurate (with qft diagonals) small patches and then use the "Drop To" plugin to trow/conform them over objects.
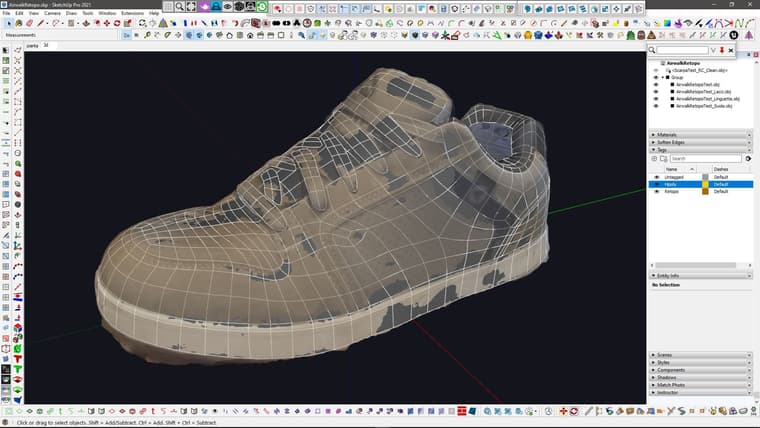
I usually do those tricks for smaller portions of models.For massive retopology on heavy meshes like this (this model is 120k+ vertices) I usually run Topogun (whith QFT oj import/export) then import back the base topology to refine and detail it using VT, Artisan, Edge tools, Qft, fredo corner, JPP, Flowify and basically every plugin compatible with quads (and basically whatever tool and plugin as long as I use the pretriangulation trick).
I did a quick video to demonstrate this tecnique a few time ago..
-
@panixia there are some awesome Vietnaniese plugins to copy\paste from\to SU\Max.
you could just paste to max and apply Retopo modifier (fully parametric, as we love it). Then continue in max or paste it back to SU -
@rv1974 of course you have that Retopo modifier if you have a new version of Max..
But I'm still on older perpetual version..
Btw I have quadremesher, which is quite similar (but not as good as the modifier) and of course the "classic" manual retopology tools from 3dsMax in the "freeform" panel.There's no need for Vietnamese Plugin because with QFT exporter/importer to move quad models back and forth between SU and Max.
The reason why I use Topogun most of the time instead of Max, is actually that the dynamic patches are sort of halfway between the speed of auto-retopo and the full control of manual retopo.
If I reacall correctly, only Blender has something similar in retopoflow, but the patches are limited to 3 or 4 sides.
In topogun you can have patches from 2 to whatewer-you-need sides, and they can be changed interactively. -
@panixia Fantastic shoe ! Always amazed by your modeling.

-
@tuna1957 thank you so much!
I'm glad you enjoy this stuff
-
yeah they significantly improved Retopo Mod:
https://youtu.be/qtj3rvL2pUI?si=fgKIm9kbfUwoqCY_&t=1
also Conform is insanely good:
https://youtu.be/gQXM76Xy0qY?si=T-FUu8PxPFfmgU53 -
@rv1974 said in SubD examples and models:
yeah they significantly improved Retopo Mod:
yeah.. I saw that.. amazing.
@rv1974 said in SubD examples and models:
also Conform is insanely good:
I also saw the new conform modifier, but I believe this video shows an updated/improved version.. looks good.
-
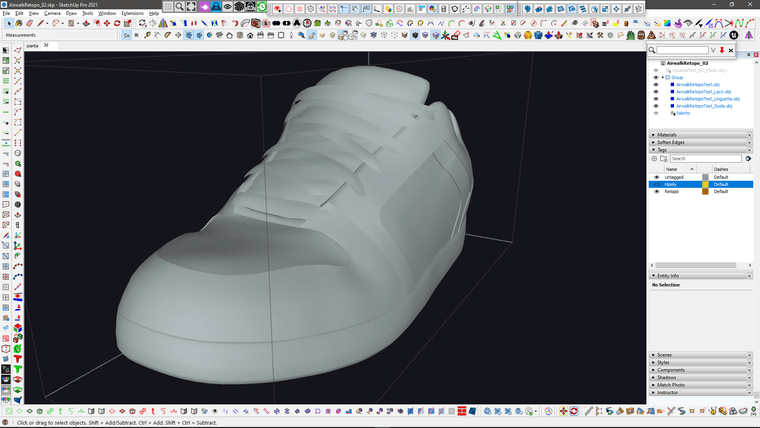
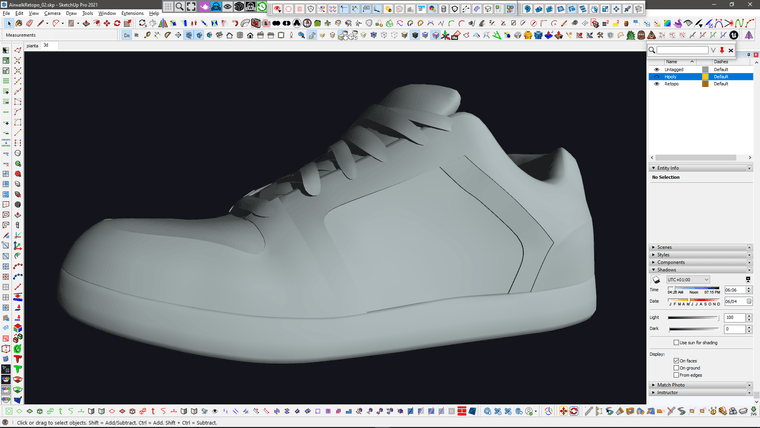
Let's go

-
Yay! Wrap-R
Looks like a fun texturing project too!
Download the free D'oh Book for SketchUp 📖
-
@Rich-O-Brien indeed

I believe I've just found a new trick to speed up that IDmask baking thing
(just some SelectionToy trick to quickly detect hard edges and split up surfaces without having to select too many loops manually)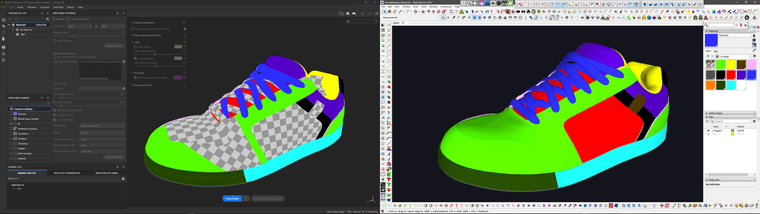
-
Addictive..

-
Brilliant and inspiring. Thanks for posting this.
-
@Mike-Amos thank you.. I'll share the last couple of models when I'm done

-
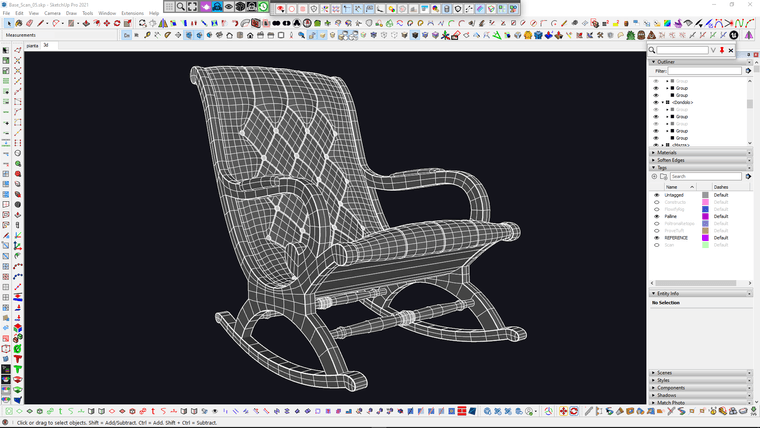
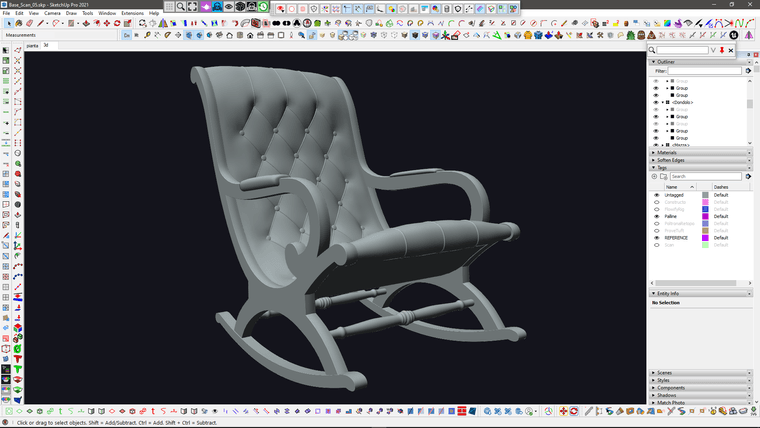
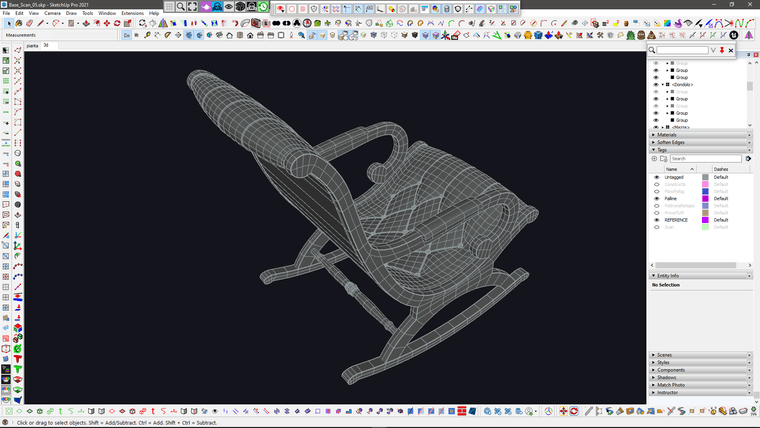
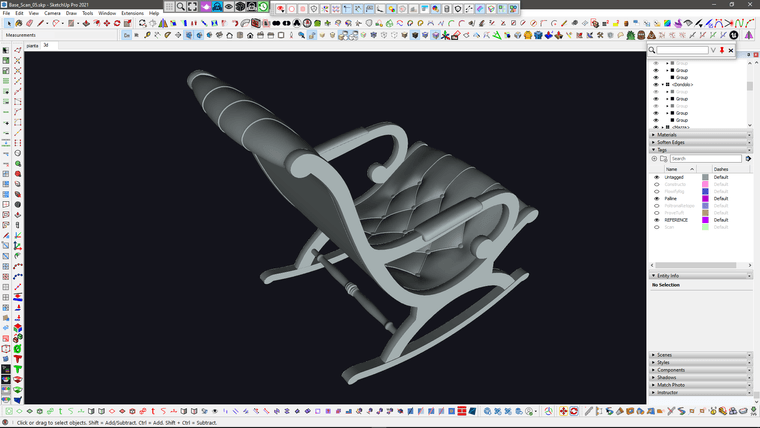
I had to put the shoe modeling on hold because I had to do this for work today

Hello! It looks like you're interested in this conversation, but you don't have an account yet.
Getting fed up of having to scroll through the same posts each visit? When you register for an account, you'll always come back to exactly where you were before, and choose to be notified of new replies (either via email, or push notification). You'll also be able to save bookmarks and upvote posts to show your appreciation to other community members.
With your input, this post could be even better 💗
Register Login


Advertisement