[Example] V-Ray Displacement
-
Hi there! Can you tell me exactly which siding material you are trying to use? I'll have a go to convert it into vismat

-
@andybot. Would love to see that tutorial. Link appears to be dead?
-
which you can see a tutorial I did a while back on that method.
Edit: updated link (I changed my blog domain name recently)
-
Thanks for pointing that out,
 I've fixed it in my post.
the correct link is
http://charlottesvillearchitecturalrendering.com/?p=127 -
Nice site Andy. And clean tutorial. Done any work with Nelson Byrd Wolf? They are doing some landscape architectures in a couple of our projects.
Omar -
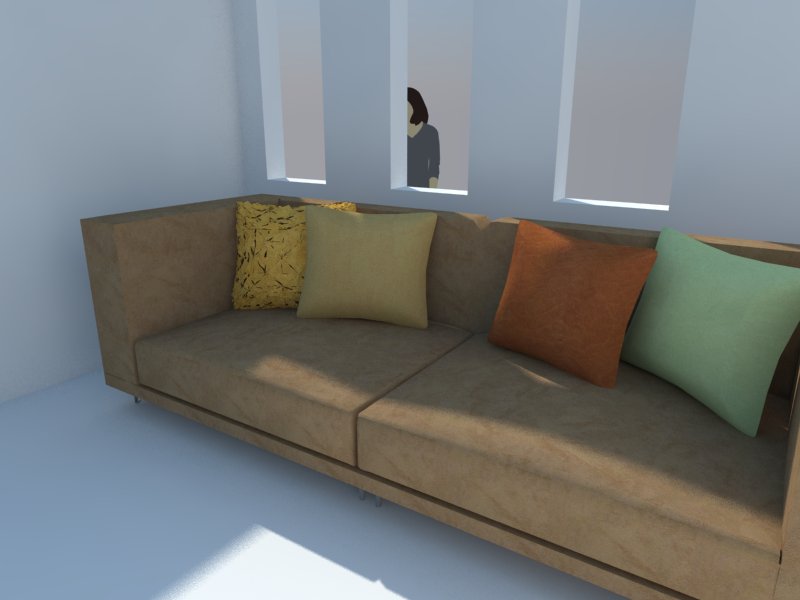
hi, i had this problem in displacement, whenever im trying to render curves, it comes out segmented
look at the yellow pillow

-
Something useful to consider when creating a displacement map, courtesy of http://viscorbel.com/vray-materials-theory/#comment-6946
"The deformations work like this – middle grey [128;128;128] of the map does not change anything on the object, darker values push the surface inwards while lighter values pull it out. The further this value is from medium gray, the stronger is the effect. Color of the map is not taken into account and only the lightness value is used."
This is good to know when you don't want the geometry created by the displacement to extend beyond the modelling you've laid out... eg bricks protruding though picture frames hanging on the wall
-
@moderat said:
I switched the displacement multiplier up to 50, but it doesn't change a thing.
I created a grey rectangle outside my model to check if it would work there (so it isn't connected to another material).. still the same?
Can someone check my sketchup file? Really stuck here. As far as I know I'm not using any groups for the model, maybe by accidence a while ago (been working on it for quite some time now..).
http://www.mediafire.com/?pxmhwih5p0t5li3
(if you open it, does it look like a heavy file? Sketchup blocks from time to time for a minute or 2..)Thank you!
Bert
When sharing files, remember to use the "Pack Scene" tool in V-Rays tools. You can find it by going Plugins>V-Ray>Pack Scene. This will ensure your scene has all required materials and textures. The scene you shared does not have the associated displacement map you are using so I cant accurately test or check anything.
Also, download and try out the grass file I've attached.
-
Oh neat! When was that feature added?
@tedvitale_cg said:
"Pack Scene" tool in V-Rays tools.
That might cause people to think it's a feature of my "V-Ray Tools" plugin...

-
Hello i have this problem with my displacement map
why is that happen? any help? pleeesa XD
Obs. it´s a night scene

-
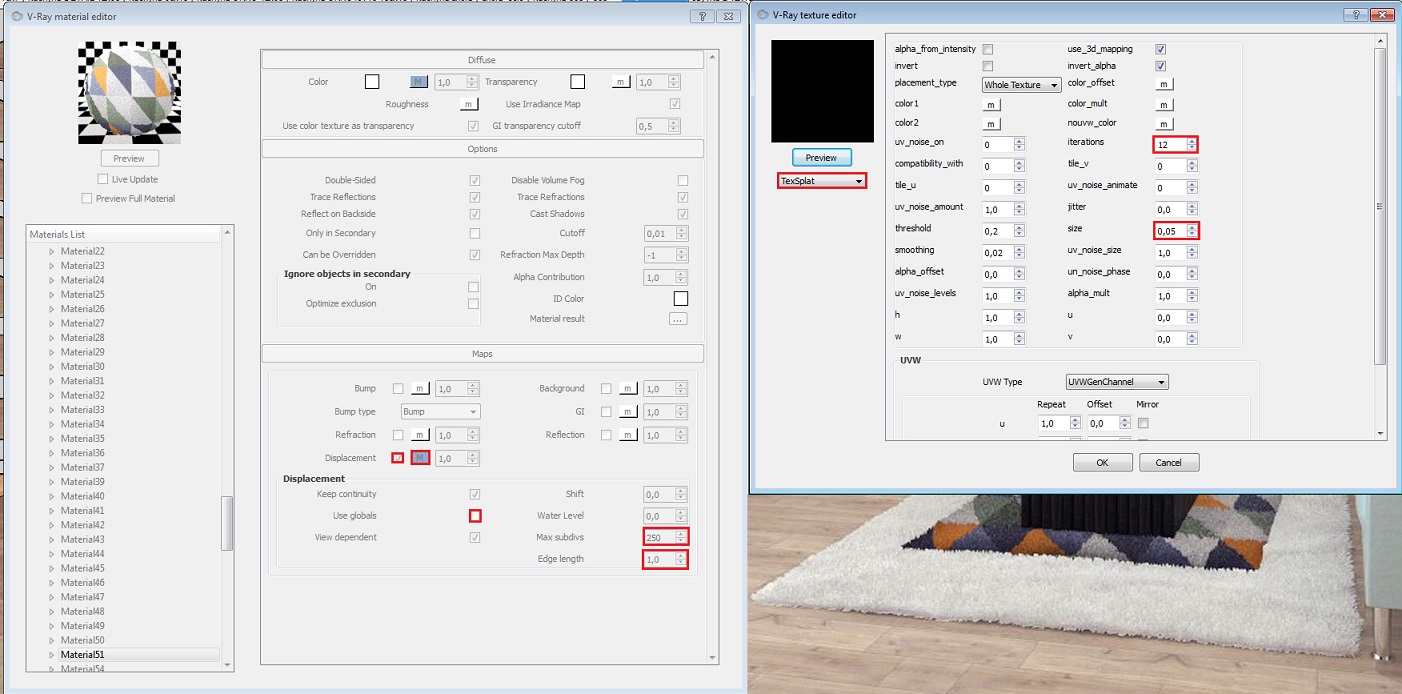
hi guys.. try this way


-
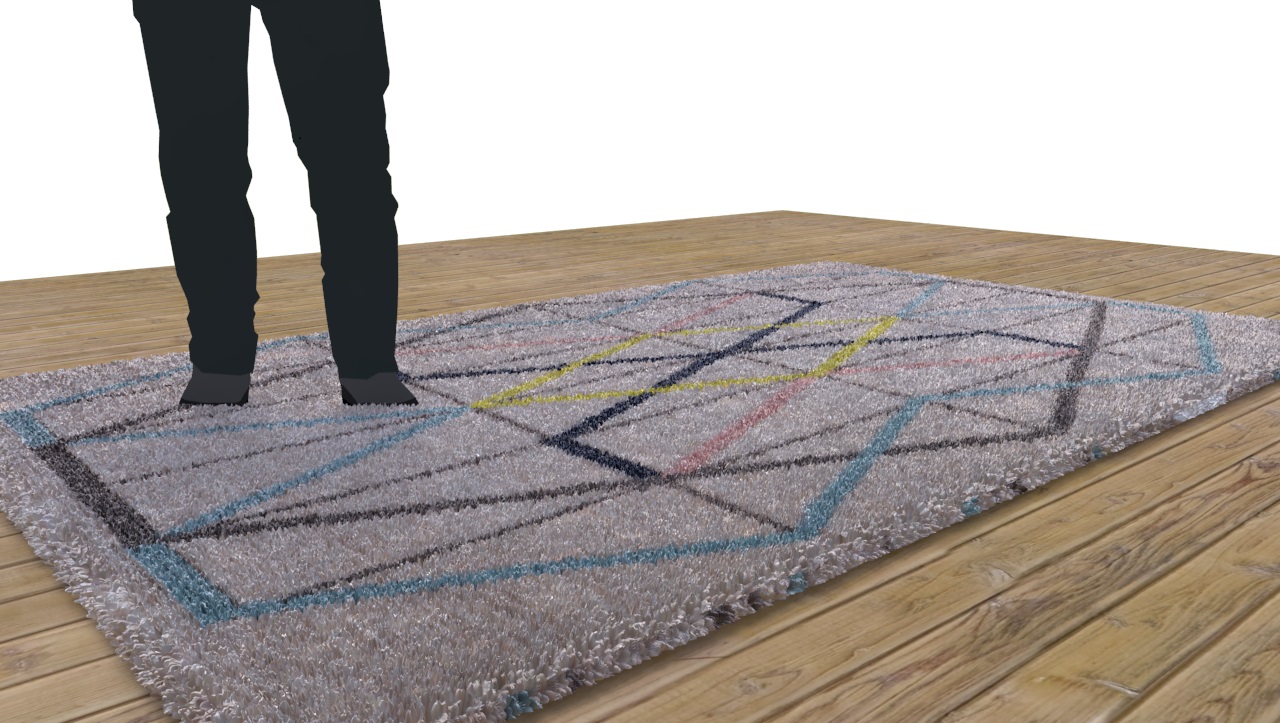
This is my displacement try.. Sketchup 2015 and vray 2.0..

-
@kenancakir said:
This is my displacement try.. Sketchup 2015 and vray 2.0..
this is cool, how did you do it? can you share the material/texture?
-
@luziusalbin said:
@kenancakir said:
This is my displacement try.. Sketchup 2015 and vray 2.0..
this is cool, how did you do it? can you share the material/texture?
Thank you.. Here is my tutorial..
Hello! It looks like you're interested in this conversation, but you don't have an account yet.
Getting fed up of having to scroll through the same posts each visit? When you register for an account, you'll always come back to exactly where you were before, and choose to be notified of new replies (either via email, or push notification). You'll also be able to save bookmarks and upvote posts to show your appreciation to other community members.
With your input, this post could be even better 💗
Register LoginAdvertisement


