[Plugin] FollowMe and keep (v0.04 update 20090210)
-
THIS IS AN EXCELENT PLUGIN FOR TOPOGRAPHY AND MANY OTHER THEMES! I SAVED UP ALMOST 95% OF TIME AND WORK.
-
thanks for this wonderful plugin. this just saved me a hell lot of headaches.
-
A really useful plugin. It helped me with creating a highway interchange.
But what if I want to paint the created shape in more than just one color? Since I'm using this plugin to create a road ramp I really want to be able to paint the sides in different colors and textures. As it is now I can't since all the sides of the thing are treated as one. If I click on the left side for example, the right, top and bottom also gets highlighted. Is there anyway to solve this?
By the way, I'm using this plugin together with the bezier curves plugin by Fredo 6 if that matters.
-
@Blomman:
I am not sure if this is valid, but is the resulting model a group or component? If so, could you right click on this, Edit Group, or Edit Component, and then apply colors, materials, textures to the various faces?
Save first, then try the above. Undo(Control Z)if this does not get the desired results.Keep watching this thread for other replies.
-
Yes, the model is automatically turned into a group which, as far as I know, can not have multiple textures or colors applied to. I forgot to mention that I've already done what you suggested (edit group) which is were I noticed the problem I described in my previous post. I've also tried "explode" but with the same result.

-
Has the model, during the FMAK process, had it's edges smoothened?
Have you hidden geometry on or off?
If it's off, just turn it on and paint the faces. Or right click the entity and choose soften/smooth and lower the slider bar until the lines appear. You can use Ctrl+E to soften any lines that you don't want to see.
I could be way off the mark

-
The hidden geometry was indeed off, now it works perfectly. Thanks!

-
this plugin has just saved me hours. i love you.
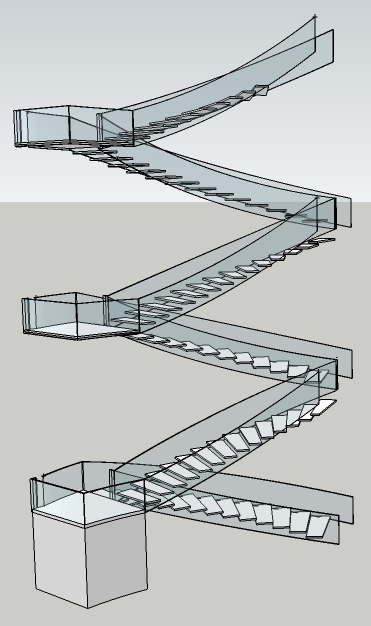
image attached. each side of the stairs is a different curve... pain in the ass.

-
Just wanted to say Thanks again!
I had lost the ruby and someone helped me find this one again...it is amazing for stairs!
-
So I installed the followme and keep plugin and it worked great on the first railing that I used it for but now it keeps crashing my SU every time i try it with this other section. Any suggestions?
-
google should really learn some good stuff like this...thanks man

-
So what am I missing? I've read through as much of this thread as I could. I can get FAK to work on simple arcs but not on this longer path. Even though it's not supposed to require it, I added a C-point to the start end of the path. Surely I've done something that isn't right. Can anyone tell me what it is?
-
Weld- Don't Weld? Group- Don't Group? This is a test, right?
Plugin "deprecation" due to Sketchup version?I mean, when you're stumped, we're in hell.
-
Tim,
I'm flattered by your comments. It wasn't a test. Well, it was a test for me.
I finally figured it out. The path needs to be basically horizontal. I didn't see anything in the thread that indicates this, though every example I saw was thus. Even so, it doesn't really do what I need anyway so I'm off on the hunt for another approach.
-
Well, Dave:
When you say basically horizontal do you mean mostly horizontal or dead flat path, or profile horizontal? I vaguely remember the demos and I may be getting it confused with Chris Fullmer's perpendicular faces tool. -
Sorry for being vague. I turned the helix on its side so its axis was along the green axis. This turned the square profile up on edge as well. I initially use Chris Fullmer's Perpendicular Face Tools to put the square on the end of the helix while the helix was standing up. that worked just fine.
-
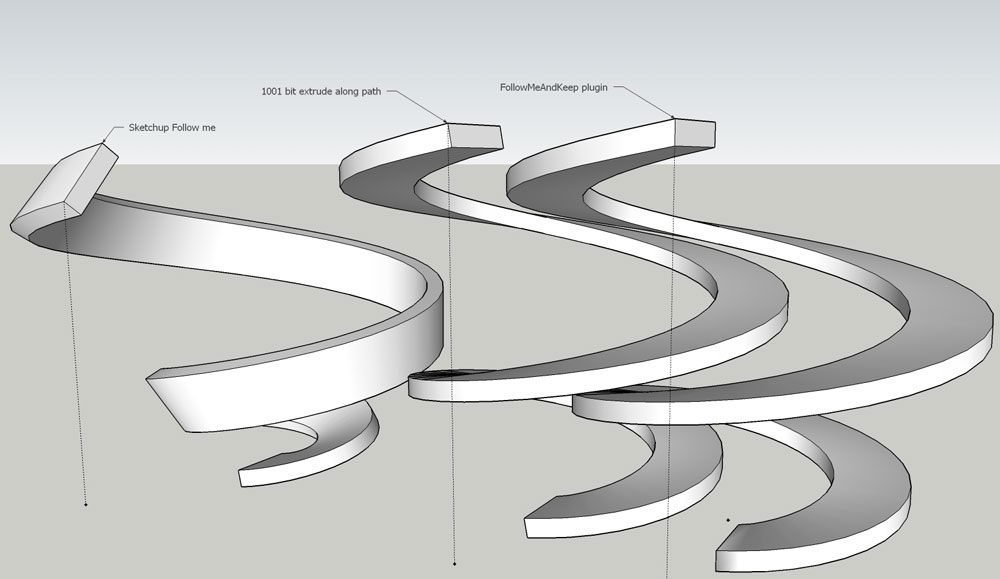
I like this tool, but it is lacking a basic feature that 1001bit's version does have: a reference point.
FollowMeAndKeep automatically uses the center of the face that it wants to extrude as the reference point for the path. When using a more complex face that needs to be extruded along a path relative to let's say the bottom left corner, you're out of luck

-
@sir.swaffel said:
I like this tool, but it is lacking a basic feature that 1001bit's version does have: a reference point.
FollowMeAndKeep automatically uses the center of the face that it wants to extrude as the reference point for the path. When using a more complex face that needs to be extruded along a path relative to let's say the bottom left corner, you're out of luck

It's good to have the option of using 1001bit, isn't it?
-
haha, yes, unfortunately 1001bit lacks a feature that FollowMeAndKeep does have, it doesn't lock the z orientation. So basically both of them lacks an essential feature of the other... and I don't know a way to combine them
 .
.

-
I suppose for FaK you could add some temporary geometry to get the bottom left corner to be the center. Not idea but it could work.
Advertisement


