[Plugin][$] Curviloft 2.0a - 31 Mar 24 (Loft & Skinning)


-
wow Fredo, the method2 drawing looks excellent!
i'll give it a try myself a little later in the day. -
Mighty impressive stuff Fredo.
I hope you get some donations for this! -
@thomthom said:
Mighty impressive stuff Fredo.
I hope you get some donations for this!agree!
Tools-> Fredo6 Collection-> Curviloft-> Donation...hit it up boys and girls

-
@charly2008 said:
Hi Fredo,
I know that it is impossible to find any errors, but still it is a great tool. I admire you, which you can write so wonderful Ruby Scripts.
Charly
Image below: Curviloft and Shape Bender.
Thanks the model. Actually, I had fixed the error already in my own version.
Let me also tell you that your golden frises are quite nice looking. I am not sure I would be able to do the same myself with Curviloft!
Finally, I think it is in practiceimpossible to find all errors, but more surely, it impossible to fix them all.
Fredo
-
Fredo, i have to admit.. i'm beyond excited!!
bezier method 2 is exactly what i was talking about.. very impressive! [which has me wondering.. how many other little ruby experiments do you have laying around on your hard drives
 ]
]
please include that method in subsequent curviloft releases. -
@unknownuser said:
J... If you wish to test in the meanwhile, you can drop the two attached files in the CURVILOFT_Dir_10 folder
[attachment=1:35q6ko6g]<!-- ia1 -->CurviloftPalette.rb<!-- ia1 -->[/attachment:35q6ko6g]
[attachment=0:35q6ko6g]<!-- ia0 -->CurviloftSpline.rb<!-- ia0 -->[/attachment:35q6ko6g]Some feedback; the "new" CurviLoftSpline.rb seems to go in an endless loop here. No result.
Tried the previous one, works ok. -
@mariocha said:
Some feedback; the "new" CurviLoftSpline.rb seems to go in an endless loop here. No result.
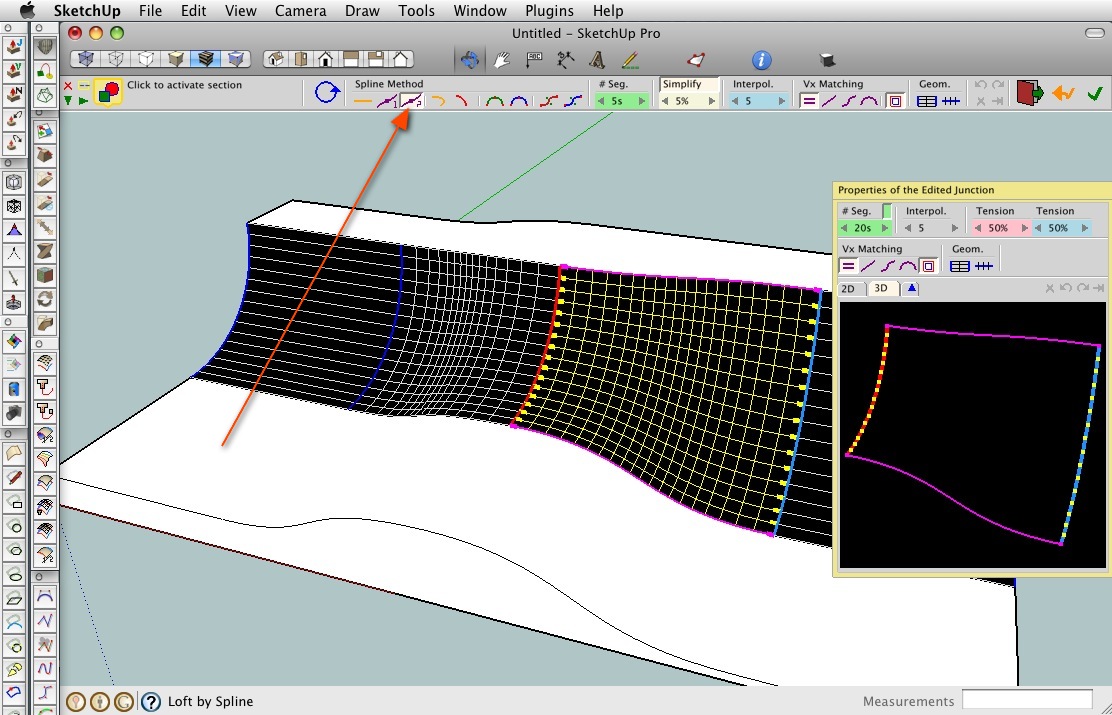
Tried the previous one, works ok.the newly added method is the one with the arrow pointing to it in this screenshot.. i dunno, i'm not experiencing any looping with it.. maybe upload a .skp showing the problem?
-
Jeff, how do you dock Ruby toolbar buttons to the main toolbar in OSX SU? When I looked at it on my Mac I thought I only had the native buttons available...

-
@thomthom said:
Jeff, how do you dock Ruby toolbar buttons to the main toolbar in OSX SU? When I looked at it on my Mac I thought I only had the native buttons available...
right click on an empty space of the toolbar then choose 'customize toolbar'.. all of your icons will be available and can be placed up there individually.. (this goes for all osx apps btw)
one thing to note when doing this in sketchup:
when you quit sketchup, your custom toolbar will be saved however, when you relaunch, only the native google icons will be up there.. ⌘N (File-> New) will give you a new window and your custom layout with 3rd party plugin icons will appear..
i think it's something to do with when the icons are initialized.. the google ones happen during launch prior to the window being shown whereas the plugins folder is accessed later during launch ?[edit - i should note as well that google's sandbox tools exhibit the same behavior at the 3rd party plugins so it's not as if they have a certain snip of code allowing them to be accessed earlier.. it's the standard google toolset, views, render style etc.. that will remain upon a fresh launch..
also, if you want to remove icons from the toolbar during customization, just drag them off the toolbar and drop them anywhere else on screen.. they'll poof]
edit2 - oh, here's a post from last year where i made a video showing the customization process:
http://forums.sketchucation.com/viewtopic.php?p=162762#p162762 -
And Jeff, deserve a THANKS.
-
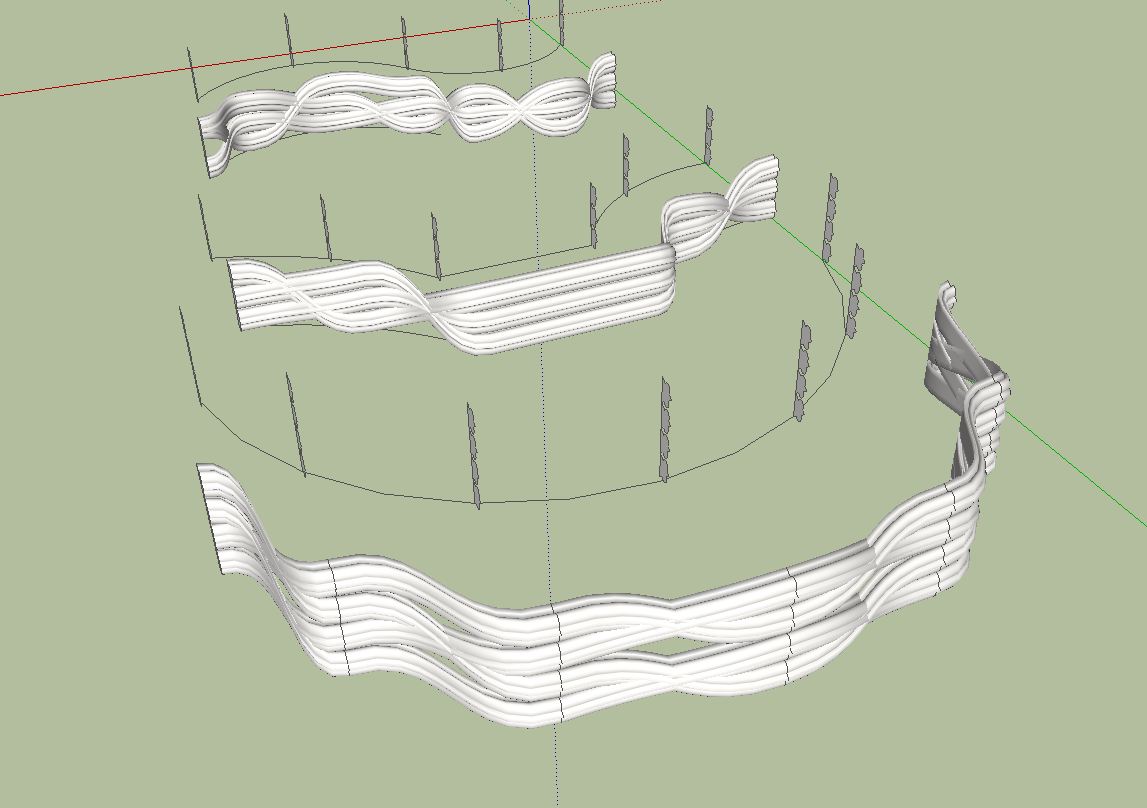
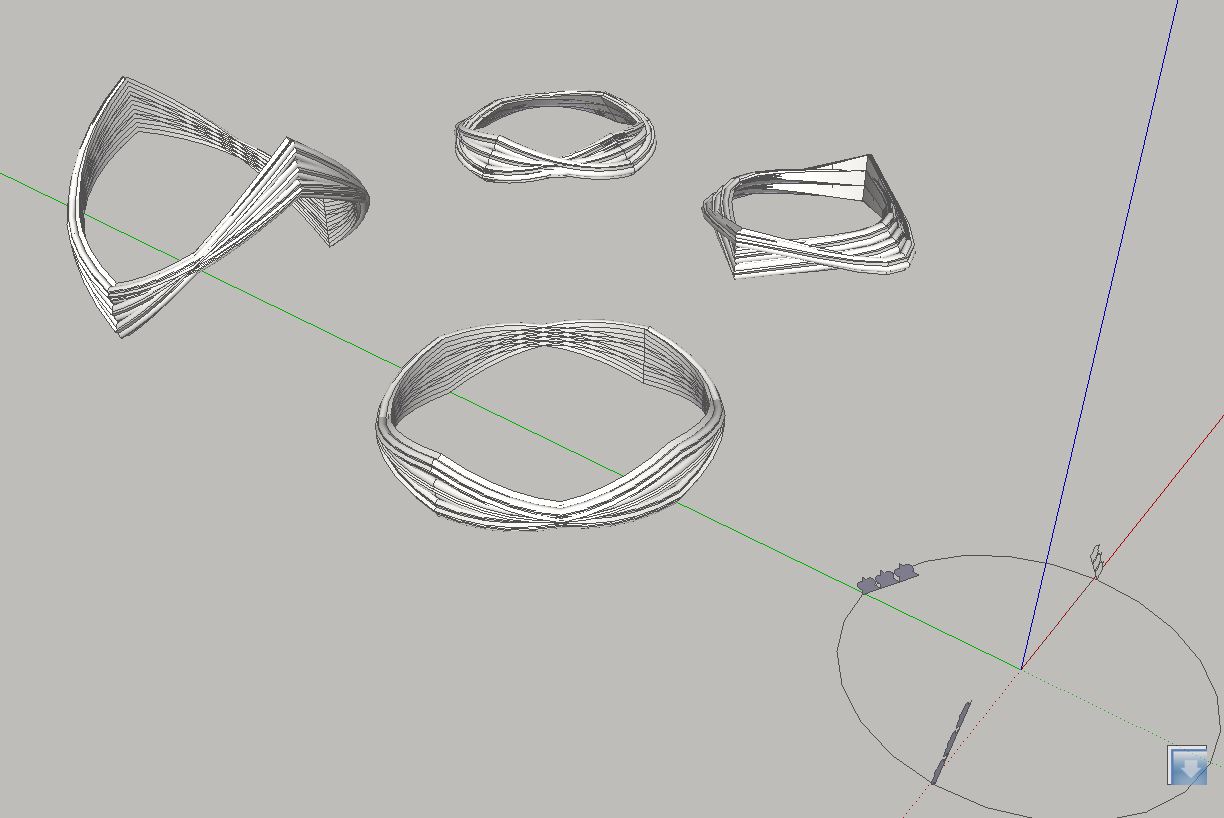
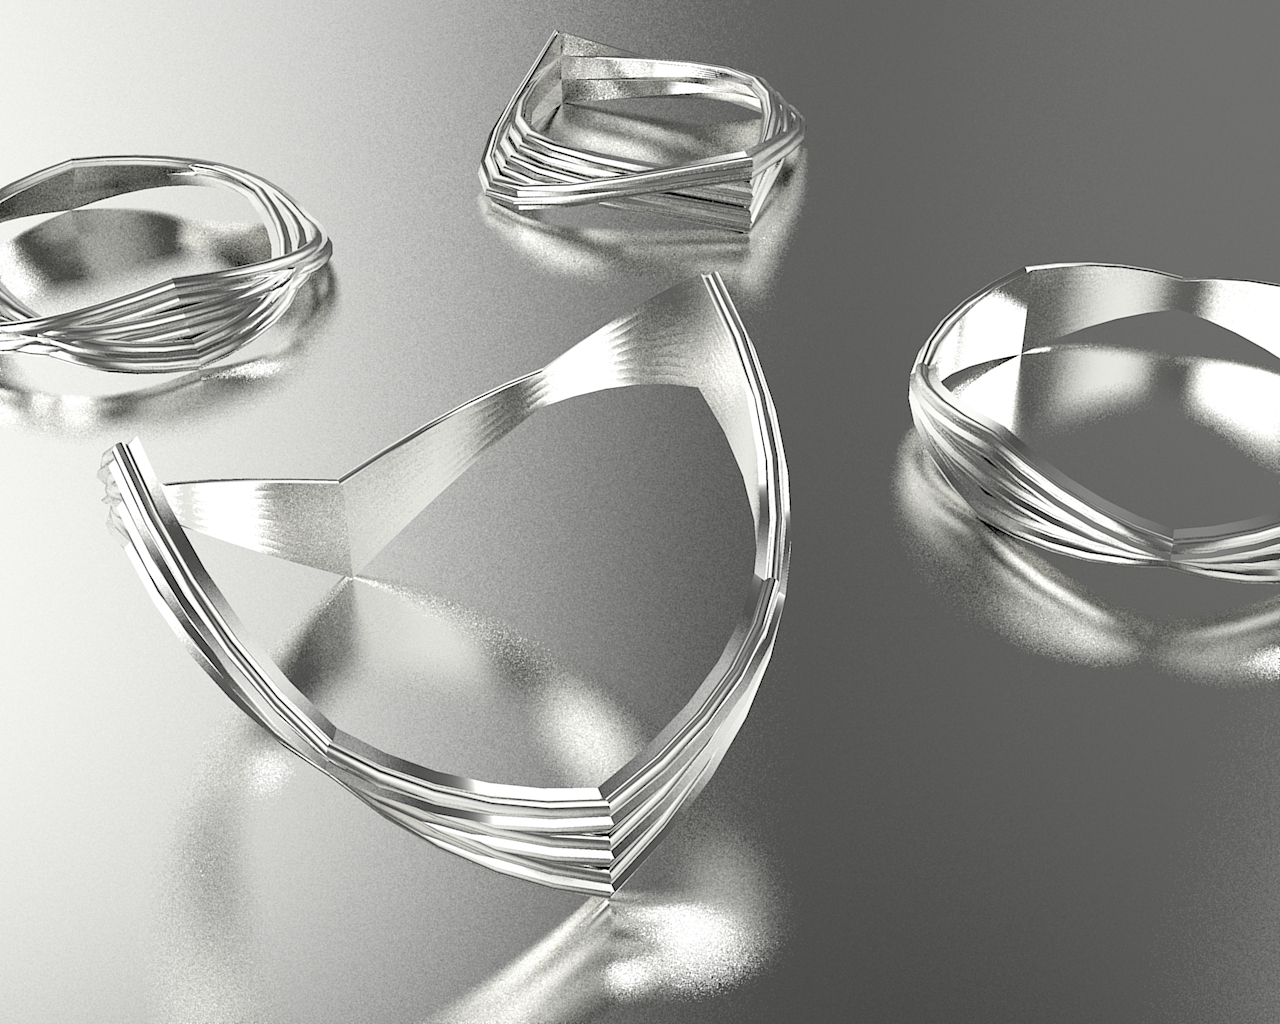
Hi Fredo,
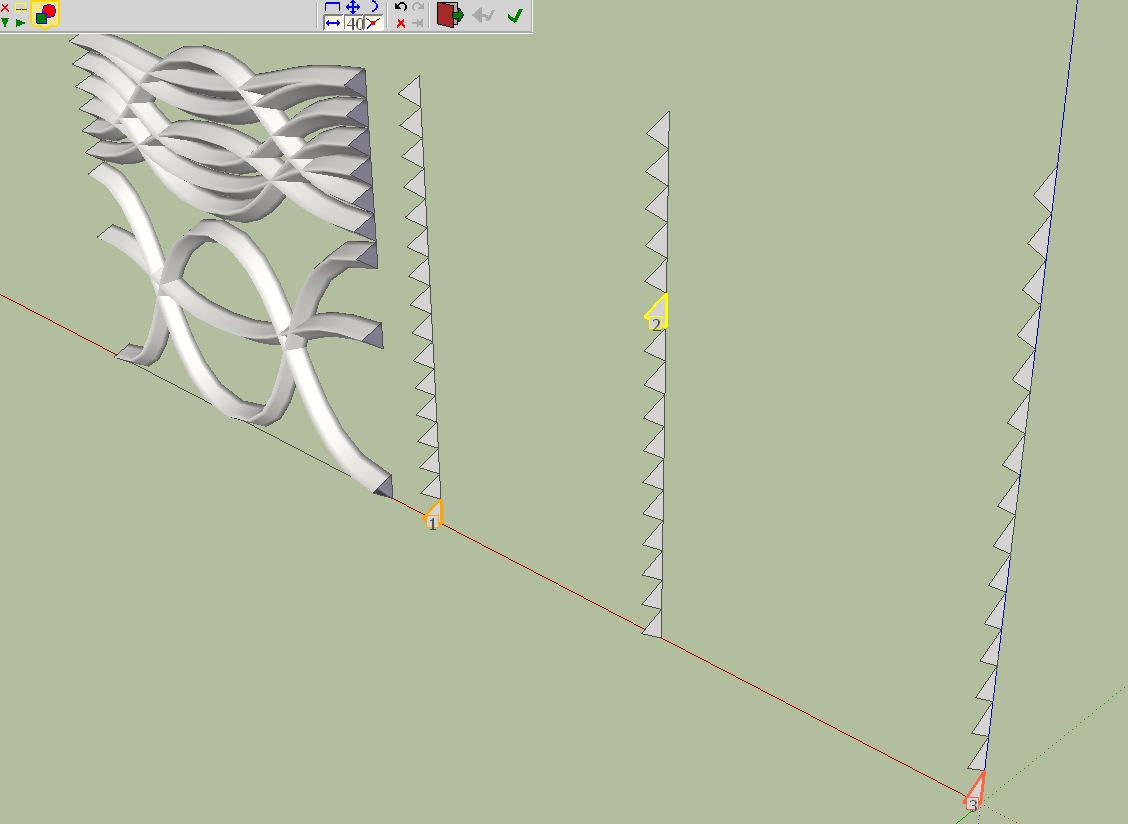
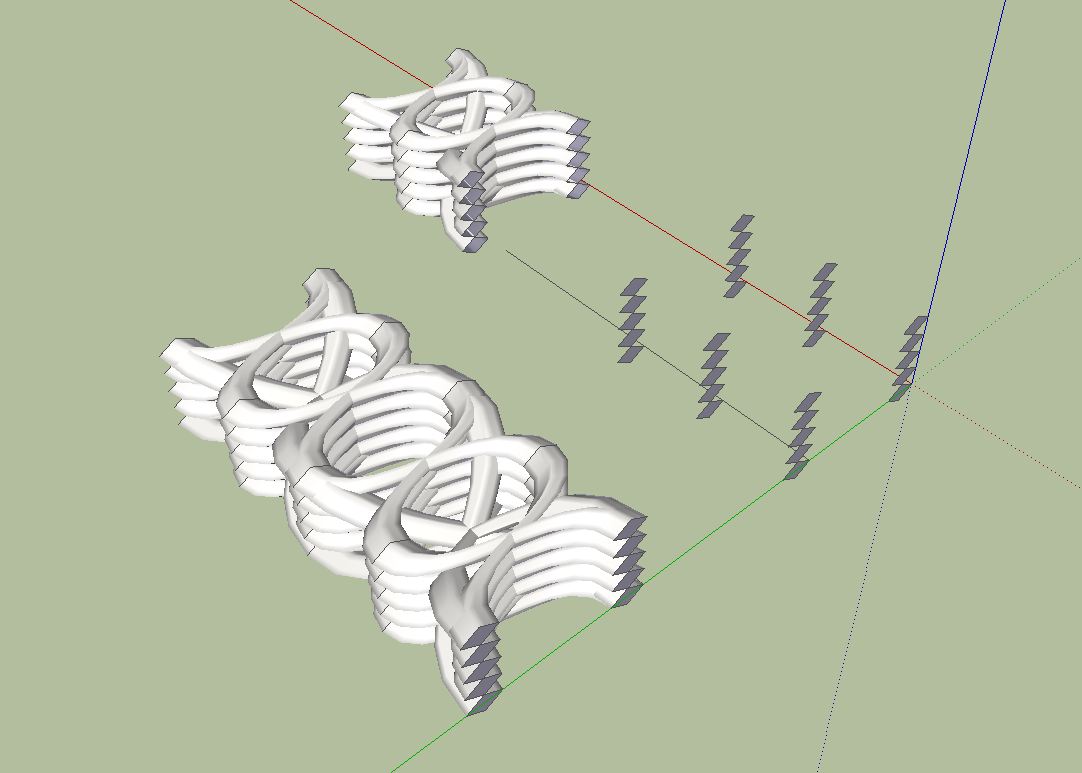
Anyone can do that, it is very easy. Draw any profile you want, make it a group and copy it several times as shown in the picture below. A further possibility is to move the profiles horizontally or vertically. So you can then try all possible combinations with Curviloft. The imagination knows no boundaries. The possibilities are endless.
Charly
-
@charly2008 said:
...Anyone can do that, it is very easy. ...The possibilities are endless.
Hey thanks a lot for the tip Charlie.
I still got to figure out how you achieve such a nice interior surface thought. -
@mariocha said:
Some feedback; the "new" CurviLoftSpline.rb seems to go in an endless loop here. No result.
Tried the previous one, works ok.Does it happen with a specific model or all models?
Which tool do you use?Fredo
-
@unknownuser said:
Does it happen with a specific model or all models?
Which tool do you use?
FredoLet me investigate a little more, I did not put enough time on it yet to be specific.
Maybe tomorrow in the plane to Basecamp.
I'll keep you in touch. -
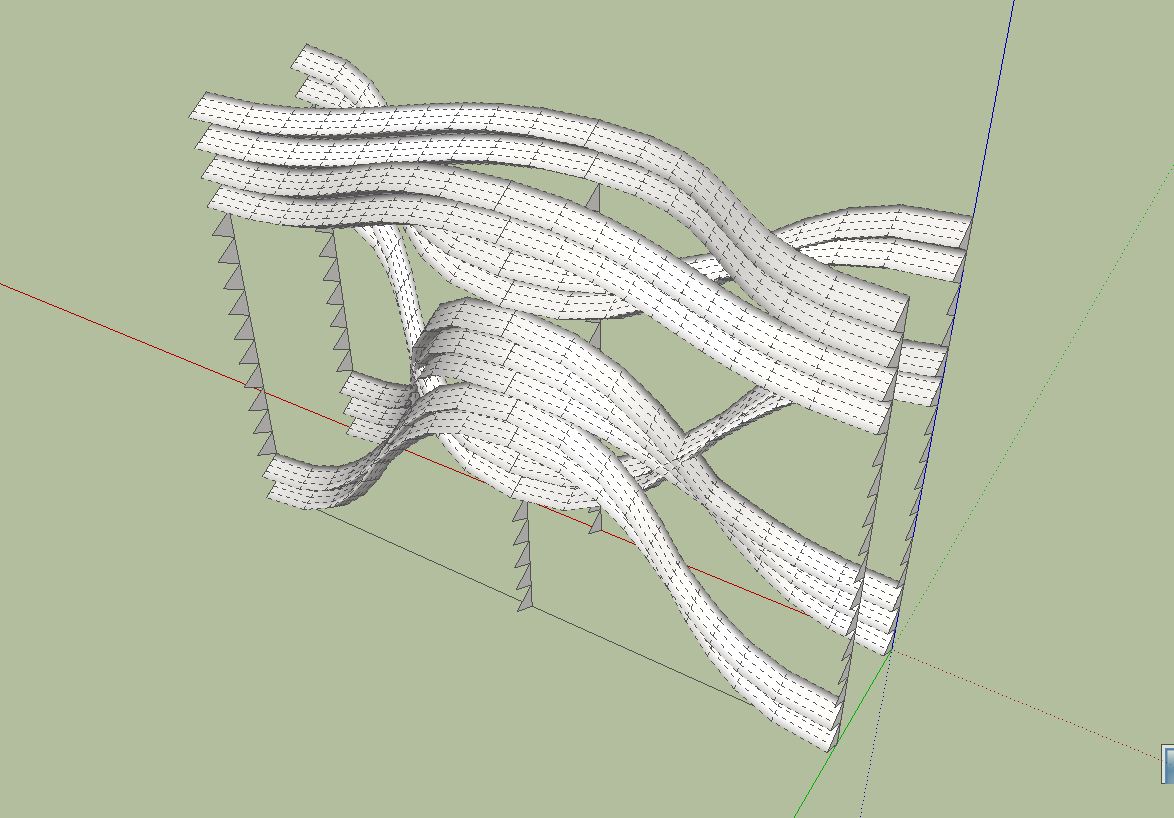
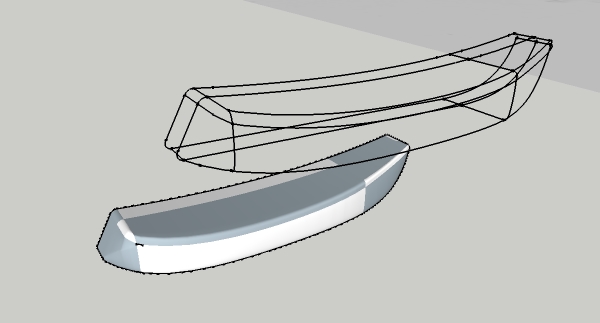
Minor issue I've discovered, and perhaps it's caused by my improper application of the plugin. I get reversed surfaces between rails/curves that make up the object to be lofted. I wouldn't mind so much, except that the surface does not remain divided by the rails, so I have to flip a few hundred faces by hand for each reversed area using "view hidden geometry" to make the faces selectable. Example of the output below. Anything I can do or suggestions as to how to prevent this?
Thanks big time for the plugin, it's really put SU on a whole 'nuther level. I'm finally able to do some modeling I really didn't know how to do in SU before.
-
@escapeartist said:
Minor issue I've discovered, and perhaps it's caused by my improper application of the plugin. I get reversed surfaces between rails/curves (...)
Double click on the group for edit, select the surface, then right click and select "orient faces".
Daniel S
-
@escapeartist said:
Minor issue I've discovered, and perhaps it's caused by my improper application of the plugin. I get reversed surfaces between rails/curves that make up the object to be lofted. I wouldn't mind so much, except that the surface does not remain divided by the rails, so I have to flip a few hundred faces by hand for each reversed area using "view hidden geometry" to make the faces selectable. Example of the output below. Anything I can do or suggestions as to how to prevent this?
[attachment=0:pvmj8oh0]<!-- ia0 -->seat.jpg<!-- ia0 -->[/attachment:pvmj8oh0]
Thanks big time for the plugin, it's really put SU on a whole 'nuther level. I'm finally able to do some modeling I really didn't know how to do in SU before.It should orient faces to be all the same...
BIT even then this isn't too problematical...
Temporarily View > Hidden Lines 'On'.
Edit the Group.
Select one face that is correctly oriented, right-click 'Orient' - all connected faces as flipped to match it.
Done!
[Perhaps View > Hidden Lines 'Off' if desired] -
@tig said:
It should orient faces to be all the same...
BIT even then this isn't too problematical...
Temporarily View > Hidden Lines 'On'.
Edit the Group.
Select one face that is correctly oriented, right-click 'Orient' - all connected faces as flipped to match it.
Done!
[Perhaps View > Hidden Lines 'Off' if desired]Thanks for the reply. I suppose that this is one of those things in the "D'Oh! Thread" that I missed.
 Yet another tip that would have saved me tons of time had I known about it before!
 -
As advised by Daniel and TIG, you should use Orient Face to get them all oriented the same way.
It is on my list to improve the generation of geometry for Skinning so that all faces are oriented correctly. It is actually not so simple, because one portion of skin can be connected to more than one other.Fredo
-
Fredo
I'm sure you've already found it... but in my similar scripts they can 'orient' faces consistently using my 'orient_faces' method [that is published around here somewhere and incorporated in modified forms in these tools]. As long as the created edges have no more than two faces you can consistently 'orient' them all to match even if the mesh 'flips' at some points - they might ALL be made the wrong way round compared to what the user expects... but then a simple reverse fixes them all in one go [I also do tricks like assume the topmost face faces upwards and use that to orient the set from - but that's not foolproof either... open shells might concave OR convex!]
Hello! It looks like you're interested in this conversation, but you don't have an account yet.
Getting fed up of having to scroll through the same posts each visit? When you register for an account, you'll always come back to exactly where you were before, and choose to be notified of new replies (either via email, or push notification). You'll also be able to save bookmarks and upvote posts to show your appreciation to other community members.
With your input, this post could be even better 💗
Register Login


Advertisement