thanks guys for your comment. hope could learn more.
Oops, your profile's looking a bit empty! To help us tailor your experience, please fill in key details like your SketchUp version, skill level, operating system, and more. Update and save your info on your profile page today!
Urasik Extensions | Lots of new extensions to check out Learn More
N
Offline
Posts
-
RE: Office building
wow thats really big. one of the huge render image i have seen

-
RE: V-ray renders
i always love to see your render stefan, weather here or there.
-
RE: Indigo Competition entry : "Imaginary Friends" [nude]
wow good concept and idea. close to reality those models. and gee the skin texture is fantastic.
-
RE: SketchUpBBS-SketchUp model competes to practice
cool and beatiful model of tank bienhai

-
RE: Need help: VRAY Techniques
Ok Be mindful of these tips.
- Do not use QMC. QMC calculation is the most exact yet the slowest.
- When using IR engine (say-5, -3) calculate faster but be aware of light leaks.
- when using IR engine, set up at least one Vray rectangular light (invisible) beyond the camera with low multiplier. This will act in certain way as fill light but at the same time areas will smoothen your image. (see my WIP tutorial at asgvis on this). Edit: adjust also in order to prevent artifacts set the QMC adaptive sampler to 0.85.
- Use Light Catche as your 2nd engine. the Default 1000/ samples .02 size/ make it 600 and samples 5 for quick review (a bit blurry but quicker) for final use .02 size and higer samples . Be sure you tick the glossy box something.
- Now its always advisable to save your IR and LC and reload them. so if you rerender again your image, vray wont calculate those things anymore and it will go direct to rendering. Also saves on the memory used in the final render process...very advised for HiRes
- Under global switches, turn off default lights and hidden lights. Its better always to override sun's parameter.
- Image Sampler... Adaptive Subdivision is often quicker than Adaptive QMC (most of the time, but not always. Adaptive subdivision with -2,1 is very quick.
- Antialiasing off. jsut use it for final render. If you are using Adaptive subdivision of -2,1, antialaising on is still quick.
- NOW this is the culprit... QMC noise threshold.. the lower the noise threshold the longer render time.. use default for test. final is may .005-.007
- Lighting. the more lights yo have the longer render time
- Blurry reflection renders longers. the higher subdivision the more longer time
- Shadows... more subdivision more smoother, but longer render time
- BUMPS are easier to use, takes shorter time to render than Displacement. jsut use displacement if necessary.
- For final render, re-start your computer. this clears up memory from all of the different programs that wind up running. Damien of sgvis suggested even, if you really want to save as much memory as possible, then go through the programs that are loaded at startup and remove the ones that are unnecessary.
- Alway purge your file. all thsoe extra files takes space of yur memory, Damien added explode as many components as possible. Nested components might cause issues, and components also take longer to work with when reading the scene from SU. (dont explode the faces you want to apply displacement, displacement wont occur) displacement will only occur on only on Group objects or faces)
- Dont use caustic. calculation of caustics takes longer
- Glazes. avoid using double glazing.. cause refraction will be calculated many times. (But if you use sometimes single glaze, refractions are not really correct)
- Translucent materials takes looooooooooooooooong time to render.
- turn off sketchup shadow, outliner and all those extra windows in Sketchup during render time. (outliner is a big culprit)
- Use track mouse during render time. (Only test an area that you are concerned about- dont overdo it) point your moude to the area you want to see first. it will definitely save time.
there are some more of course.. but i think 20 is enough.
Now again its render time against quality. If you want super quality image, it will really takes longer render time.
-
RE: Selection of my components
thanks for sharing, i love the bus station.
-
My SU organic models
the only way to improve your weakness is to tackle it. This is true personally, that is why i have to gather all the organic ruby plugs available to develop my organic modelling in SU.
Here is my first one "PATO". my daughters love it. I have added displacement in Vray.
Modelling using Smooth and Subdivide.
-
RE: Oriental + African
@solo said:
Nomeradona,
Great to see you posting again.
I have been trying to get the ball going with a displacement ruby for SU for a few months now, I dropped a seed about a month ago and I believe there are one or two Code masters working on it as we speak (hope)
I understand that such a feature is not entirely practical for SU because of it's lack of poly support but for an accent foreground model it certainly would be a feature I would use regularly.
The image below I achieved using Vue 6, I used the displacement feature and mapped my image then baked it to polygons and also baked the image to the polygons so that when I export and import in SU the texture will match the geometry.
I used Deep Exploration to convert the .3ds to .skp (It works better than importing a .3ds file directly)
The file size with texture came in at 1.8mb a little high but looking at the hidden line image you can see the level of detail and I could have exported a lower res version if need be.

i can post now because its our vacation in the school. but the school will start soon so assuredly it will be busy again. so jsut really end up in reading many of your post with even less time to answer them during free time. i think i missed a lot before with modellign after all these rubies for organic modelling came out. i have bought MOI and even dont have enough time to study it. now i have this smooth and subdivide, i understand although its easier you have to sit down really how those iterations work, in order to have much better control of it. but the question in shall i have time.
Its good news that we have codemasters who are working with displacement. Oh gosh your workflow solo is really efficient. I did not realize the Deep Exploration convertion power. I heard it but to be honestly i dont really know what is it. That attachment is really nice, even how you bake the texture.
-
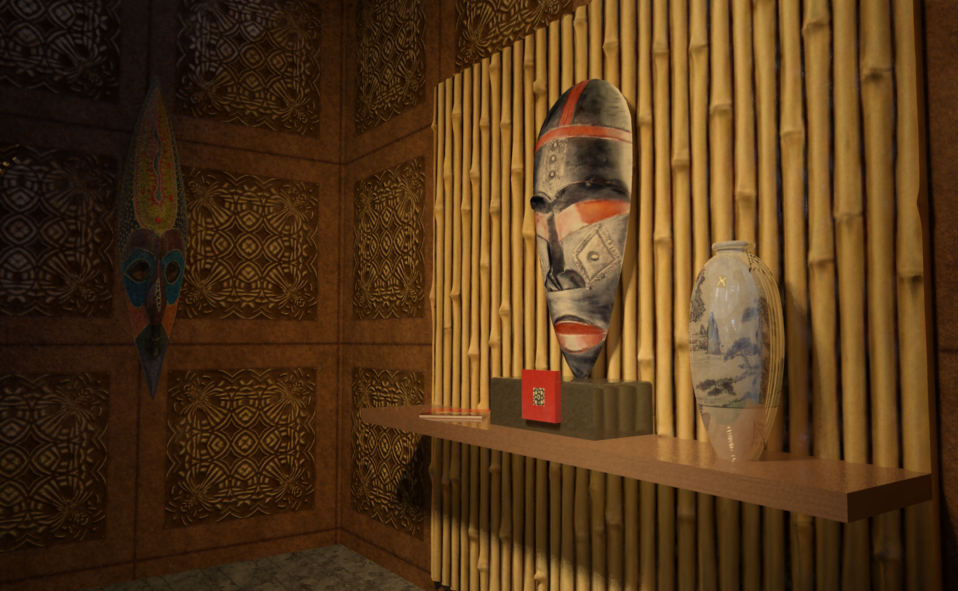
RE: Oriental + African
another one. the chair was not mine. a bit contemporary but with oriental touch and african fabric.

-
RE: Oriental + African
thanks bien hai.
stefan, what i did is i use photomatch technique, during modelling. so after modelling you will see when you apply the texture it fits. -
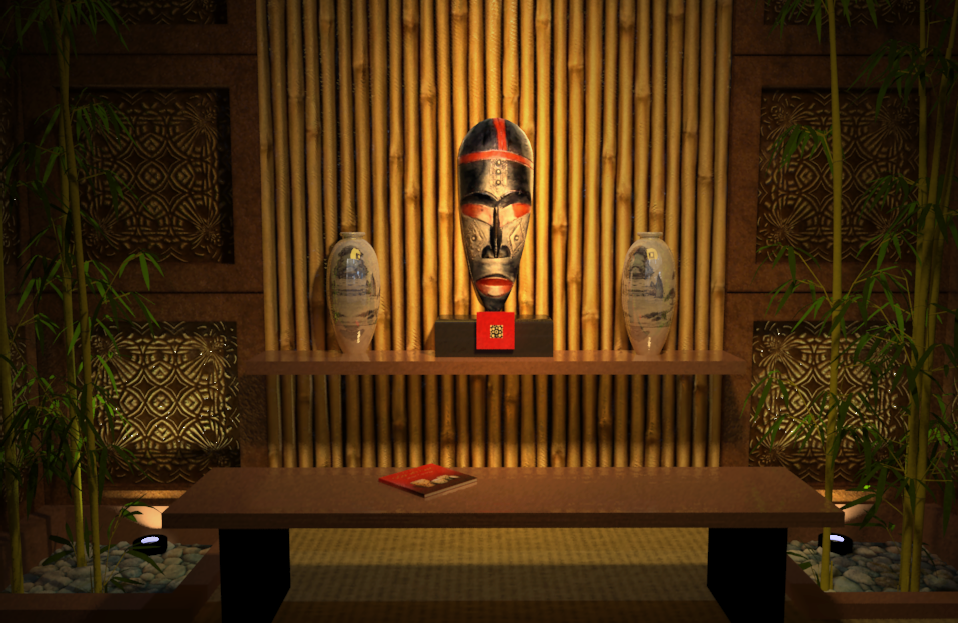
Oriental + African
i know my modelling was still lagging behind, but with all this new rubies, organic modelling is much easier. this is a continuation of my worhsip series and this time is using mask as main feautures.
I modelled these masks using soap bubbles ruby. i am still struggling with smooth and subdivide with precision control.. still need more practice.
the bamboo is not a model but its displacement in vray. i have done my displacement map in vray pixel by pixel and still im not satisfied in controlling the heights of white to black. Is nt really good to have a displacement ruby for sketchup. where you will apply a displacement map and this ruby will identify the heights, and build up eventually the mesh for you. WHAT, Didier hope you can hear me.No post processing. direct vray output
Nomer

-
RE: Form and function furniture
beautiful solo, who knows some manufacturers will see this and you can have a patent with these.

-
RE: Infinity pool
@kwick7 said:
I think thewatercolor style and actual rendered image is, by far, the best. Great work!
thanks you like that one.
-
RE: Infinity pool
@unknownuser said:
Nice render, only thing is maybe some table reflection in the water, as the legs look a little cut off.....
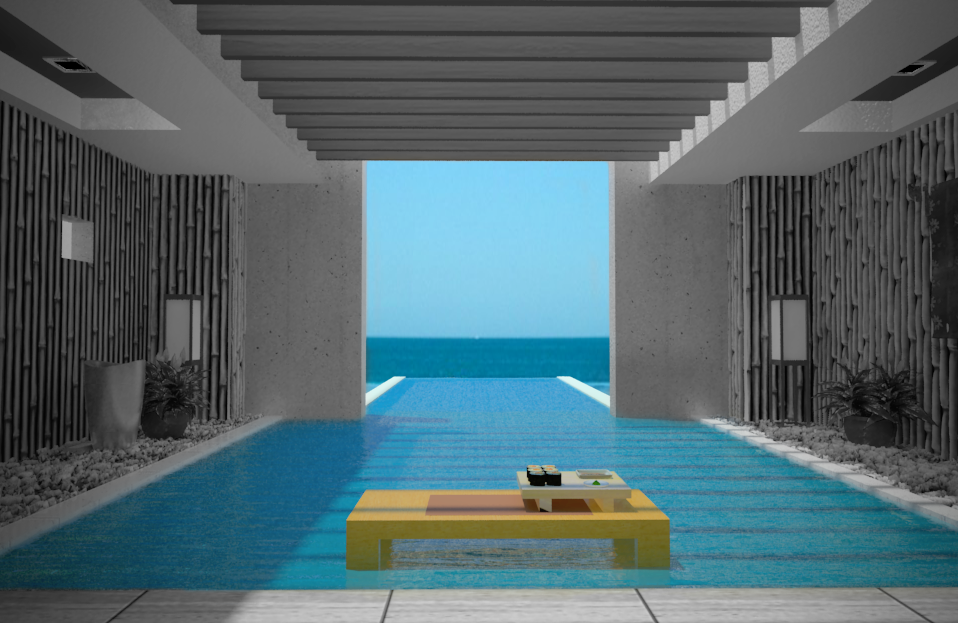
hi james thanks. indeed the legs of the tables seems cut off. any way here is my actual images on how to combine SU styles and rendered images. then using photoshop (not the with blending modes) but rather using Mask and opacity.
image applied with desaturate and mask to reveal the colored areas
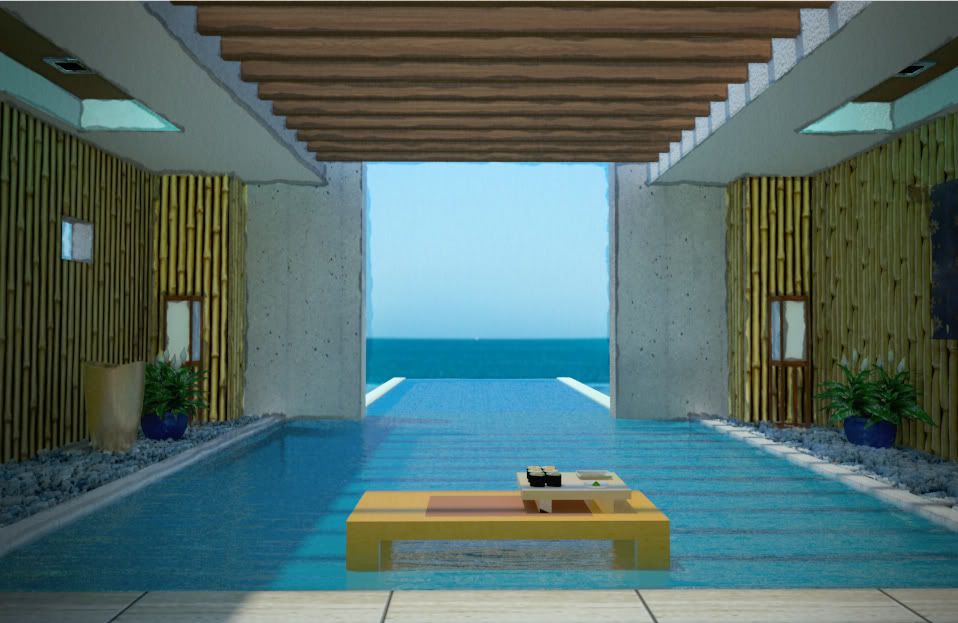
using watercolor style and actual rendered image
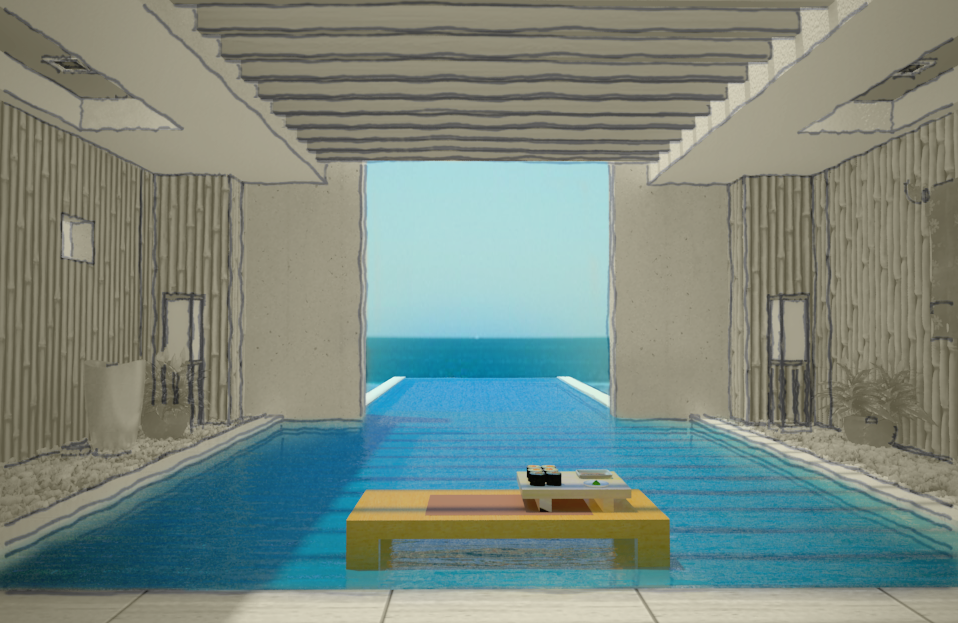
this one is using the above with sketchy lines.
-
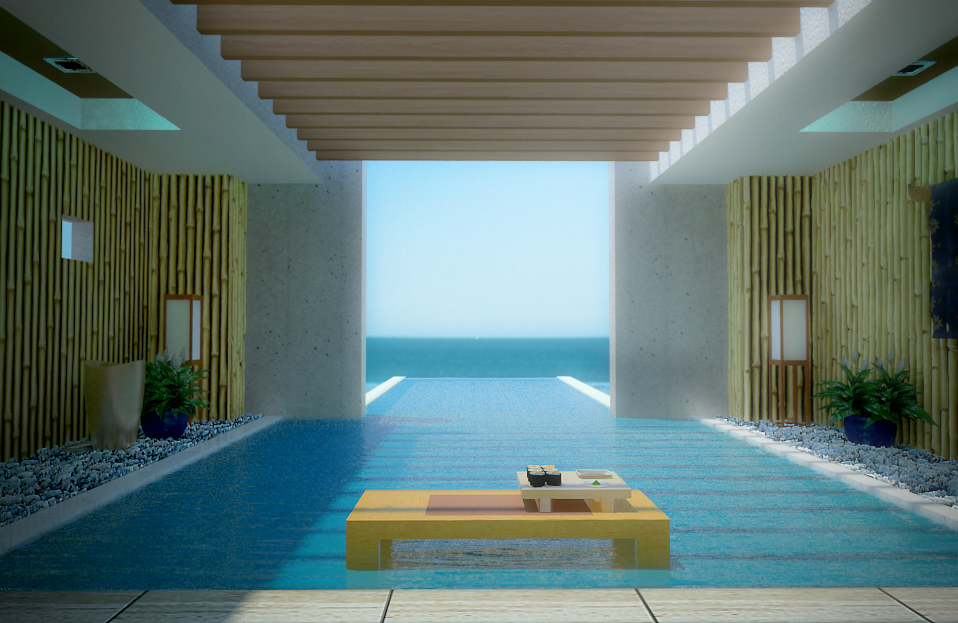
Infinity pool
just want to share this one. Sketchup. rendered in vray. i have used diffuse light filter for the bloom.
-
RE: Day and night render of a dwelling - Podium
i especially like the night scene. the amount of dark slider you use in the shadow setting was nice.