I didn't reply here because I thought it was out in the main forum, I'm getting confused.
I'm not sure I want to be part of a forum that has a use for this 
I didn't reply here because I thought it was out in the main forum, I'm getting confused.
I'm not sure I want to be part of a forum that has a use for this
Yes, it is best to set it to show fully what you need, and if you are seeing Tilde in the measurements then it is telling you that you don't have the display settings fine enough for it to display accurately.
Be careful of working with such tiny dimensions, while sketchup is accurate it does have a tolerance at which it can see vertices as being the same and it can fail to form faces.
Sketchup is accurate, even to 6 decimal places of a mm. However it will round the display precision if you tell it to.
In Window/Model Info/Units you can change the display precision, if you give it 3 decimals you should see correct dimensions.
I'm not altogether sure why you find it easier in 2d but you can simply work on a copy, don't make it unique, and any changes you make will be reflected in the 'positioned' one.
You can't just go back to 2d, so the real question we need answered to give you an answer would be, What is the end result you are after?
This tells us what options would be appropriate.
For example if you want a 2d floor plan you can set the view to top and camera to parallel projection and you'll see a 2d view of what you have.
But if you want a 2d face then you could perhaps select the face and its edges the shift select the rest and hit delete, this would leave you with just the face.
So what is it you need? Show us an example. attach a model.
No, it looks like that isn't the issue then.
You'll find the insider program on the windows update Page.
Are you using an insider program beta win 11? Many reports of SU failing with that.
I've been doing a lot of 2d work lately in sketchup simply as a scene setter for layout floorplans. I've been avoiding using my spacemouse as it tends to orbit when you really only want pan and zoom, and sometimes you slip and it is just off standard view. If you're a space mouser you'll know what I mean by it feeling awkward if you aren't using it.
Suddenly dawned on me I can turn off the rotate option of the space mouse and happily zoom and pan to my hearts content without getting out of alignment. D'oh D'oh D'oh
I felt so stupid I had to dig up this thread.
Feels like spam posting an ad for your commercial tutorials in the tutorial section rather than posting a tutorial.
Some really lovely modelling at the fundamental level. Beautiful.
When you feel that 'the need to add artificial light to produce photo realism' is ironic you may have missed the reality of a photo realism.
Photos are 'artistic realism', they use reflectors and lights and all sorts of trick to fake a believable reality. They don't show the lights and other mechanical helpers.
So think about what you want to achieve in you photo realistic render. Is it perfection of reality or a rendering that looks perfect.
You need to be aware of light sources and their direction but you can add light without having to show the mechanics of those lights if you do it carefully.
So, going back to Rich's comment about the dark hole at the front door, bring light into it but don't make it look like you bolted a flood to the ceiling and screwed in some floor lamps on the curved wall.
There is realism and there is Photo realism. and never the twain shall meet.
It appears I am not understanding what you want to achieve, so I'll leave it to others.
A simple way to look at it is to create a footprint (say the concrete slab) for the architectural model where you want it and make that a component, use Save as from the context menu when you right click on the component, either in the model or in the component window. This allows you to save the component to a place of your choice.
Then if you open that model, it will open without the wrapper, you will be inside the component ready to edit. Build your house but don't move the geometry away from the axes as that is the locator for placement within the other model. Save your changes.
Go back to the original model, once again right click on the component and select reload, navigate to the edited model. This will replace the 'footprint' with the now edited geometry.
So the trick is the position. The axes in the original component is where the reloaded geometry will be placed. As soon as you import or anything like that the position is changed. You can choose to move the component within your original model and it will continue to reload wherever you put it, but keep in mind that if you move the geometry way from the axis when editing the component model, it will move it in the same way in your original.
Perhaps you just need to learn about components and how to make ones that cut a face.
The only way I can replicate your issue is by selecting too many faces and the incorrect finishing.
I suspect the material, the blue in particular, is hiding your error and you are selecting too much. Or simply expecting something that doesn't happen.
You actually don't need JPP if you just want to thicken the frame, as I've shown here.
Make sure what you are selecting when using it and that you have the Finishing set to produce both faces.
And as Rich mentioned, you should be grouping or componenting things as you go or you'll run into many errors.
Spot on with the 5 minutes at least, the rest is just hearsay.
Looks like you've picked the 5 minutes when Dave's asleep to ask.
My guess would be he has used Thomthom's Draw Bounding Box to create the guide geometry.
https://sketchucation.com/pluginstore?pln=tt_draw_bb
As for colour and size of the dimension text, you can set your default for that in Window/Model Info/Dimensions
Or adjust them after the fact in entity info, individually or as a selection.
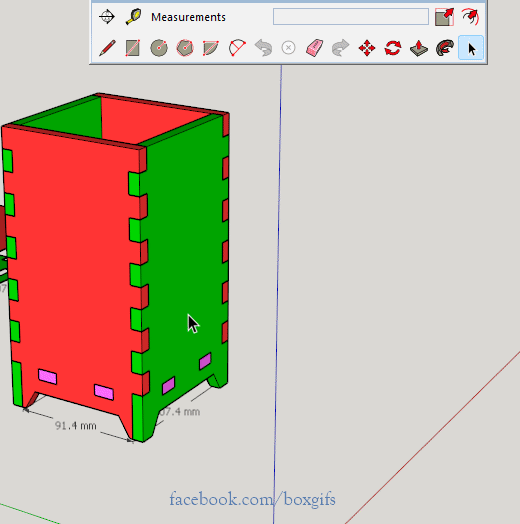
Something else to keep in mind with 3d printing.
Different material will shrink different amounts, so the finished size often depends on what material you are using.
It is often better to make things slightly bigger or small and manually adjust the size if you need a perfect fit.
For example sanding down an oversized plug to fit, or drilling and taping a small hole to the right size. By printing a blank hole you get a wall thickness that is drillable, rather than drilling through a 'solid' which is usually filled with a network of fill.
Your geometry is very slightly skewed, I believe probably due to having length snapping enabled.
Go to Model Info/Units and turn it off in all your templates.
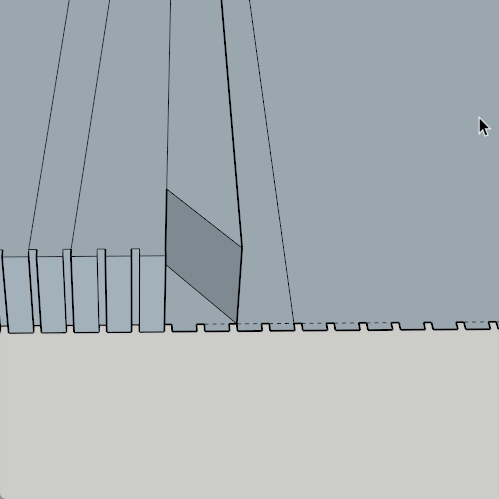
Turn on hidden geometry and you can see the issue. You have an soft edge running along the notches.
Remove those edges and it will be a single face.
Whenever you get that error turn on hidden geometry and look for the joint.