ERROR: Unknown plugin identifyer.
Hello all.
getting the error above on a new page when clicking on purchase license, only on ThruPaint.(Clicking in the same situation on jointpushpull license purchase will lead to a new buying page)
any helps?
ERROR: Unknown plugin identifyer.
Hello all.
getting the error above on a new page when clicking on purchase license, only on ThruPaint.(Clicking in the same situation on jointpushpull license purchase will lead to a new buying page)
any helps?
Thank you guys for all your comments ,
I decided to edit the previous model , and using "weld" plugin makes a huge different on editing , and using soap and bubble plugin is very useful to create ceilings .
@pbacot said:
"orient faces" may help a little but it looks like you will need to use "reverse faces" What are all the interior faces? Are you showing interior scenes? if you don't need them they are interfering working on the outer wall skin anyway. The easiest way to select the uppper wall edges is to isolate the skin into a a group that is just a clean ribbon of the outer surface. Use the smooth[-soften window to soften the vertical edges. Then you can select the top edges indpendently more easily.
thank you so much pbacot for answering ,
the interior faces created when I was trying to extrude the non-flat face to create the walls , and as they are all separated I can't delete them all,
smoothing the edges worked great , but the lines are still separated but now I can select the hole wall and deselect the wall , is that what u mean ? this would help 
@pbacot said:
I'd try intersect faces to make a hole and jambs. You can use the jamb edges for a face to make windows and doors too.
First select a face that will be the orientation of the door. Extrude it, then extrude a perpendicular face (clear of the wall). Draw the door shape. Push pull back through the wall surface. Intersect faces "with context" and erase what you don't want.
okay , now this is one of the big problems using fredo and extrusion tool,
none of shapes are solid and I can not use intersect ! I know they are not solid because they are not a complete closed shape , but this is what the plugin makes , so is there anyway I can solve this problem ? or I am in complete dark knowing how to use SU 
Thank you so much 


Hello ,
I am working on a model which is about 160,000 sqm (400mx400m) , I designed an international exhibition , I used "Extrusion Tools" and "Fredo6 joint push pull" tool to create the body of building .
But , now that I want to work on details on the walls or ceilings , got lots of problems cutting surfaces or putting materials on , or finding edges of a wall , and etc. .
One of the main problems is , selecting edge of a wall created with extrusion tool . I've read some posts about how it works , but it was so difficult to work with , considering how big the model is and having so many walls and ceilings makes my modeling method useless . I have to find an easy way to do it .
The site is like a hill and the form is very curvy , and this combination makes modeling so hard for me .
I have lots of questions but I try to ask major ones ,
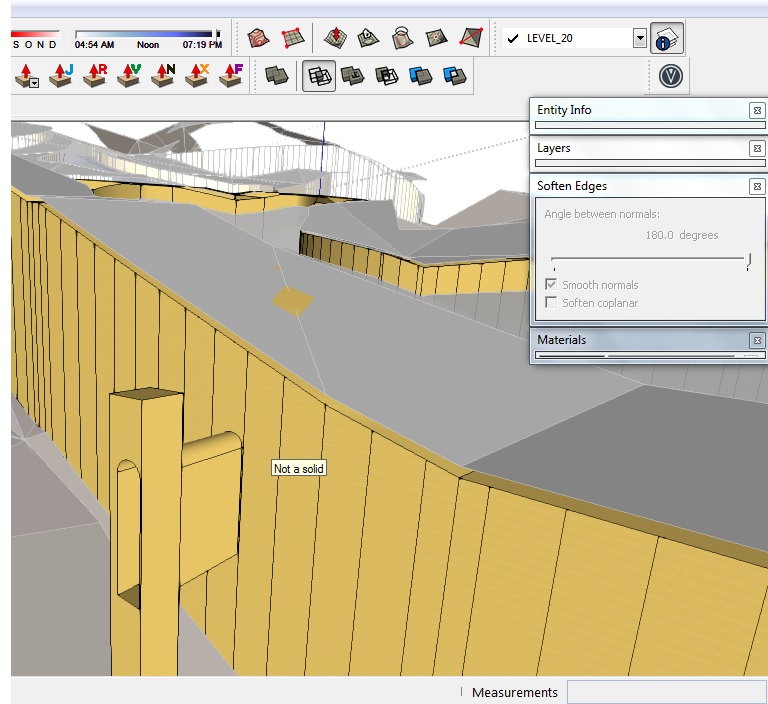
As you can see in 1.jpg I'm trying to select the top edge of walls to create ceilings , but all lines are separate and its almost impossible to continue selecting like this on the hole modeling process .
even if I select all the edges with least errors , when I use sandbox contour , It doesn't give a good result . Even one single wrong select will make a bad result . and this happens because there are too many single separated lines caused by extrusion tool or joint push pull tool .
next question is , how can I cut a non-flat surfaces to place some door or window on it ?
another question is : I have to make a 3dsmax export to render it from , because my render guy do not know SU very well . I have no idea what will happen for surfaces I created with fredo6 extrusion tool in 3dsmax . and don't know if its possible to put materials on curved surfaces , in 3Dsmax instead of SU to get better result .
and lots of more problems if anyone likes to hear 
P.S : I am going to make a new model and start it all over again , do you think it's a good idea ? Or suggesting to work on this model ?
And I have only 6 days to make everything done ! including modeling and rendering and etc. .
I've posted the SKP file saved in SKP8 .
Thank you guys for helping me 
Form sent to skethucation 1 saved skp8.skp
@valerostudio said:
Plain and simple - Warehouse is full of crap. I would open each Warehouse file independently, clean as suggested above, try to render it VR by itself and ensure there are no errors. Also make sure you are the latest 2.0 release as there have been issues in the past with materials missing and then renders go blank.
Thank you valerostudio 

@jql said:
Well for your level Kerkythea is definetely worth the try! You'll improve the level of your rendering and won't notice a difference as Kerkythea has everything you'll need in a medium term. Other software packages, however have so many more features that they can't compare.
Most of them like Vray, are competing at another level. I use Thea myself and it's great! But there are so many excellent choices...
Explore Kerkythea, and when you feel the need for more explore every option available...
yeah , that's what I need , thank you for your help . I started the project , maybe make some test render in couple of days 

I deleted all trees in my model and it is totally smooth now ! I think as Cotty mentioned it is the main problem , using 2d trees should solve it 
Thank you again TedVitale_CG 
I tried using kerkythea for render and it was good , I mean it was very easy to use , can I use it instead of v-ray ? What do you think about this software ?
@jql said:
Architecturally speaking, the buildings should be "proxies" too.
What I mean is that the building shouldn't really be there but, instead, just the building shell.
What I do is:
- Create a component with only outside faces of the building, including windows and doors;
- Rightclick on this "building shell component" and "save as" to a folder in your pc;
- This creates a sketchup file from that component in that folder;
- Open the landscape model and go to menu "file > import";
- Import the file you created in step 2/3;
- Insert it on the right place;
- Check if that model is smoother now...
Materials:

Normal | SketchUcation
3D SketchUp Community for Design and Engineering Professionals.

(sketchucation.com)
wow ... I think it worked , the model is smoother now . The building was component before and it was a shell also , but what just happened ? I'm curious 


Thank you cotty 
@tedvitale_cg said:
When ever you do decide to use Warehouse models always be sure to clean the model first. Purge it of un necessary layers and dump any useless geometry, like car interiors.
For trees, if you are not seeing them up close, use 2D face me trees, saves a lot of time and keeps the geometry light in the model.
Truthfully, to do a model of this scale you need to be using V-Ray 2.0 rather than 1.49. The new version of V-Ray supports the use of Proxies. This way you can have hundreds of 3D trees with out overloading SketchUp.
Thank you TedVitale , using 2D models instead of 3d is really useful , I start to find them online ,this will help a lot for making lighter model .
Unfortunately I have to stick to my vray version 1.49 . So using proxy is not my option 
And what about the materials ? I think default materials on Sketch-up are not what I want to use , is there any alternatives I can use instead ?(which is as easy-to-use as sketuchp materials)
And any basic tips that I should consider before starting the project ?
Hello ,
I am an architect . I want to start to make a model of a big residential complex (about 10-20 hectares) contains lots of villas and couple of apartments .
I import apartments models and landscape lines from CAD . I want to render some images by v-ray . I did one of apartments model , and put some sketchup material , and some (I guess) 3d warehouse trees and cars and etc. on it . The model goes extremely heavy and considering a big lag of my v-ray plug-in before starting a render (not responding issue) it takes more than 20 mins to see a preview on 640x480 size . There was no light , or v-ray texture or etc. . There was only skp materials , sun and shadow . But I have to say the file is heavy .
Any way , if this situation remains during modeling the whole site , It will be impossible to finish the job !
Is there any way that I can make a lighter model ? like using other materials or sth like that ? I've heard a lot about not using 3dwarehouse models cause they kill the machine ! but do not know any alternatives.
By the way , I do not want to make a perfect render ,and I do not know how to use v-ray very well (usually just click on render button or change some lights intensity , at best!) , I just want to show some good visions to satisfy the customer , and it has a 10 days deadline , so , not enough time to work on every details .
I am just about to start the modeling , so any comment would be so useful , any ideas about how to start the modeling and its process would be extremely valuable to me .
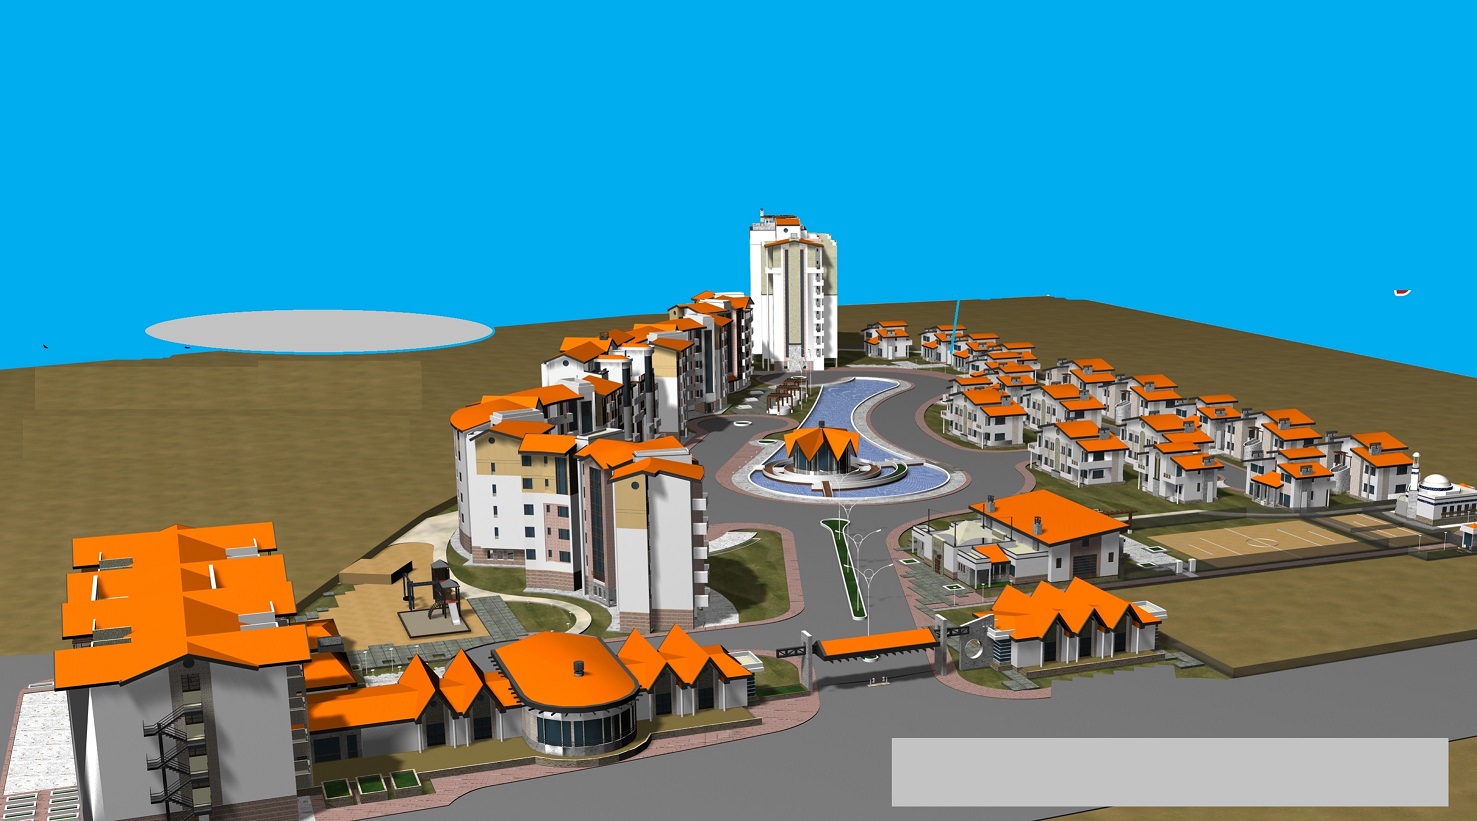
this is a preview of a 3d model which someone made for my costumer and did not satisfied him , so he ordered a new one to me :

So , the model has to be much better than it , (not the buildings details , just the quality of scene and materials would be enough)
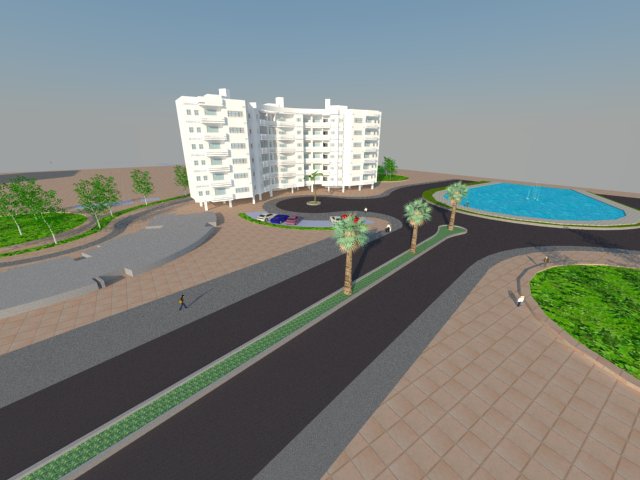
And this is the best I could do so far (only a part of site) using sketch-up materials , sun , and shadow , and v-ray render :

Any help ? Any alternatives for materials or 3dwarehouse files ? Any ideas to do it in right or better way ?
I use Intel Core2 Quad CPU 2.83 GHz / 8 GB RAM / Win7 64-bit / Sketch-up 8 / V-ray 1.49.01 / NVIDIA Geforce 210 Graphic card
ps : (to moderator) sorry , I did not know where to post my problem so started a new topic. don't know if it is a v-ray related issue or modeling .