Medeek Wall Plugin
-
So this is currently a specific limitation when it comes to handrails:
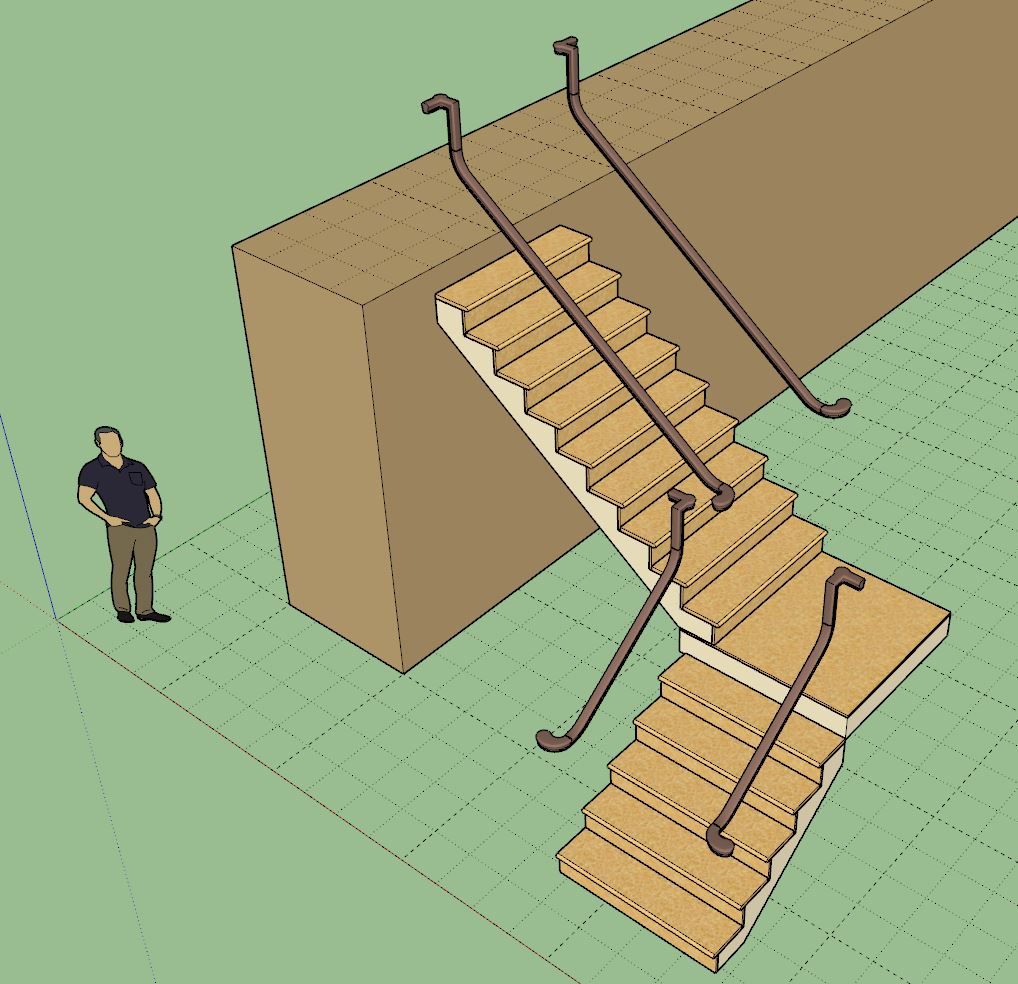
The issue here is that each run of stairs literally needs it own handrail sub-menu (set of parameters). Globally the handrail options are fine but as soon as you start adding landings you then have multiple stair runs and it quickly gets complicated. Note that the same handrail settings get applied to each run of stairs currently, this is less than desirable with complex stairs.
Of course the workaround for this is to not rely on the automatic landing functionality and create each separate run of stairs as a separate assembly (linear stair runs only). However this negates the convenience of having the landing and winder options that I recently added.
Yes, I’m a bit in the weeds now but I want this new handrail system to be as functional and fully featured and efficient as possible. I will need to put on my thinking cap and come up with a viable solution that is not too complicated (for a complex problem).
-
one option might be to have the handrails independent of the riser sections. you could create a stair assembly from whatever your stair setup is (like a component with unified stair metadata inside it), then add the handrails over the entire structure - which could be a continuous rail or segmented, etc. might be easier to code it this way by reading the overall stair assembly metadata and use that to generate the handrails.
-
Version 3.7.9 - 12.26.2024
- Added the inverted T-Shape landing.
- Enabled straight and curved flared staircases.
- Added 37 handrail fittings into the built-in handrail fittings library.
- Updated the handrail module with additional parameters for over-the-post handrail systems.
- Enabled additional handrail sub-menus for multi-landing stair assemblies.
-
Tutorial 57 - Over-the-Post Handrails and Fittings (18.42 min.)
-
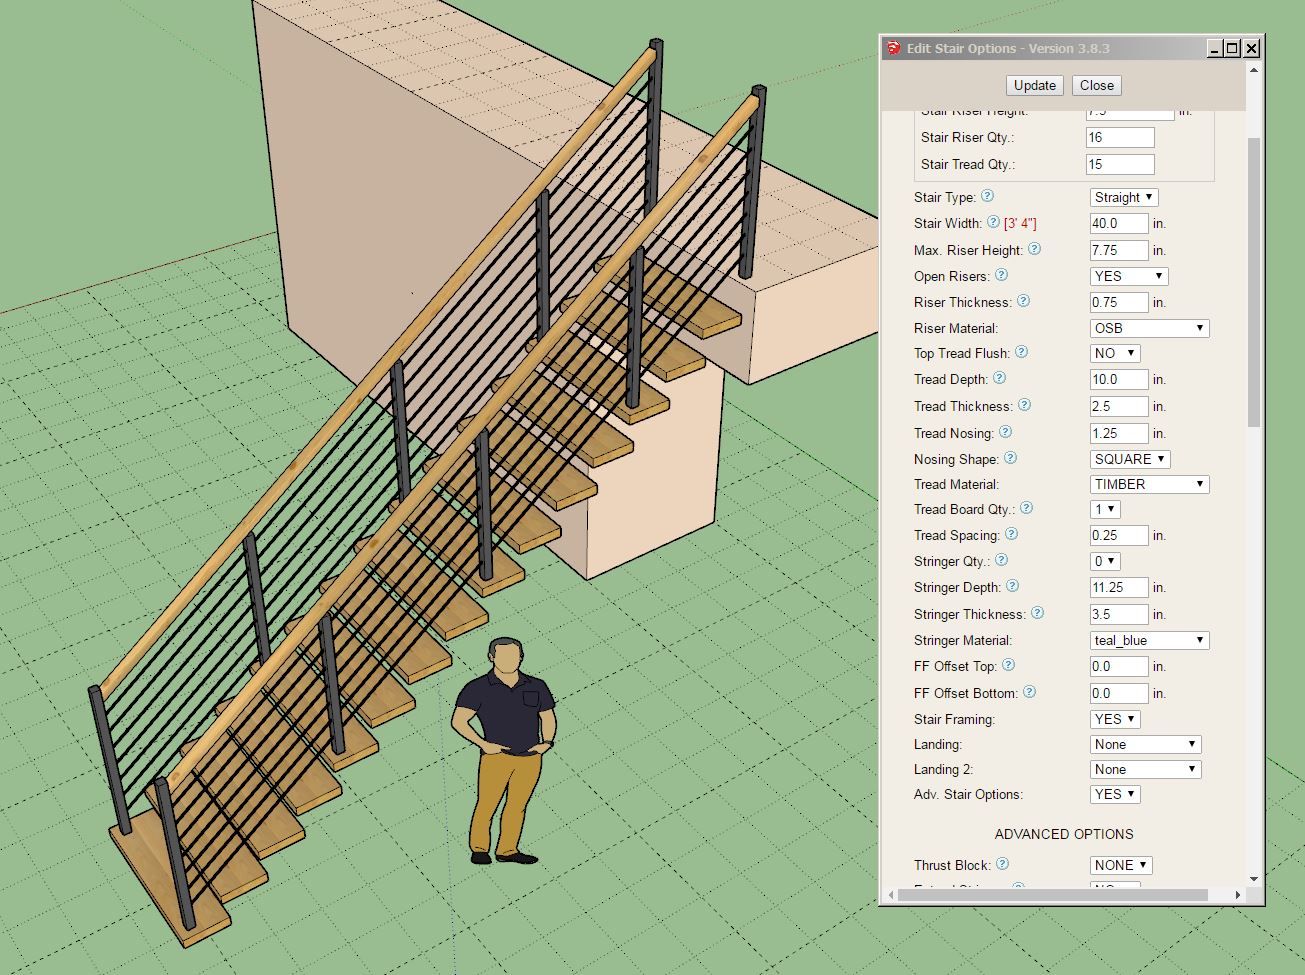
Version 3.8.0 - 12.30.2024
- Enabled open tread staircases.
- Added sub-menus for multiple stair runs for open treads.
- Added the following starter steps: square, full round and half round.
- Added a return parameter for square cut starter steps.
- Enabled flared handrails (over-the-post) for straight and curved flared staircases.
-
Tutorial 58 - Open Treads and Starter Steps (7:35 min.)
-
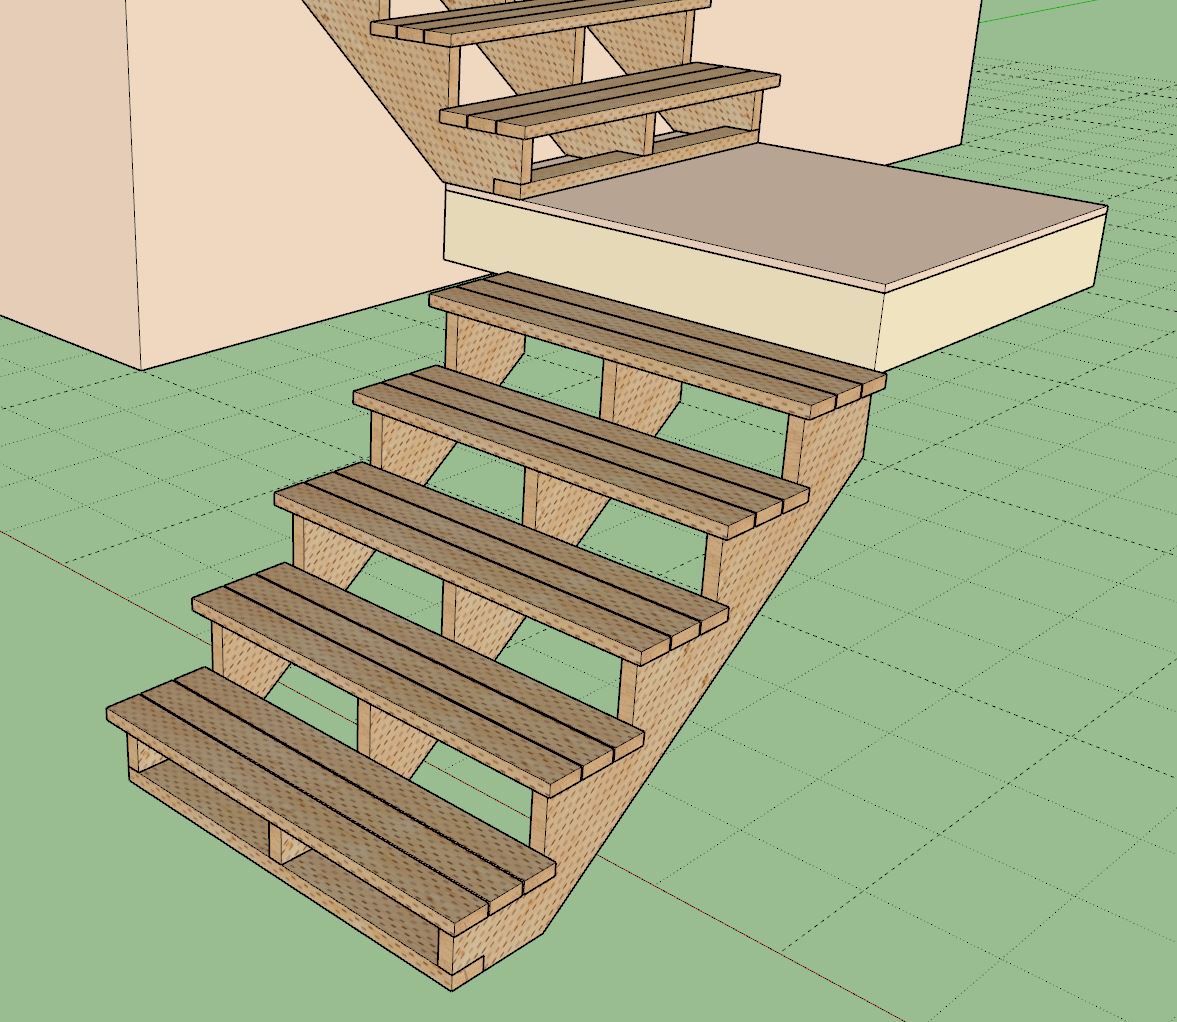
Is there a way to increase the size of the top-landing or intermediate-landings so that the nosings are one tread dim offset ?
That way the handrail turns properly - smoothly without a vertical drop.
Some localities' codes require the landings to be a tread or 300mm bigger than the stair's width.
Also extending the handrail a similar amount at the top and bottom is required...Separately... the FollowMe twisting of the profile along complex paths is longstanding.
Extensions like Upright Extruder sidestep this; so you need to emulate those...TIG
-
Version 3.8.1 - 01.02.2025
- Added additional sizes to the post module for steel square tubes.
- Updated the side spacer algorithm for stairs.
- Enabled wood grain texture for treads, risers, thrust blocks and stringers.
- Enabled a multi-board tread and spacing parameter for stairs.


-
@TIG The landings are not super sophisticated yet, mostly place holders. Still a bit of work to do on them.
The drop on the handrails (over-the-post) is fairly typical from what I've seen. I'm getting most of my reference material from ljsmith.com
-
Tutorial 59 - Multi-Board Treads and Side Spacers (7:15 min.)
-
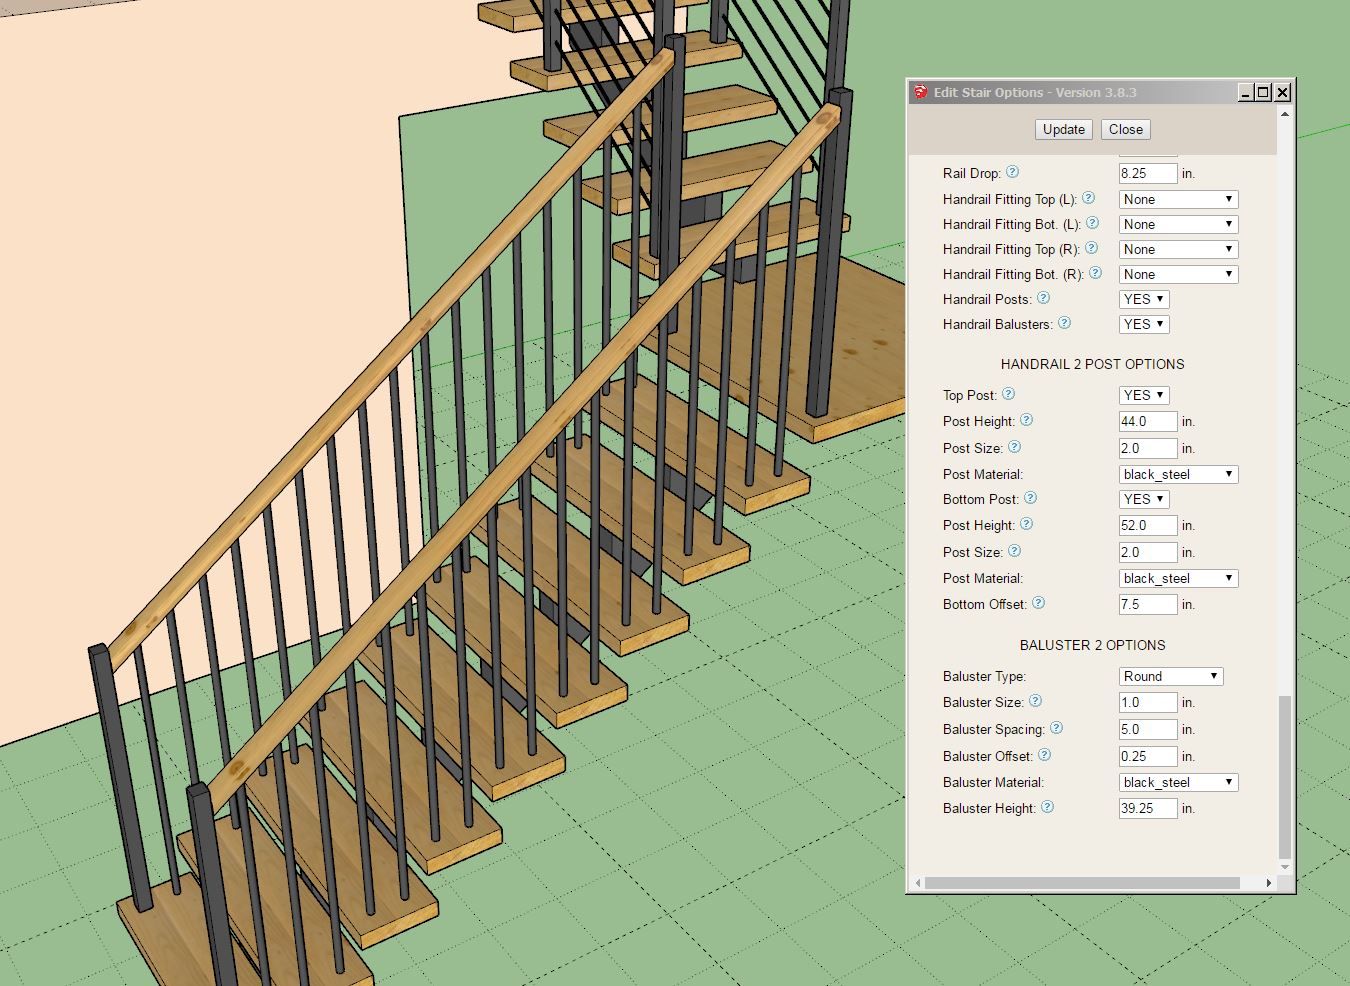
Version 3.8.2 - 01.05.2025
- Added balusters to the stair module for vertical and OTP handrails.
- Added newel posts to the stair module for vertical and OTP handrails.
Tutorial 60 - Balusters, Posts and Handrails (16:39)
-
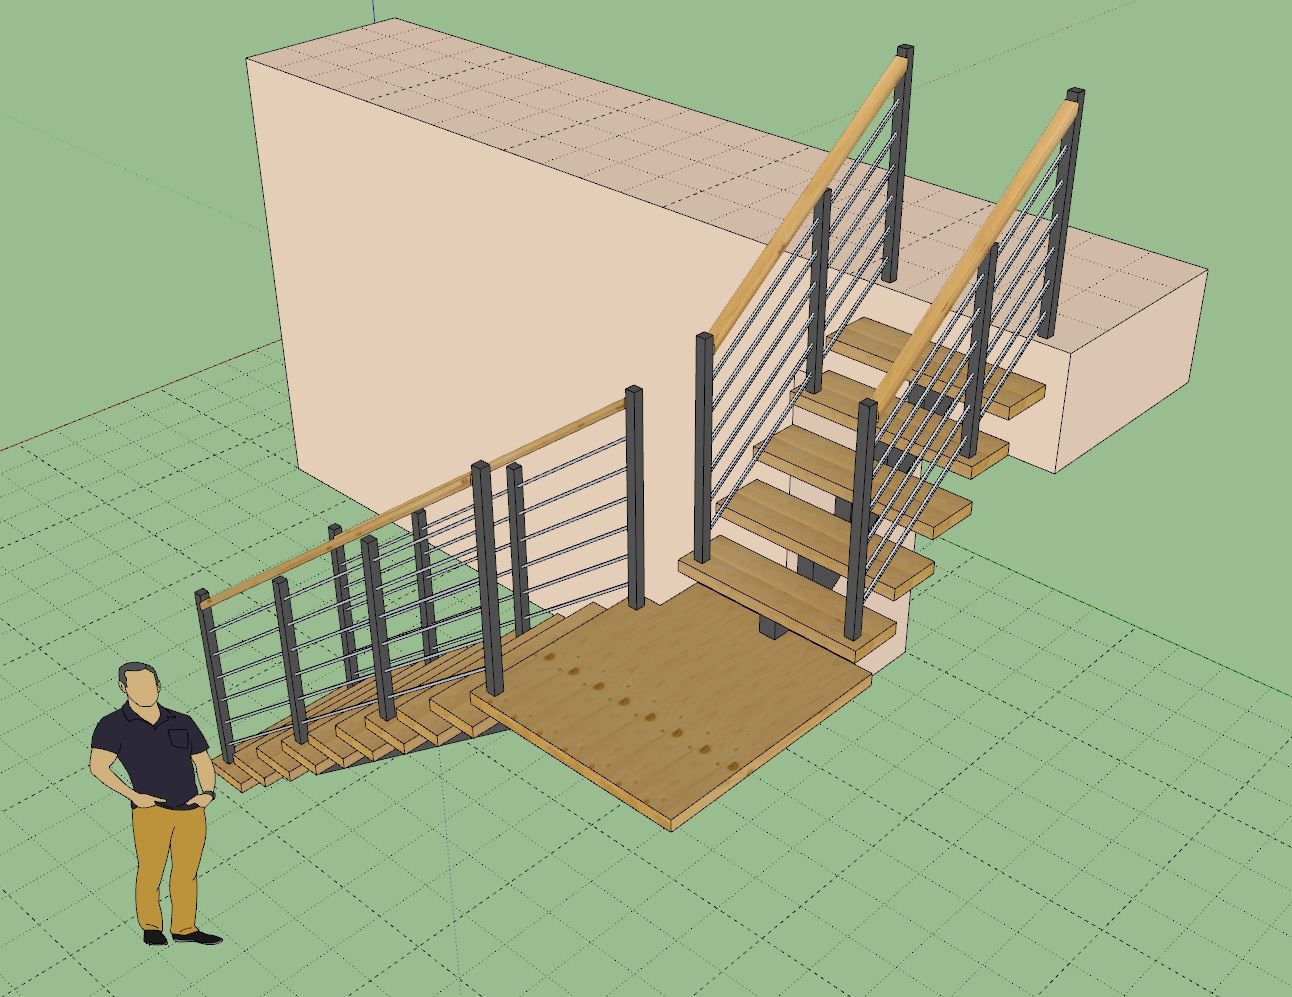
Version 3.8.3 - 01.10.2025
- Added a "deck" profile or option for handrails (with balusters) to the stair module.
Tutorial 61- Handrails for Decks (8:51 min.)
-
Version 3.8.4 - 01.14.2025
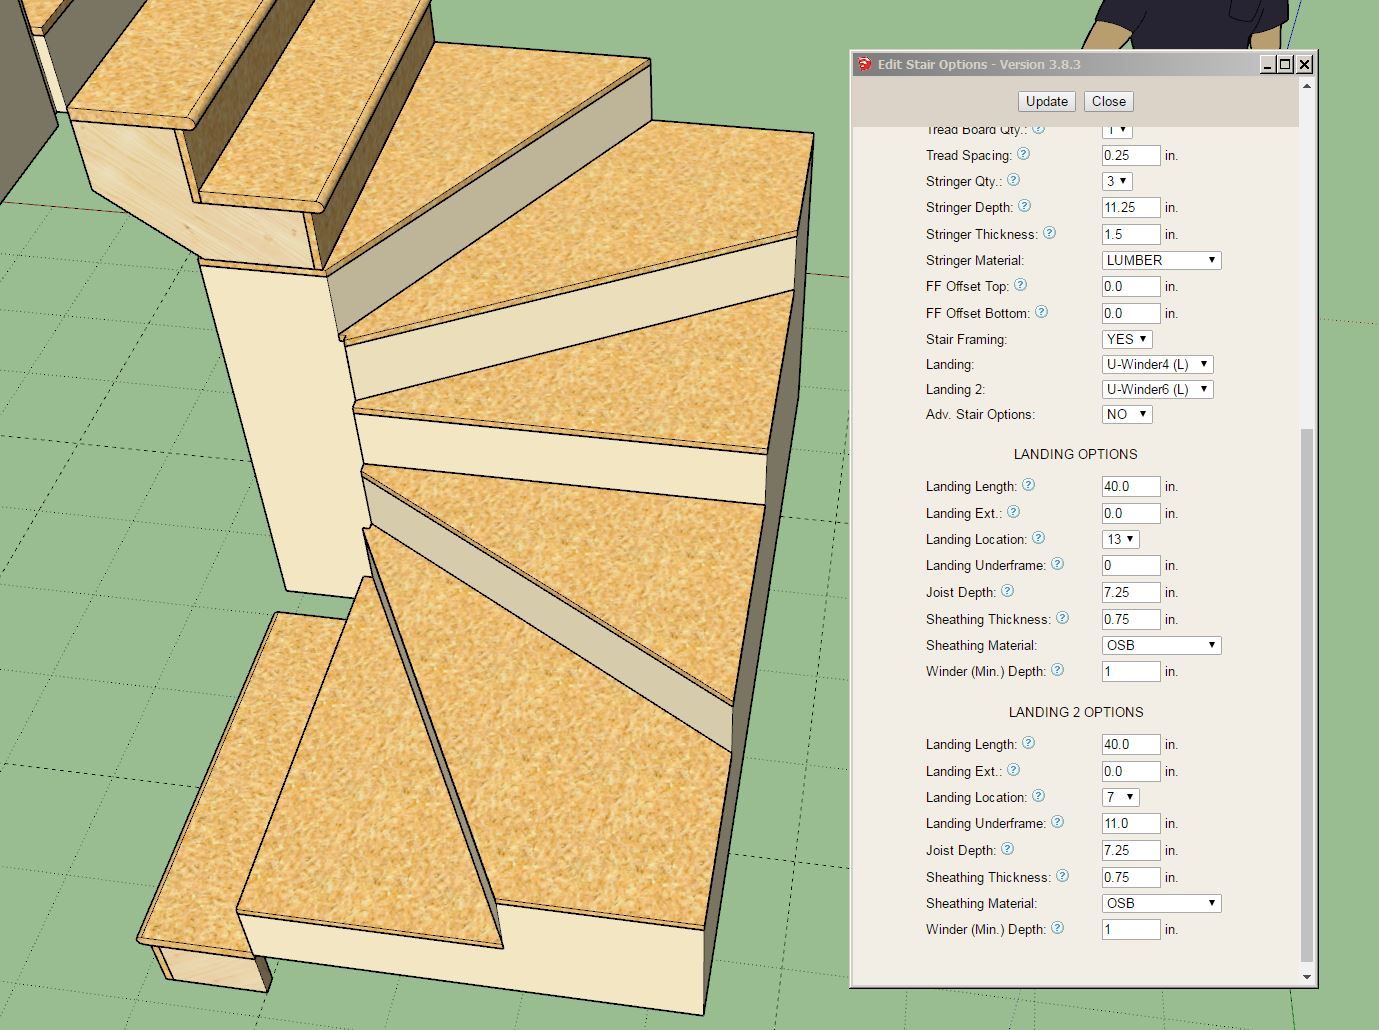
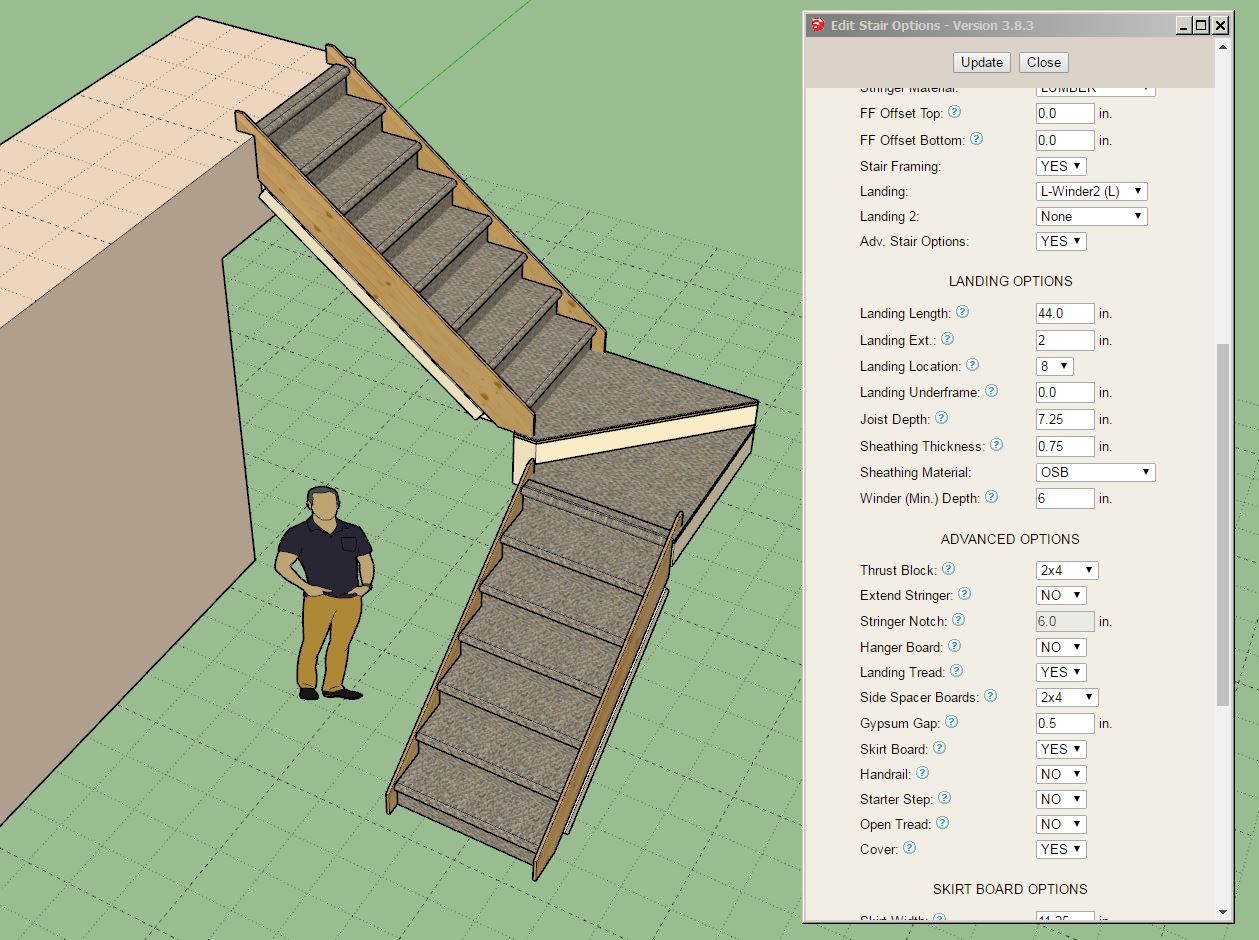
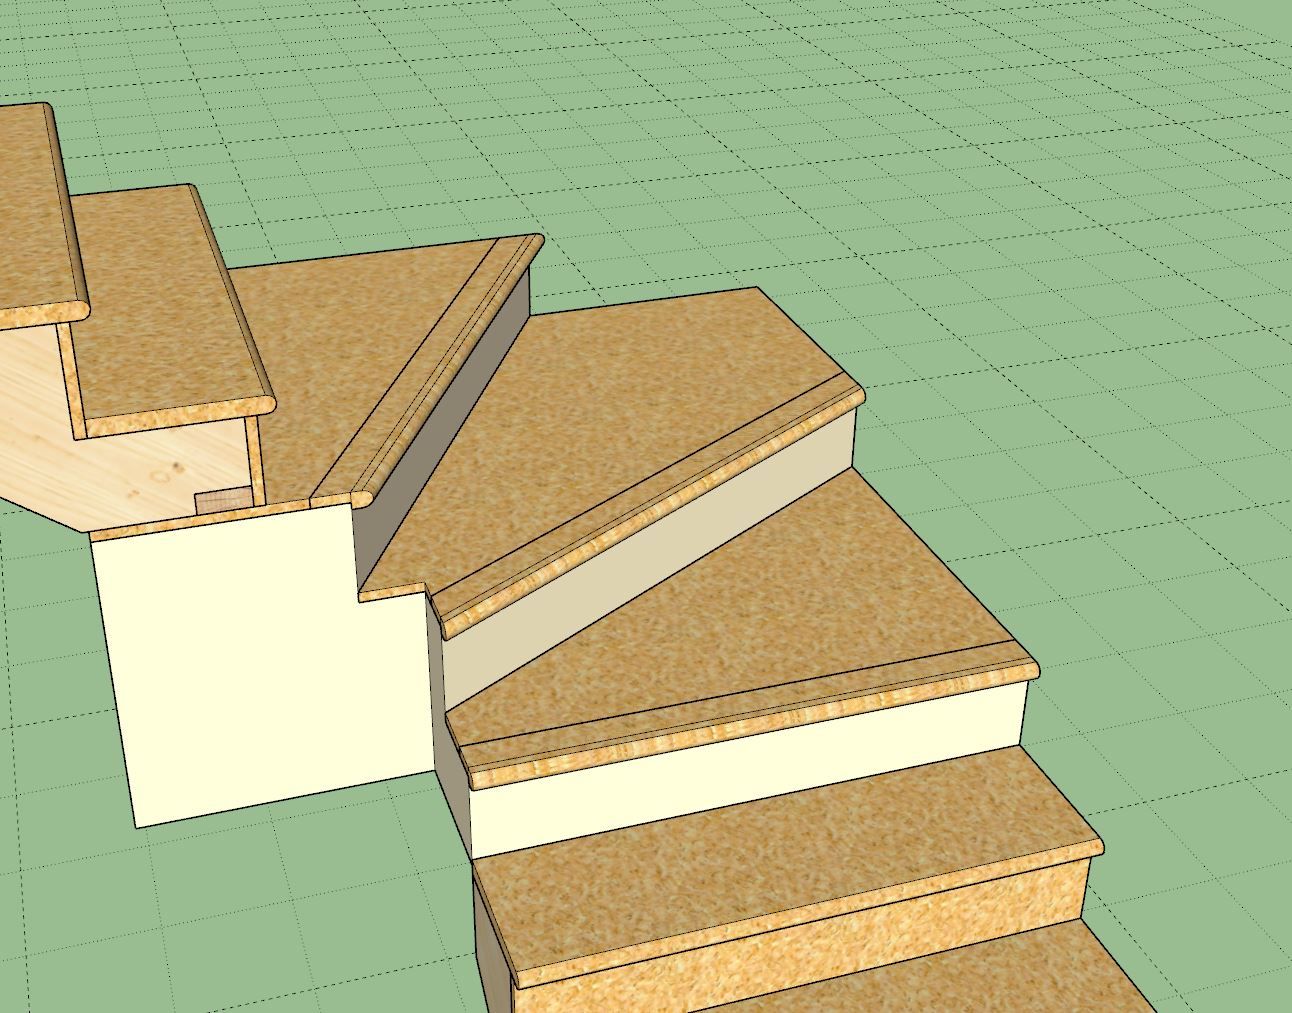
- Added a minimum winder depth parameter for all stair winder types.
- Adjusted the deck handrail algorithm for narrow cap rails (2x4).
-
Version 3.8.5 - 01.21.2025
- Updated the skirt boards to accommodate open treads.
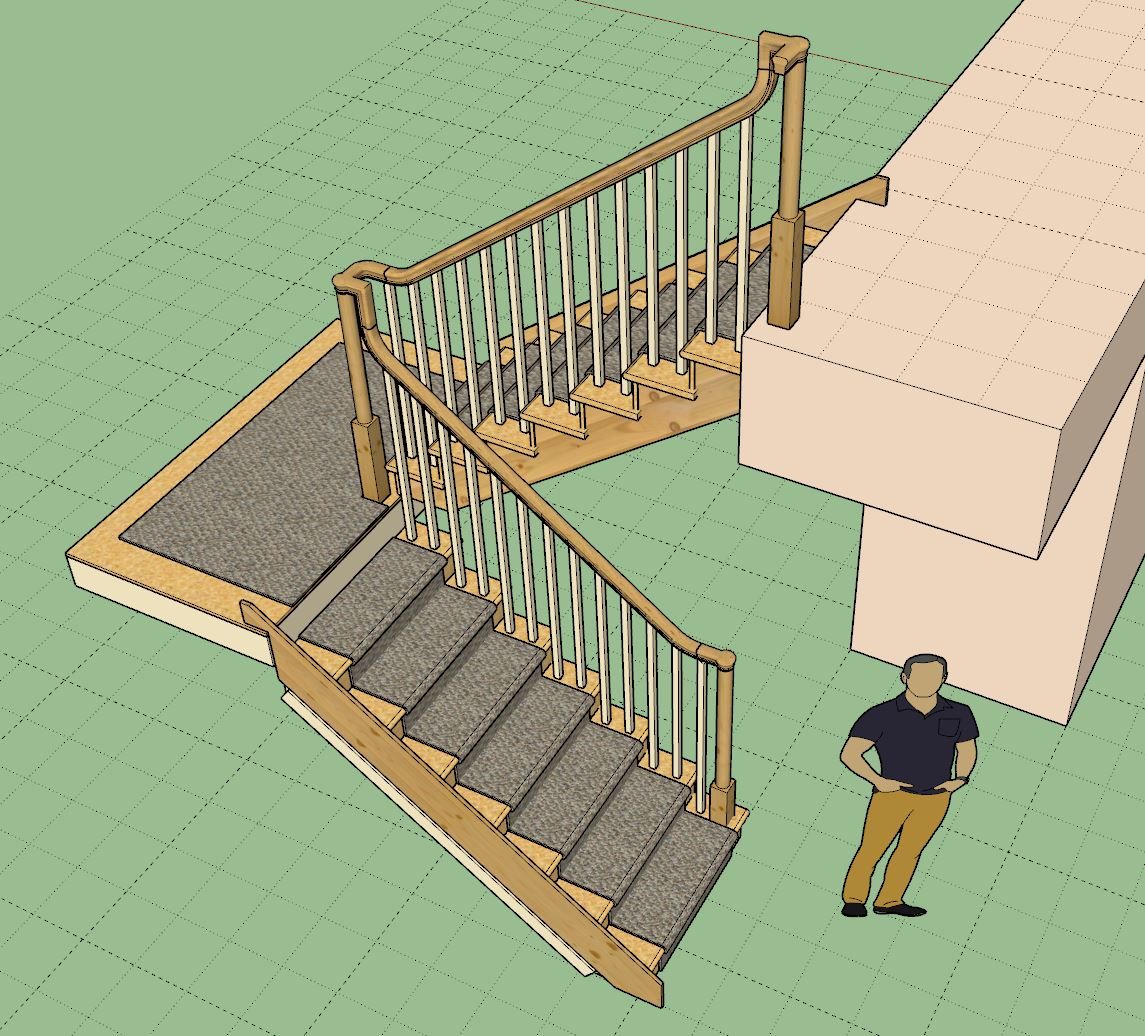
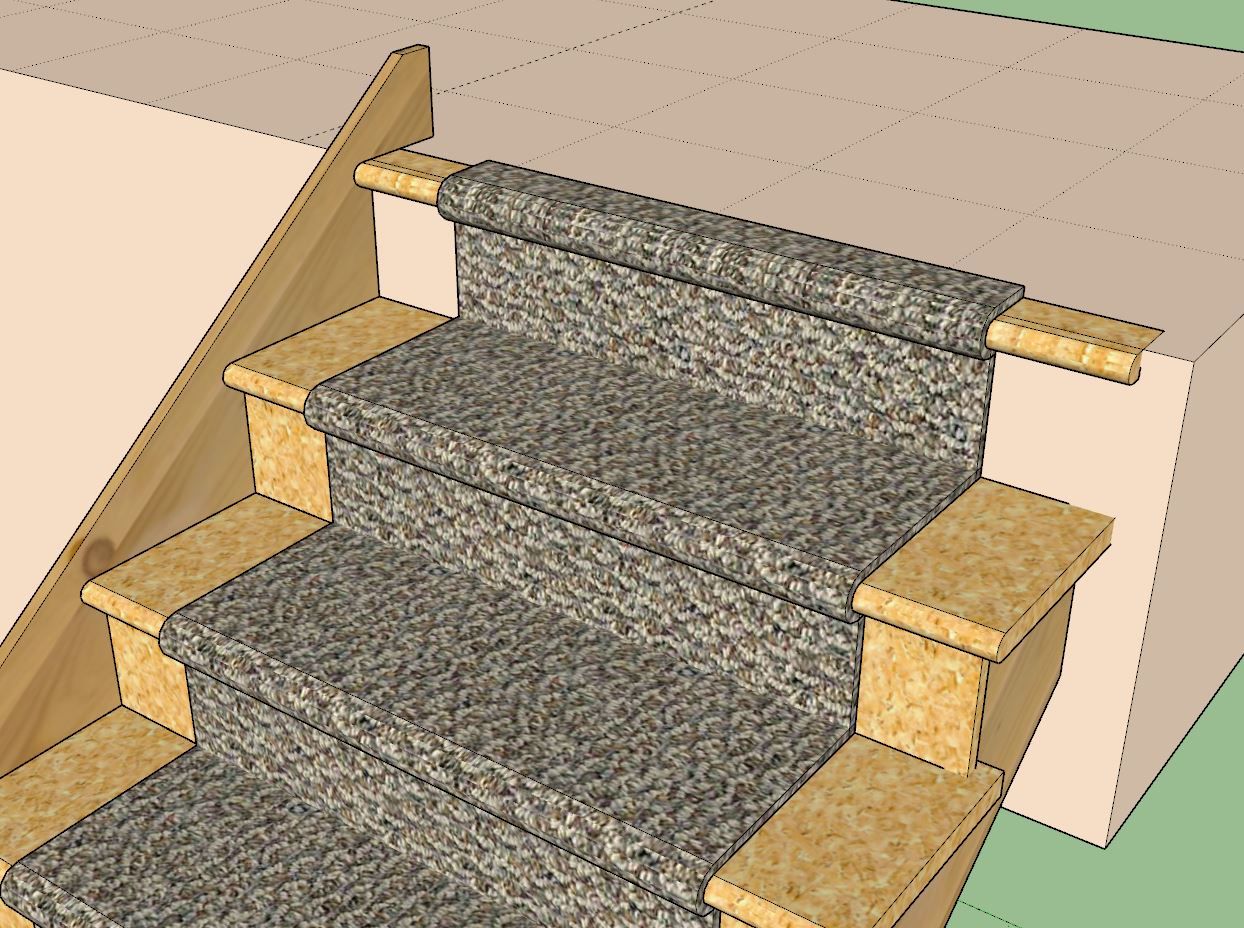
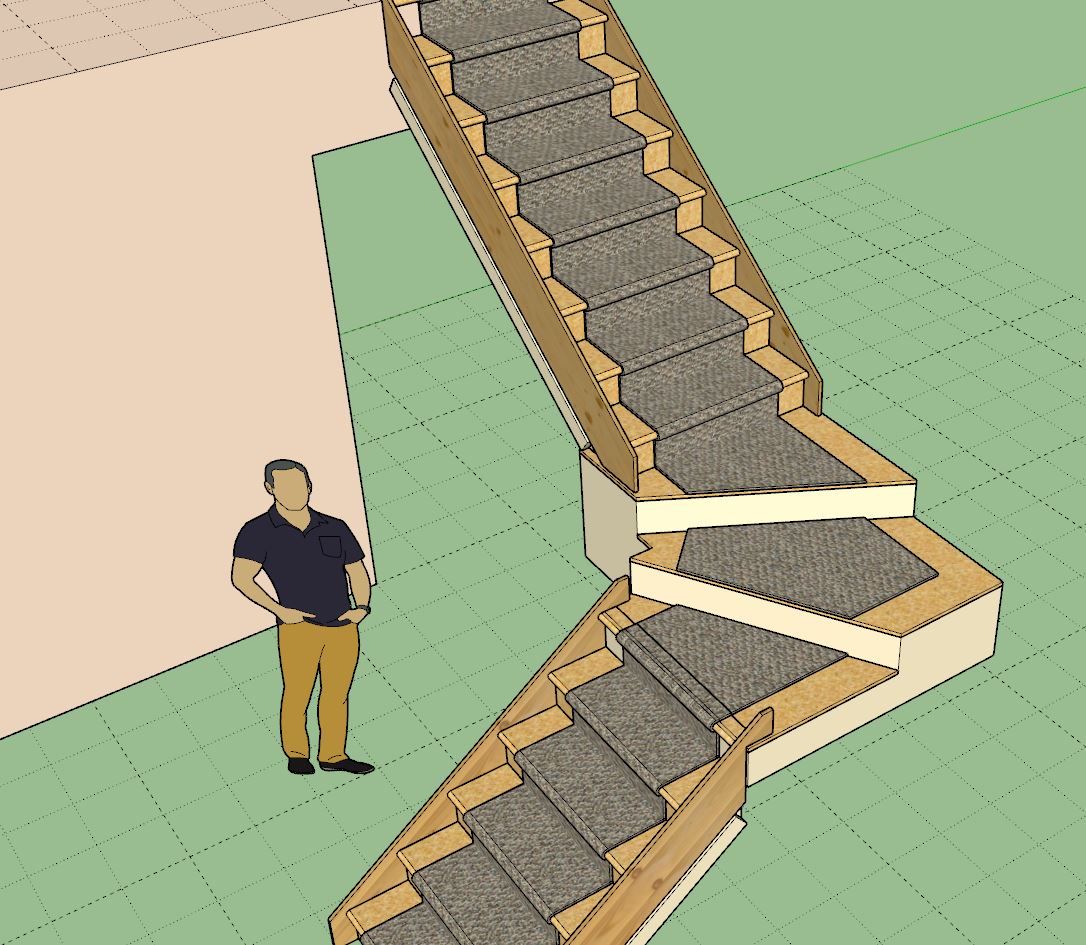
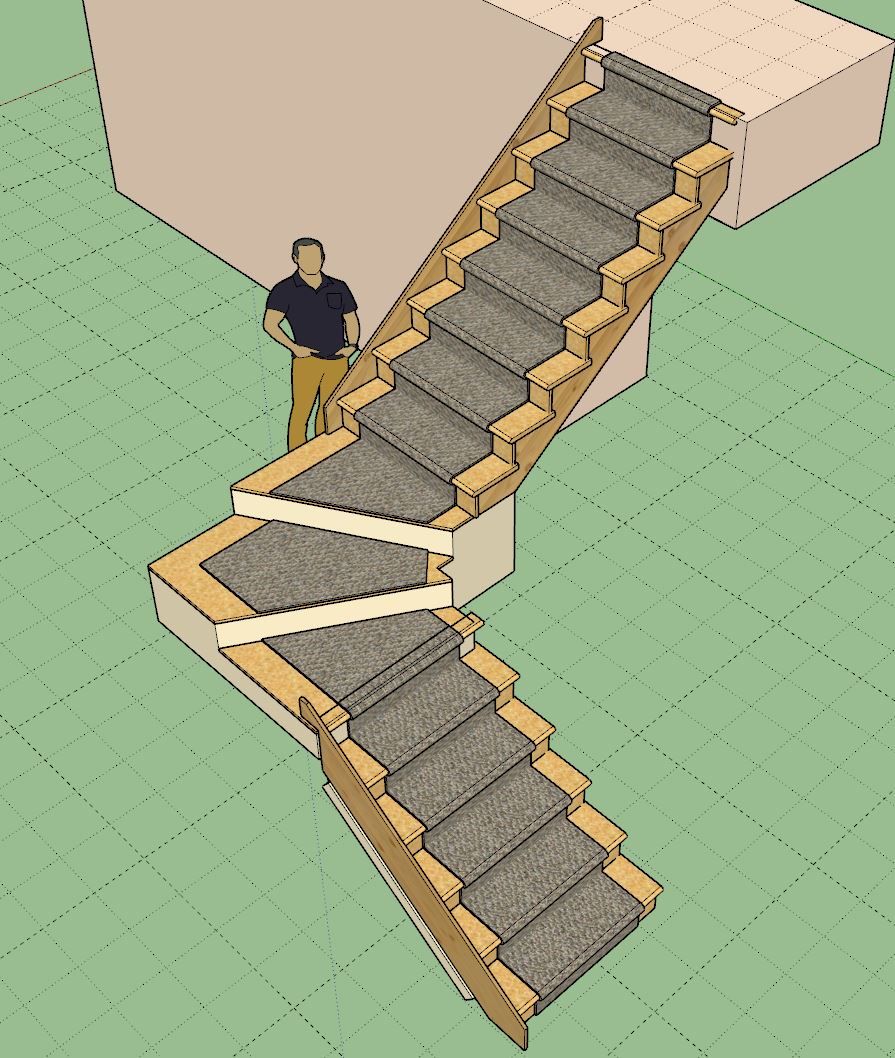
- Added tread covers, carpet and stair runners for stairs, landings and winders.
-
Tutorial 63 - Stair Runners and Tread Covers (10:06 min.)
-
[b]Version 3.8.6[/b] - 01.25.2025
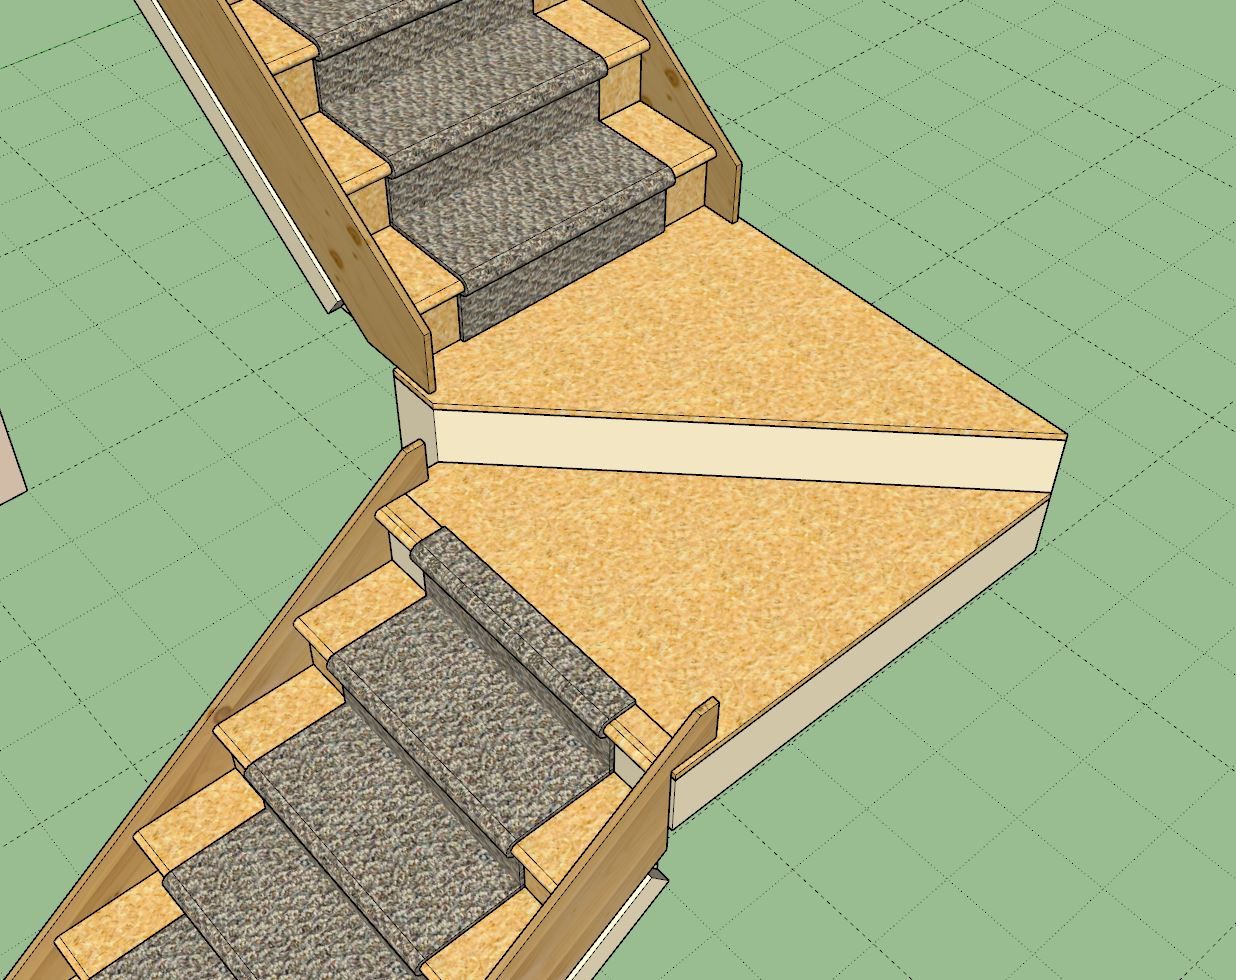
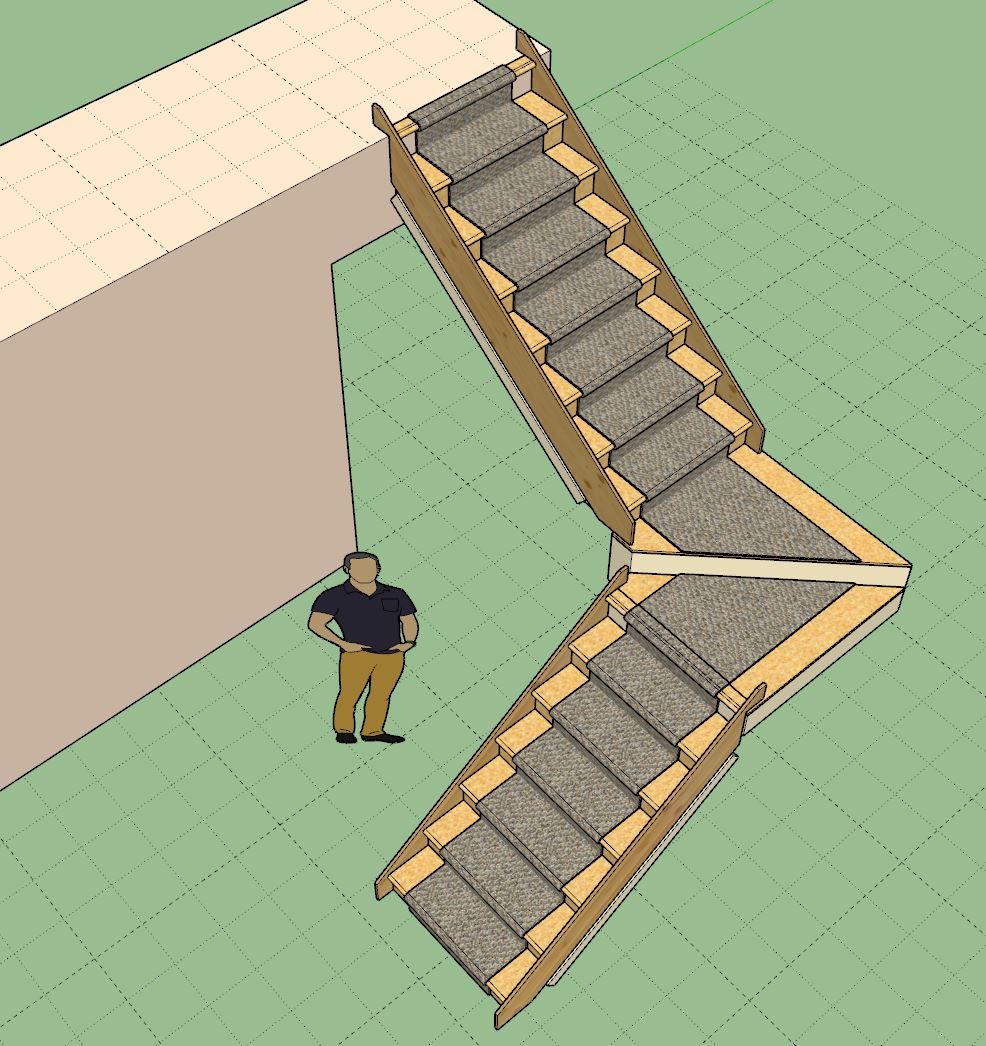
- Added tread covers, carpet and stair runners for T-shaped landings.
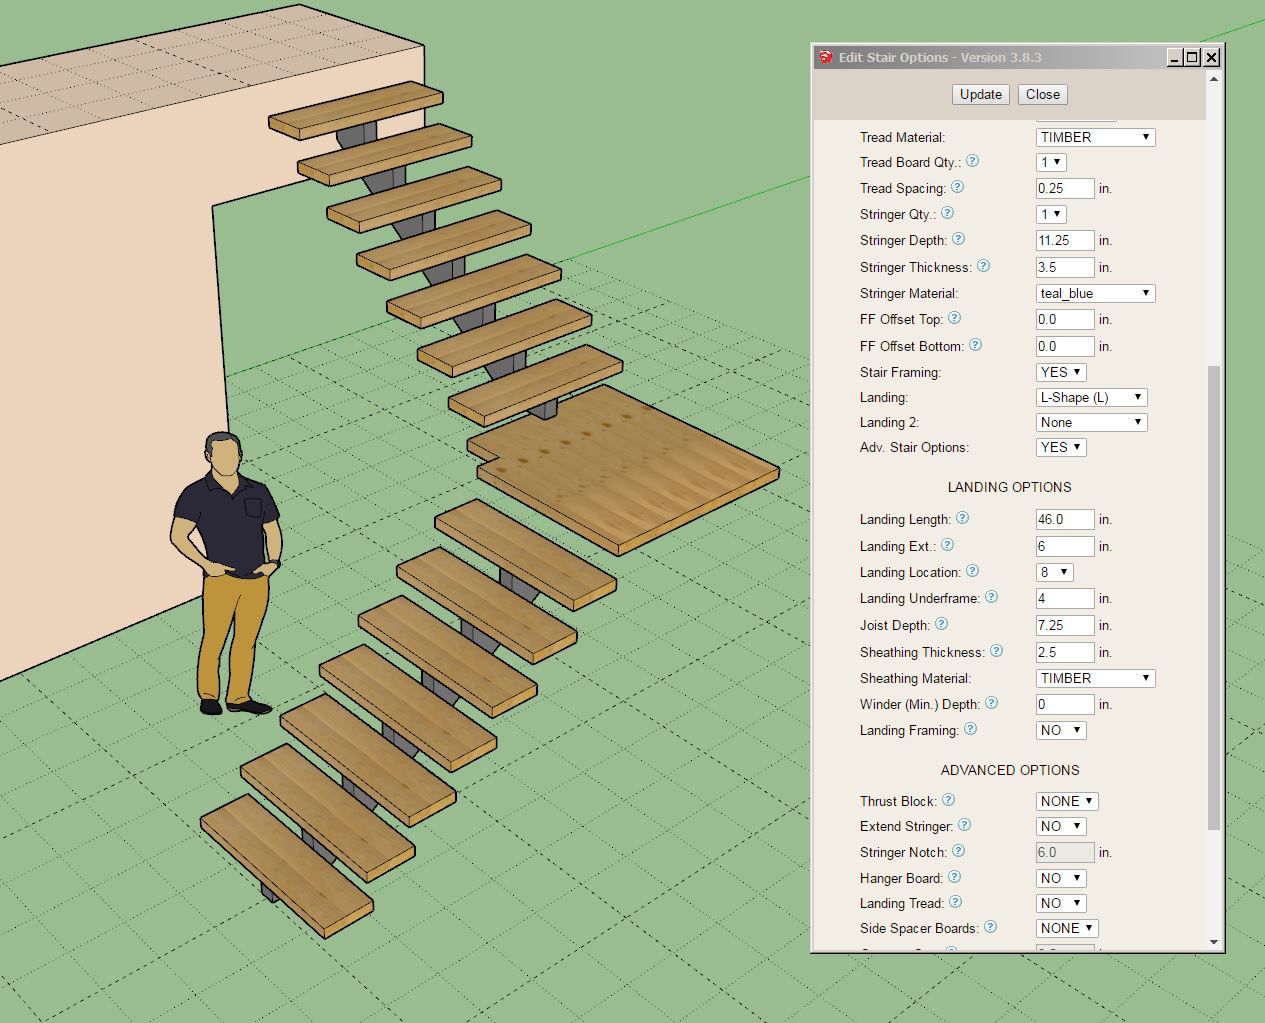
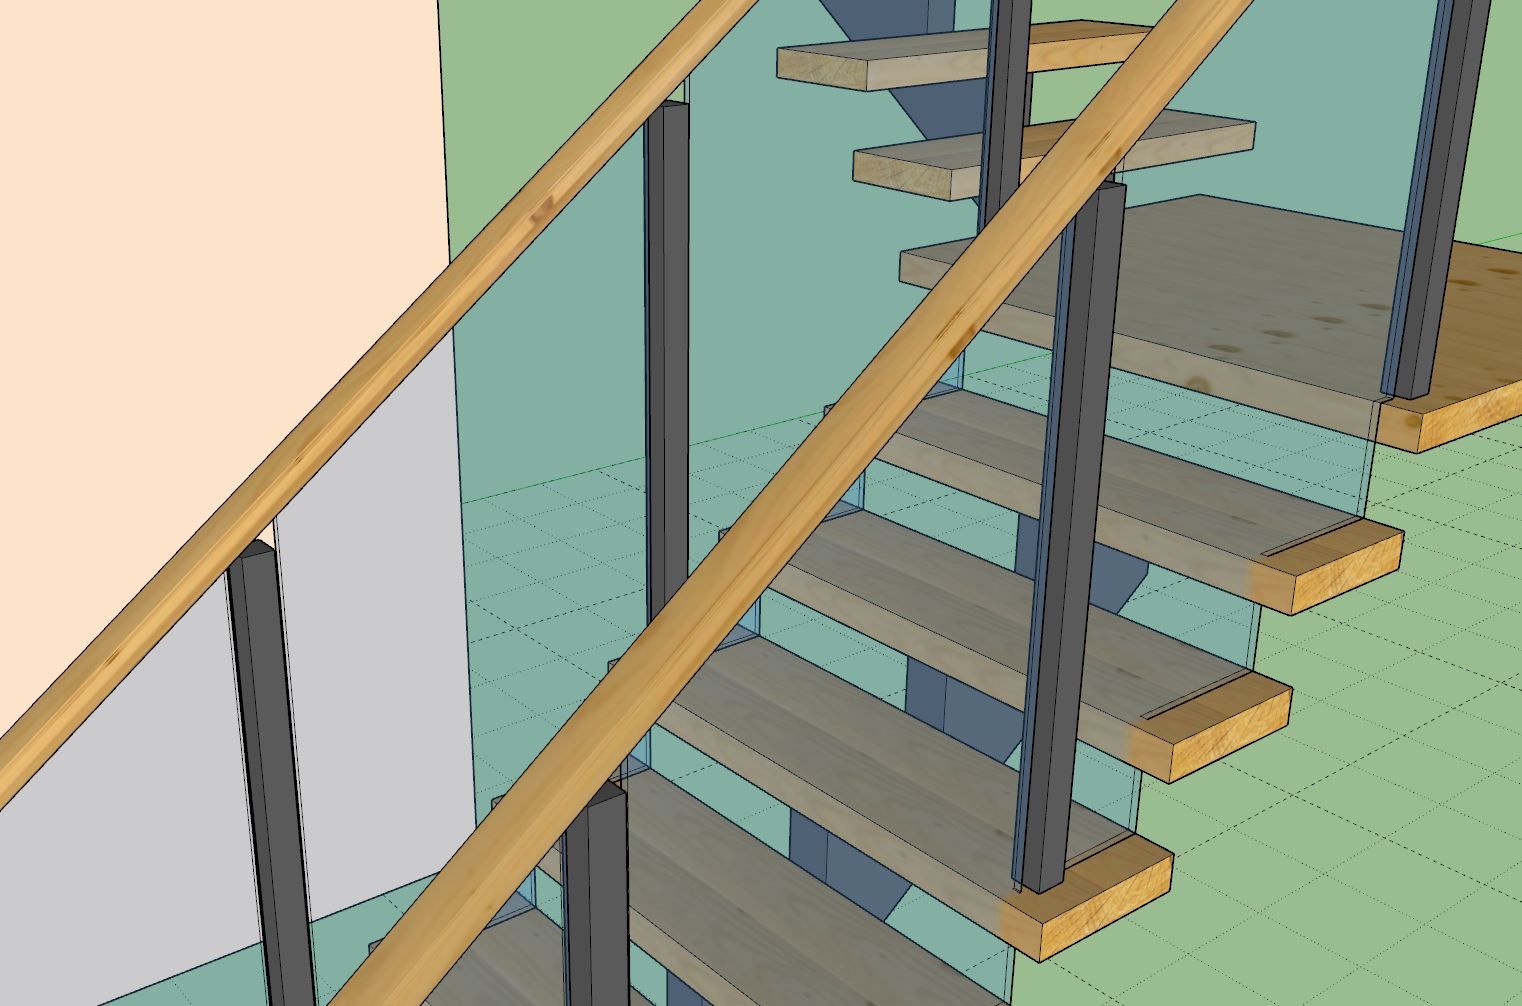
- Enabled the option for a single stringer (for modern style stairs).
- Added an option to disable the placeholder for landing/winder framing.
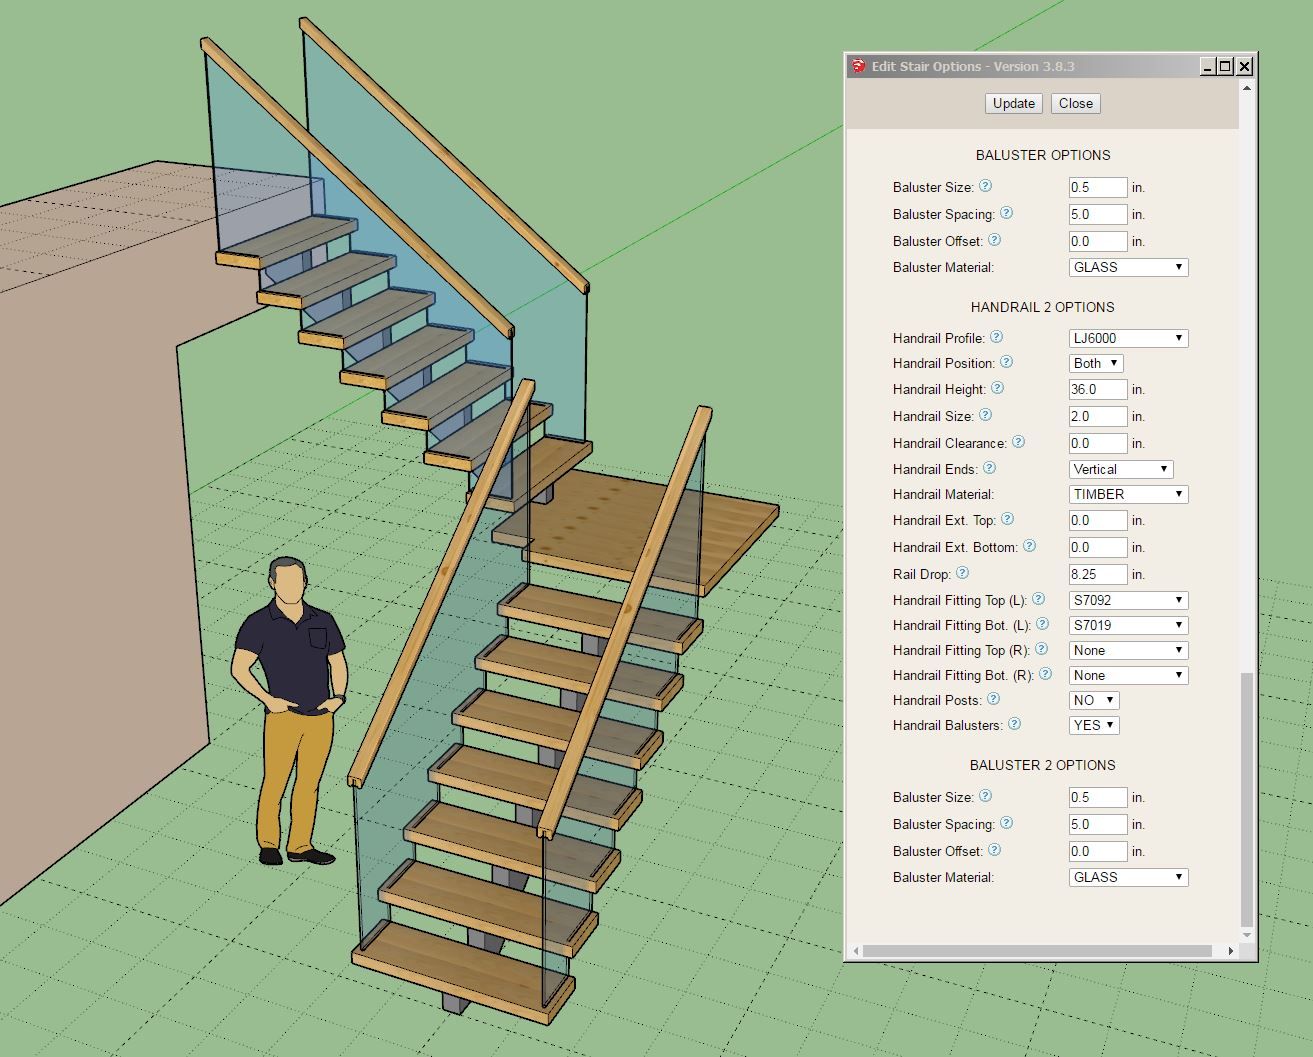
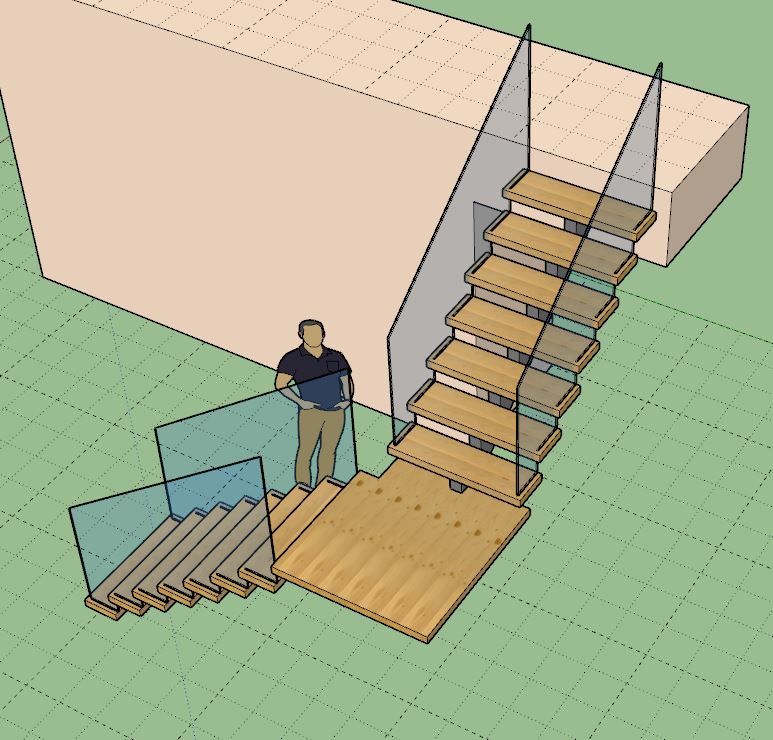
- Added a "GLASS" option for balusters within the built-in baluster materials.
- Added a "None" built-in option for the handrail profile parameter.
-
Tutorial 64 - Modern Stairs (12:43 min.)
-
Version 3.8.7 - 01.28.2025
- Enabed subtractive geometry for all stair assemblies.
- Added the following two parameters to the baluster sub-menus: Baluster Type (Square, Round, Glass, Cable), Baluster Height.
- Enabled intermediate posts for both glass and cable railing.
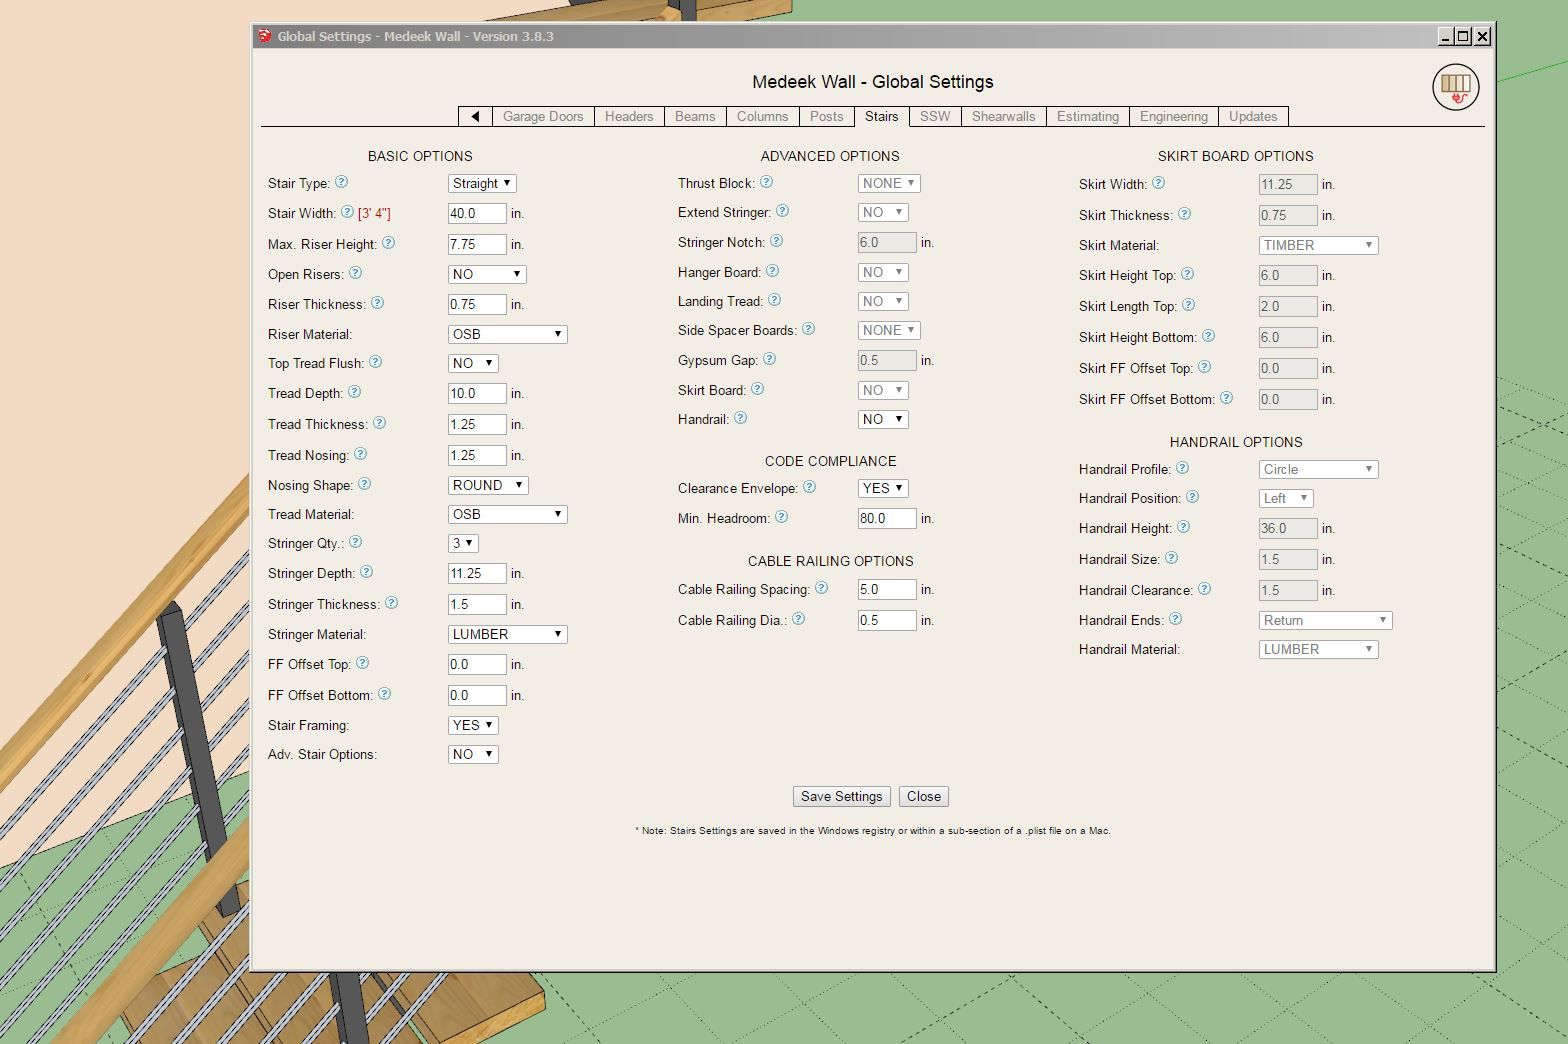
- Added the following cable railing options into the Stairs tab of the Global Settings: Cable Railing Spacing, Cable Railing Diameter.
- Added a bottom vertical offset parameter for bottom posts of a stair run.
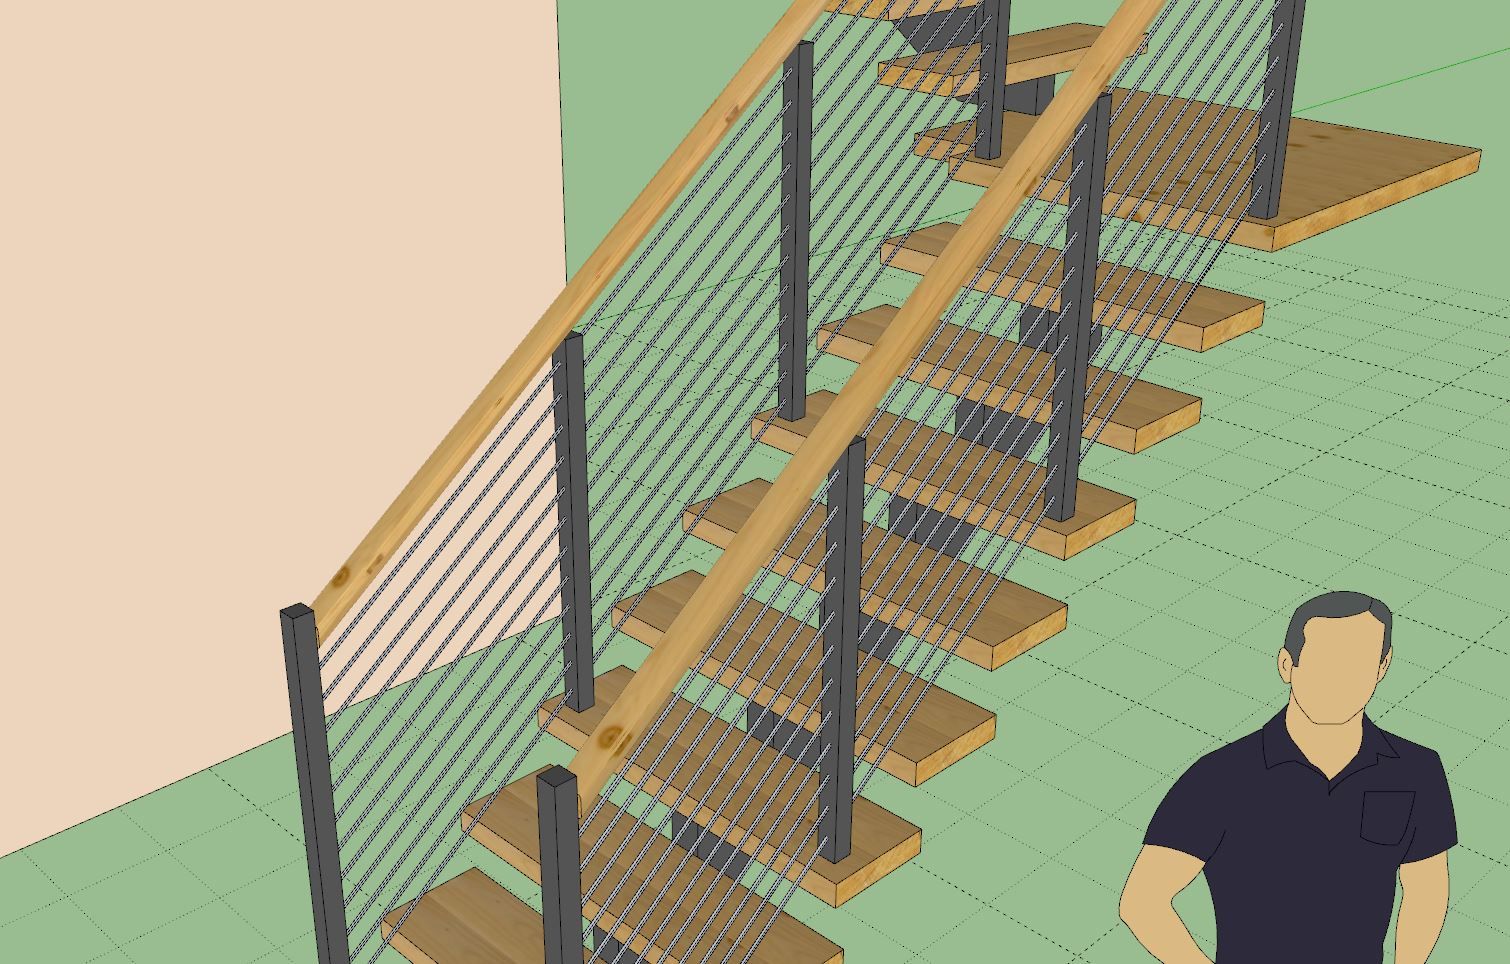
Tutorial 65 - Cable and Glass Railing (13:26 min.)
-
Version 3.8.7b - 01.29.2025
- Fixed a bug with the baluster options.
- Enabled a zero stringer option for floating stairs.
-
Just a few more loose ends before I jump back to the Floor plugin.
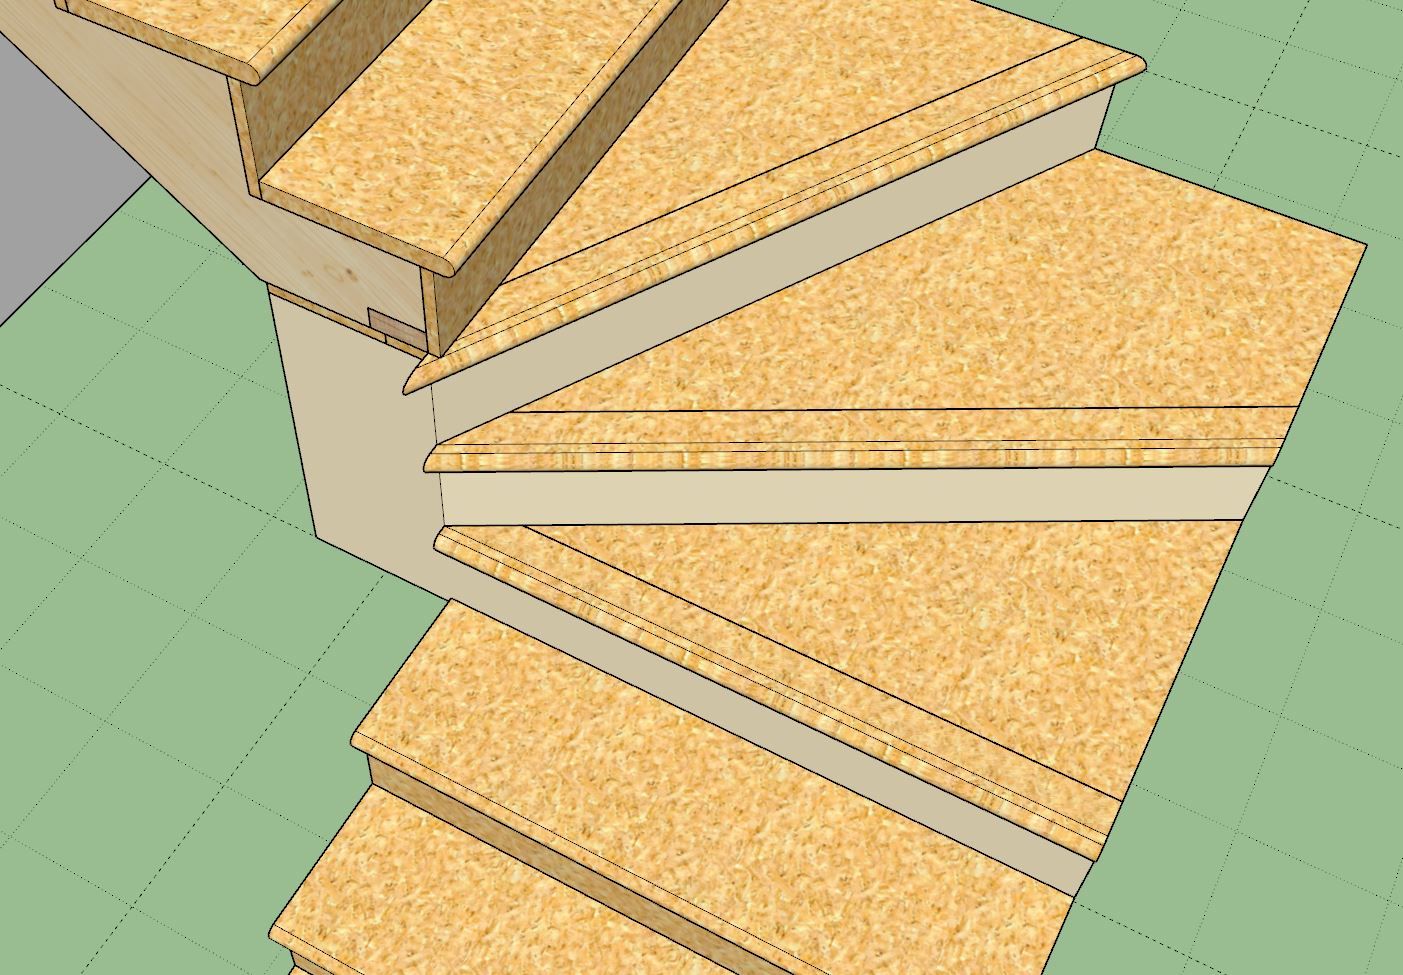
I would like to enable landing treads for winders, but things get a little interesting when the min. winder length is set to zero. Does this look okay?
Hello! It looks like you're interested in this conversation, but you don't have an account yet.
Getting fed up of having to scroll through the same posts each visit? When you register for an account, you'll always come back to exactly where you were before, and choose to be notified of new replies (either via email, or push notification). You'll also be able to save bookmarks and upvote posts to show your appreciation to other community members.
With your input, this post could be even better 💗
Register Login


Advertisement