Shape on the curve surface
-
Hello everyone, this is my first post, and I wouldn't bother you that I had found a solution through search, sorry.
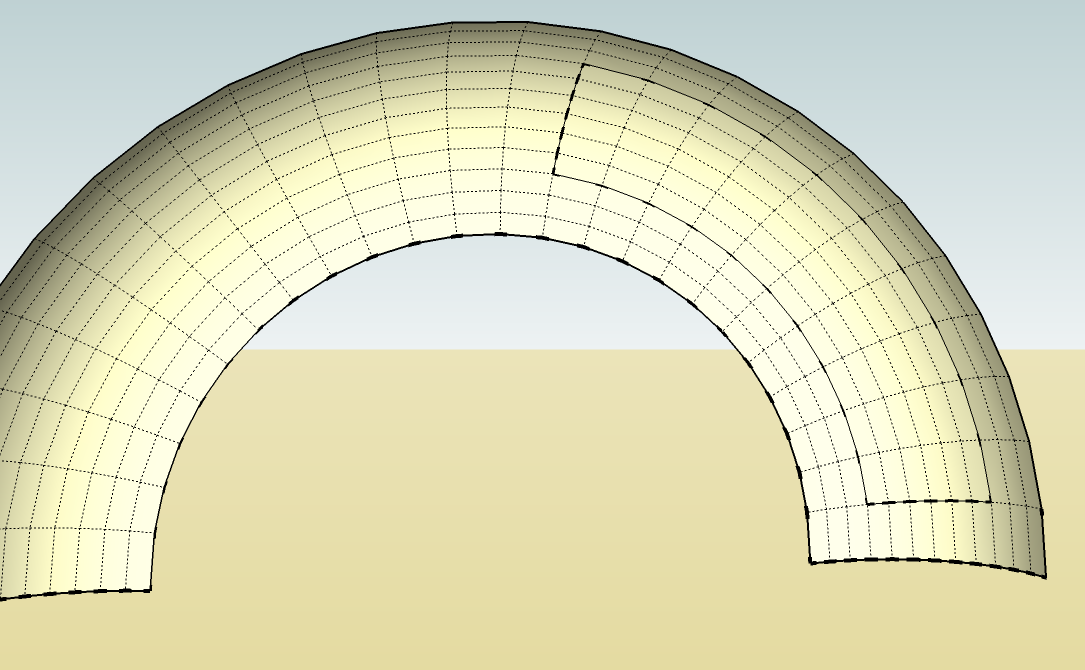
I have this shape (directed by arrows) and I don't know how to make it
[xxl-img:mz3n6qtv]http://i191.photobucket.com/albums/z126/ser_cleaner/1a85d96c.jpg[/xxl-img:mz3n6qtv]
In google sketchup I used "skinning of shapes" tool
[xxl-img:mz3n6qtv]http://i191.photobucket.com/albums/z126/ser_cleaner/3e63a3a2.png[/xxl-img:mz3n6qtv]
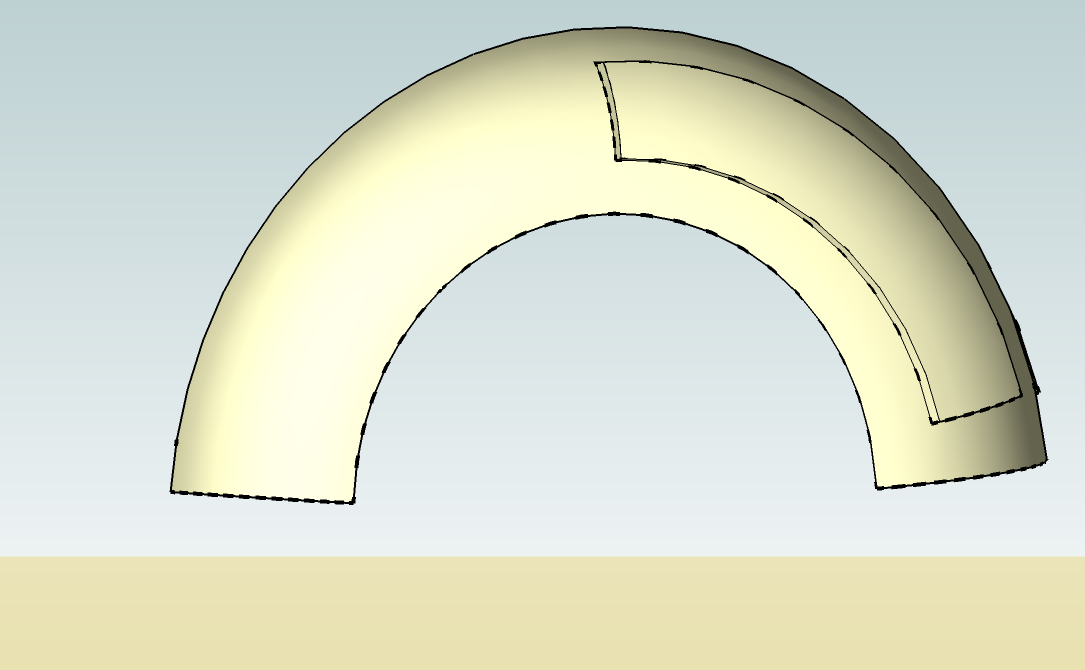
Now I don't know how to make a rectangle on a curve surface, and pushing it. Using offset tool is not possible because the curve area can't select.
Also I do not know how to make a decoration marked ellipse. Maybe I should use the scale tool, but how do I get that curvature?
I hope you will help me. Regards
-
For the first
Just use the Joint Push PushPull by Fredo 6
Maybe Tools on surface by Fredo6 again can be helping


And for the second the free Profil Builder at Smustard by Dale Martens
-
You can create the shape with a follow-me arc on arc. or other such that you get evenly divided quads that follow your desired shape... so this may not be exact. Then turn on hidden geometry and draw lines around the quads that would be your recessed shape. Turn Off hidden geometry and use joint push pull. Guessing at the right number of segments for your arcs is required to provide the best layout lines (hidden softened lines).
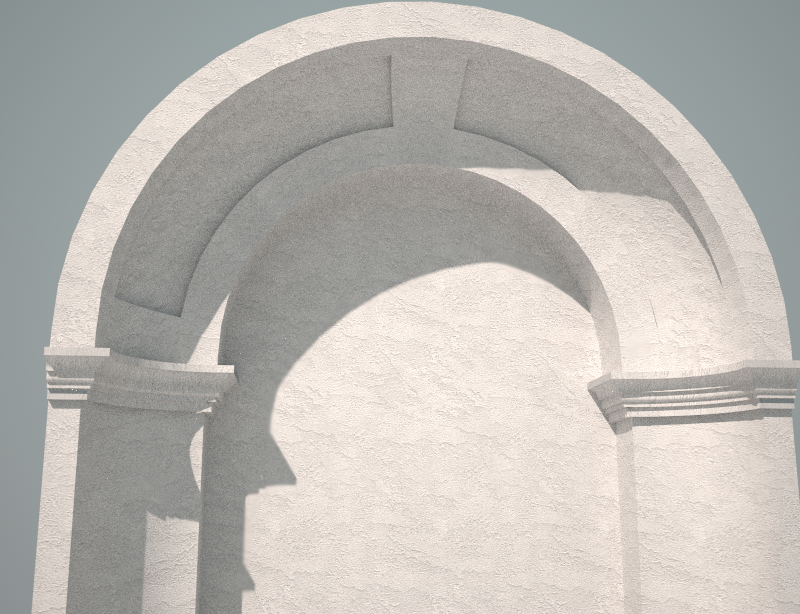
You might add some vertical lines to your arc before follow me. That is you need to extend the large arc lines down so there is section that is vertical--so the top of your crown is on a horizontal plane. I did it after the fact. I took the lowest lines of the vault shape and used TIG's "extrude edges by vector to object" plugin on the blue axis(object being a horizontal face I drew where the crown top would be.
Of course do all this (and the crown) to one side and make a component that you can mirror to the other side.
It appears that the radius is bigger at the top of the vault (or is that an illusion?). If you can indeed imitate that, I suppose some skinning tool like Pilou noted is needed.
For the crown use follow me or profile builder on a path of an arc and edges. I used a stock crown profile--not the one in the picture. I won't say it went smoothly. Took a lot of clean up. A quick Maxwell fire render.Yeah there's something funky rendering on crown.
 I'm going home.
-
Thank you for your answers. @pbacot that's it I want to achieve. Since I am a beginner, and my english is not my native language to me is now pending to study what you wrote, and I must find needed plugins. Radius isn't bigger at the top of the vault. Now I'm going to try to do by your instructions. Thanks again to all.
-
I replied and thanked to Pilou and pbacot, but I do not see my post.
-
The picture you show looks like the joint push-pull in progress, and after that it should compute the shape and form faces. Try typing a distance in the process for the depth of the push. Certainly there are factors that can cause it to fail but this looks like it's getting close.
When I referred to the follow-me tool: I used an arc as the "path", pick the tool then click on a FACE that has an arc as part of the outline. I am not sure if you are familiar with the tool. There are some tutorials on it, if you haven't learned it yet. There are requirements to set it up which would be easier to understand when you read the help sections and see the tutorials. It's in the Google help, since it is a standard SU tool.
@unknownuser said:
I turned on hidden geometry, and instead "follow me" I used the "line" tool to get the required shape.
Yes, that is how I drew the recess shape (after making the vault surface with follow-me). I drew over the softened lines with the line tool. (You can also use the eraser with a key combination (Option-shift on the Mac) to Unsoften lines for the same result).
Good luck. Looks like you have some progress on the model.
-
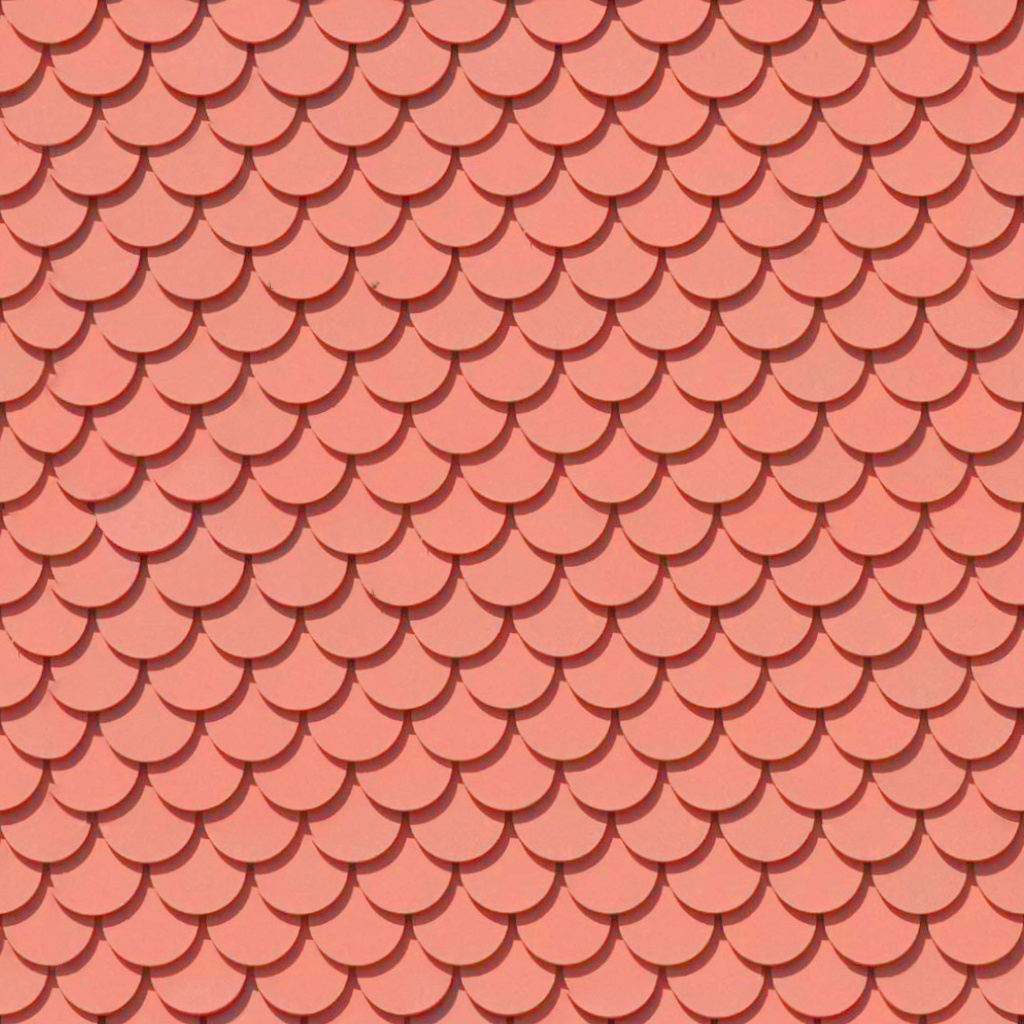
I would model only the ridges while for the pitches of the roof you could start with a texture like this maybe adding some dirt.
-
It really looks very good, but I think that each tile has a rectangular shape with semicircular ends. This way more reminiscent of fish scales.
-
Looks like it would be easy to model one roof tile, copy many times to make a square, and then take a pic of that and edit it, convert to png or whatever you need to make a render texture tile. I don't render, clearly.
-
@unknownuser said:
but I think that each tile has a rectangular shape with semicircular ends.
Ok, maybe this is better then.
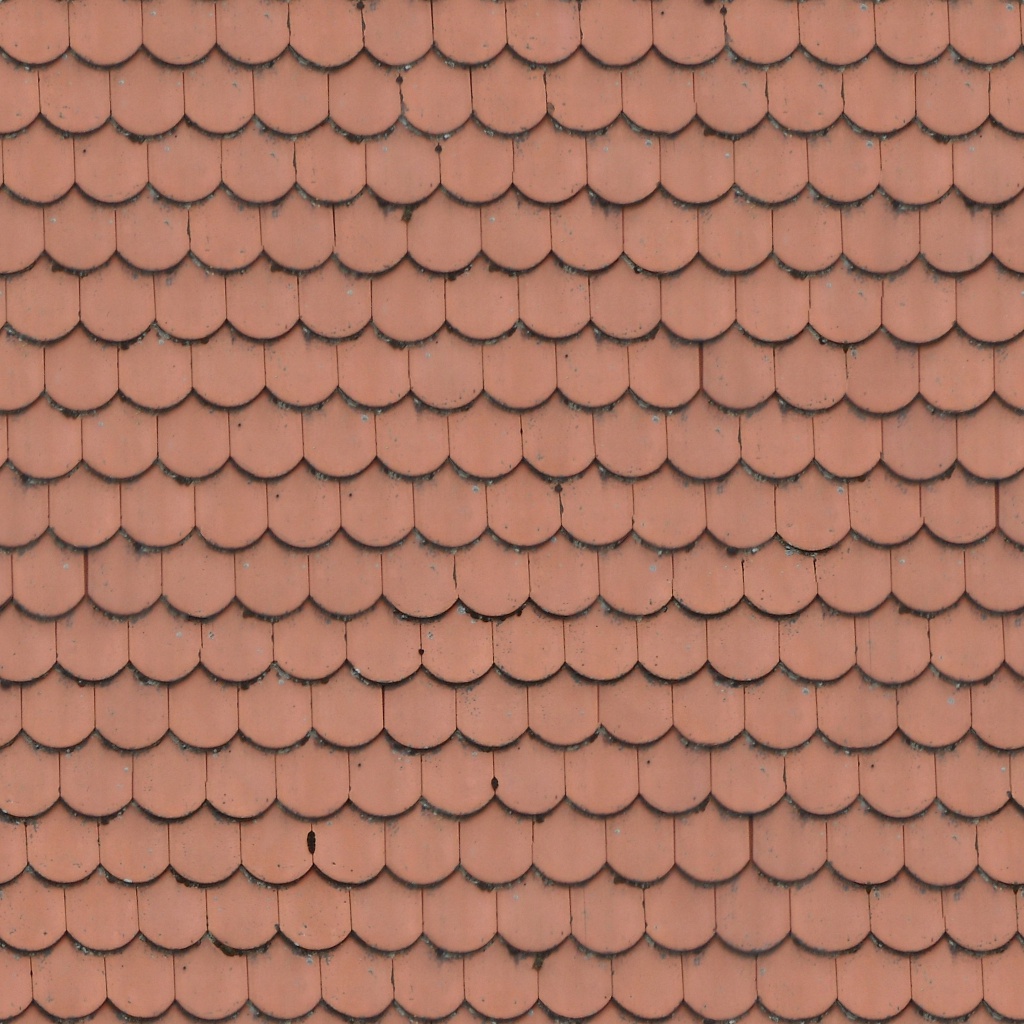
-
Nice, Massimo.

And, cleaner: Good job. Looking forward to seeing more shots!
-
Massimo well now you made it exactly as it should.
 Did you made tiles in the SU, and how (rectangle + arc) they are multiplied and aligned? How are inflicted dirt and weathered, (with Photoshop maybe?
I can put more pictures, if you are interested, when I finish the model. I am not satisfied with a dome on the tower.
-
@unknownuser said:
Did you made tiles in the SU, and how (rectangle + arc) they are multiplied and aligned? How are inflicted dirt and weathered, (with Photoshop maybe?
Neither SU nor PS. I used PixPlant starting from a photo found on the net. It required a bit of work, no more that 10 min however, because the photo was not so good: deformed and crooked. PixPlant is a wonderful program, you can easily straighten, crop and set a pattern for the seed image. Then generate the seamless texture from the seed image. Also you can work easily locally on small details (add and remove parts of the seed image, generate local parts of the texture etc.) in order to correct the final image. And of course you can also generate normal, displacement and specular maps from the diffuse map.
@unknownuser said:
I can put more pictures, if you are interested, when I finish the model.
Sure.

-
@unknownuser said:
Looks like it would be easy to model one roof tile, copy many times to make a square, and then take a pic of that and edit it, convert to png or whatever you need to make a render texture tile.
Is this tenable, reasonable or not so much?
-
I understand, but Massimo is so well done, and I have to ask him how he did it. His tile material is perfectly fit to the roof.
-
No, I understand and appreciate your wanting to go with the easiest, best as judged by you. I was hoping 'they' might comment and help us both.
-
@brookefox said:
No, I understand and appreciate your wanting to go with the easiest, best as judged by you. I was hoping 'they' might comment and help us both.
I'm not one of them, but I thought it was an interesting idea to use SU this way. It takes some artistry and patience (which I didn't apply). Hard to simulate the realism of the photo with soft shadows and all. So which is faster? I think the photograph is faster and nicer. A quick render, not really run long enough. Maybe they have more ideas on this method....
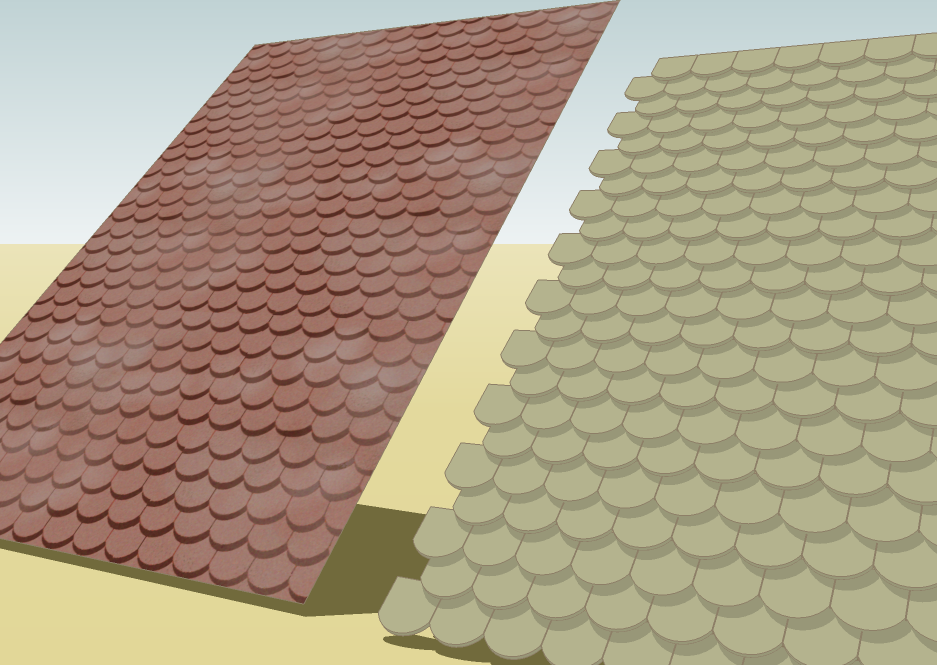
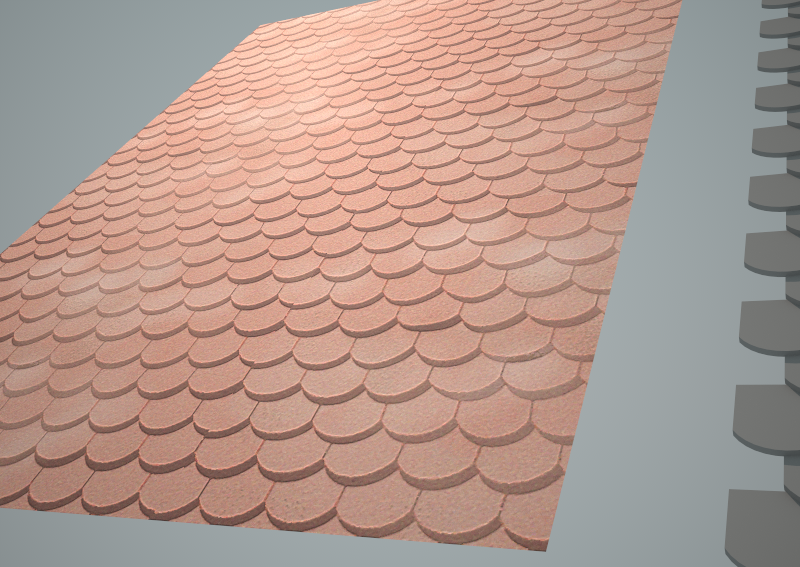
-
I appreciate your weighing in. If you have the photo in hand, quicker, as you say, but if you don't (as he didn't), nice to know you can 'make' the photograph.
Thank you, Peter.
-
Cleaner,
- With Hidden Geo ON. select a face. Context menu "Texture" /Position, as well as possible. Choose "projected". Sample the texture with Materials eyedropper (command key on Mac--Windows=?). 2. Then: Hidden Geo OFF. Apply texture to whole face. See if that helps.
It looks like your image is only part of the face, so not sure how you can fix that. I'd try expanding the field around the decoration in a photo editor.
What is that dome made out of? Looks like it's coming out nice!
Peter
-
@brookefox said:
@unknownuser said:
Looks like it would be easy to model one roof tile, copy many times to make a square, and then take a pic of that and edit it, convert to png or whatever you need to make a render texture tile.
Is this tenable, reasonable or not so much?
yeah.. it's reasonable.. i do it sometimes with decent results..
(also allows you to make huge textures to avoid tiling in the render while avoiding all the geometry needing to be in the model itself)..
it's circumstance based.. sometimes it will work, others it's won't..
Hello! It looks like you're interested in this conversation, but you don't have an account yet.
Getting fed up of having to scroll through the same posts each visit? When you register for an account, you'll always come back to exactly where you were before, and choose to be notified of new replies (either via email, or push notification). You'll also be able to save bookmarks and upvote posts to show your appreciation to other community members.
With your input, this post could be even better 💗
Register LoginAdvertisement


