[Plugin][$] Curviloft 2.0a - 31 Mar 24 (Loft & Skinning)
-
[a
Hi.
The model consists of two components.
I've done all curves with "Classic bezier curve", and all are "infinite curves" following the green/red/blue axis when placing control points.
Still I got some kind of "V shape" in the front curved panel, see picture and file (concerning file size I had to remove the mesh).How can I avoid this? I tried to elaborate by changing settings but with no luck.
The person solving this will be a Nobel prize prospect...
Thx!
//Mikael[attachment=1:ni34c5df]<!-- ia1 -->Front 1.5 fix SUC.skp<!-- ia1 -->[/attachment:ni34c5df][/quote]
[attachment=0:ni34c5df]<!-- ia0 -->tangent.gif<!-- ia0 -->[/attachment:ni34c5df][quote="surfmike"][attachment=2:ni34c5df]<!-- ia2 -->Screen Shot 2016-12-16 at 20.44.08.png<!-- ia2 -->[/attachment:ni34c5df]
Give me the Nobel (don't forget the$
 ).
).
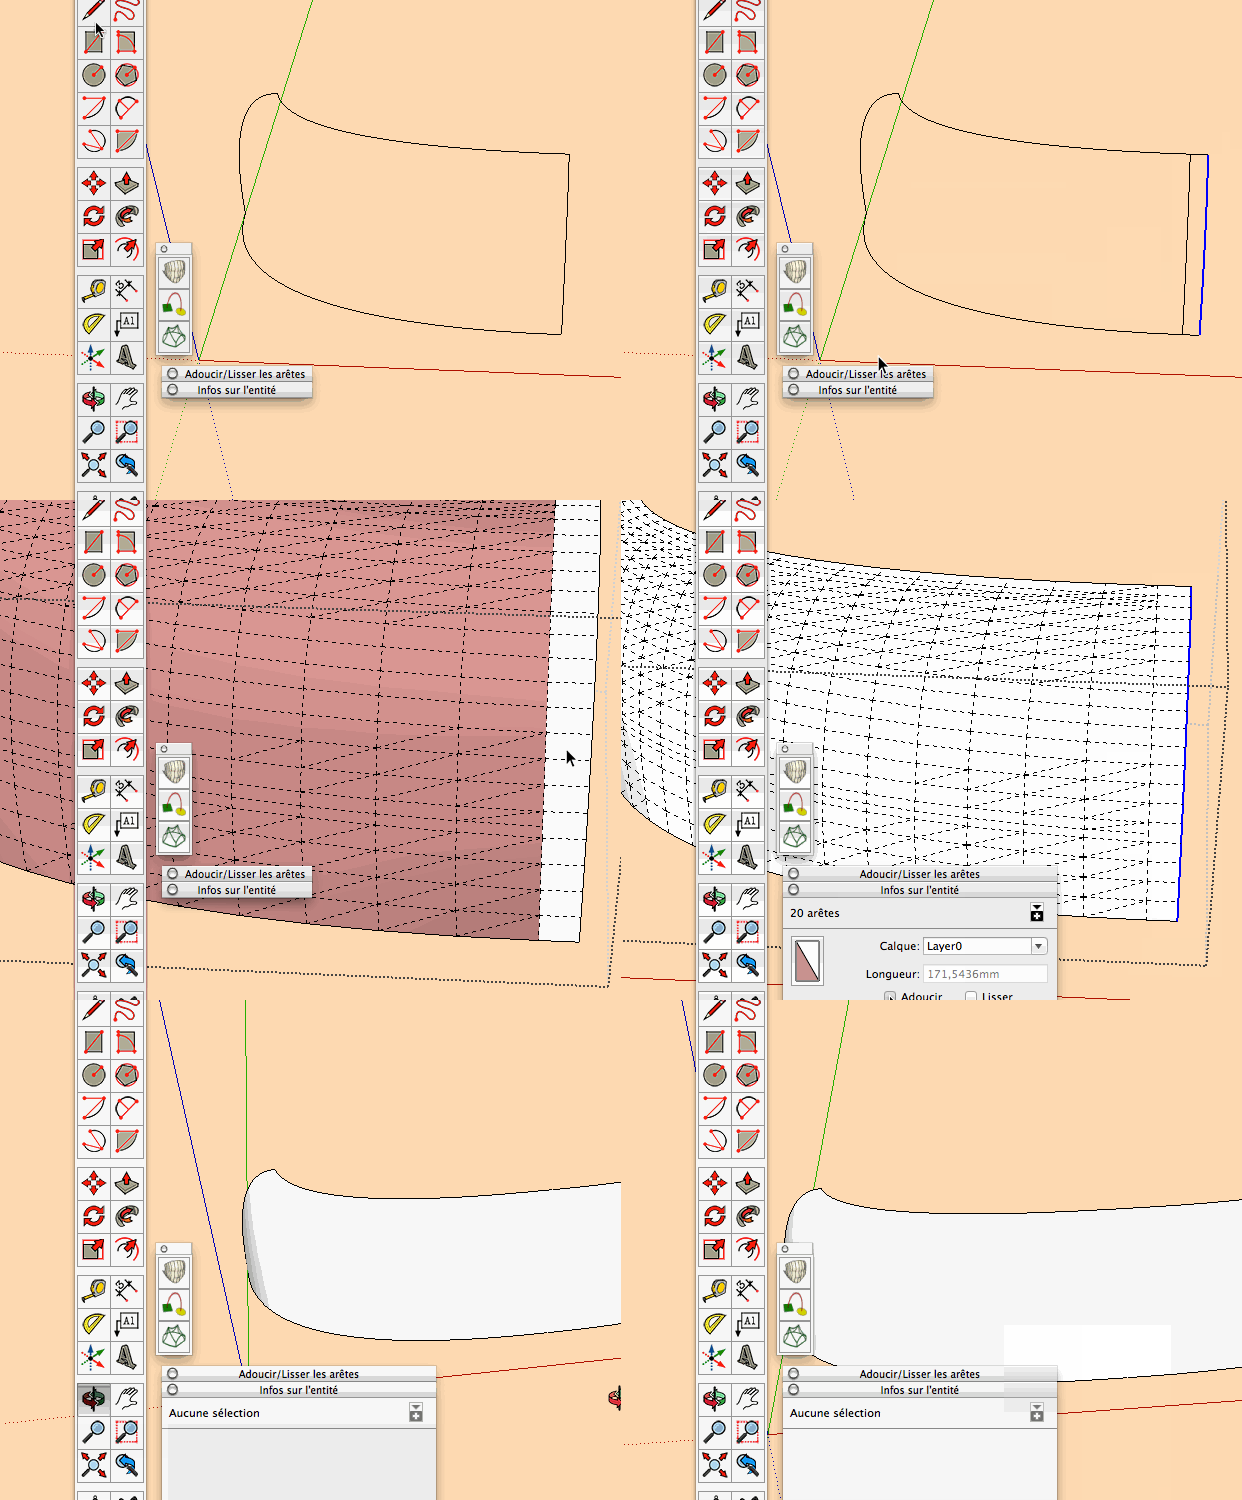
-
Sorry i have forgotten the $$$ !


-
@jgb said:
From the image posted, it looks like you have another mesh inside this outer mesh that is poking through, and you are trying to fix the outer mesh instead.
I can't say for sure as your SKP file is SU-2016 and I am using SU-2015 which cannot load your file. If you can post the file in 2015 format I will look at it closely.
Thanks, a SU2015 file is attached.
@gilles said:
[a
Give me the Nobel (don't forget the$ ).
).I had exactly the same idea in mind, but it ended up with two "V's" with a flat surface inbetween...

If you look real close in your animation/file you will see the shadow in the upper area telling there's still a "V", right?
In SU when using "soft" and "smooth" it all looks good, but when aiming towards 3D printing soft/smooth just hiding artefacts.
I placed a surface in the middle of the "problem area" to show it more clearly, see attached pics.Thanks all!
//MikaelFront 1.5 fix SUC (SU2015).skp
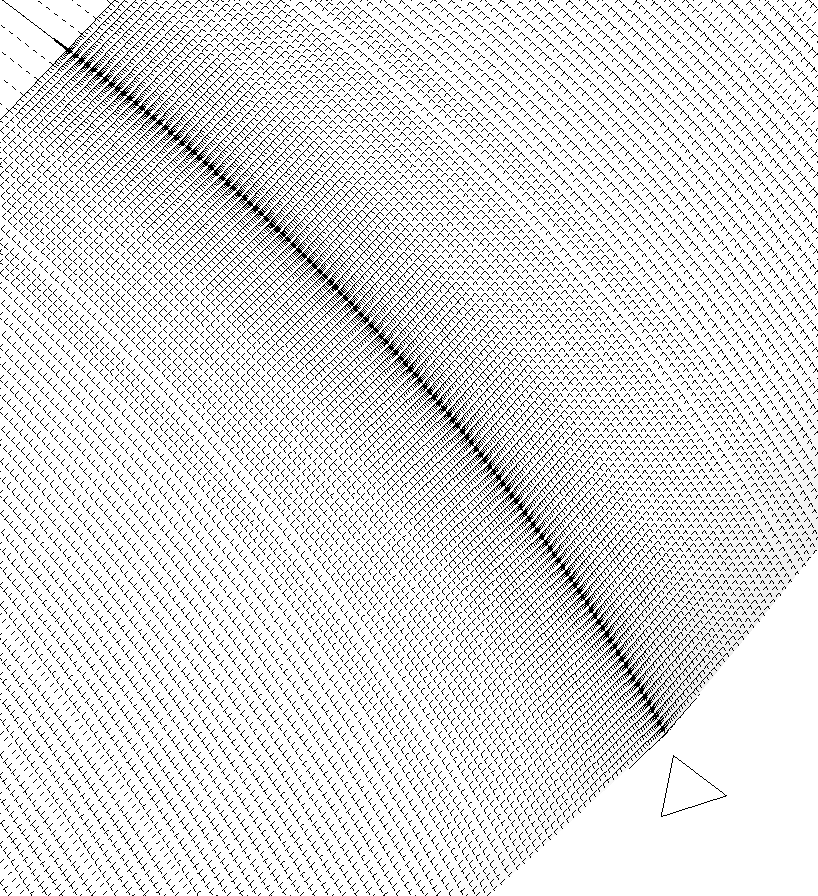
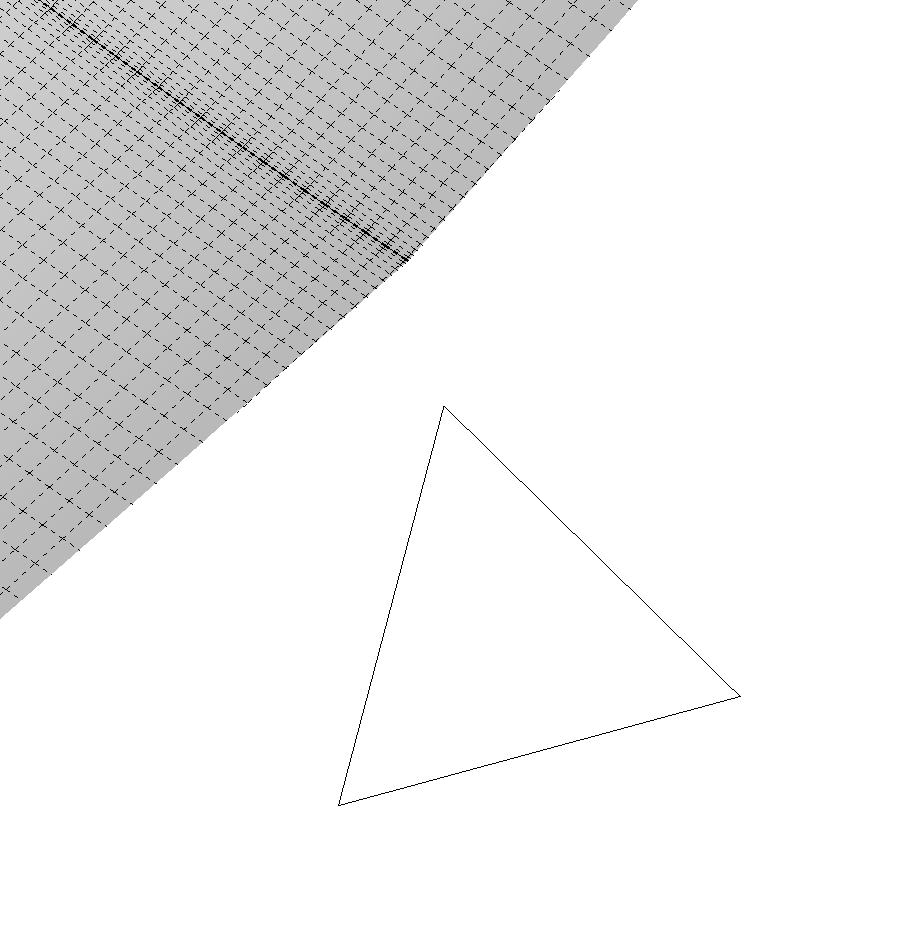
-
I looked at your model; that's all I could do, is look at it.
One half of the model is composed of almost 2,000 UNCONNECTED very short edges. I could not even weld them into a curve. How you got a surface from them is a bit of a mystery.However, the "V" you got is no mystery, as this happens to me where I flip a curved surface to form a mirrored other half. It also happens every time I create a large complex surface in several parts. I have to then massage the joins smooth.
The finite lines that form the curve at the "join" are not perfectly aligned in parallel to each other, and when you do the flip there is a small angle to the curve at the join, that appears as a ridge or "V" to the visual rendering. That angle at the "V" is a bit larger than the angles between the lines elsewhere on the curve, and as a result look larger.
To correct that, there are a few ways to do it.
If it was only for a visualization, then making the join lines between the 2 halves smooth and soft should make the join look smooth.
But you want to 3D Print this, so that probably will do nothing for the physical printed part. The "V" will form a bit of a ridge.
What you need to do is delete the surface triangles that form the join line, leaving a gap. But delete the end lines last. Why? Later down.
Explode both halves, then draw a line at the top and bottom corners, joining the 2 halves. You now have a valid curved perimeter for Curviloft to fill.
Explode the Curviloft group, and the "V" should disappear.If the join is now too flat, then undo the Curviloft surface and the 2 lines you drew. Then undo the deletion of the 2 end lines that formed the "V". (That's why!)
Draw a line mid angled to the original lines and a line joining the 2 halves, then Curviloft that perimeter. This flattens the "V" but not quite flat, so the 3D printed part should not have a ridge.
Sorry, but I do not have the time to draw and annotate the fix.

-
JGB,
Thanks for helping out, I fully understand your instructions.
However, when I color the line by axis it shows beziers with parallell red end lines (7,2mm on above, 0,045mm in the below line) in each half.
Maybe 0,045mm is too short to be recognized correctly, but in the final skinning group there's parallell lines alright even though 0,045mm became 1,06mm (see attached pic).
But the issue is that inbetween those perfectly parallell lines the skin gets a "V" shape... (???)
//Mikael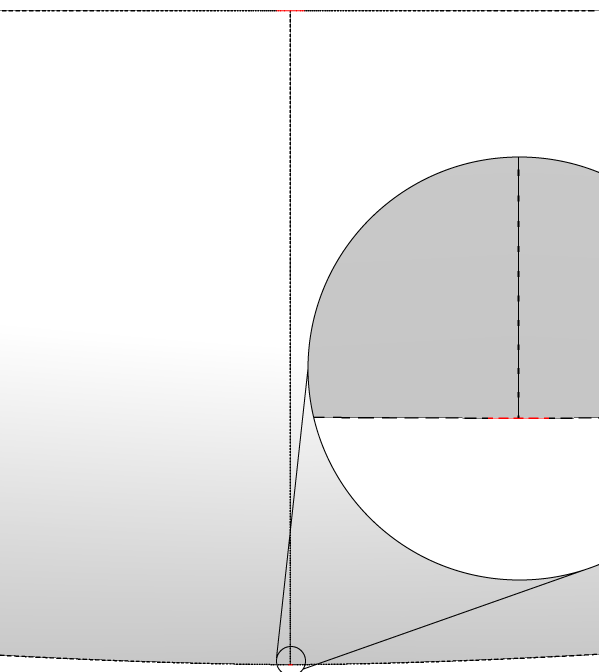
P.S The unconnected edges was a unpleasant result of copy/paste 300s beziers from SU2016 to 2015. D.S
-
@surfmike said:
JGB,
Thanks for helping out, I fully understand your instructions.
However, when I color the line by axis it shows beziers with parallell red end lines (7,2mm on above, 0,045mm in the below line) in each half.
Maybe 0,045mm is too short to be recognized correctly, but in the final skinning group there's parallell lines alright even though 0,045mm became 1,06mm (see attached pic).
But the issue is that inbetween those perfectly parallell lines the skin gets a "V" shape... (???)
//Mikael[attachment=0:vpj5k8ov]<!-- ia0 -->red_line.png<!-- ia0 -->[/attachment:vpj5k8ov]
P.S The unconnected edges was a unpleasant result of copy/paste 300s beziers from SU2016 to 2015. D.S
You don't need to copy/paste from SU2016 to 2015, just Save as and choose the SU version.
Also when you work at this scale make a component, copy/paste this component, scale the copy X100 or X1000 and work with the copy, 0,045mm is far from the tolerance of SU to create faces.
-
Maybe 0,045mm is too short to be recognized correctly,
Yes, that is a problem. I noticed it but forgot to say so in my reply. SU really does not like very short lines.
To get around this scale up the whole object 10 times and do the required functions on that, then scale back to 10% to return to original scale.
SU can display short lines, but has some difficulty working with them.
As Gilles said, save the SU-16 version as SU-15 and re-post it so I can look at it again.
-
Here's a "Save as..." version for SU2015.
Thx! -
OK, Got it.
I've been playing with it for well over an hour. I needed to implement a few tricks I've learned with Curviloft over the years when it just won't skin what I see as a clean perimeter. I managed to skin all the curves and yes, I do see the "V" ridge and it is why I said above. I did a partial re-skinning of the main join of the 2 components, and that does eliminate the "V", but it is a laborious job and I simply do not have the time to finish it, so here is what I did......1 - I separated the 2 halves so they do not interfere visually as I did the fix. Move just one comp on the red axis, so later it is easy to rejoin them.
2 - I tried skinning the main complex curve, but the perimeter was not true. So trick #1 is to explode the curves and delete the edges at the corners, but leaving 1 edge as a rejoin reference endpoint. I then rejoined the end points for an intact curve that Curviloft will accept. 4 corners - 8 lines deleted and redrawn.
3 - Curviloft skinned the side and top easily, but hung twice on the front curve.
4 - Trick #2 - when Curviloft craps out on a "perfect" perimeter, it is most often due to a very complex curve (and this IS a very complex curve) or where the curve is also part of an adjacent curve, I move/copy the perimeter away from the total object. I make sure the corners are clean, 2 lines only connected at endpoints. Curviloft skinned this. It took almost 10 minutes; I thought it hung again. When I brought the skins back together, sure enough, the "V" was there.
5 - I then softened and smoothed the join line and the "V" was less noticeable, but that was a visual fix only. A 3D printed part would have a ridge.
6 - I deleted the 2 faces and lines at the join from bottom to only about 1/2 way up as this was taking a long time to do. I had to do it with perspective off because the lines were so close to each other.
7 - I then drew a line ON RED AXIS from each horizontal line to the length of the gap. I then made an endpoint to endpoint line up the curve, softend and smoothed all lines, and effectively recreated the part of the surface deleted in #6 but it was now flat in respect to its mirrored half.
The "V" is essentially gone, as the join is flat.
What you see is SU interpreting the surface as it reflects the 2 halves.
That file is too big (18.5mb) to be attached for your reference. Even just the curved part is too big.
A cupola pointers......
The curves are way too fine, resulting in an unwieldy Curviloft surface. This skin has over 135000 entities alone. That is big. I know you want to 3D print a very smooth surface but take into account the resolution of the printer, and draw accordingly. The main problem you will face (NPI) is that Curviloft will almost double or even quadruple the line count from a perimeter because the endpoints of the opposing parts of a perimeter do not exactly align with each other.
If you need to join 2 curved surfaces at a common edge, try to make the faces at the edge meet the other side as close to straight as possible, or you will need to massage that join line to make it smooth. That is a tedious task, one I have to do all too often.
I hope this helps!
-
I have sketchup 2016 and I tried to install this plugin and the latest libfredo-plugin through the Sketchucation extension. As far as I can see both got installed, but I am unable to find the toolbar or any way to access the Curviloft plugin to actually use it. Could anyone help me?
-
In v2016 you may need to activate the Lib and the Extension itself, using Preferences > Extensions.
The Extension should then appear in a submenu item [Tools > Fredo6 Collection > Curviloft.
There is also a Toolbar of the same name [which will also need activation]... -
Hey.
I have a issue.
I have used the Curviloft plugin for a while now to create what it calls loft junctions between surfaces based on spline curves. This have worked perfectly until about a week ago or so.
Since then it have refused to complete the "loft surface". Instead it just color the edges purple like it did previously when I had forgotten to select a surrounding edge, and it refuses to do anything beyond that. I've tried to completely delete the plugin and re-install, but it did not fix it. I'm still unable to get it to work.I think the problem started around the same time that I installed the fredotools plugin, but I'm not sure. Regardless I tried to delete that too but that did not help either.
-
Could you open the Ruby console before launching Curviloft and see if there is any error message displayed while you do the selection in Curviloft.
Thanks
Fredo
-
The Ruby Console window remained blank while I tried to use the curviloft plugin. I have not used this ruby function before so I was unsure whether I was supposed to write anything or not? Here is a screen-shot of it, which also shows how far I am able to use the curviloft command.
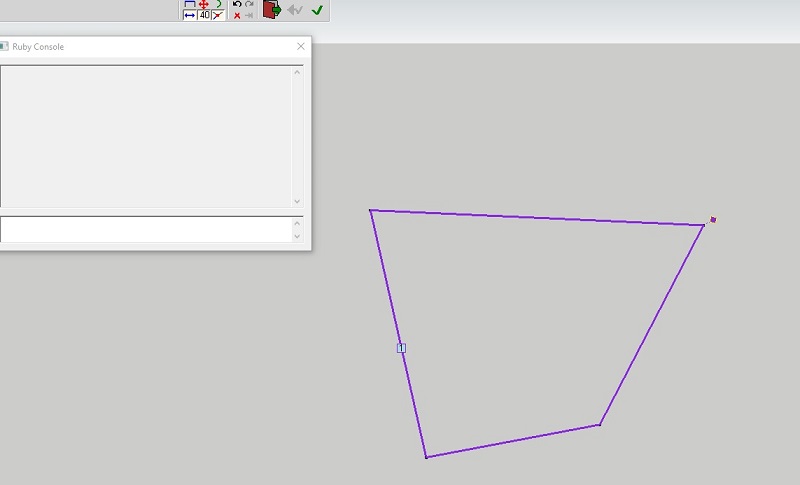
-
It would appear that you are using the wrong tool. Try the third tool on the toolbar instead.

-
@dave r said:
It would appear that you are using the wrong tool. Try the third tool on the toolbar instead.
[attachment=0:fwubhjnj]<!-- ia0 -->Screenshot - 2_26_2017 , 7_07_23 AM.png<!-- ia0 -->[/attachment:fwubhjnj]Hm, It can't seems like you are right, but I could swear that I used the same tools previously. Maybe I just had a brain fart. Rather embarrassing.

-
Hi everyone.
Can anyone help me for this problem with sketchup curviloft.
-
How did you install Curviloft and Round Corner? Did you also install LibFredo6?
-
感謝大大
[mod=:nzf08c63]Thank you greatly[/mod:nzf08c63]
-
@azeemuddin said:
Hi everyone.
Can anyone help me for this problem with sketchup curviloft.Not sure where my first post went...
Having a similar problem on a mac (OS 10.5.8) running SU7. Here is are pictures of the error dialogue, the Plugins folder, and the first several entries in the libFredo6 folder.

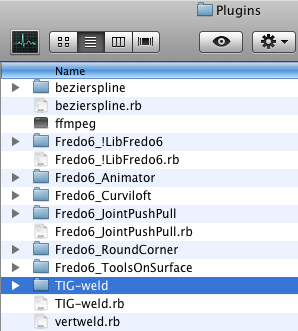
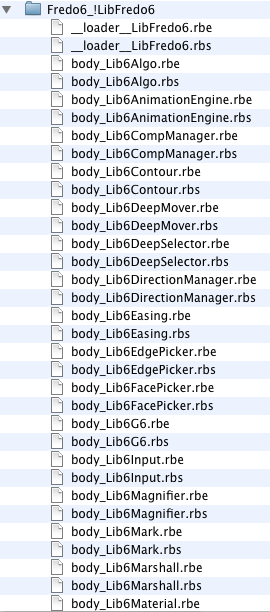
Hello! It looks like you're interested in this conversation, but you don't have an account yet.
Getting fed up of having to scroll through the same posts each visit? When you register for an account, you'll always come back to exactly where you were before, and choose to be notified of new replies (either via email, or push notification). You'll also be able to save bookmarks and upvote posts to show your appreciation to other community members.
With your input, this post could be even better 💗
Register LoginAdvertisement


