sketchucation logo sketchucation
    • Login
    ℹ️ Licensed Extensions | FredoBatch, ElevationProfile, FredoSketch, LayOps, MatSim and Pic2Shape will require license from Sept 1st More Info

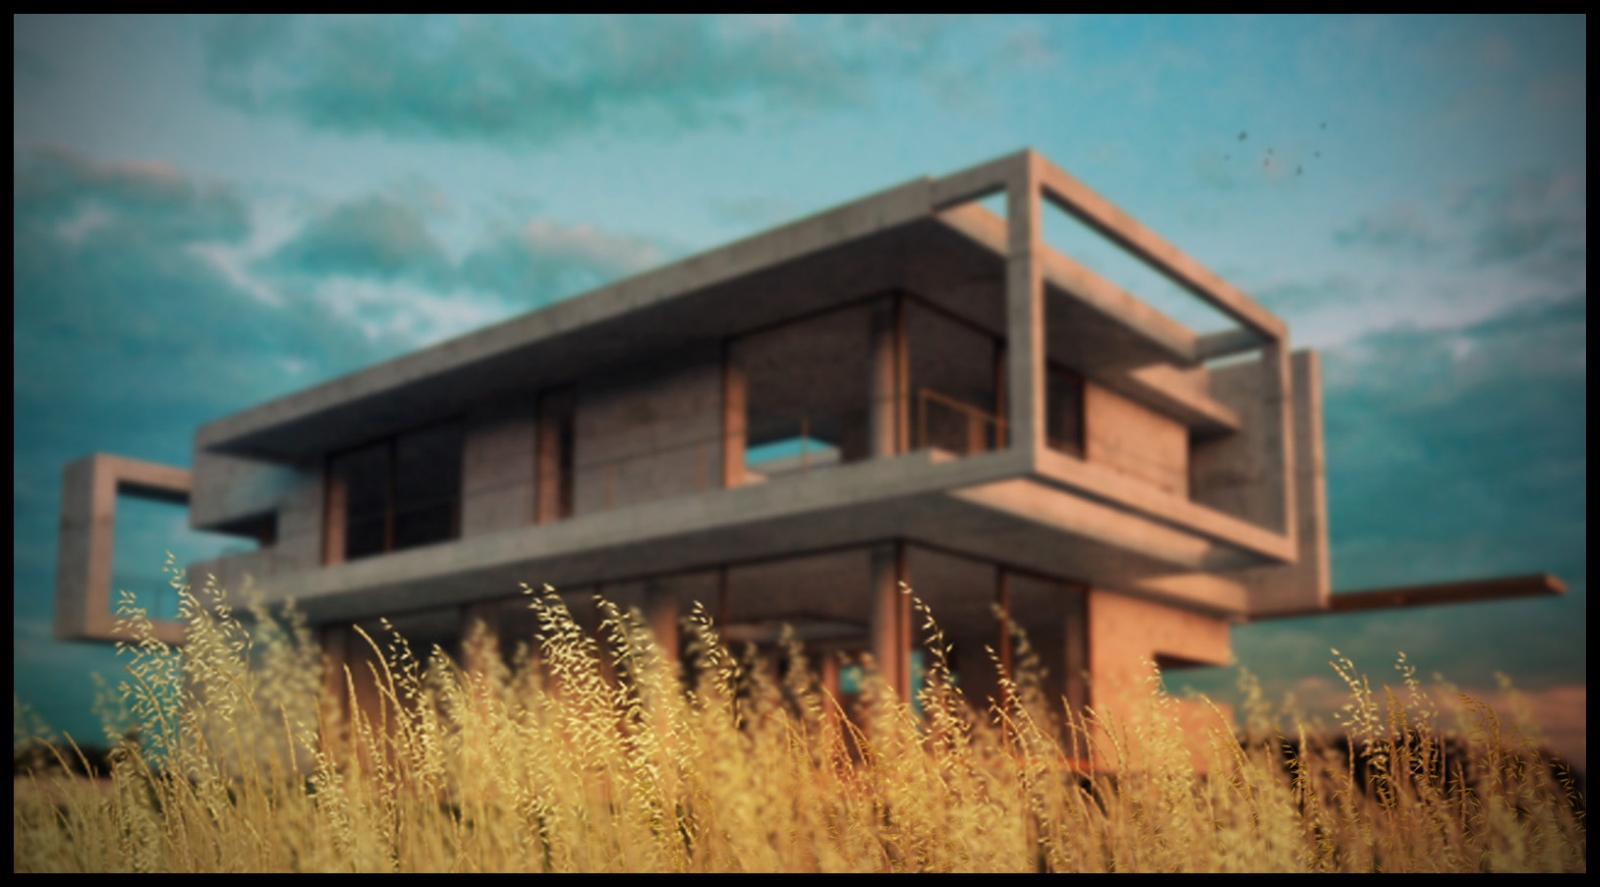
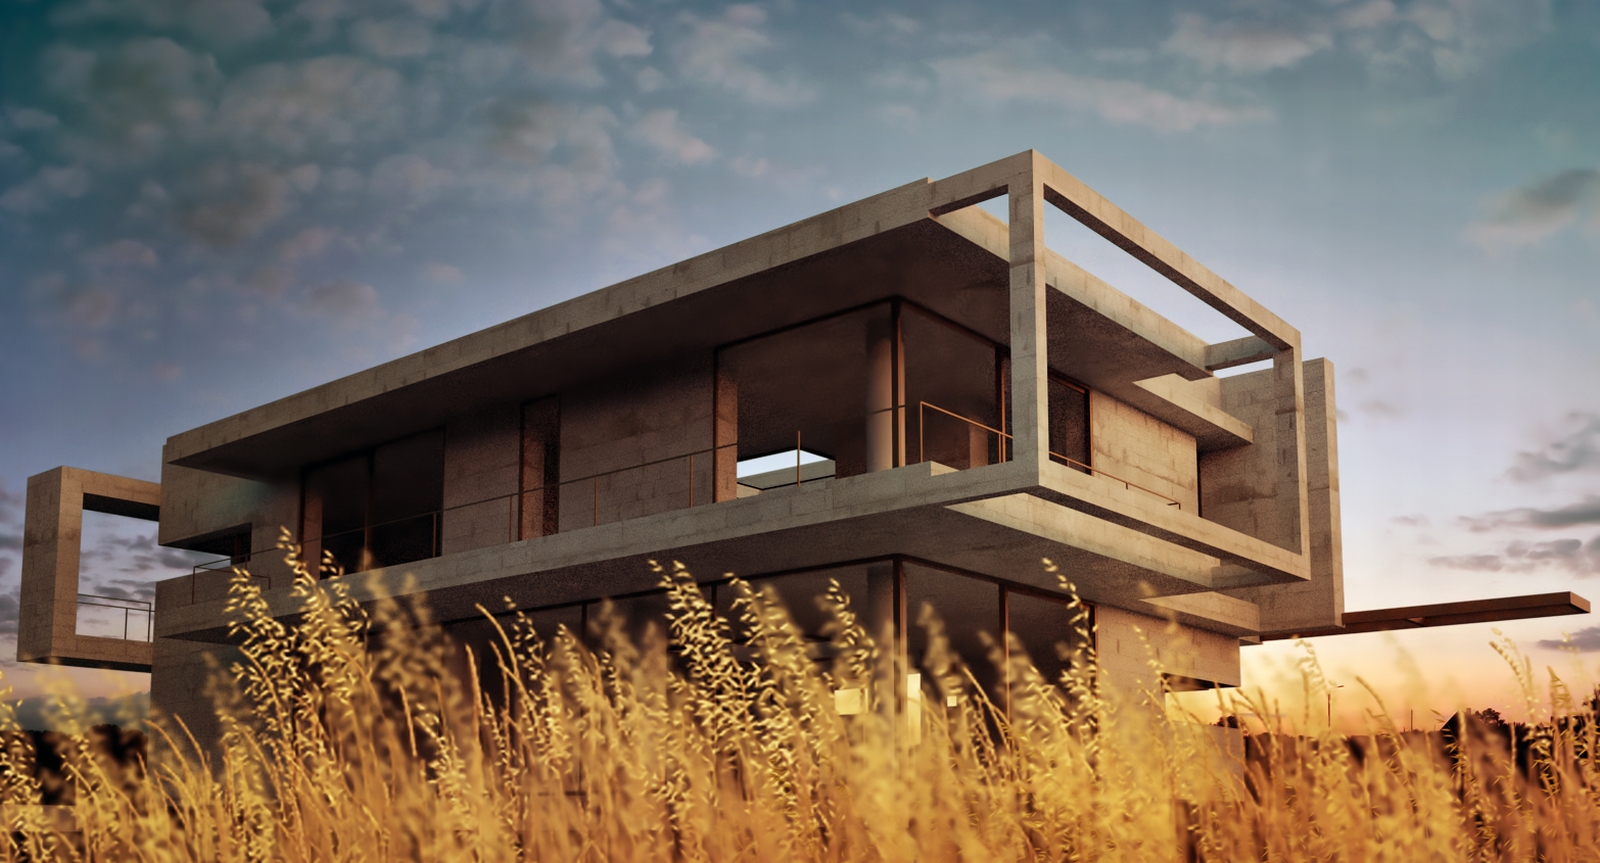
    Villa PM maxwell render and process

    Scheduled Pinned Locked Moved Gallery
    19 Posts 13 Posters 1.7k Views 13 Watching
    Loading More Posts
    • Oldest to Newest
    • Newest to Oldest
    • Most Votes
    Reply
    • Reply as topic
    Log in to reply
    This topic has been deleted. Only users with topic management privileges can see it.
    • D Offline
      davidh
      last edited by

      Attached is a maxwell render of the Villa PM uploaded by Hieru.I have also attached a small step by step showing the process from sketchup to maxwell.The maxwell render is lit by a HDRI file and there are only 3 materials added to the model,the vast majority of the work was done in photoshop.Overall,from render to finished image it took about 3 hours.Regarding the model,I think it is one of the best models uploaded recently and is perfect for rendering setups,basically because there are a lot of different angles and popouts to the building along with many diagonals, that make it very easy to come up with dynamic views.(I have shown what I mean in the bottom image)I think these diagonals can really help to achieve better compositions.Again thanks to Hieru for uploading the model.


      Villa PM final.jpg


      Villa PM crop final.jpg


      Villa PM Render process.jpg


      Villa PM line.jpg

      1 Reply Last reply Reply Quote 0
      • HieruH Offline
        Hieru
        last edited by

        Wow 😲

        Glad you found the model useful and thanks for the insight on your process.

        Is there any chance you could share your Photoshop technique for adding dirt? I've been looking for online tutorials but I haven't had much success.

        PS - Whoever let the house get into such disrepair needs a good talking to πŸ˜‰ Sadly it does happen though:

        http://www.pushpullbar.com/forums/attachment.php?attachmentid=7477&stc=1&d=1132834916

        www.davidhier.co.uk

        1 Reply Last reply Reply Quote 0
        • L Offline
          leminilab
          last edited by

          😲 All I can say is: it looks awesome!

          ...

          And +1 on the dirt tutorial πŸŽ‰

          • "Live every day as if it were your last and then some day you'll be right."
          • "ThomThom rules!!!"
          1 Reply Last reply Reply Quote 0
          • jamalitoJ Offline
            jamalito
            last edited by

            😲 _ 😲
            okey okey I want to believe that is render not real photo
            breath . breath . breath
            wow great work really I thought you are speaking to really pic not render go head man I wish you more successful
            I wish to find like this tutorial because I have problem in make final render

            Albert Einstein:
            ((I am enough of an artist to draw freely upon my imagination. Imagination is more important than knowledge. Knowledge is limited. Imagination encircles the world.))

            1 Reply Last reply Reply Quote 0
            • C Offline
              cadmunkey
              last edited by

              David, can you tell me where you got the background from? Is it purchased?

              1 Reply Last reply Reply Quote 0
              • D Offline
                davidh
                last edited by

                I have attached the 2 dirt maps i used in photoshop.I will upload a more detailed tutorial later but basically what I do is copy the dirtmap image into the rendered image in photoshop and use the distort tool (EDIT -TRANSFORM -DISTORT in the pull down menu)to align it over the area I want to grunge up.I then use the overlay blend and set this to about 40 -60% and thats it.If you do this with multiple textures in the same area you can really start to build up interesting textures.
                Regarding the background,it was a free download, a very hi res jpg .(sky 0008)
                the website http://vknt.be/free/skies/


                paint08.jpg


                4301-bump.jpg

                1 Reply Last reply Reply Quote 0
                • HieruH Offline
                  Hieru
                  last edited by

                  Thanks for the explanation. I didn't think it would be that simple - I assumed it would involve creating grunge brushes and using a technique to over paint in perspective.

                  www.davidhier.co.uk

                  1 Reply Last reply Reply Quote 0
                  • C Offline
                    cadmunkey
                    last edited by

                    Thanks for sharing the resource David.

                    1 Reply Last reply Reply Quote 0
                    • marked001M Offline
                      marked001
                      last edited by

                      very impressive post processing here, david... really impressed!

                      http://www.revision21vis.com

                      instagram: revi21on

                      1 Reply Last reply Reply Quote 0
                      • D Offline
                        davidh
                        last edited by

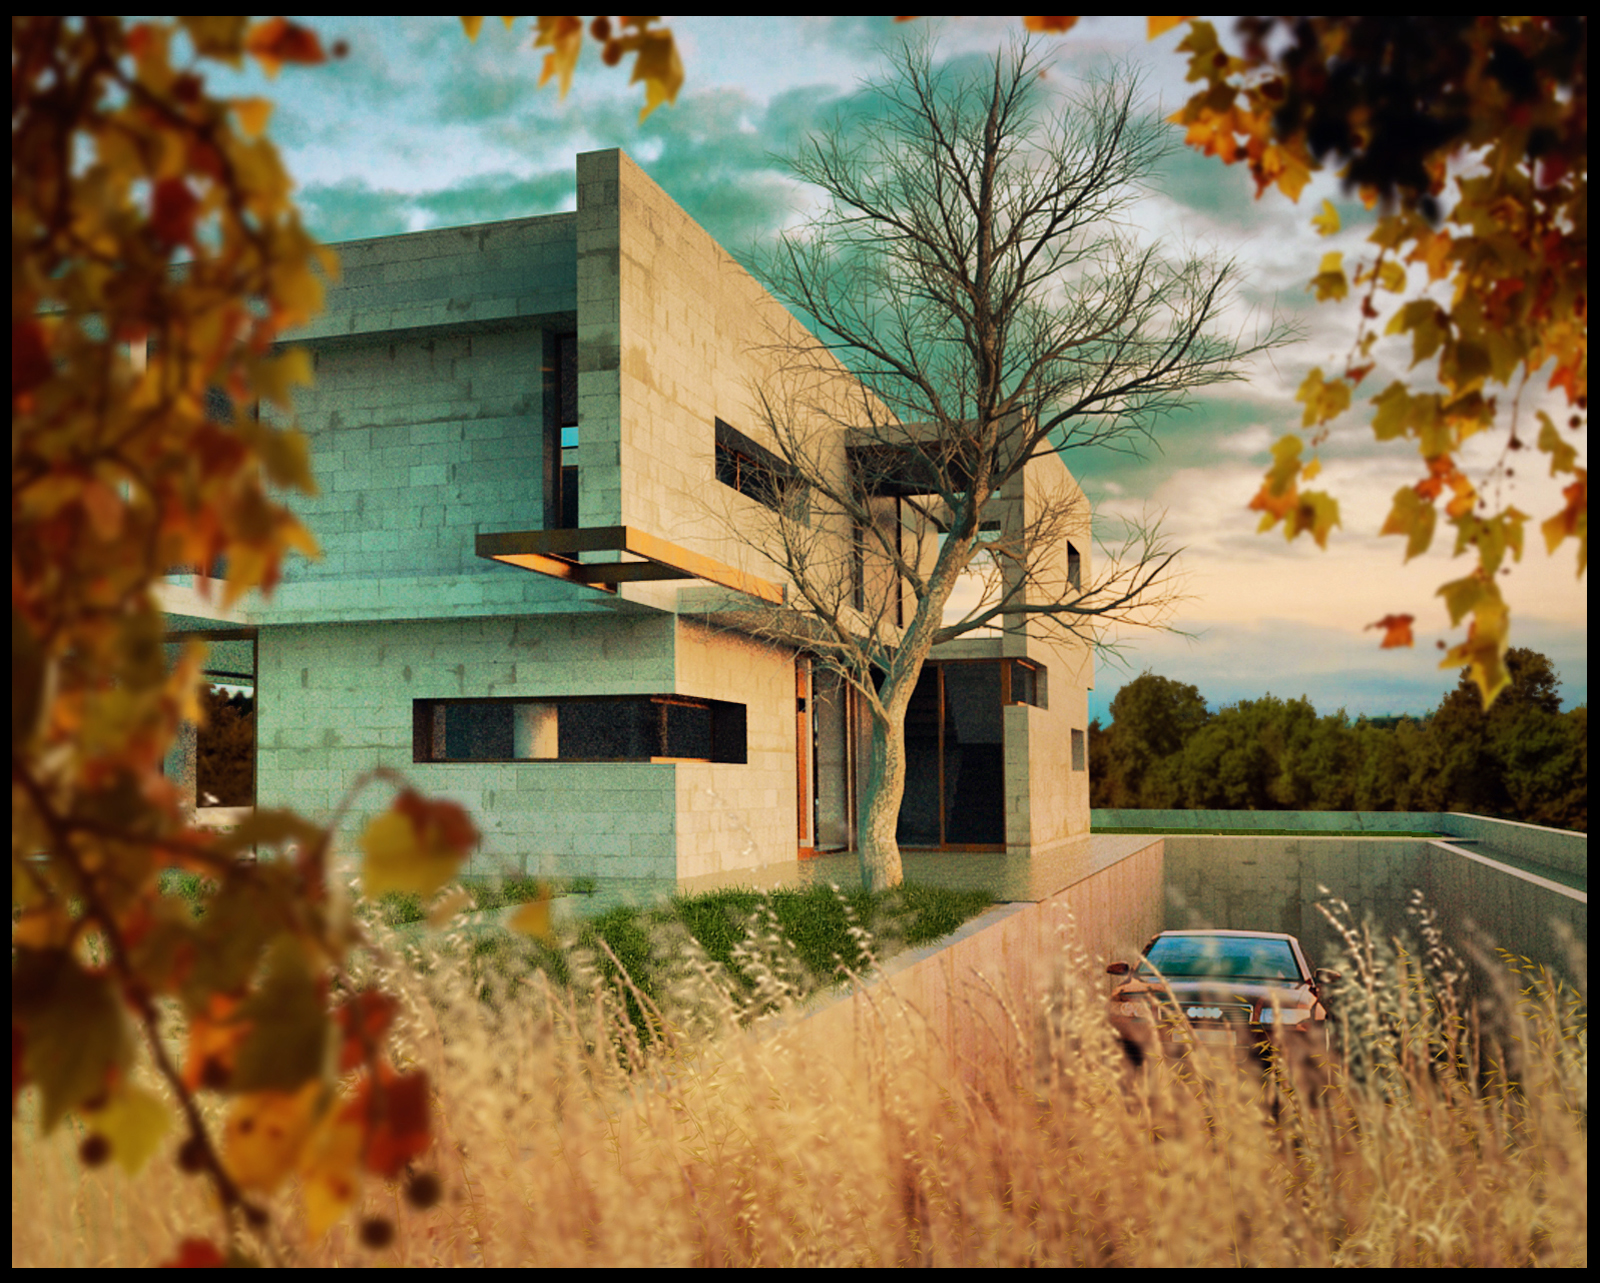
                        Heres one with some additional foreground elements and a very dead tree!


                        thru the trees.jpg

                        1 Reply Last reply Reply Quote 0
                        • RichardR Offline
                          Richard
                          last edited by

                          Stunning work AGAIN mate!

                          Just wondering though why you don't add the dirt as a layer to the materials prior to rendering? I pretty much add a dirt layer to every material.

                          Also not so sure about the car in this one, they seem out of place in a ruins shot!

                          [BUILTBRAND.COM.AU](http://builtbrand.com.au/)

                          1 Reply Last reply Reply Quote 0
                          • D Offline
                            davidh
                            last edited by

                            Hi Rich,
                            The main reason I didnt add dirt maps in maxwell is because I was originally just playing about with the HDRI lighting and when I had the photoshop file open I decided to play around with the textures as well.The car does look a bit out of place but its really there to catch reflections on the bodywork and glass,just to help to accentuate the contrasts with the materials.I have attached 2 more images here.As I said before its a great model to test render with but its all about the lighting for me at the moment.


                            foreground grass 1.jpg


                            foreground grass 2.jpg

                            1 Reply Last reply Reply Quote 0
                            • jarynzlesaJ Offline
                              jarynzlesa
                              last edited by

                              super method πŸ‘ thx for sharing πŸ‘ . im looking forward to your next work.

                              http://www.vizualizaceschodiste.mypage.cz/

                              1 Reply Last reply Reply Quote 0
                              • RichardR Offline
                                Richard
                                last edited by

                                @davidh said:

                                As I said before its a great model to test render with but its all about the lighting for me at the moment.

                                Well ten points for that - the lighting is superbe!!!

                                [BUILTBRAND.COM.AU](http://builtbrand.com.au/)

                                1 Reply Last reply Reply Quote 0
                                • omiKronO Offline
                                  omiKron
                                  last edited by

                                  Whoa, Maxwell rocks ! Looks so real πŸ‘ And the post work in Ps makes it more real πŸŽ‰

                                  1 Reply Last reply Reply Quote 0
                                  • Bryan KB Offline
                                    Bryan K
                                    last edited by

                                    whoa

                                    The second one of the last series is superb.

                                    See my portfolio at https://delphiscousin.blogspot.com/

                                    1 Reply Last reply Reply Quote 0
                                    • X Offline
                                      xaideoe
                                      last edited by

                                      @richard said:

                                      Stunning work AGAIN mate!

                                      Just wondering though why you don't add the dirt as a layer to the materials prior to rendering? I pretty much add a dirt layer to every material.

                                      Also not so sure about the car in this one, they seem out of place in a ruins shot!

                                      Do you have any tutorials or reference to add dirt to the maxwell material? Cause I am trying to achieve a nice and realistic look with materials layer layers but I can't..

                                      1 Reply Last reply Reply Quote 0
                                      • DanielD Offline
                                        Daniel
                                        last edited by

                                        beautiful images, David

                                        My avatar is an anachronism.

                                        1 Reply Last reply Reply Quote 0
                                        • FrederikF Offline
                                          Frederik
                                          last edited by

                                          πŸ˜†
                                          Not that it really matter, but take a look at the dates...
                                          This thread is back from June 2011... πŸ˜„

                                          Cheers
                                          Kim Frederik

                                          1 Reply Last reply Reply Quote 0
                                          • 1 / 1
                                          • First post
                                            Last post
                                          Buy SketchPlus
                                          Buy SUbD
                                          Buy WrapR
                                          Buy eBook
                                          Buy Modelur
                                          Buy Vertex Tools
                                          Buy SketchCuisine
                                          Buy FormFonts

                                          Advertisement