[Plugin] UVTools 0.2 Pro (Beta) (Updated for SU6)
-
@ qwertydesign: well, unfortunately im not that good on laying out uv mapping, it is true that lithunwrap and probably the other uv mapping software have ability to stitch out all the uv one by one, but that process is kind of hard and time consuming to do.. im still learning and searching too for the easiest way to do it properly and efficiently.. right now what often im doing is, i split the face on sketchup and manually positioning the texture (in my case is architectural thingy), i know it will be much harder on organic model.. but mybe u can try that way.
regards,
-
@vidy said:
@ qwertydesign: well, unfortunately im not that good on laying out uv mapping, it is true that lithunwrap and probably the other uv mapping software have ability to stitch out all the uv one by one, but that process is kind of hard and time consuming to do.. im still learning and searching too for the easiest way to do it properly and efficiently.. right now what often im doing is, i split the face on sketchup and manually positioning the texture (in my case is architectural thingy), i know it will be much harder on organic model.. but mybe u can try that way.
regards,
Thank you for your time on this Vidy. I tend to use more curved shapes myself, see qwertydesign.deviatart.com
I will try your techique as dividing it down may simplify the process.
Many thanks. -
Oh my, I just stumbled across this wonderful tool. We have a "V-Ray Sphere" in our product... and mapping it is an impossible task normally. With this plugin though... it's just beautiful. Thank you for brightening my day.
-
SU 8 pro crashed when using this plugin...
-
Has anyone been able to use UVTools on SU 8?
Mine crashes... : (
-
My guess is that Whaat is not seeing any advantage to porting this to SU8.

-
Just did a quick test on SU8 and I did not get any crashes.
When is it crashing? Exporting or Importing?
Maybe it's conflicting with another plugin that is using Observers.
-
Does anyone know whether this plugin will allow the scale of the texture to remain constant even when the scale of a component or group it is related to changes?
This can be either the texture mapped directly to the faces within a group or component or to the group/component itself.
-
Hey Dale,
It crashed for me when trying to UV map a sphere.
Best,
Jason. -
Mine crashes when I try to apply a UV map from context menu... (ie. Spherical)
-
Since I don't know what you're using for the unwrapping/mapping process I can only suggest this video
It's the third in a 5 day series but he explains how he goes from Blender to Gimp and back. And also how to properly unwrap a head. Worth a watch.
-
Ok, so I have a model of a human head and 4 photos of each side of the head. I export the surface to a UV mapping program which rips it apart into a flat surface. Now what? How on earth do I distort the photos to match the weird-shaped surface, so the eyes are where they should be and not where the ears go etc? And how do I seamlessly join the photos together first?
Is there a good tutorial on all of that somewhere please, because a head textured with black and white squares or bricks, like in the examples, just doesn't look right somehow

-
Wow, that looks easy (Not!)

Shouldn't take more than a year to learn to use Blender. Another year and I might manage to unwrap my first model. Another couple of years and I should manage to texture it and import it back into Sketchup.
Obviously not quite as straight forward as I had imagined. Guess I'm just a slow learner.
-
Hi there Whaat.
Wha(a)t is this ??? Perfect uv map in uvmapper3d but when i save it and reload to SU it gets a little ofsett some places ?? Somthing i do wrong or have forgotten or a little bug ??? Btw, great plugin.
Edit: think the solution is that this only happens from a 90 degree horisontal / vertical face to a angel face wich in turn means that the lengtht of the edge is different from face to face. Can anyone fonfirm this ??

-
Yo,
I am not shure, if I did somethimg wrong, but I tried with Maya 2009, and when I try to open or import the Bridge object, I can´t see anything in Maya. Even in the Outliner there is nothing displayed. When I open the UV Editor, it comes up blank.
regards, 3rd Eye
P.S.: Keep trying, we really need this UV Mapping stuff.
By the way @ TIG: Your object importer is really cool, working for me nice so far! Thanx for taking the challenge! (I havent tried with really BIG models up to now) What I dont understand: If you chose the import comand Import "obj. with textures" why does it not bring the uv coordinates with it - or does it? (for me this didn´t work)
-
@3rdeye said:
...
By the way @ TIG: Your object importer is really cool, working for me nice so far! Thanx for taking the challenge! (I havent tried with really BIG models up to now) What I dont understand: If you chose the import comand Import "obj. with textures" why does it not bring the uv coordinates with it - or does it? (for me this didn´t work)The UV mapping should be brought in by the OBJimporter, assuming it was exported out initially!
There is a limitation for 'distorted' textures - an exporter has some difficulties with those as they somehow require more 'points' than the OBJ format allows. For example, if you use SUp's built-in OBJ exporter you will find that a series of 'unique' distorted-texture-files are made for the 'distorted textures' and these are used instead of the usual image file for a non-distorted one. My own OBJexporter doesn't [yet] cope with distorted textures but does UV map scaled/rotated/placed textures OK - an upgrade is due when I get a moment free...
-
For the Crash on SU 8 you have to experiment with this steps also:
@olishea said:
use the paint bucket tool to roughly apply the texture to your object.....it will not look correct (dont worry). now select the object (just click its surface) and go to edit>surface>uv tools>then choose cylindrical or spherical map.
should be straight forward. you can change the scale of the texture in the sketchup materials window.
Another thing, Unselect the faces that does not have the texture.
-
Hello everyone!
I have a little problem I want it resolved.
I downloaded the plugin UVTools 0.2 Pro and seems to be working fine as long as I follow the instructions
until I found some glitches on the mapping of the texture.
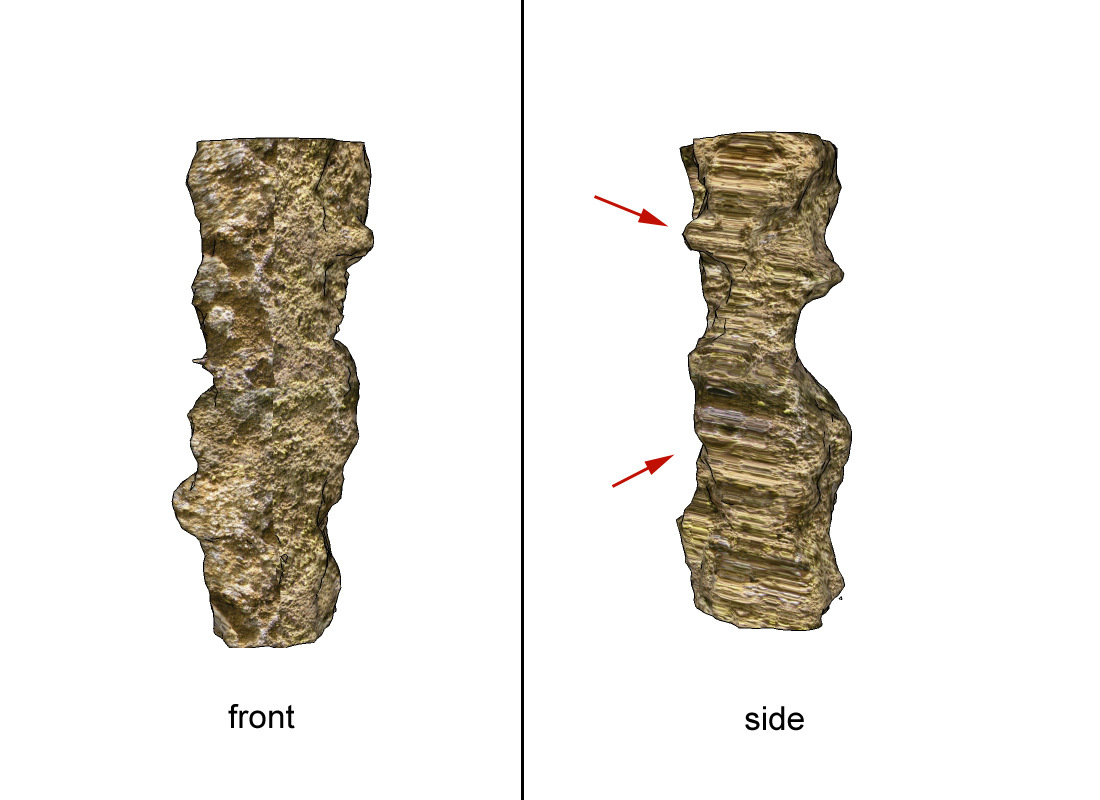
I am trying to map a texture on an organic model of a columnar rock and this is the result:
I noticed that a part of the model seems to "stretch" or distort the texture image. In other parts, it's just fine.
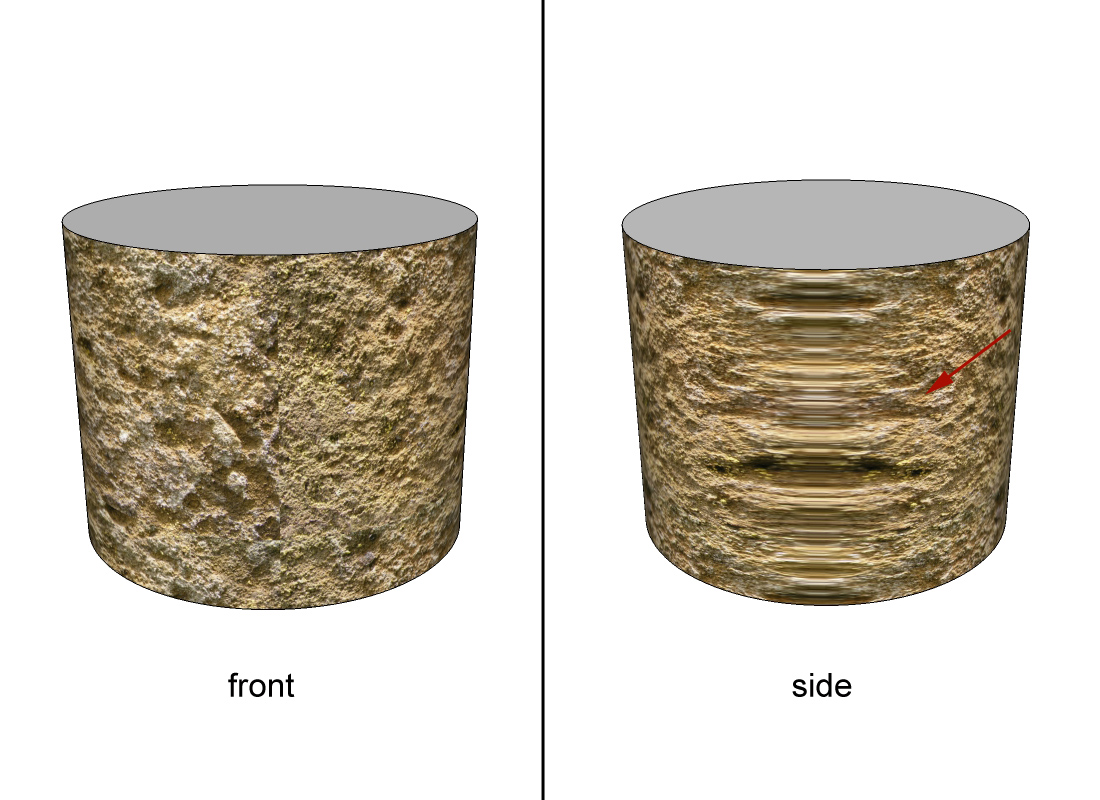
I also tried it on a cylinder model (see attachment below), it happens the same. When I used the UVTools plugin, I use spherical mapping but it also happens the same when using cylindrical mapping.
Please tell me what seems to be the problem why the texture map isn't smoothly mapped on the model?
Thanks for any input or help you can provide.
All the best,
Andy
-
Well, from here it rather seems to be planar projection than spherical or cylindrical. With UV Tools 2, you need to do the mapping in an external program. Which one are you using?
-
Hi Gaieus!
Thanks for your reply.
I did not use any external mapping program. I mapped it directly in SU.
This is how I did the mapping:
-I loaded the organic model which is grouped originally, exploded it.
-Imported the texture and placed it on the surface of the model.
-Exploded the texture, then using the eyedropper in the paint tool, added the
texture on the paint tool dialog box.
-Then I applied the texture using the paint tool on the surface of the model.
-I then right click on the model, selected the UV tools plugin and selected spherical map.
That's how I did it.
Did I do something wrong? Anyway, can you suggest an external program for me to do the mapping?
Thanks for any input or advice.All the best,
Andy
Hello! It looks like you're interested in this conversation, but you don't have an account yet.
Getting fed up of having to scroll through the same posts each visit? When you register for an account, you'll always come back to exactly where you were before, and choose to be notified of new replies (either via email, or push notification). You'll also be able to save bookmarks and upvote posts to show your appreciation to other community members.
With your input, this post could be even better 💗
Register LoginAdvertisement


