sketchucation logo sketchucation
    • Login
    1. Home
    2. Sauronbloo
    3. Posts
    ℹ️ Licensed Extensions | FredoBatch, ElevationProfile, FredoSketch, LayOps, MatSim and Pic2Shape will require license from Sept 1st More Info
    S
    Offline
    • Profile
    • Following 0
    • Followers 0
    • Topics 4
    • Posts 28
    • Groups 1

    Posts

    Recent Best Controversial
    • RE: Issue rotating to fit

      I didn't picture that at all when you said "rectangular grid".

      Is this what you mean by spider the roof?

      @mac1 said:

      Unless the actual building is racked some way other than just model errors the rendering issue should not be of concern ( can be handled be monochrome during design and the only rendering during show and tell, use of scenes, layers) and of course you have already accepted impact of schedule and cost have been considered since design change is not allowed.
      BTW it takes 6 degrees of freedom to define the location of a rigid body in free space ( x, y, z, pitch, roll, yaw) etc. and SU allows you to do that and not with standing model errors fitting should be doable. Also BTW just translation and rotation gets different results depending on the sequence

      I have to read your posts about 5-6x before they start to sound like English to me. Are you saying; 'the issues shouldn't be a big deal if I'm just rendering, not constructing in real life', and stating how much space I would need btw parts to actually build? Is translation the trick with going into scale, then typing "-1"? what do you mean by the diff results?
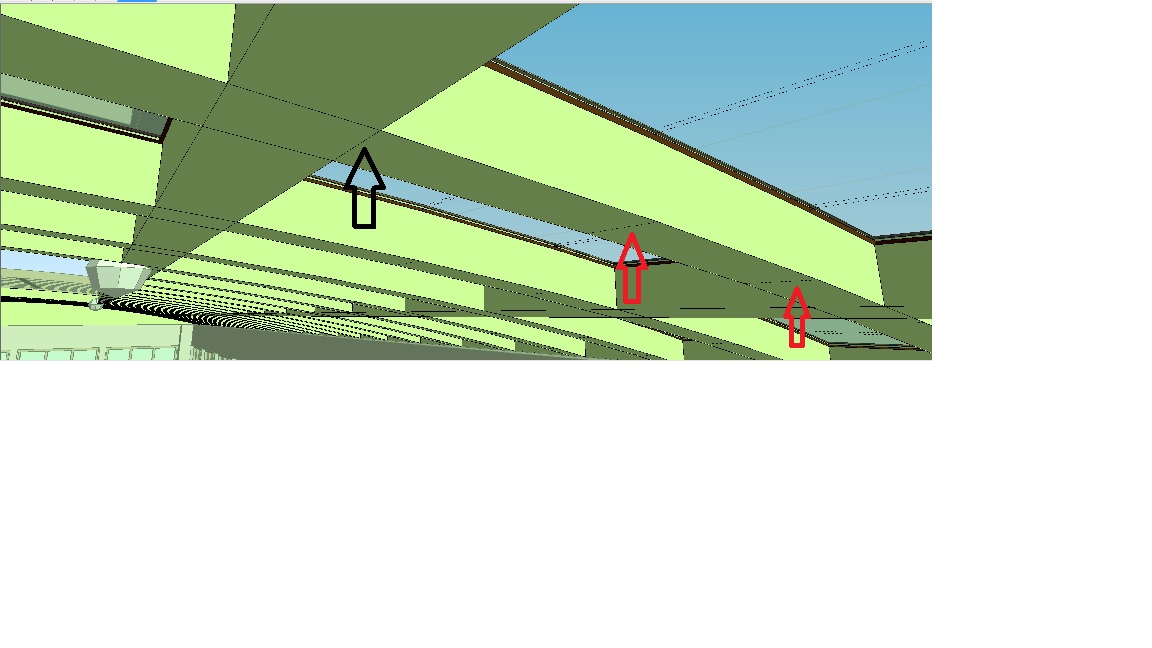
      @mac1 said:

      Attached is a approach that does not use rotate nor scale but just offset tool and the push pull.
      Several additional comments; One snippet of geo 852' off set from main model deleted; architectural units display precision is not adequate for accurate modeling IMHO so changed to decimal;
      Su has the native capability of replacing one component with another and the replacement is added to model in accordance with how the new component and model axis are set.Both of those can be independently set plus the gluing plane can be set. This can allow the use of one component definition for all the lite's if model conditions are correct. (This is based on the fact component definition is invariant under scaling, rotation, moving but for the reason above this condition could not be meet.(The roof base triangles are not equilateral)
      The attached portion of the model was simply done using the same Lite layout as the OP model and then the window frames will be created by a combination of off-setting to the required OP frame dimensions and the push pull to the required depth / height.
      Double glazed lite's are required but only one side was done. IMHO a spider at top is still required to make the design reasonable as noted above.

      While I appreciate the time and effort you put in to answering my q, I'm lost as to what you mean in the paragraph that mentions "geo 852'"(dunno what that is). I'm also confused as to what importing components has to do with the issue at hand. I think it would be easier to just redo the roof as I did, than to find/make new components to replace window panes. The main issue was not even the windows at all, the parts wouldn't fit bc the triangle was drawn wrong. Once I drew a good triangle, everything fit together. I know that windows can be made many diff ways, including push/pull, I made all the windows in my first model by dissecting a face with a plane and drawing every line by hand.

      Couldn't even use push/pull on the curve

      Now I'm smart enough to use a plugin, but that plugin was not working for the one window at the top. I was wondering if there was some reason that window wouldn't spawn, or what? even in the model you posted (2 copies of the same, right?), when I delete the lines separating the tip of that triangle above the row of holes you've cut, the tool will not make that face a window. Why not? Those were my 2 questions; Why no window, and why wont it rotate to match the mirror copy.

      I now have that roof complete, the hard part was getting the 2 halves to meet in such a way that it would be possible for one side of windows to slide over the other, and I've represented that well enough to render(this isn't meant to be a construction plan). I'm still having trouble with the window frame tool. It refuses to work in certain areas, especially triangles. I've encountered a new issue, also. I've imported a few components, now my axes are all different. I cant draw rectangles on things bc the red/green don't line up with that component, so I must use lines. That or I wanna rotate something to match a wall, but it's not the same angle degree as the wall. For example: my wall is at 90deg. anything native to that group can be rotated to 90deg and fit nicely, but I gotta rotate this to 12.7deg or something stupid and hard to find. every component has a diff angle, like wth?? Is there a way to get them all on the same page, cuz it's a pain for me to rotate them just right, too easy to be off a bit.

      As far as my progress, I wanted to stay with the look I had bc it went with the lower level of the roof, but yes, I did try a few styles when the first didn't work, you can see the new style has no equilateral triangle up top like before cuz the plugin wouldn't do it n I'd rather change styles than do all that by hand - I'm not "stovepiped" into any one idea.


      Everything fits together, and the 2 levels are coordinated with lines matching


      I put a cylinder in the center, which rotates the top half of the glass


      I made the frame line up to the vertical axis wherever it touches other parts, at the head and foot

      posted in SketchUp Discussions
      S
      Sauronbloo
    • RE: Issue rotating to fit

      Sorry for not getting back, I redrew the triangle, It was much better once I made sure that everything was lined up correctly. Unfortunately, I can't just make a squared roof bc it's easier. This design calls for a triangular point. I often have issues getting things to fit right, bc I'm not very familiar with actual construction, but I don't know any better ways to do things. Often the window maker on 1001 tools won't even make my window, maybe bc I'm causing an intersect?

      posted in SketchUp Discussions
      S
      Sauronbloo
    • RE: [Plugin] Sculpt Tools v 1.0...

      While looking for directions on the use of vertex tools, I realized that the sandbox tools seem to be at least a minimal version for doing this type of work. Anyone like me, that didn't know this, use the free and native tool by enabling it in window/preferences/extensions, then enable the toolbar in view.

      posted in Plugins
      S
      Sauronbloo
    • RE: [Plugin] Sculpt Tools v 1.0...

      @mitcorb said:

      Many use Artisan by whaat, or ThomThom's Vertex Tools. These are both very reasonably priced, and, I think Artisan has a demo offer.

      TT's vertex has a trial, thx. Waanna learn how to use these things, and see if they will work for me/my project before paying $40, and I had problems getting artisan to do anything, it just stayed grey like i had already used up the trial. I'm gonna try Vertex tools, which I had no idea were similar to artisan

      posted in Plugins
      S
      Sauronbloo
    • RE: [Plugin] Sculpt Tools v 1.0...

      @jim said:

      I would say it is outdated. Last updated in 2009, and the author hasn't added to this thread since Oct 2010.

      Has anyone tried to contact the the author?

      So, what does everyone use to sculpt? I need to make a bush/hedge. I don't want it to be all boxy, what can I use?

      posted in Plugins
      S
      Sauronbloo
    • RE: Issue rotating to fit

      I have used the arrow keys to lock line orientation, but never thought of using it for rotation. move along the ground plane? does that mean under the object? Only know to click somewhere on the object, then a second point, then start rotating. I made the box to be sure the second point wasn't sliding down the face, couldn't get it right.
      I did copy the other side, but i did feel something was off, I measured a bunch of places n felt that it was okay, though, but I could've screwed up somewhere. Yeah, I'll definitely copy and paste the other half.
      The roof lines are not square to the axis? huh? so ur saying the 2 triangles that make up the end point are not equal halves of that space? I'm finding it harder to maneuver in certain instances lately. I was having much difficulty finding midpoints to divide the faces, and any line touching the edge I wanted the middle of would change my midpoint, with no way I know of to say, "no, I want the middle of all of this line. On other occasions I'd use a line to that distance or a box, but on an angled face thats a problem for me. trying to extend a line a certain distance from that angle was crazy impossible, that's why the pitch of the roof doesn't match the overhang, which i obviously did after using the building as the border for the roof.
      I don't understand how I need to scale it? Should I redo the model more accurately? Your instructions went over my head, all I can understand is that when I flip, the fit is off. Can u pls tell me simply; is an angle off, is there some law of geometry that I am breaking? am I flipping it wrong somehow? why doesnt a mirror copy fit into the mirror space? Thanks

      posted in SketchUp Discussions
      S
      Sauronbloo
    • RE: Issue rotating to fit

      If you can glean anything from the file, here it is. As I stated, I put a box around it be when trying to rotate an angled face, it likes to use the slant as the rotation point, so I boxed it to be sure to spin on one plane, not an angle. Does that make sense?


      GS sample.skp

      posted in SketchUp Discussions
      S
      Sauronbloo
    • Issue rotating to fit

      I'm having a heck of a time making a greenhouse roof. It took forever to get all of the frames done, as the (1001 bit tools) tool was giving me an issue, and I couldn't find any instructions. I finally got them all to form, after much struggle, and wearing out the 'undo' button. Now that I have this triangular section of roof fully panelized, I want to make one component of all of these windows. I've tried to flip the component by every individual axis, then all combinations of flips that I could think of, but none would fit another section correctly. I then tried to use the rotate tool, but being slanted, I had to build a boz around the angled form, so that it would rotate only on the one axis, not thru a slant. Even going thru all of this, and rotating to 90, 180 or 270 degrees, it still ends up mis-aligned with the structure. Not only do I not want to recreate the work of creating the individual windows, I want to use components to reduce drain on the system rendering all of those unique items. Can someone pls help me understand what I'm doing wrong?
      The area started off as a triangle, and I split that in half, so both halves are even, then I copied that triangle, flipped it, and that became the opposite end of the structure. There's no reason that a 90,180,270 flip doesn't make for a nice flip as far as I can see. Please help


      This is the window array


      this is after boxing and rotating, but u can see it is off kilter

      posted in SketchUp Discussions sketchup
      S
      Sauronbloo
    • RE: [Plugin] Sculpt Tools v 1.0...

      @skyways128 said:

      Got a bit of a problem using Sculpt Tools here, as I'm using Sketchup 8, which I've heard is supposedly incompatible with the plugin. After reading some earlier posts, it seems that I have to uninstall all my plugins and then reinstall them for Sculpt Tools to work.

      Thing is, it loads just fine, but it does nothing when I select bulge/smooth/drag whatever. I tried left/right clicking and pressing the arrow keys. It does absolutely nothing.

      Am I using it right, or do I have to uninstall and then reinstall my other plugins?

      BTW, if I simply cut and pasted all my plugins from the Sketchup folder to a backup folder, installed Sculpt tools and then re-pasted the plugins back into Sketchup plugin folder, would that work?

      Thanks in advance for any advice.

      I have the same issue in SU2014, is this plugin outdated now? The only other free sculpt tool I can find seems to only work with pro (DM_artisan). It seems quite hard to browse the plugin wh, as people may use different terms, languages, or even misspellings to classify their work. Can anyone point me to a plugin that is similar, or how to get this to work with SU 2013 or (preferably) 2014? thx

      posted in Plugins
      S
      Sauronbloo
    • RE: Endless material difficulties

      Daniel- I understand that this is akin to asking "what's the best way to lose weight", but if you also add in what diets you've tried, and what issues you've had with them, as well as what your desired result is, then a knowledgeable dietitian should be able to give you some good suggestions.
      You tell me to read threads of others debating renderers, but I've read many and only ended up with more questions than before. I've tried numerous programs based on what I've read in these and other forums, but am no closer to a solution than I was on the first day that I tried the first program. Reading more discussion really doesn't seem to be the answer, and I've spent way longer trying out renderers than I did making the model in the first place! I know there are many choices, but given my skill level, the issues that I'm having with my current programs, and my desired result, I can't imagine that there's not a single recommendation to be made, other than basically doing a google search(which was my very first action, by the way). I'm not lazy, and don't consider myself stupid or slow. I've done my homework before making any moves, but I'm at my wit's end with all the complications and disappointments. I don't ask for help as my first option, but after reaching the extent of what my level of knowledge can infer about these programs. I've searched google for shaderlight help, been on forums for vray help, forums for twilight help, now I should get a new program and research for help on that? I know you're only trying to help, but there's gotta be a better suggestion than "search the forums" and "try a new program", unless there is a thread with specific info you feel might help me out, or a reason why you would recommend me using a specific program, given what I'm going through with what I'm using (like; "if you're having trouble with materials rendering as seen, x program is really straightforward", "I used to pull my hair out trying to get the render to look like the SU model, but x program was so easy for me with that issue")
      I know no one gets paid to help me, I'm not trying to be demanding, but this is the help I need, either someone can offer that or not, but I feel that pointing me to general discussions will only waste more of my time, and this project has already grown WAAAAAY out of the scope that I was prepared to take on. Thanks a bunch!

      posted in SketchUp Discussions
      S
      Sauronbloo
    • RE: [model] A simple skipjack

      This scene is so simple, yet amazingly realistic!! I'm searching for programs, processes, and procedures to turn my poopy renders into something that looks more like your results. I probably shouldn't be posting this here, but if it makes more sense, I'll repost in a relevant forum and reference this thread, if you don't mind.

      I've included my best attempts, and what I feel is lacking in each
      they were done with twilight, vray and shaderlight, in that order


      This one is pretty good on the roof, but the windows are way dark , even though transparency is like 10%, so u can't see out the windows or get good light in


      This is the closest I've gotten to what I want, but it still looks cartoony, not very realistic or cgi, more like a painting. I love the roof, but the rest seems flat


      Once again, close, but lacking a touch of realism. I did this early on, and was unable to improve or even duplicate later

      posted in SketchUp Components
      S
      Sauronbloo
    • Endless material difficulties

      I've been trying to do a project, building a structure with lots of natural light. I've made a gymnasium with a roof covered in window panels. I didn't have much of a hard time until I started trying to make it render realistically. I started with shaderlight, which was good, but looked too cartoony, not photorealistic. As I searched for better materials, to try and make it look more real, I kept finding .vismats as the really good materials, so I figured out what used them and downloaded a trial. That left me with vray now installed, on top of SL. Vray was very confusing, but I was able to get a few pretty nice renders before I got completely lost, and couldn't even re-render the same things I'd already done as well as before. Although many great materials were easy to use w V4SU, there were TONS of awesome materials that weren't vismat, and I wanted to use them, but I guess you need EVEN MORE programs, and some skill to turn the alpha/bump/etc. channels into a true material/texture. The inability to use all of these mats, plus the unrelenting confusion that goes along with 100,000 settings for every aspect caused me to yearn for a simple solution. While trolling the web for rendering tips with vray, I came across a mention of Twilight, hailed as easy to use as compared to V4SU, so I gave that a spin. I'm now on twilightrender.com trying to figure out why my twilight templates don't work half the time, but I'm back here to beg for help in general.

      I want to find a render program that I can use a tutorial to figure out how and why to change settings to suit my needs. I don't need world-class images, but I'd like it to at least look like a decent cgi, though I don't expect to achieve photo-realism. All the tuts I've seen for vray are just rote copying of steps, without any explanation of why you need to change vray's indirect illumination post-processing saturation from 1.0 to .9. It doesn't really help to watch someone set up a perfect kitchen shot, when I'm trying to set up an outdoor view of a building, and have no reference for what these settings mean to my scene.

      Can anyone point me to either a simple to use program that can give great default results, rather than superb custom results(doubtful, but wishful thinking)? Or point me in the direction of tutorials that will actually teach me how to set up my program to render MY SCENE great, rather than some scene made by another guy in 2008?

      I really appreciate any advice, and please understand that any tone of bitterness is just frustration, and I apologize.
      I have shaderlight trial that just ran out, vray trial still good, twilight still good, thinking of trying thea, but want to spend my time finalizing my project, not endlessly trial-ing render program after render program. I'm on win7 with SU2013. THANKS!!

      posted in SketchUp Discussions sketchup
      S
      Sauronbloo
    • RE: Cannot split a face, pls help

      %(#008000)[
      @tig said:

      However, the bottom [and top] facets of your curved beams must have dividing edges between them to maintain the associated faces which have slightly different 'normals'.

      you can use the slider to only affect edges between faces up to a certain limit so if it's ~60º solid edges are kept between clearly different angled faces, but those between edges with slight variation in their faces' 'normal-angles' are smoothed...
      ]

      Ok, I'll have to pay closer attention when moving the smooth slider, I've just been putting it all the way up and checking every thing. I see that I have very limited understanding of how most of what I do is accomplished, I'm surprised I've even gotten this far!

      %(#008000)[
      @pbacot said:

      TT cleanup to remove coplanar (unnecessary) edges. Then smooth all with soften-smooth window--adjusting the setting to keep sharp edges sharp. I don't see a problem with texturing etc. What is the purpose of welding at this point?
      ]

      I have an issue that's been driving me crazy when rendering, that the faces don't reflect the light how I want bc the faces have hard lines separating them. I want the roof to reflect like a curve, not a faceted diamond. I thought welding would stabalize the structure, allowing me to erase the offending lines. I tried welding the whole roof face, but that caused more problems, as whole squares welded together, not allowing me to select one edge, but a whole window opening on one click- not wjhat I want in this case, but an awesome plugin! Cleanup fixed tons of probs, and cleaned out tons of unused materials, but I think it also purged some mats that were in use on a small scale- this was well worth it to me, as there were so many trash materials that twilight wouldn't even attempt to list them!

      I've gotten great info from you guys, but I think I've gotten far enough off the original topic for now, I guess it makes more sense to start a new thread relevant to my next question or issue. Thanks for all the helpful replies!

      posted in Newbie Forum
      S
      Sauronbloo
    • RE: Cannot split a face, pls help

      %(#008000)[
      @box said:

      Lines on a curved face cannot be deleted without losing parts of the face, they can be hidden or smoothed. You can use the eraser tool combined with ctrl to smooth them or with shift to hide them.
      ]

      That stinks, but somewhat expected. So, given that each face will represent a texture differently, will smoothing or hiding cause the faces to render as one, or will they still, for instance, reflect light differently? And is there a diff btw smooth or hide, or will they render the same?

      %(#008000)[
      @tig said:

      View > Hidden Geometry ON
      You will see the offending 'hidden' line.
      I suspect you have overlaid not-quite-coplanar faces ?
      It might be hidden and/or soft/smooth - they have a different dot pattern?
      Select it in Entity Info and change it as desired...
      The right-hand part of the bottom of that frame must not be coplanar with the left-hand part.
      Otherwise you would be able to delete the coplanar edge and the two faces would merge.
      To fix the issue try selecting the 'hidden' line and Move it over the top of the one at the 'crux' which causes the face to vanish when deleted...
      If that change makes the faces coplanar you should be able to delete the edge and the faces will merge.
      It it's still flaky use Eraser+Shift to Hide the Edge, of Eraser+Ctrl to smooth it - although that second option might produce unexpected weird visual affects...
      ]

      upon unhiding lines, I saw that it was dotted, while the offender is solid, entity shows smooth and soft. Tried moving it, but that just ruined the curve and I still couldn't delete it w.o losing (even more) face. Ctrl or shift with eraser both turn the solid line into a dotted line, can't tell the difference without ent. info, so not sure which is better

      %(#008000)[
      @unknownuser said:

      For clean all lines not needed on a same plane of faces use CleanUp by Thomthom! 😉
      ]

      As you guys can see from the attached, I've got LOTS of lines to play with/weld to get this thing right, so if TT has a one shot cure-all, then I guess that's what I need for this

      attached is the view of the original line (blk), and the two smooth lines (red) making up the curve spanning this window. I've got 120 skylights in this roof lol.


      planar.jpg

      posted in Newbie Forum
      S
      Sauronbloo
    • RE: Cannot split a face, pls help

      I appreciate all the replies!
      Pbcot- I made the curve by making an arc. I took that arc, copied it, connected by lines, making a 2d parenthesis, then push/pulled to create a solid curved roof. I made large planes, and chopped the solid roof up, intersected faces, then deleted to make skylights in the roof. now I've got lots of lines that wont erase without taking a chunk of the roof face with it.
      Dave, Pilou- I guess I'm gonna have to get some new plugins, I guess. I've heard of recurve, but also that it interferes with other tools, so I haven't dl'ed it. that curvizard tool looks awesome! Do you think if I get all the curves in the shape to weld, that I will be able to clean all the lines without losing geometry, or is that just something we have to deal with?

      I added illustration of the issue. Changed the framing color to contrast better, and painted the inner faces gray for clarity. I can safely delete the other 3 lines making up the square in the center without losing any faces, but they keep the effect from spreading when the offender is erased


      This line selected is the the offender.


      There was no visible line at the point on the right where the opening stops.

      posted in Newbie Forum
      S
      Sauronbloo
    • RE: Cannot split a face, pls help

      In case that last reply was confusing, the problem was that the line I was copying had broken into some tiny parts that I was unable to see, but the gap allowed the faces to connect. looking now for any advice on preventing issues with curved lines/faces in the future

      posted in Newbie Forum
      S
      Sauronbloo
    • RE: Cannot split a face, pls help

      Tried dbl-clicking face and deselecting face to leave all edges. was able to effectively split the face, just gotta delete all the extra. Is there any way to keep my lines from exploding into 100 unusable fragments? It's really annoying that, not only is it a pain to copy the stupid curves around to work with, but my lines don't stay solid. Is there something I could be doing wrong to make my lines go screwy? I VERY often have issues with curved lines/surfaces, like lines I cannot delete without part of my curved face deleting with it (I originally got weld bc I thought it would fix that)thx for any help

      posted in Newbie Forum
      S
      Sauronbloo
    • Cannot split a face, pls help

      I've been using this program for over a month, but every time I get comfortable, something sneaks up to steal my joy. I've got this solid that I've decided I need to bisect, then use push/pull on. It's a curve, so I have to copy the edge line and paste on, as drawing a line won't follow the curve. For no good reason I can determine, this line never stays solid, but always breaks into pieces, even when I smustard weld it:
      (WARNING: make_unique is a deprecated methodof Sketchup:Group
      quietly_force_sync_mats_cb just calledERROR: skpHelperClasses.rb:updateSkpMaterial, unable to find a material called: GRP Glass1
      ERROR: skpHelperClasses.rb:updateSkpMaterial, unable to find a material called: matte_plastic1
      WARNING: make_unique is a deprecated methodof Sketchup:Group
      quietly_force_sync_mats_cb just calledERROR: skpHelperClasses.rb:updateSkpMaterial, unable to find a material called: GRP Glass1
      ERROR: skpHelperClasses.rb:updateSkpMaterial, unable to find a material called: matte_plastic1)[No idea why its trying to mes with the materials here, as the item in question is 100% "metal_framing", the materials listed are the window panes and plastic seal holding the windows onto the frame - both a separate group nested within the frame]

      Anyways, When I select all parts of the unweldable curved line, and copy it to the middle of the face I want it on, it refuses to interact with the surface. I cannot select the upper and lower portions seperately, even after intersecting all faces with selection(which shouldn't be necessary, as I am working within the group, on the same level of the group the whole time(meaning I'm not using different groups, these should be sticking to each other as soon as they touch. As you can see from the 3rd pic, I even selected more of the line than needed, just to be sure it was touching both edges of the object. I only need the main section split, not that little tab
      I'm sorry to be such a pain, but this project is driving me absolutely insane. There always seems to be enough progress to keep me from saying "screw it", but enough delays and confusion to keep me from getting the results I want each time it seems within reach. smh


      here is the face I want to split, with the bisecting line doing nothing. you can see that nothing shows as grey, or in another group


      Here's the line I use as a reference, and how even after welding, I still ned to select multiple


      Shows the line from the other end, here I've selected extra, to allow an overhang to be sure I'm not leaving a gap at one end

      posted in Newbie Forum sketchup
      S
      Sauronbloo
    • RE: Trying to import complex textures

      Well, for anyone coming across this thread, I'm abandoning this issue. I've searched the vray forums, and followed those to other sites as far as I can, and It seems there is no easy way to reproduce these effects without knowledge of texturing. The files seem to be included so that ppl with skill can load the seperate images into 3dsmax and make their own version from the source files. I've hurt my brain just trying to get that far, I'm not even gonna bother trying to mess with the files. I've gone over to twilight, which seems much easier to get the simple but good results I'm looking for. I'm not trying to take a college course to get this better, and it seems that's the only thing that'll get me the real results I want. Thanks for both of your responses

      posted in Newbie Forum
      S
      Sauronbloo
    • RE: Trying to import complex textures

      There's no one with any info on this? I found ancient threads that refer to programs that can take all the images and package a .vismat from them, but not sure what skill I need to use it, and all the dl links are dead. Anyone, please, little help here?

      posted in Newbie Forum
      S
      Sauronbloo
    • 1 / 1