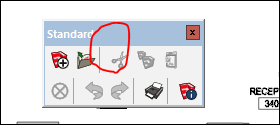
Only happens on one PC, both of which have same version number 19.0.685.

Only happens on one PC, both of which have same version number 19.0.685.

Thanks Box......I have been trying working without it today, and so far so good. Not sure why I thought it would be beneficial in the first place.
I was trying to move some objects a few inches. However, the move command was unresponsive. In a panic, I started removing portions of the model, which was over 100,000 KB, thinking I was starting to go over the memory limit. But then it dawned on me......I temporarily increased the length snapping increment from my typical 1/8'' to 24'' a few days ago and I forgot to change it back. (I almost NEVER touch this setting) Crisis solved!
See attached model.
Audit reads as follows: A c D b A t t r i b u t e ( 1 E 8 C ) H e i g
Stay away from Autodesk objects that are 'surfaces'. I cannot break these down - no matter what.
i think the attached .dwg has something called surfaces and regions. can it be exploded 100% into vector linework before i import it into skp?
That's not a bad idea, actually. I can place a guide point at my component's X,Y,Z intersection before exploding it. Smustard's Midpoint extension does the trick. Thank you Dave R. (See? Sometimes it pays to drill down.)
Unfortunately your suggestion does not preserve the axes. And using unique components is problematic for the way i generate my non-welded pipe system models. I am forever re-sizing objects. it's easier for me to explode and resize a copy of a component that is already situated in my model than it is to jump to a window containing a long list of components and searching for the right one. but when i explode said component, the axes that i had carefully placed in the fitting's center-line is lost and i am forced to jockey the new group back into position. This has everything to do with maintaining a fast work flow. if i had the luxury of non-existent deadlines, groups would be my models. But what i gain in speed-modelling, is lost when i generate the construction document with LayOut. Rather than drag out a components instance name when i attach a label, i have to type in the description manually. So I need to think this whole method over.
Is there a way to convert a component into a group without having to explode it?
Is there a way to explode a component or group without its carefully set axes being disturbed?
I would love to use my 2019 version. However, the subject items have been made smaller (in the shape of an eye) and they were moved to the left edge of the tool tray. Up thru 2018, the pickboxes were big and on the right side of the tray. I hope Trimble can change the new config back to the way it used to be. I always park my skp 2018 layer tray on the upper left corner of my screen and the short pointer travel distance to the big pickboxes is fine because they are closer to the middle of the screen. The 2019 design slows my workflow and adds a degree of frustration.
The pallet of black and white patterns in the materials inspector......can the samples be changed to, say, blue and white? I moved the slide bars to create a 180/100/100 cyan color, but the result remained black.
i don't want to push it - but it would be cool if we could hover over the row of tabs and tilt the mouse wheel to force a scroll.
Please fix this issue with the right-arrow button. It occurs when the quantity of scenes runs off the screen. Very hard to click that tiny thing - especially since it's up against the monitor frame. I mentioned this on an old wish list.
not sure i follow you pbacot. see attached sequence of crude screenshots. their numbers don't match the narrative below, but you get the picture.
Dave R's method required the creation and deletion of a guide line.
Box' first method required the availability of an edge that is perpendicular to, and spans, the two edges of the long run of the footing.
Box' second method required creation and deletion of a line.
My method requires none of the above.
As a side note - I always recommend SketchUp to professionals in the construction trades - both designers and installers. Whether it's my son who is on his way to becoming an architect, my brother who is a stairbuilder, my colleagues who are pipe sketchers, people who work for structural steel, electrical and mechanical design firms and installers. At first they seem open, but later scoff at the idea. It may be true that the final product must still be done with AutoCAD - but the initial building blocks to develop a design are so much easier and faster and more fun with SketchUp.