Yeah, my scene transitioning follow a bezier curve and is different from the native scene transitioning. I will change this in MSP1.1.0.
Oops, your profile's looking a bit empty! To help us tailor your experience, please fill in key details like your SketchUp version, skill level, operating system, and more. Update and save your info on your profile page today!
Check out Febhouse | New extensions for Shadow Analysis in SketchUp Download
A
Offline
Posts
-
RE: SU2018 and MSPhysics 1.0.3 scene transitions problem
-
RE: [Plugin] ClothWorks v1.8.0 - 28 Apr 2024
@marvsweden said:
Purchased. It's going to be exciting using it.
I'm on Mac/SU2018 and the toggle UI window/button doesn't work. It shows up once but if I toggle it by hitting the button it never shows up again until i shut down and restart SU.Thanks for an important report! I will fix this by as soon as tomorrow (if possible).
-
RE: [Plugin] ClothWorks v1.8.0 - 28 Apr 2024
@pixero said:
Possible BUG: In the Time step drop down there are two 1/840.
Yes, that's just a typo in the dialog. When you use the second 1/840 option, the actual timestep set is 1/960. Already fixed and will be updated in next release.
@pixero said:
@arc said:
Is this license a permanent license? How many computers with one license support?
It's 3 computers.
Additionally, the way SCFLicense works is that if you release (deactivate) a licence you can use the licence on another device or reactivate it on the same device. So, there is no limit to the number of times the licence can be activated/deactivated, as long as it is on up to 3 devices.
-
RE: [Plugin] ClothWorks v1.8.0 - 28 Apr 2024
Here is a higher resolution simulation of an American Flag.

A roughly 100cm X 170cm rectangle was drawn for the flag and applied a grid with spacing of 4cm.The pole was assigned a collider state. Pins were attached at upper and lower right corners of the flag.
Using ClothWorks UI, flag thickness was increased to 20mm to prevent self-overlaps.
After simulation, I applied loop subdivision and followed with 2 Laplacian smoothing iteration to eliminate rounded corners formed by loop subdivision.
A texture was assigned at the end, utilizing the Toggle Draped option.
-
RE: [Plugin] ClothWorks v1.8.0 - 28 Apr 2024
Thank you all for comments and support! I greatly appreciate it. More tutorials are to come soon.
@nlipovac said:
I was wondering will v2 comes with something like force modifier in Blender, for pillows and similar?
Version 2 will include these. But in between, the plan is to:
- Improve cloth collision algorithm, so that cloth doesn't overlap itself.
- Add multithreading - we must use most of the processors resources.
-
RE: Creating a plaid on a chair - cloth simulator?
Thanks, Jorgensen!
For the link, here is ClothWorks: https://sketchucation.com/forums/viewtopic.php?f=323&t=69485
-
RE: [Plugin] ClothWorks v1.8.0 - 28 Apr 2024
Juju, it's not yet at official ExtensionManager, but will be there if soon.
-
[Plugin] ClothWorks v1.8.0 - 28 Apr 2024
ClothWorks
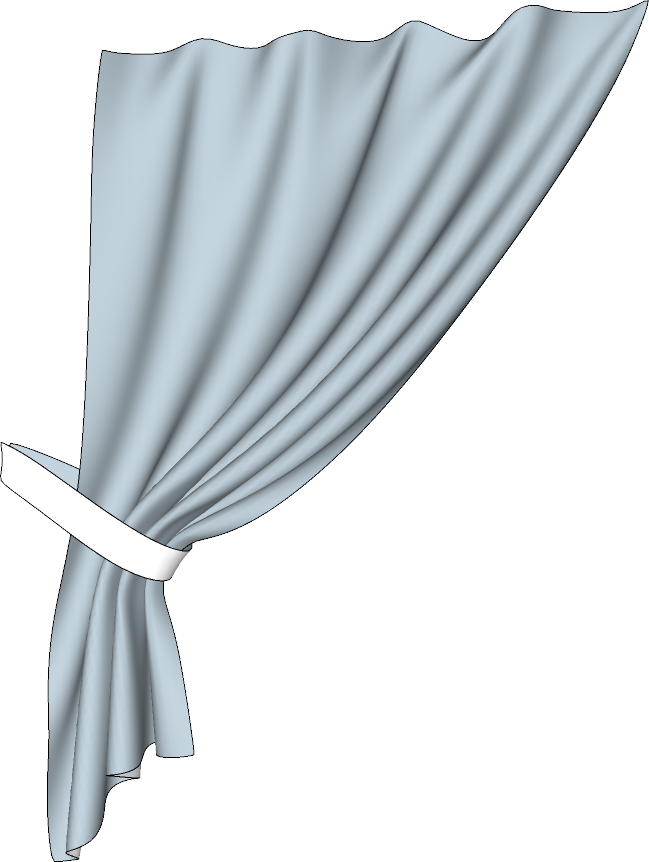
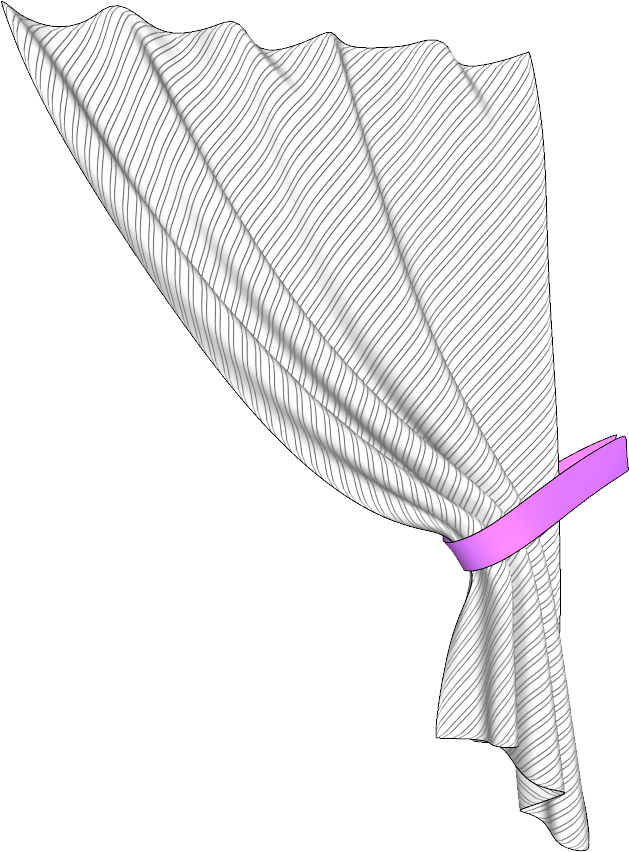
ClothWorks is a cloth simulator for SketchUp for draping cloth and wires over components of any shape and size and also for simulating curtains and flags.Workflow functionalities include:
- Quadrilateral, Equilateral, and Adaptive grids for converting face or a set of faces within a group/component into a grid of faces, with a desired grid padding. Additional edge purging options allow for removing the generated grid. Grid options are for manipulating cloth.
- Split Edges for dividing an edge or a set of edges within a group/component into segments, with a desired edge padding. Weld Edges allows for merging the split edges. Edge options are for manipulating wires.
- Loop Subdivision and Laplacian Smoothing options for subdividing and smoothing the resulting, simulated cloth or wires, while preserving texture UVQ coordinates.
- Drape and Undrape for renewing and resetting (respectively) cloth, wire, and pin transformations. Toggling drapery is, particularly, useful for when changing the texture of the cloth.
- Record and Export for recording simulation and exporting the animation into a sequence of images, SKP files, OBJ files, and various other formats. A third-party software, such as MakeAVI, can be used to combine a sequence of exported images into a video file.
To get started, refer to and download the ClothWorks Manual.
To install ClothWorks, you can refer to the ClothWorks Installation Guide.
To buy and activate your license, please refer to the ClothWorks License Guide.
Video Tutorials
Platform and SketchUp Requirements
- Window 7+ / Mac OS X 10.8+
- SketchUp 2016 to 2024
- SketchUcationTools v4.4.0 or later, for licensing and unlocking features. Note: The latest version of the extension must be installed for licensing to work properly!
Installation Instructions
ClothWorks can be installed via the SketchUcationTools extension or manually, from Plugin Store.You can also download at Google Drive
Refer to the following steps for installing manually:
- Download ams_ClothWorks_vX.Y.Z.rbz.
- Navigate to your plugins folder (see Extension Folder Location section for details).
- Extract ams_ClothWorks_vX.Y.Z.rbz and copy the content into the plugins folder, so that the plugins folder contains ams_ClothWorks folder and ams_ClothWorks.rb file:
…\SketchUp\Plugins- ams_ClothWorks
- ams_ClothWorks.rb
Uninstallation Instructions
Refer to the steps below to uninstall the extension:- Close SketchUp.
- Navigate to your plugins folder (see the Extension Folder Location section for details).
- Delete ams_ClothWorks folder and ams_ClothWorks.rb file.
Extension Folder Location
On Windows, the plugins folder is located at, either:
%appdata%\SketchUp\SketchUp 20##\SketchUp\PluginsOn Mac OS X, the plugins folder is located at:
~/Library/Application Support/SketchUp 20##/SketchUp/PluginsLicensing
Licensing unlocks four features:- Loop Subdivision – smoothens cloth by increasing resolution, meanwhile preserving texture coordinates
- Laplacian Smoothing – smoothens cloth by balancing vertices
- Movable Pins – allows transforming pinned cloth while in simulation
- Adaptive Grid – generates grids for complex faces and 3d geometry
ClothWorks licensing depends on SketchUcationTools, version 4.4.0 or later. The latest version of the extension must be installed for licensing to work properly!
With SketchUcationTools (v4.4.0+) installed, a licence file can be obtained and/or activated by accessing:
(Menu) Extensions → ClothWorks → License…Within the licensing dialog:
- Click on the Obtain Licence button to purchase your licence. This will navigate you to SketchUcation PayPal purchasing page. Ensure to specify your email address correctly, so that the purchased licence file is shipped to the correct address.
- Upon receiving your licence, download the file and save it to your computer.
- To activate your licence, click on the Validate Licence button and select your purchased licence file. This will unlock all the features.
At any given time, a purchased licence can be activated on up to three devices.
For detailed instructions on activating your licence, please refer to ClothWorks License Guide.
If you purchased a ClothWorks license and have not received an email with your license file, within the next 10 minutes, or experience any other licensing problems, please contact clothworks@sketchucation.com. Include your SketchUcation username in the email.
If you are looking to obtain a new copy of your license file purchased earlier, please also send an email to clothworks@sketchucation.com and include your SketchUcation username in the description.
Important Notes:
Verify that the simulation works, and does not crash, prior to purchasing a licence.In case your license seat count becomes full, please refer to the Known Issue section, in ClothWorks License Guide on resetting your license.
Known Issues and Limitations
- Avoid using the undo command after a simulation. Each frame of simulation is treated as a single operation, which clutters the undo stack. To undo the cloth layout, make use of the Toggle Draped option, accessible from the ClothWorks toolbar or menu.
- Self-collision is not perfect and may allow for self-overlaps. In case self-overlaps occur, applying smoothing options after the simulation, especially Laplacian smoothing, can eliminate overlaps.
- Only top-level groups and components are assignable a cloth, a collider, or a pin type. All nested groups/components of a collider and a pin are included in the simulation.
Useful Tops
- Before starting the simulation, ensure that Outliner and Components inspectors are closed or collapsed. When these dialogs are open or expanded, there tends to be an extreme lag.
- If self-collision is turned on, cloth thickness must not be greater than cloth grid spacing. If the thickness is greater than grid spacing, cloth geometry will clutter out due to overlaps with neighboring particles.
- Increasing the update timestep, say from 1/420 to 1/180, makes cloth weaker. If possible, avoid increasing the update timestep. On the counter-note, decreasing the update timestep, say from 1/420 to 1/1200, makes the cloth significantly stiffer.
- Overlaps with colliding opponents may also occur. To prevent overlaps when draping over a collider, reduce gravity, increase viscosity, and/or increase the thickness of the collider. To prevent overlaps with other cloth objects, increase the thickness of either to minimize the occurrence.
- After performing simulation and finalizing the draping, that is subdividing and texturing, you can reduce file size by clearing drape history:
(Menu) Extensions → ClothWorks → Clear Draped and Purge
-
RE: Creating a plaid on a chair - cloth simulator?
ClothWorks is a standalone plugin. It will only have SketchUcationTool as a dependency extension for licensing.
-
RE: MSPhysics 1.0.3 (16 October 2017)
Charles,
For now, there isn't a way other than modifying the simulation code, so that it only disables the pick & drag and not the user input. I may need to add a Ruby function for that in the future versions.
Anton
-
RE: MSPhysics 1.0.3 (16 October 2017)
Charles,
You got the idea right, but the force you apply must be applied as a point force. Doing so will also, generate torque as you want. For the point, you can either apply force at clicked location or at a particular point such as pole's origin + some shift in the up direction...
Here is the script for applying at point force:
# Triggered when simulation starts
onStart {
  @impx = 45 * simulation.update_timestep_inv
}

# triggered when body is clicked
onClick { |point|
  this.add_point_force(point, Geom;;Vector3d.new(@impx, 0, 0))
  # Or point could be a custom point
  #tra = this.normal_matrix
  #point = tra.origin + AMS;;Geometry.scale_vector(tra.zaxis, 100)
  #this.add_point_force(point, AMS;;Geometry.scale_vector(tra.xaxis, @impx))
}
Note that in the simulation tab, you will have to enable the game mode option, which will disable the pick & drag tool, to prevent it from interfering.
Then, the script is then supposed to be assigned to every pole thingy in your model. As mentioned before you can do this by using the "assign script to all with name" button (assuming that all pole thingies have the same name).
Anton
-
RE: MSPhysics 1.0.3 (16 October 2017)
Hello, charlessowers,
I'm not quite sure what you're trying to achieve. Using a simple pick and drag tool may help. Just hold the shift key when dragging the IR beams.
If in case you want to do something else, perhaps an onClick even will help. For that you will have to utilize an onClick event for all beams, which will do the desired thing when a beam is clicked. (And of course, to write the same script to all beams you can write script to one beam and make use of the "assign script to all with name" button).
Anton
-
RE: MSPhysics 1.0.3 (16 October 2017)
Tom Dahl, I did see your viking lander video - very inspiring and educational! I also commented at your Sketchup Community thread. Nice work!
Aside from that, I have logged all the crash reports, issues, and feature requests reported by you and many others. I have learned many things from the feedback. MSPhysics will be rewritten, with tutorials this time...
-
RE: MSPhysics 1.0.3 (16 October 2017)
Hi, pabloarias,
Cloth and soft bodies (on the ToDo list) is something that I might implement in the long-term. The physics engine that I use doesn't have a functional cloth/soft-body system yet.
Other than that, I am writing a separate cloth simulation plugin (with my own physics engine). I've been working on it for quite a while now and I am looking forward to finishing it as soon as I can.
Regards,
Anton -
RE: MSPhysics 1.0.3 (16 October 2017)
Announcing version 1.0.3: http://www.rubydoc.info/github/AntonSynytsia/MSPhysics/file/RubyExtension/MSPhysics/CHANGELOG.md
@rick149 I added an option to hide/show selected entity as you requested.
@TDahl I improved the joint connection tool. Whenever you perform connection with alike instances, it will ask you whether to apply same connection to all instances, which will simplify the work you will have to do when dealing with chains or threads. I also improved the behavior of a Fixed joint. Now, if you use the version of your Viking Lander model that I posted, that contains Fixed joints, the wobbling of the segments should be significantly reduced. Edit: Also, if you change Fixed joint stiffness to 0.99, the wobbling would no longer be there.
-
RE: MSPhysics 1.0.3 (16 October 2017)
Pilou,
I just made a demonstration of that in MSPhysics and free Twilight: https://drive.google.com/open?id=0B3qg8f4WrNdHZlp4NUd1N0FNXzg
Free Twilight also allows rendering in High+ mode and large resolutions. I used small resolution just to get it to render fast.
This can also be done with Kerkythea but in my opinion Twilight is a better rendering software. When I have time I will do a tutorial of how to set it all up. It shouldn't be to difficult though.
The model is attached below.
Regards,
Anton
-
RE: MSPhysics 1.0.3 (16 October 2017)
Pilou, I think that light animation can easily be achieved with MSPhysics and TwilightRender/Skindigo/Kerkythea. Simply attach a lamp to a BallAndSocket joint, play simulation with record enabled, and then export to desired rendering format. Although in this video, a different approach is used, I'm certain that a rendering software would guarantee better results.
-
RE: MSPhysics 1.0.3 (16 October 2017)
TDahl,
Connect closest joints option is now a default functionality of joint connection tool. It's difficult to explain the behavior of a joint connection tool. That said, it needs a big overhaul. I will work on it after I finish with my other plugin.
Regards,
Anton