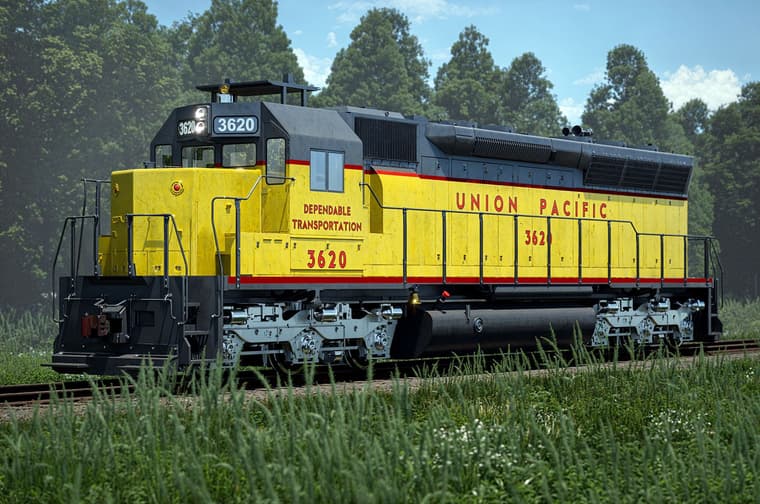
EMD SD45 - Union Pacific

-
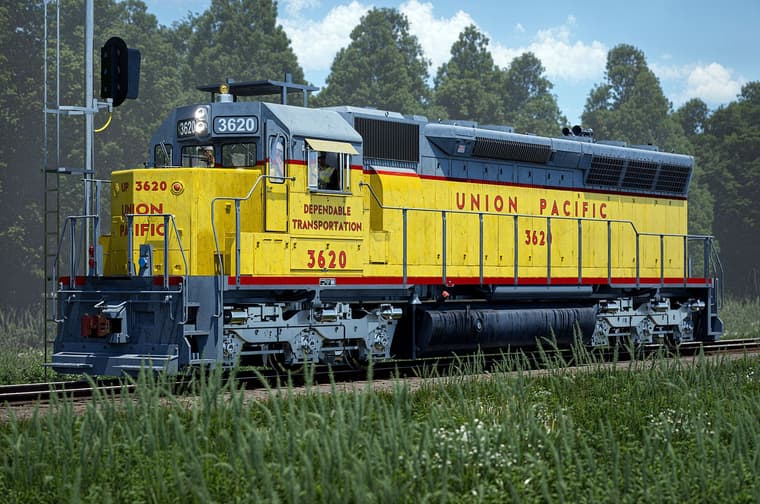
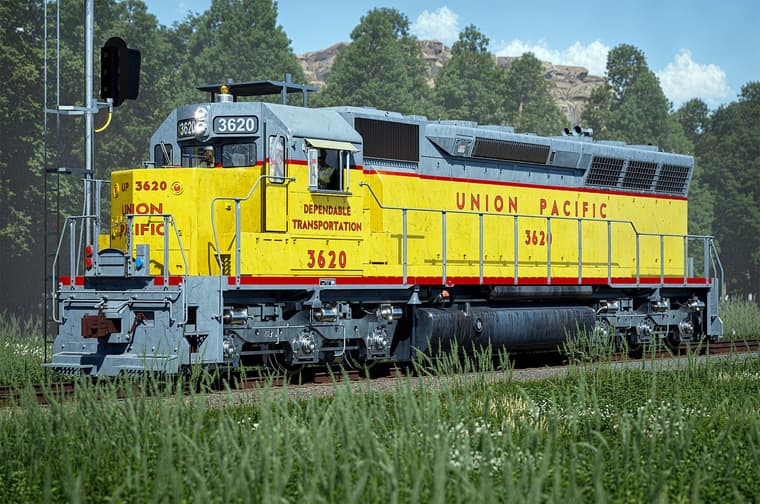
Here's the latest. Still a WIP but I'm getting close to finishing. This is modeled with SU 2022 Pro and rendered in D5 Render.
-
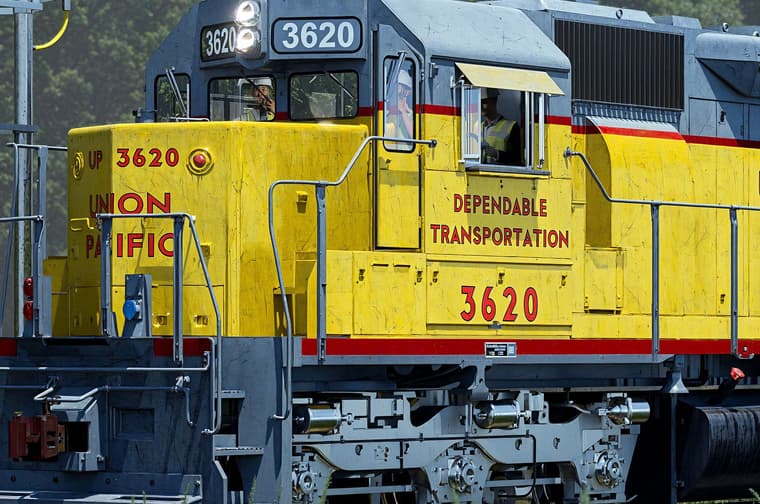
@Gus-R Love the variation in the in textures. Grimy and dirty but no noticeable repetition.
Incredible detail too!
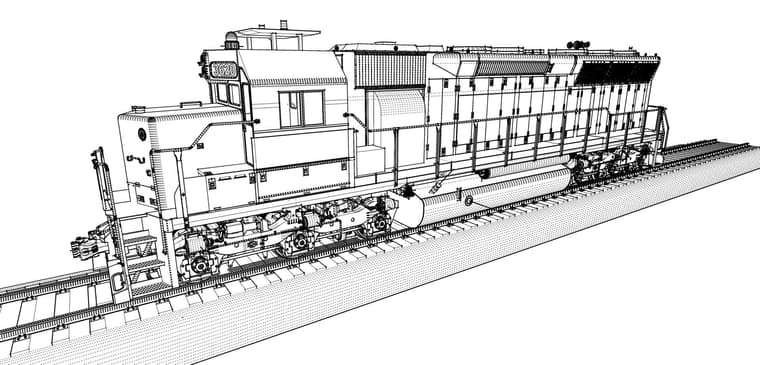
What's the file size? Would love to see some raw SU with wires to really appreciate the modelling.
Download the free D'oh Book for SketchUp 📖
-
@Rich-O-Brien said in EMD SD45 - Union Pacific:
@Gus-R Love the variation in the in textures. Grimy and dirty but no noticeable repetition.
Incredible detail too!
What's the file size? Would love to see some raw SU with wires to really appreciate the modelling.
Thanks Rich. It's 29 MB right now.
I get a little carried away with my line segments even though it slows me down sometimes. I manage it with scenes like turning of the trucks.
The weathering is by adding a material to the AO layer using images from a package called DGruwier Surface Imperfections - Volume 1 from Gumroad. It's pretty handy and works with D5 Render and Thea Render.
-
@Gus-R epic Gus

-
-
@Gus-R said in EMD SD45 - Union Pacific:
DGruwier Surface Imperfections
Is DGruwier Surface Imperfections, something you just put in a diffuse slot?
-
@L-i-am said in EMD SD45 - Union Pacific:
@Gus-R said in EMD SD45 - Union Pacific:
DGruwier Surface Imperfections
Is DGruwier Surface Imperfections, something you just put in a diffuse slot?
For D5 Render I invert the texture image and put it in the AO slot. With Thea Render I mix it directly in a layer slot. I forgot exactly the where and how.
-
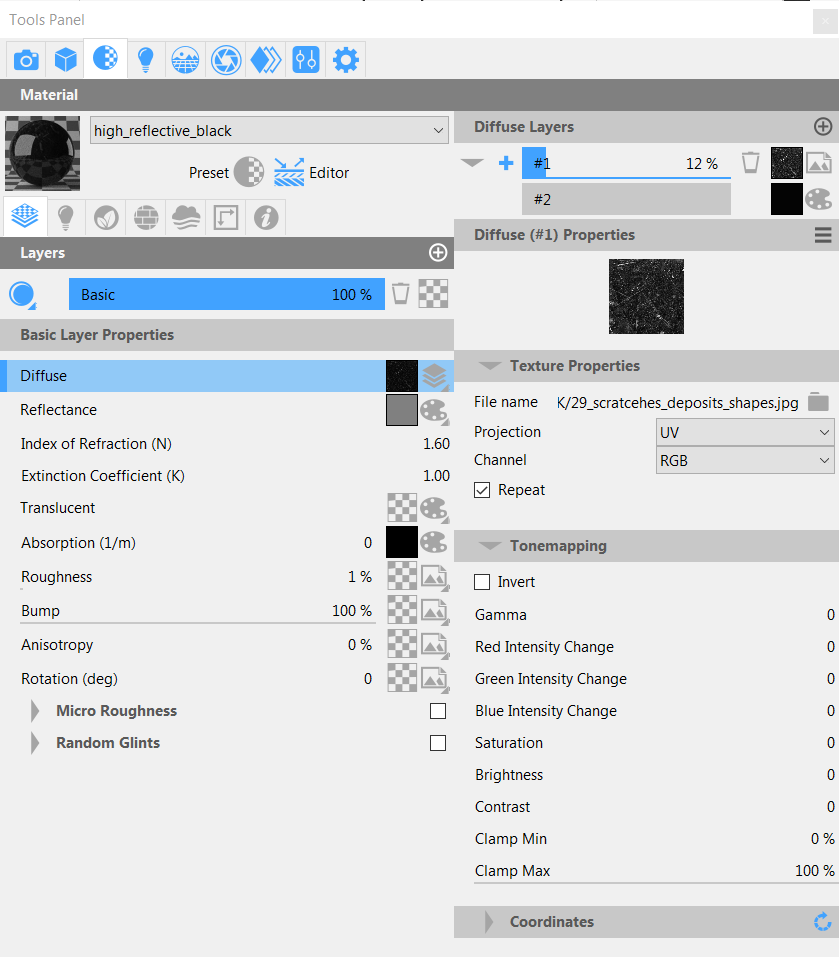
@Gus-R This is the imperfections setting for Thea Render for SU. You can see on the upper right I added a scratches jpg on a diffuse layer as shown. It really can make a big difference and is an easy option for weathering or distressed metals, plastics, etc.
-
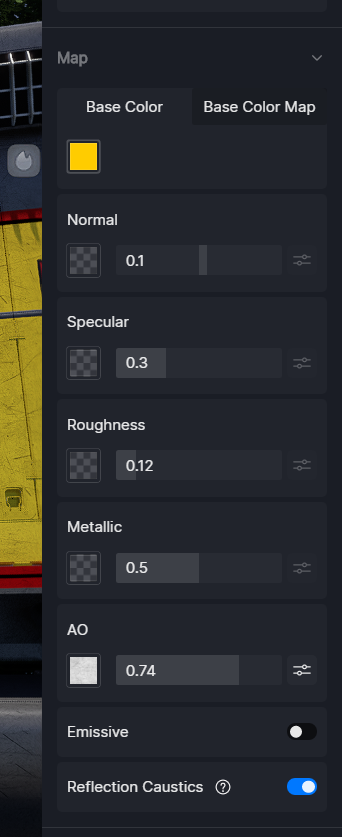
@Gus-R For D5 Render I add an imperfections image to the AO (ambient occlusion) layer pushing the AO up high. You have to use an inverted image which you can do in Photoshop, GIMP, etc.
-
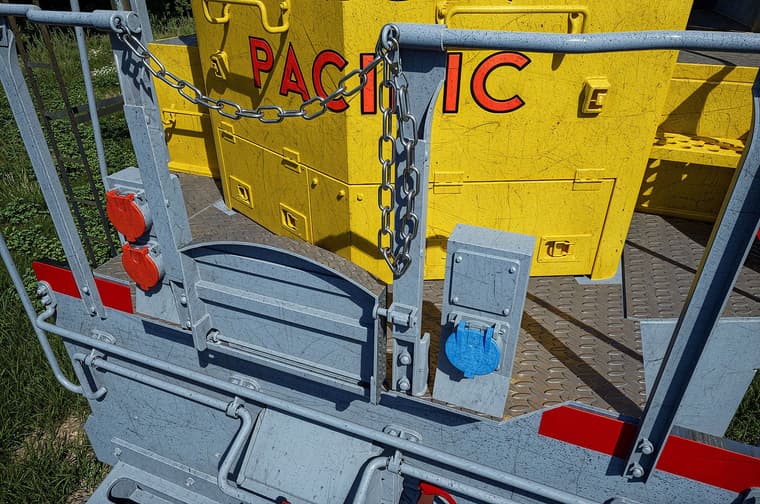
Another update!
Added/created: window wipers; 27 point connectors in front (the red and blue plug covers); window wind screens; window shade (still working on that); new decals in front of hood; fuel cap texture; manufacturer plate; tool box on side finished; door latches at 600 volt access panel; weathering; etc.
Also changed the gray to a lighter gray. I have to add the walk in front with chain and latch; some hoses and a valve for air brakes; etc. Train signal by others and the two figures are from D5 Render. Otherwise I slogged through almost every single piece of this model.
I tried to find reference drawings for most of it including blue prints for the trucks which have to be upgraded to a later model. Some things like the window shade apparatus and the tool box latch I had to do my best guess at the design using some fuzzy images.
-
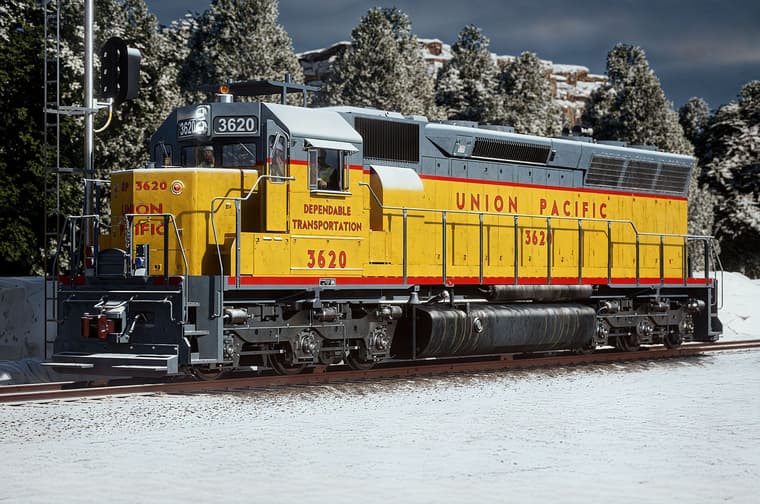
@Gus-R More updates. Made that chain. Ended up using Profile Builder since Tax Engineering wasn't working out for me. I'm sure it's much easier in Blender but I don't see the point in going that route. Also some snow and a cliff in the background. I have to make those gladhand connectors and hoses for the air brakes in front as well as the manual brake wheel in the right rear of the locomotive.
Did you know the EMD SD-45 weighs 368,000 pounds? Like most freight locomotives the underframe is massive which I learned from modeling it. Gladhand connectors are like what you see in trucks connecting the air to the trailer.
-
@Gus-R The main two references for this model are:
Canadian Pacific Historical Association
Norfolk and Western Historical Society
Found a lot of stuff on Flickr and some model railroading site. I used some reference for the trucks from an HO gauge brass model of the SD-45. Also a lot of stuff at Utah Rails.
-
Amazing work!
-
Jaw dropping stuff, magic. Smiling like a loon again.
Hello! It looks like you're interested in this conversation, but you don't have an account yet.
Getting fed up of having to scroll through the same posts each visit? When you register for an account, you'll always come back to exactly where you were before, and choose to be notified of new replies (either via email, or push notification). You'll also be able to save bookmarks and upvote posts to show your appreciation to other community members.
With your input, this post could be even better 💗
Register Login


Advertisement