sketchucation logo sketchucation
    • Login
    ℹ️ Licensed Extensions | FredoBatch, ElevationProfile, FredoSketch, LayOps, MatSim and Pic2Shape will require license from Sept 1st More Info

    Barcelona Chair [TUTORIAL]

    Scheduled Pinned Locked Moved Gallery
    19 Posts 12 Posters 5.7k Views 12 Watching
    Loading More Posts
    • Oldest to Newest
    • Newest to Oldest
    • Most Votes
    Reply
    • Reply as topic
    Log in to reply
    This topic has been deleted. Only users with topic management privileges can see it.
    • HieruH Offline
      Hieru
      last edited by

      Fantastic work πŸ‘

      Would you mind sharing your technique for modelled the piping on the chair?

      www.davidhier.co.uk

      1 Reply Last reply Reply Quote 0
      • J Offline
        jsteacy
        last edited by

        great modeling! A few snap shots of how you did it would be great! +1 for sharing it if you are willing to.

        1 Reply Last reply Reply Quote 0
        • D Offline
          designerstuart
          last edited by

          i'm interested in how you created the seat surface - not familiar with subdivide and smooth. did you extrude and intersect, followme or something more clever?

          1 Reply Last reply Reply Quote 0
          • S Offline
            Slimdog
            last edited by

            Great render and model. Good to see that some people find kerkythea easy.

            1 Reply Last reply Reply Quote 0
            • V Offline
              Vicspa
              last edited by

              Great job Gus, πŸ‘ hope you can find time to put out a tutorial on the seat and piping. πŸ˜„

              1 Reply Last reply Reply Quote 0
              • Gus RG Offline
                Gus R
                last edited by

                Thank you again. I'm still trying to get a hang of Kerkythea which does get easier with time. The key like most everything is practice, practice, practice.

                I added a tutorial for the cushion above. Might get to the piping later today or tomorrow but for now it's as simple as using the line work from the component sections for the cushion (see skp file) and using Lines to Tubes. The centerline of the tubes and piping is the same line(s)you'll find around the component. It's a simple matter of copying and pasting the required line from the component.

                Make sure to weld the line work before creating the tube. Also, just make one tube (piping) section which you can convert into a component. There would be two piping components for the tufted area and one for the perimeter of the cushion (top and bottom).

                www.instagram.com/gusrobatto/

                www.facebook.com/gusrobatto

                www.flickr.com/photos/gusrobatto

                1 Reply Last reply Reply Quote 0
                • HieruH Offline
                  Hieru
                  last edited by

                  Thanks for taking the time to put together a really informative tutorial - it really helped me to better understand proxy modelling. Cheers πŸ‘

                  www.davidhier.co.uk

                  1 Reply Last reply Reply Quote 0
                  • G Offline
                    GdBTM
                    last edited by

                    wow! it's a very good model!

                    can you share the .skp file for the previous versions of sketchup?

                    1 Reply Last reply Reply Quote 0
                    • Mike LuceyM Offline
                      Mike Lucey
                      last edited by

                      Great work Gus and thanks for the tutorial πŸ‘

                      Support us so we can support you! Upgrade to Premium Membership!

                      1 Reply Last reply Reply Quote 0
                      • Gus RG Offline
                        Gus R
                        last edited by

                        Thanks and you're welcome. I just added a piping tutorial. You'll need "Lines into Tube" which is available here at Sketchucation.

                        Here's the latest incarnation of the Barcelona Chair using Artisan rather than SDS. I used the sculpt brush to bump up the tufts a tiny but which also helps to smooth them out. Also did some dimension adjustments on the chair frame, stool and revised the steel to 12mm thickness.
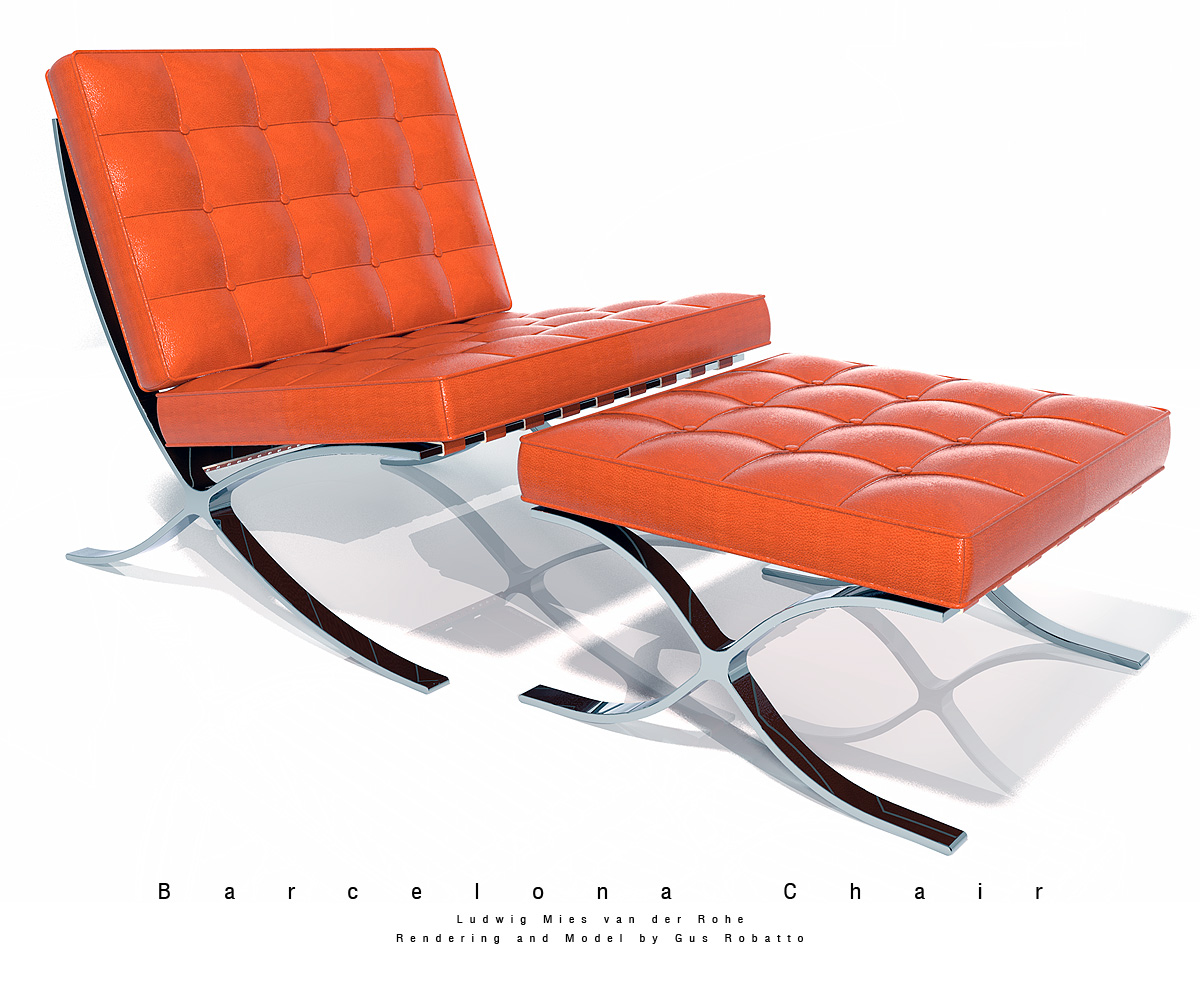
                        Barcelona-Chair-Robatto-008.jpg

                        www.instagram.com/gusrobatto/

                        www.facebook.com/gusrobatto

                        www.flickr.com/photos/gusrobatto

                        1 Reply Last reply Reply Quote 0
                        • brodieB Offline
                          brodie
                          last edited by

                          I'm still on v7 but the tutorial is really intriguing. Anyone mind saving a copy down to v7 and sharing?

                          -Brodie

                          steelblue http://www.steelbluellc.com

                          1 Reply Last reply Reply Quote 0
                          • Gus RG Offline
                            Gus R
                            last edited by

                            @unknownuser said:

                            I'm still on v7 but the tutorial is really intriguing. Anyone mind saving a copy down to v7 and sharing?

                            -Brodie

                            Brodie, I just uploaded parts 1 and 2 as version 6. Went down one more version just in case there are others still on 6. Hope that works for you.

                            www.instagram.com/gusrobatto/

                            www.facebook.com/gusrobatto

                            www.flickr.com/photos/gusrobatto

                            1 Reply Last reply Reply Quote 0
                            • V Offline
                              Vicspa
                              last edited by

                              If not 6, here are versions for 7. Hope it works for you.


                              Robatto%20-%20BarcelonaV7_1.skp


                              Robatto%20-%20BarcelonaV7_2.skp

                              1 Reply Last reply Reply Quote 0
                              • brodieB Offline
                                brodie
                                last edited by

                                Thanks a lot for that! It was a great tutorial!

                                -Brodie

                                steelblue http://www.steelbluellc.com

                                1 Reply Last reply Reply Quote 0
                                • 1 / 1
                                • First post
                                  Last post
                                Buy SketchPlus
                                Buy SUbD
                                Buy WrapR
                                Buy eBook
                                Buy Modelur
                                Buy Vertex Tools
                                Buy SketchCuisine
                                Buy FormFonts

                                Advertisement