[Plugin] 2D Tools
-
There are several tools around, by me and others, project-to-plane, drop-vertices etc that take selected lines and change their vertices etc...
-
@tig said:
There are several tools around, by me and others, project-to-plane, drop-vertices etc that take selected lines and change their vertices etc...
Hello, how are you? Thank you for your answer.
It just seemed more practical to have it in the same 2d tools and the ease of having the previously selected z-plane.
Thanks and regards. -
Hi.
I too get freezes from the 2D tools, the rectangle tool, the arc, circle, poly line edit, and the freehand tool.
Text tool and fillet is fine. Some I didn't try.No crisis for me, as its the fillet and text tool I'm after.., so this is just reporting it

Mac Book Pro, latest operating system, Sketchup latest version, 21.1.298, plugin installed today from this site.
cheers,
Odd Håkon Byberg
-
hi-
Downloaded this for the fillet tool but found some issues to share.
PC, SU2021 Pro
When I try to fillet the corners of a rectangle created using the SU native rectangle command the corners do not trim if the radius is under .26" and when I go to delete the lines from the corners it will crash SU after i delete about 4 or 5 of the lines. If I delete the lines after each trim before doing the next corner it does not crash. But If i create all the fillets and then delete the lines it crashes. This happens every time.
My goal is a radius of 0.24". It seems that any radius 0.27" and greater trims the corner lines just fine.Any thoughts?

-
@njsanna said:
My goal is a radius of 0.24". It seems that any radius 0.27" and greater trims the corner lines just fine.
Any thoughts?
Reduce the number of segments from the default 18 to 12.

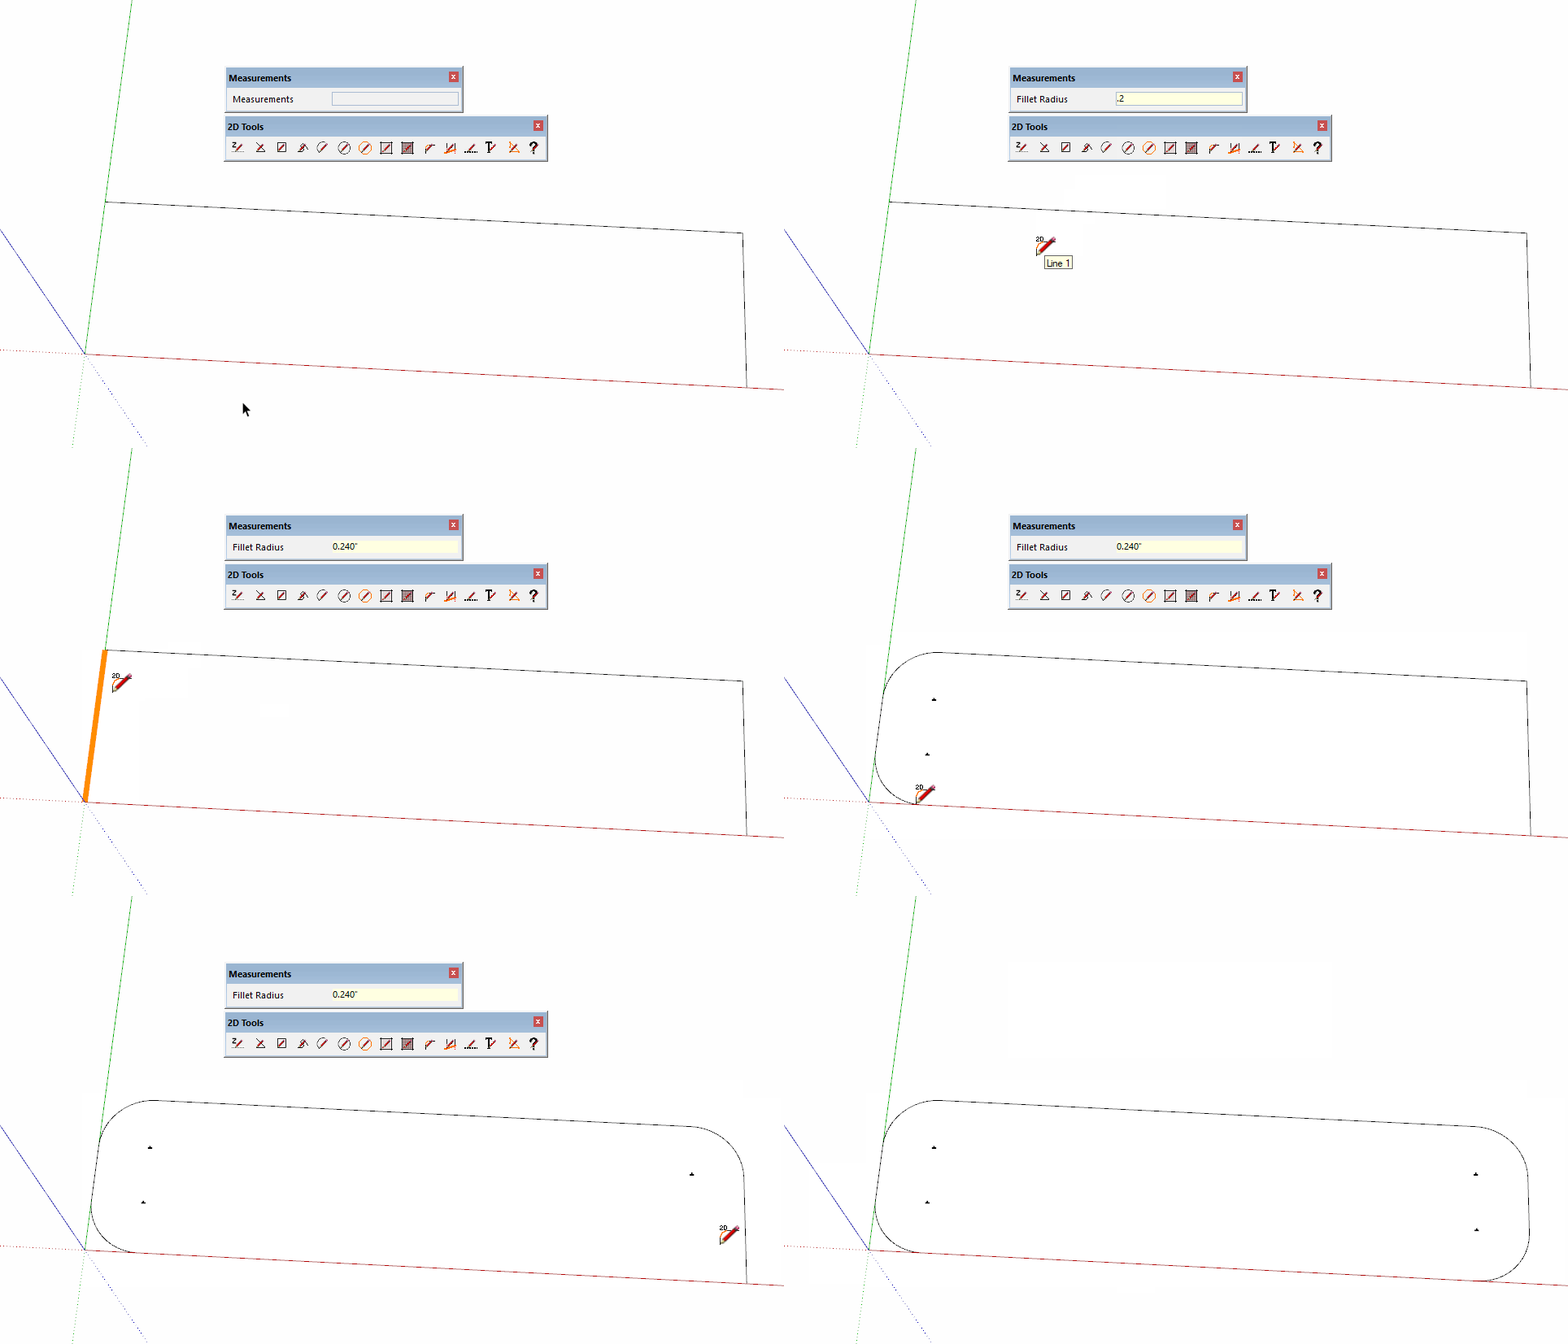
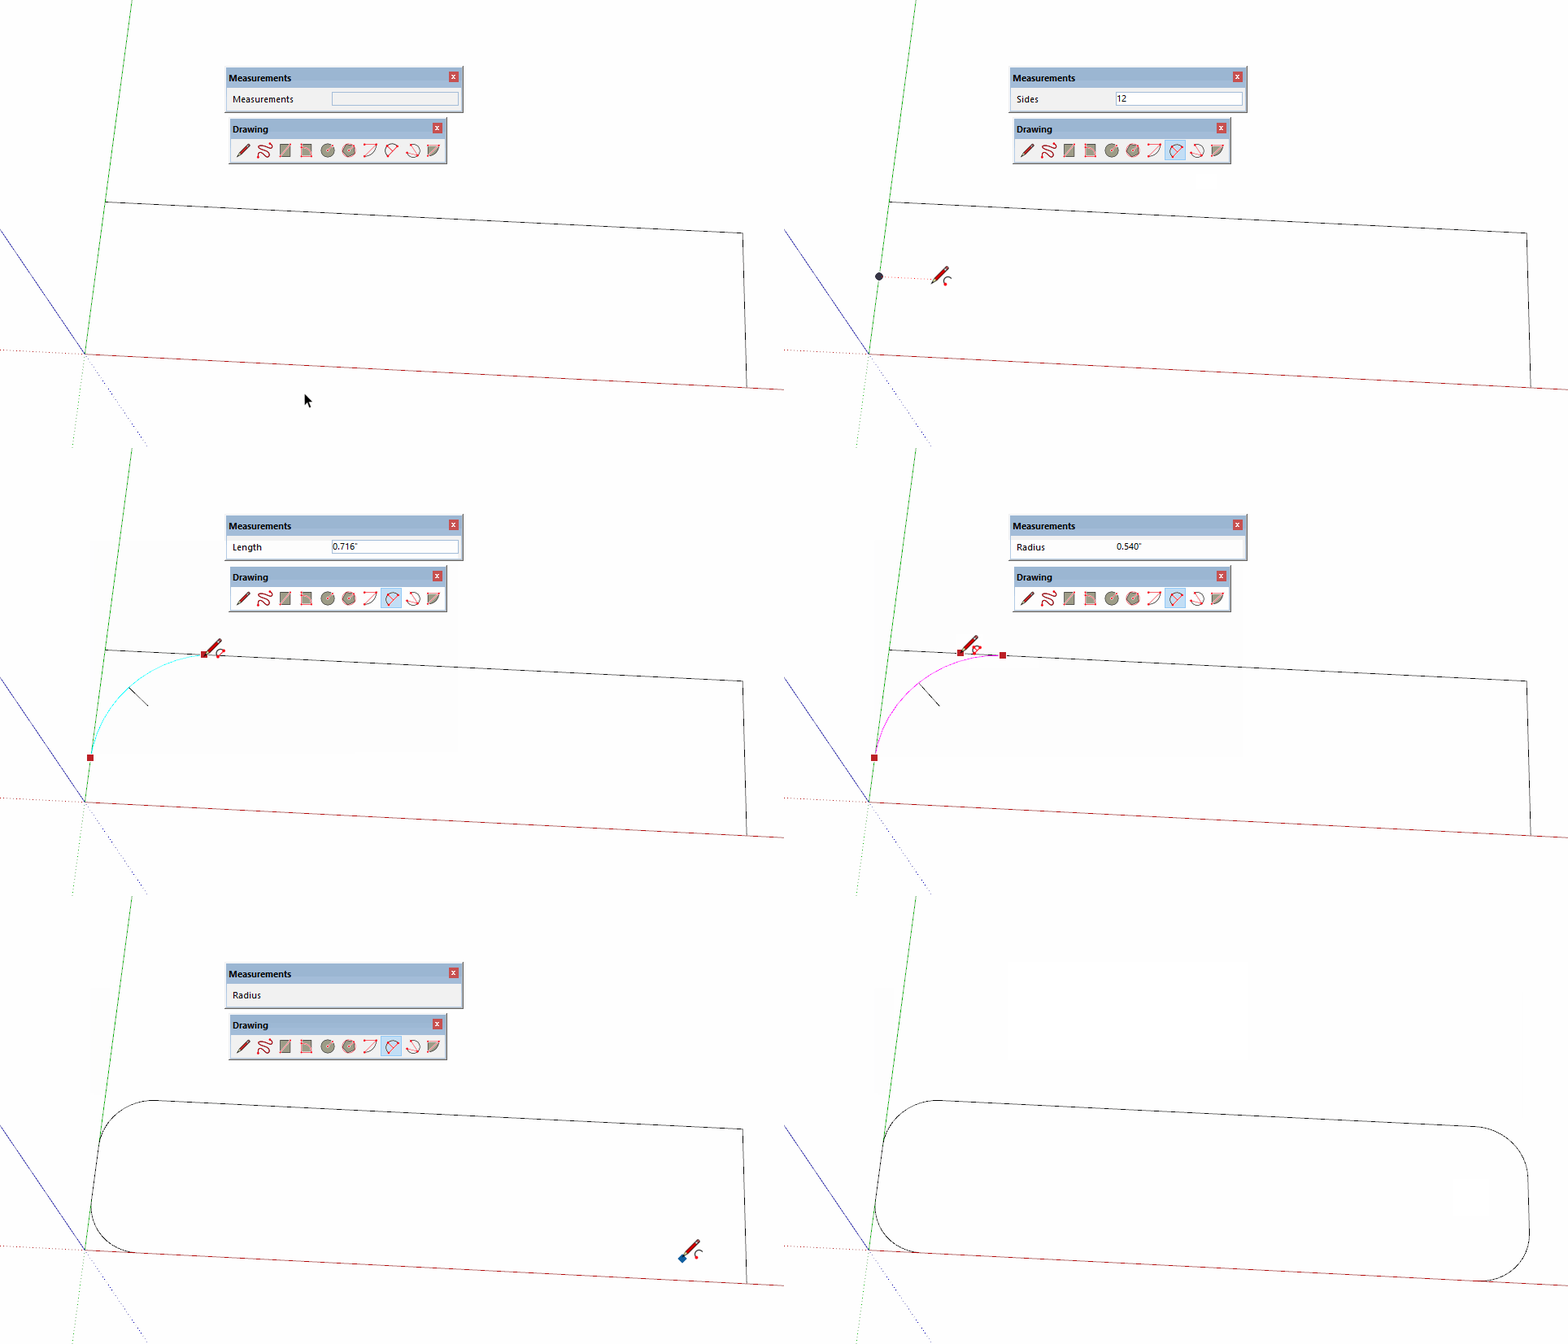
Alternatively, use the native 2-Point Arc tool instead. Double click in the corners for the arcs after the first one.

Please update your profile. It says you're still using SketchUp 2013.
-
From watching your gifs Dave, as I don't have the 2d tools, it is quicker with native tools.
-
@dave r said:
@njsanna said:
My goal is a radius of 0.24". It seems that any radius 0.27" and greater trims the corner lines just fine.
Any thoughts?
Reduce the number of segments from the default 18 to 12.
Alternatively, use the native 2-Point Arc tool instead. Double click in the corners for the arcs after the first one.
Please update your profile. It says you're still using SketchUp 2013.
Thanks Dave. I did not know you could do that with the native arc tool. That's a very specific point that you have to be in to input the radius. I was always building guides at the correct distance from the corner and snapping it.
-
@njsanna said:
Thanks Dave. I did not know you could do that with the native arc tool. That's a very specific point that you have to be in to input the radius. I was always building guides at the correct distance from the corner and snapping it.
At the time TIG released 2D Tools the 2-Point Arc tool didn't do that. The feature was added later.
There are several ways you can set a specific radius for the arc. One is the way you've done it with guides. Another is to place the arc and then edit the radius in Entity Info. The method I show does require that you bring the cursor back along the second edge to get the Measurements window to be asking for the Radius. In some cases you can just type the radius value followed by r although that requires knowing where the ends of the arc will be.
-
The magenta inference is the trick, click once when you get the magenta the first time then move back along the edge until you get magenta again, then let go and type the radius.
-
Installed the latest version 7.7. It worked for a couple of hours but started to freeze when using the rektangle, arc, etc. The line tool works just fine. Did a fresh install of sketchup (21.1.331) an have no other extentions installed but 2Dtools an debabelizer. It is strange but it just stopped working. Not knowing for sure but i think it started after playing around with the different line weights/types.
-
No known issues about this...
If you work in an empty new model is it the same ? -
@tig said:
No known issues about this...
If you work in an empty new model is it the same ?yes, fresh install, different empty templates, inches, mm, cm.... etc, make no difference.
It freezes when I try to use the rectangle, circle, arc tools. The line and text tool is working. On page 25 in this tread there are several reports on the issue. the user "rdube" amon others. https://sketchucation.com/forums/memberlist.php?mode=viewprofile&u=561750.I work on a iMac (Retina 5K, 27-inch, Late 2015) with Mac OS 10.14.6 (18G9323)
8GB RAM and AMD Radeon R9 M395 2 GB -
I am stuck.
I can't get the issue to appear on PC.
A few MAC users have had issues, but I haven't been able to track-down the problem...
If you try the tools when the Ruby Console is open are there any error massages ? -
@tig said:
I am stuck.
I can't get the issue to appear on PC.
A few MAC users have had issues, but I haven't been able to track-down the problem...
If you try the tools when the Ruby Console is open are there any error massages ?No messages. One thing I come in mind; just before this started I got the "unexpected file format" error message on one of my models. I did not use 2dtools in that project but the problems started right after that.
anyways, I can live without that tool so no need to do alot of work and errorhunting.
I use many of your tools every day. Thanks for all the work and good tools! -
Thank you for this wonderful ruby
and I have a problem
my 2d tools is related with y axis. not z axis
so, actually I can't find any way to use it correctly
Do you have any way to solve this problem?
or Can I direct the right axis?
My sketchup is 2022 version
I'm looking forward to your reply
thank you
-
the 1st one is from top view
2nd one is from iso view
3rd one is the one I rotate it as if y(green) axis is z(blue) axis
these 3 captures are my problem
it follows y axis always
I can't find why
plz help me
-
Edit the style so ground and sky are displayed and repeat the screenshots.
It appears you have moved the model axes. That doesn't change the ground plane orientation.
-
@marketeye said:
my 2d tools is related with y axis. not z axis
These tools are designed to work on the ground plane, which is indicated by the default location of the red/green (x,y) plane so with no Z element. Use the standard Top view.
By the way, your profile indicates you are using SketchUp 2022 Free/Make but there is no such version. Please correct that as the information in your profile helps us help you.
-
2dTools always draws 'flat' on the model's ground plane XY, or above/below it, if you change its datum.
I suspect that you have changed the model's displayed axes to not be the default model's axes - e.g. the blue Z axis is now rotated and the green Y axis is shown where the Z axis really is.
2dTools always use the model's default axes, even when you have manually reset them.
To change your axes back to the default you set the axes to be displayed and right-click > context-menu when hovering the cursor over any one of the three axis lines [RGB] and choosing 'Reset' from the context-menu...
If your Template, used for your new models, has ill-advisedly got revised axes then you probably want to fix that too... -
Hello,
When I use the 2d Line Style tool and right click in an open space to activate the Style Dialog box, I get the Invert Selection dialog instead. I am using Version SketchUp Pro 2020 20.2.172 64-bit. I reinstalled the update below with no change.
Please help.
Thank you, GBR
Advertisement


