The "Duh!" thread (aka the Doh! thread)
-
@xrok1 said:
i think the biggest duh moment of all that everbody (hopfully) goes through is realizing that it matters which way the faces are oriented.
90% of the 3dwarehouse posters still havn't had that duh moment.

...ok, I'd better ask, because my mind is blank after reading this.
What do you mean, "it matters which way the faces are oriented"?
This is either something I know, in different terms, or something I don't know at all.
-
Hi,
What Rocky is saying is the when you create geometry that your faces are all White not Blue.
If you draw a simple square on the ground plane you notice it's blue. It's basically the inside face of a yet to be push/pulled object. Once you pull it up the remaining faces are created with White faces out and blue in.
The problem with not orientating your faces correctly becomes apparent if you create a face within a face, and reverse one face so it's blue. Now if you pull one face then orbit you'll see the havoc it can cause!
Rule #1: always orientate your faces!
Rule #2: read rule #1
-
In 3d modeler's, traditionally faces have a front and a back side to them. Some modeler's have ignored the backsides of faces, so if the face was pointing away from the camera, the renderer would just ignore that face (it would not appear in your render, making for lots of holes in the model if you were not careful about getting faces oriented correctly).
I SketchUp, the default material light color face is the front face, and the blue-ish purpley color is the back side of the face. So in some people's eyes, it is important to always model so that the white side of the face is pointing outward (like if you make a box, all walls should be white, and all blue walls should be facing the inside of the box).
Most renderers can deal with materials applied to the backside of faces now, so it is not as important as it was previously. But some people (most?, many?, I don't know) still argue that it is important to model that way. It could be cosidered a Best Modeling Practice to some degree.
Chris
-
And hoppfully as soon as you Pull (in Sketchup) a simple rectangular blue surface (bad oriented)

that's magic this blue surface becomes a "white volume"! (so well oriented)
And no problem* to the end of your session
*If you have not some circonvoluted volumes!


-
You can also think this way; in the physical world everything has some thickness (even a sheet of paper). Now there are two kinds of 3D modellers; "solid" modellers and "surface" modellers (like SketchUp) where everything is made up of faces (and their bounding edges).
Now a front face should always look "outward" of a (fake) "solid" while the back face should be oriented inwards thus indicating that in that direction there is just the "thickness" of the object.
As said above, some 3rd party rendering software do not like back faces but neither do some other applications - for instance if you want to 3D print something, these back faces will drive some printers crazy.
In SU itself it is really not too important nowadays. I still remember however that even Google Earth did not like back faces and rendered only black colours where they were exposed (this has been solved by more modern exporters ever since).
-
It gets even more important when you start sending models through a render engines - many features there demand that your normals are oriented correctly.
-
@broomstick said:
@thomthom said:
A more recent Duh I had:
Being able to select only a few edges from a face and offset them instead of the whole face.
I had this one today!!
Wow. I didn't know that! I thought you had to offset the whole thing then erase unwanted lines and draw wanted lines. Duh!

-
@xrok1 said:
the duh moment that turned out to just be a der! moment.

but seriously you can copy your construction lines with (ctrl) copy, and then say *10 or whatever so you get 10 equally spaced. if that helps?
Duh! Wow again! I have such a hard time dividing stuff like 7 3/16" into 3 equal sections. This helps a lot! Thanks!
-
@unknownuser said:
@xrok1 said:
the duh moment that turned out to just be a der! moment.

but seriously you can copy your construction lines with (ctrl) copy, and then say *10 or whatever so you get 10 equally spaced. if that helps?
Duh! Wow again! I have such a hard time dividing stuff like 7 3/16" into 3 equal sections. This helps a lot! Thanks!
Move+ctrl to copy + typed 'dimension' + <enter> moves the copy by that 'dimension'.
Immediately typing 10x [or 10* or x10 or *10 !] will copy 10 times, at that dimension each time.
Alternatively immediately typing /10 will take the 'dimension' as the total distance and make 10 copies that are fitted into the distance, dividing the 'dimension' into 10 equal parts - as you say great if you want to subdivide 7 3/16" into 3 parts without worrying about the Math. -
@ecuadorian said:
Today I discovered that I can drag-and-drop images straight from Firefox into the SketchUp viewport.

Wow! Just tried it with your avatar and it works!!!

-
@unknownuser said:
@ecuadorian said:
Today I discovered that I can drag-and-drop images straight from Firefox into the SketchUp viewport.

Wow! Just tried it with your avatar and it works!!!

I had and odd duh moment for that - because I just did it one time, and I surprised myself afterwards when I realised it worked. I assumed it didn't - so I have no idea why I even tried.
-
But the inverse don't work


-
just figured out how to adjust a textured face.
Right click
 texture
on textured face. Actually I knew about it but just forgot. -
@arklandesign said:
hehe .....This is a funny and informative thread at the same time...
I have one... discovered by mistake yesterday.
If one is in a complicated model and want to focus attention to a particular part of the model, one can double click on the scroll wheel at the point one is interested in and that will centre that point in the middle of the screen....making orbiting even easier.Haha! Thanks! Funny how stupid some people are. Surely not me though!

-
here's one:
what's the difference between the "soften" and "hide" commands for lines?
-
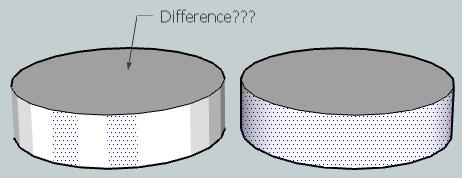
Left is Hidden, right is softened...
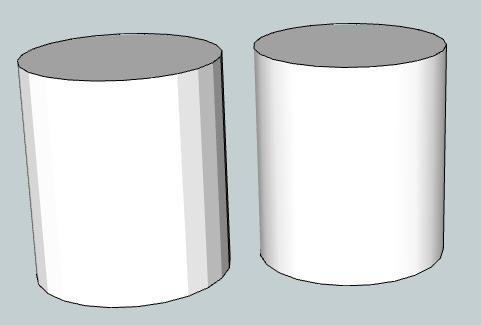
and SHIFT+ = Hide
and CTRL+ = Soften
-
@unknownuser said:
Left is Hidden, right is softened...
Other than appearance, is there a difference in how the two behave?
(I'm slow to Doh! on this one
 )
) -
In this example the cylinder with the HIDDEN lines, it's faces are still individually manipulated. Where as SOFTENED results one continuous face. SU playing games with the mind
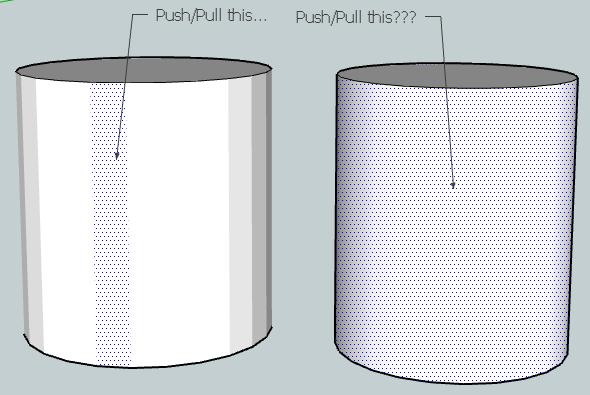
To create the cylinder without softened edges, just draw a circle, then right click it and Explode Curve followed by . Now you can hide edges and see for yourself!
-
Hmm. Strange. I'm able to create hidden and soft lines (I use hidden lines regularly).
But if I create two cylinders, just as you have, the hidden line version behaves exactly the same as the soft lines version (sketchup displays the sides as one big face, unless I display "hidden lines" then I can select each face individually).
Also, my hidden line cylinder looks identical to the soft line cylinder.
Can anyone comment on the intent behind creating these two different line styles? What is the "suggested" or intended use for each?
-
Hi DanBIG,
Draw two circles and the right click as mentioned above to 'Explode Curve'
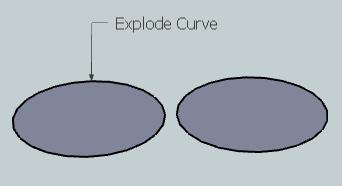
Now both circles, because we have returned the circle to individual segments, instead of one polyline, SU creates a cylinder with individual faces...
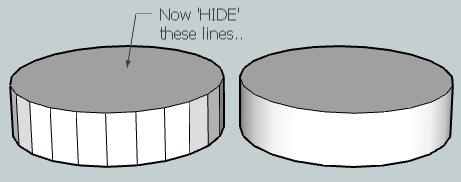
Hiding these faces do not merge the faces into one another again, it just hides the Edges(Vertices). Thus still enabling you to manipulate each face...
@unknownuser said:
What is the "suggested" or intended use for each?
SU, when it creates CURVES(POLYLINES), allows you to simulate smoothness. As SU natively uses only straight lines to create any curve, having the ability to simulate smoothness/roundness is necessary. When you select View>Hidden Geometry you are effectively asking SU to show both HIDDEN and SOFTENED lines.
To answer your question, which looks nicer?
Hello! It looks like you're interested in this conversation, but you don't have an account yet.
Getting fed up of having to scroll through the same posts each visit? When you register for an account, you'll always come back to exactly where you were before, and choose to be notified of new replies (either via email, or push notification). You'll also be able to save bookmarks and upvote posts to show your appreciation to other community members.
With your input, this post could be even better 💗
Register LoginAdvertisement


