The "Duh!" thread (aka the Doh! thread)
-
Yes nobody is perfect.
-
@unknownuser said:
Also I couldn't find anything about moving vertices. And even more, while doing so, how to lock moving a vertex to its own edge's direction. (=hover over the edge first, press [Shift], only then move the vertex)
This one is new for me!
Well seven years to learn this too.
-
@gilles said:
Yes nobody is perfect.
How true.
Fact is, I learned it (lock vertex to edge) from someone else, .....from Anssi.
And this was also after having used SU for several years. (Doh for me at that time) -
@valerostudio said:
Left, Right, Up arrows lock the Red Green Blue Axis when using move! How did it take me 7 years to figure this one out!
And not only the Move tool but the line tool, too (just in case you needed it)

And yes, I only discovered it about a year ago or so?

-
@wo3dan said:
And even more, while doing so, how to lock moving a vertex to its own edge's direction. (=hover over the edge first, press [Shift], only then move the vertex)
There's always something new to learn..
-
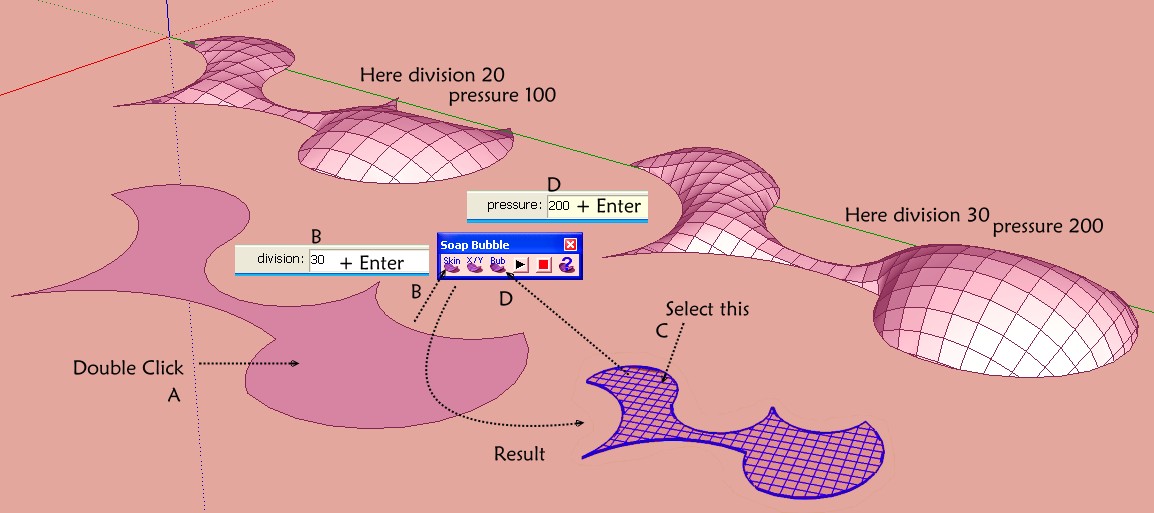
A funny thing with soap skin Bubble!

you can copy / move, rotate even resize the result "C" before call the button Generate SoapBubble!!

for a collective Pressure on some objects from copy moved rotated even resized!
But not from different objects Soap Skinned!
It's not so bad!
Ps And you can of course stop the process make other things then retake them at any moments!
Pressure is not additive just absolute! (can be negative or positive)
-
It's more effective to import DXF file generated from PLT (via Viewcompanion Premium)
than original DWG one. No need to mess with Xref binding and parsecs from 0,0,0 .
. -
Another in the line of D'oh moments, I am trying to increase the accuracy that sketchup uses to place a point. I have scaled a group by x10 to see what I want to do but even now I find that trying to place a new line results in the start point NOT going where I want it to, rather the point goes only aproximately the same country as the location I want to start from. The start point WILL be another end point OR an intersection. Lovely this memory trick, learn something, leave it unused, forget it.........
-
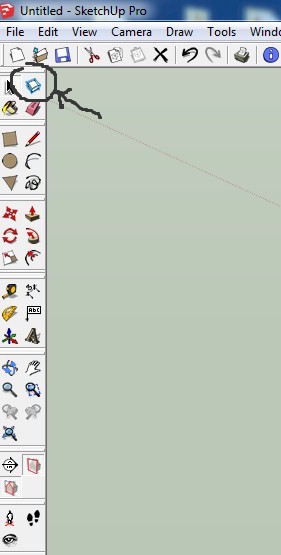
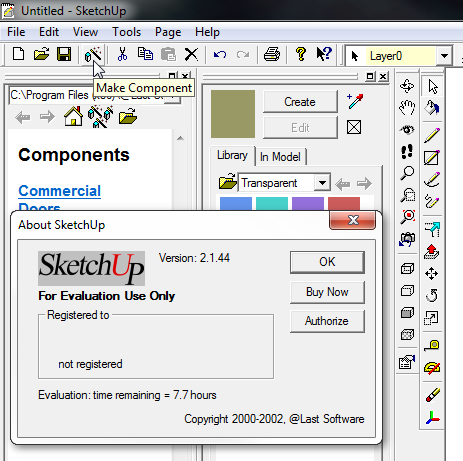
I had an embarrassing DOH! moment the other day...I just discovered the "make component" icon on the toolbar! When was that added? All those years going through the pull-down edit menu.
-
In what number of version ?
And what is the image of this icon ?@unknownuser said:
All those years going through the pull-down edit menu.
Seems you have also the Shortcut G on a selection !

-
@unknownuser said:
In what number of version ?
And what is the image of this icon ?@unknownuser said:
All those years going through the pull-down edit menu.
Seems you have also the Shortcut G on a selection !

I've checked and the icon is on 2013, 8, 7, and 6. It might have been on earlier version, but can't confirm.

-
@daniel said:
I've checked and the icon is on 2013, 8, 7, and 6. It might have been on earlier version, but can't confirm.

-
Everyone knows that we can enter value in both Metric and British units regardless of the model units right.
But I recently discovered that we can also combine the two unit systems !!!
That means to move an object I can enter 6'3.5mm in the vcb and sketchup accurately places the object!!!
How cool is that!!
P.S. Doesn't seem to work the other way around tho.. 6M3" seems to give an error of invalid length entered. go figure
-
@flyashy said:
...That means to move an object I can enter 6'3.5mm in the vcb and sketchup accurately places the object!!!.....
This seems to be an (one of the) exception(s). To move 6"3.5mm does not work. I can't figure out why one dimension would be in two different units anyway. More that X is in one unit, Y in another (and Z in yet another). And you are right, this is also possible in SketchUp.
Example: you can scale a cube in 3 directions to accurate dimensions by applying 1m,10',12" [Enter]
-
So I was reading another post, and it was discussing how they use "hide rest of model" when they clicks to edit a component. I have tried that method, but found that most of the time I wanted to see the rest of the model. But did find the "hide rest of the model" helpful sometimes.
So I wondered could I put that attribute in a scene. Darn you can. So now I have a scene I use most of the time which doesn't hide the rest of the model, and a scene called "hide rest of the model" which I switch to when I wish to have this function.
So I am just passing this along.
Every day I discover something new.
Ken
-
@unknownuser said:
....So now I have a scene I use most of the time which doesn't hide the rest of the model, and a scene called "hide rest of the model" which I switch to when I wish to have this function....
Hi Ken, thanks for sharing.
You may want to assign these two different options (On/Off) to just one shortcut key. To toggle the view 'Hide rest of model' On/Off. It's fast and available in all models.
-
Did you know that when you click on the plugins menu and then tap on a letter on your keyboard it cycles through your plugins starting with that letter?
It's a native Windows feature for keyboard navigation... like when you press Alt in any program.
I just never thought of using it in Sketchup... Something to think about...There is only one drawback, if you only have one plugin that starts with a certain letter it will be activated before you can say Robinson Crusoe!
Good Luck!
-
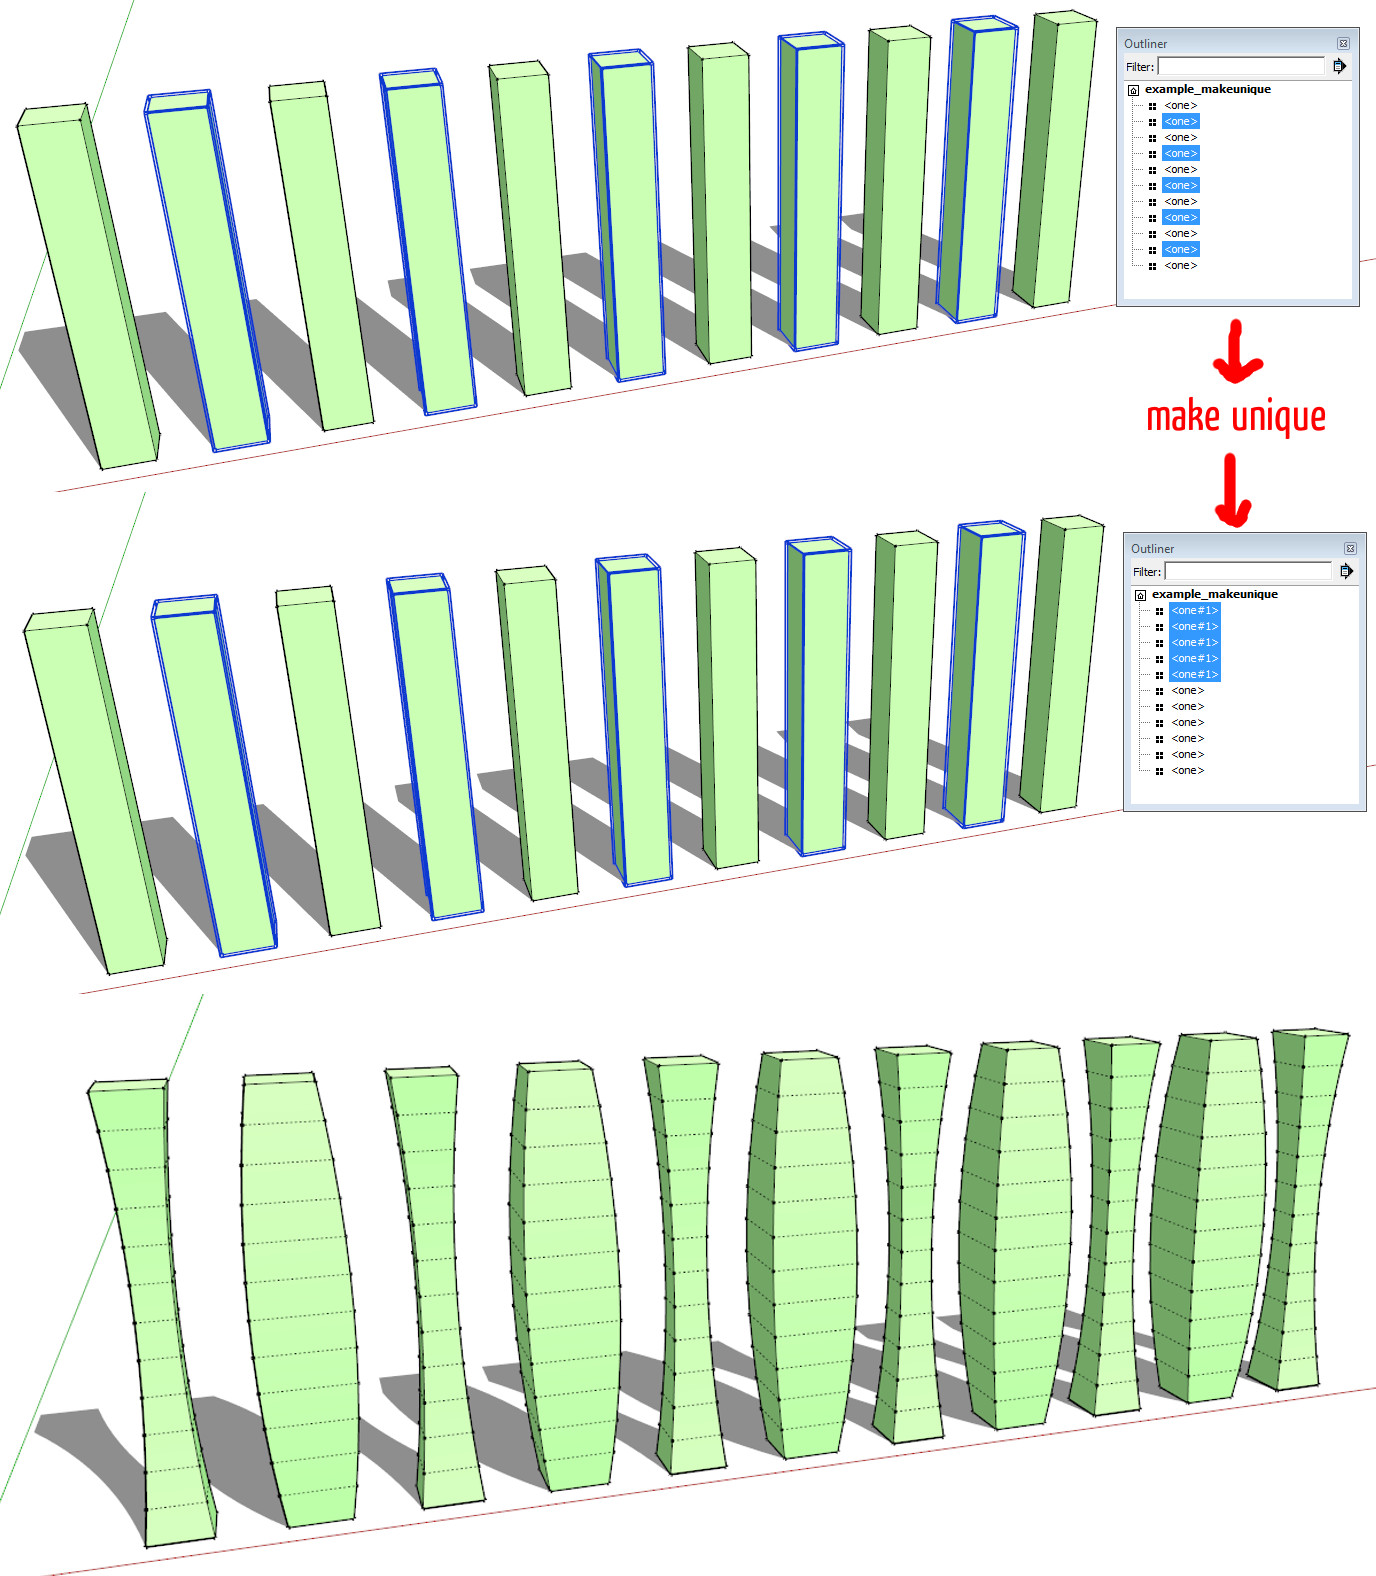
Not really a new one for me but I use it regularly, so it might be a little Duh! for someone?
If you select several instances of the same component and use "make unique", these instances become all instances of the new component. An example to clarify what I try to explain ...

-
Very practical!

-
Now you tell me.
This could saved me a hour at least.
Here is a problem. I have 40 lights all the same but separate groups (Not component).
Anyway to turn them all into one component instance.
Hello! It looks like you're interested in this conversation, but you don't have an account yet.
Getting fed up of having to scroll through the same posts each visit? When you register for an account, you'll always come back to exactly where you were before, and choose to be notified of new replies (either via email, or push notification). You'll also be able to save bookmarks and upvote posts to show your appreciation to other community members.
With your input, this post could be even better 💗
Register LoginAdvertisement


