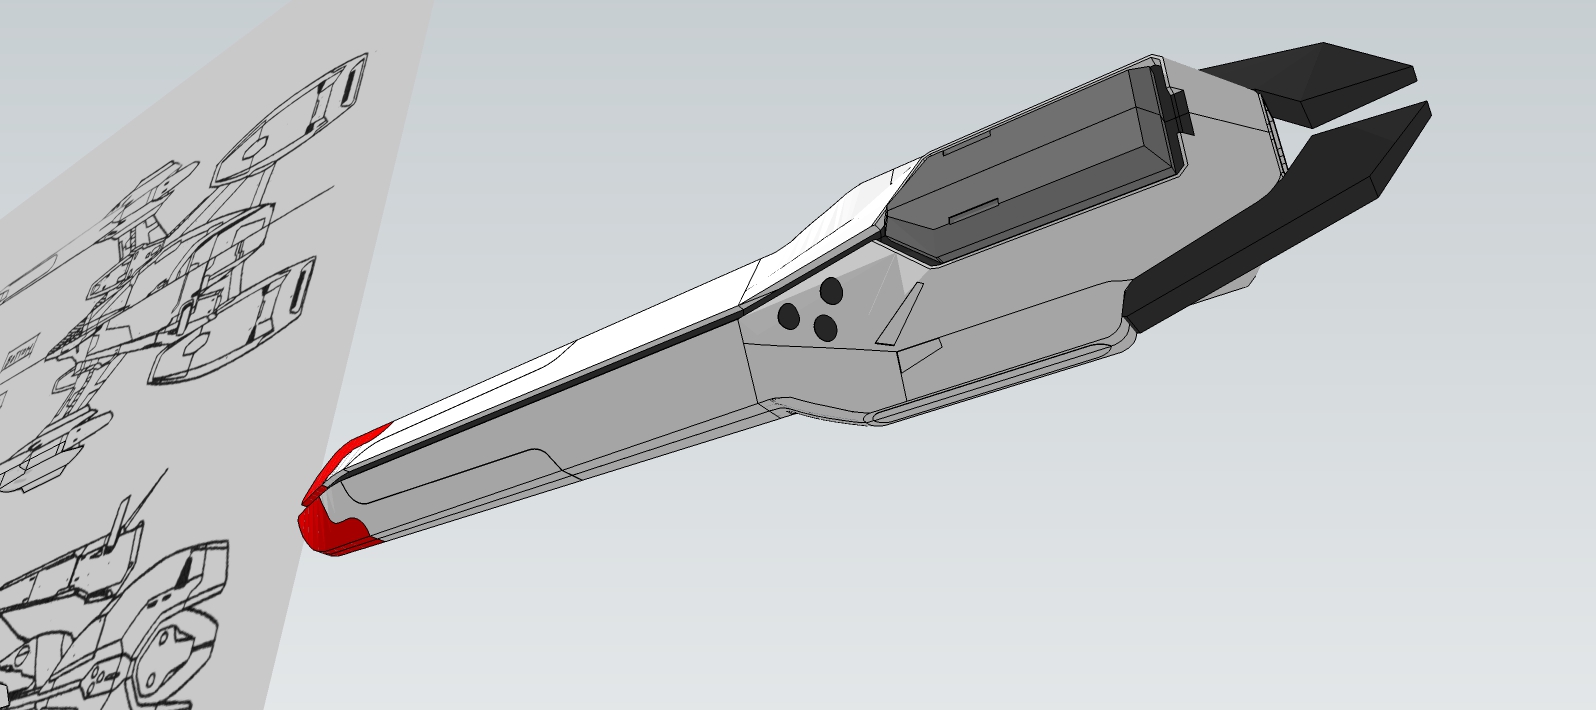
• Login
sketchucation logo sketchucation
  • Login
πŸ€‘ 30% Off | Artisan 2 on sale until April 30th Buy Now

The Nadesico A

Scheduled Pinned Locked Moved WIP
194 Posts 10 Posters 48.2k Views
Loading More Posts
  • Oldest to Newest
  • Newest to Oldest
  • Most Votes
Reply
  • Reply as topic
Log in to reply
This topic has been deleted. Only users with topic management privileges can see it.
  • M Offline
    Mike Amos
    last edited by 24 Mar 2022, 12:32

    Nice mate, on a roll. πŸ‘

    1 Reply Last reply Reply Quote 1
    • B Offline
      Bryan K
      last edited by 24 Mar 2022, 22:10

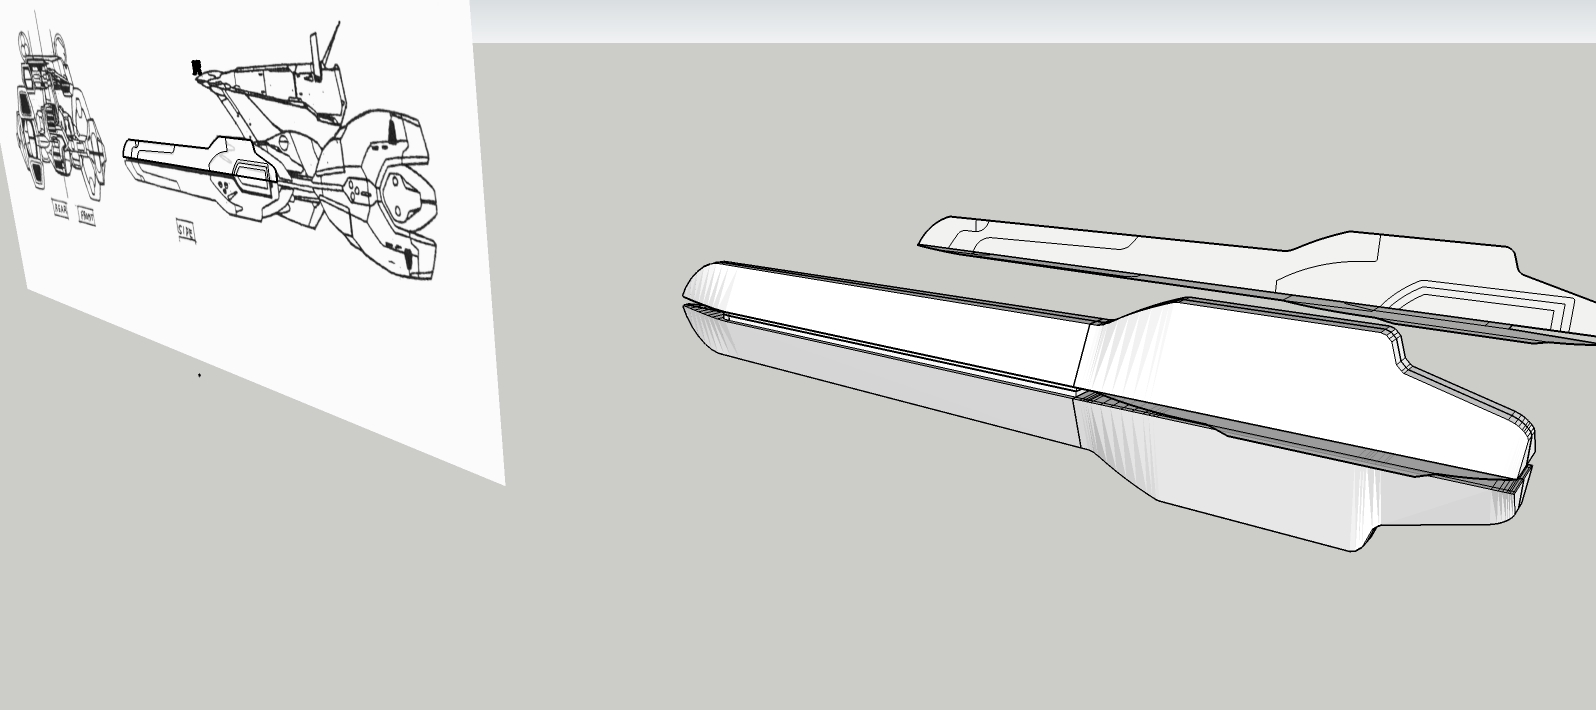
      Started with this shape.
      Nadesico A5.jpg

      Then +Push/Pull and resized each face along the profiles. Now need to do the indents. Still needs some tweaking on the shape. I see one profile out of alignment.
      Nadesico A6.jpg


      Nadesico A7.jpg

      See my portfolio at https://delphiscousin.blogspot.com/

      1 Reply Last reply Reply Quote 0
      • B Offline
        Bryan K
        last edited by 26 Mar 2022, 04:48

        Thanks Mike!

        Same technique for rear half of the front nacelles. Started with the same shape, +Push/Pull following the profile working backwards. Make component, then mirror the copies.

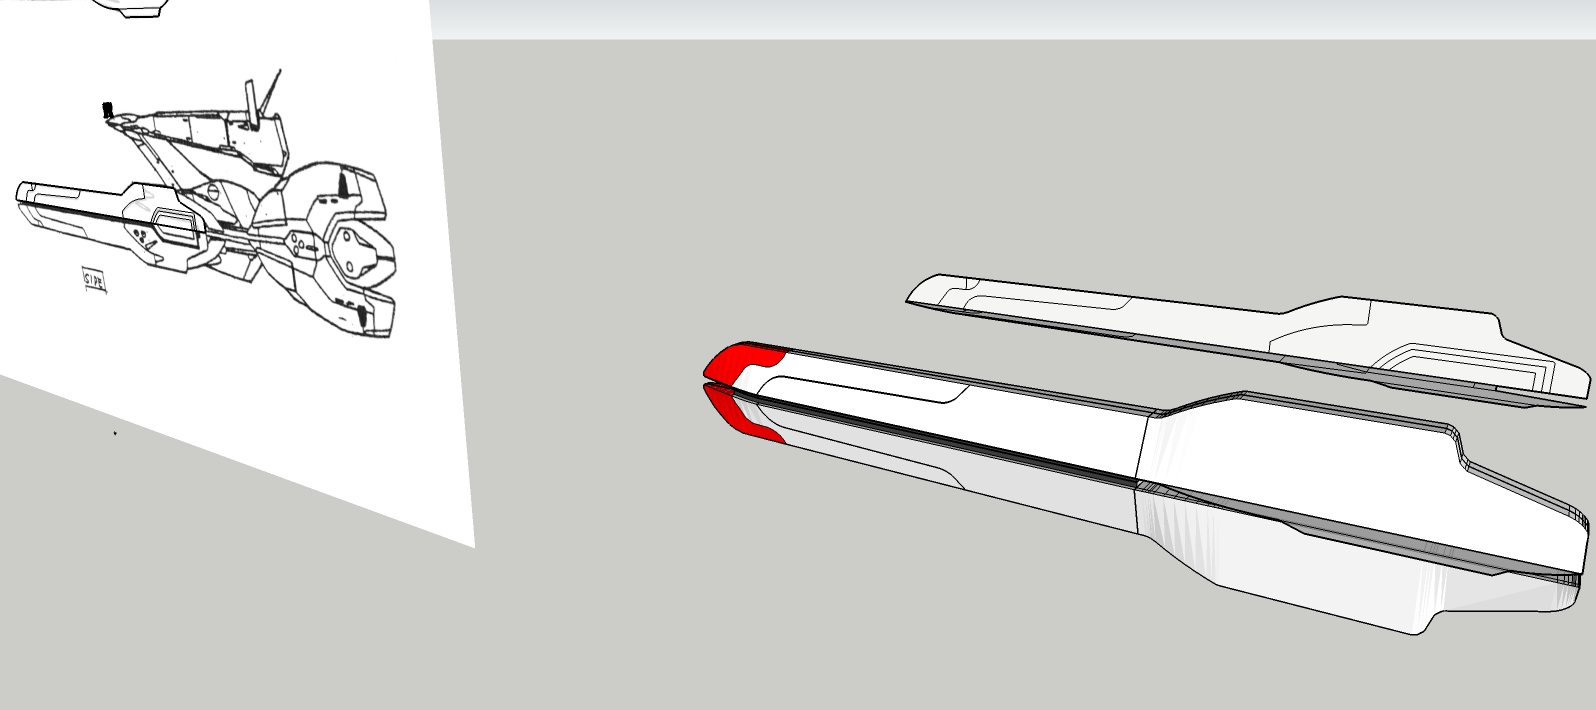
        Tweaked the front a bit more. Will stop here and and reference the images and tweak before building more shapes.

        The issue I'm seeing is the drawings are just slightly different from the actual model kit, so I'm going to end up with a hybrid because each reference offers details the other doesn't. The shape and scale will be exact, but minor detail like curves and angles are going to differ. So I'm going to have to find a middle ground. But I'm going to default to the drawing and anime references when in doubt. Hence, the nose is more rounded than the model kit, yet more angular than the drawing.

        LOL. No wonder I've only seen one CG model of this ship and references were hard to find. It's a crazy design!
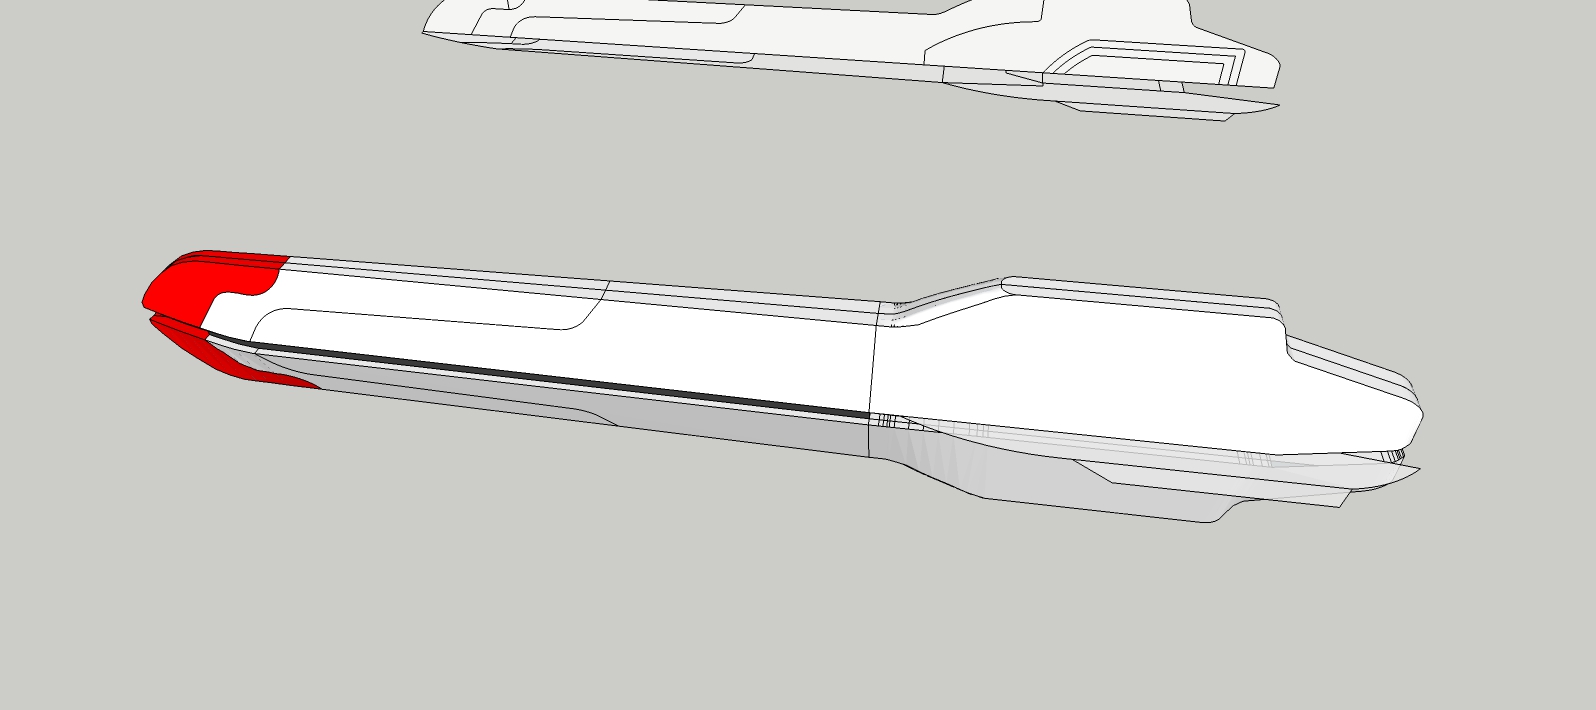
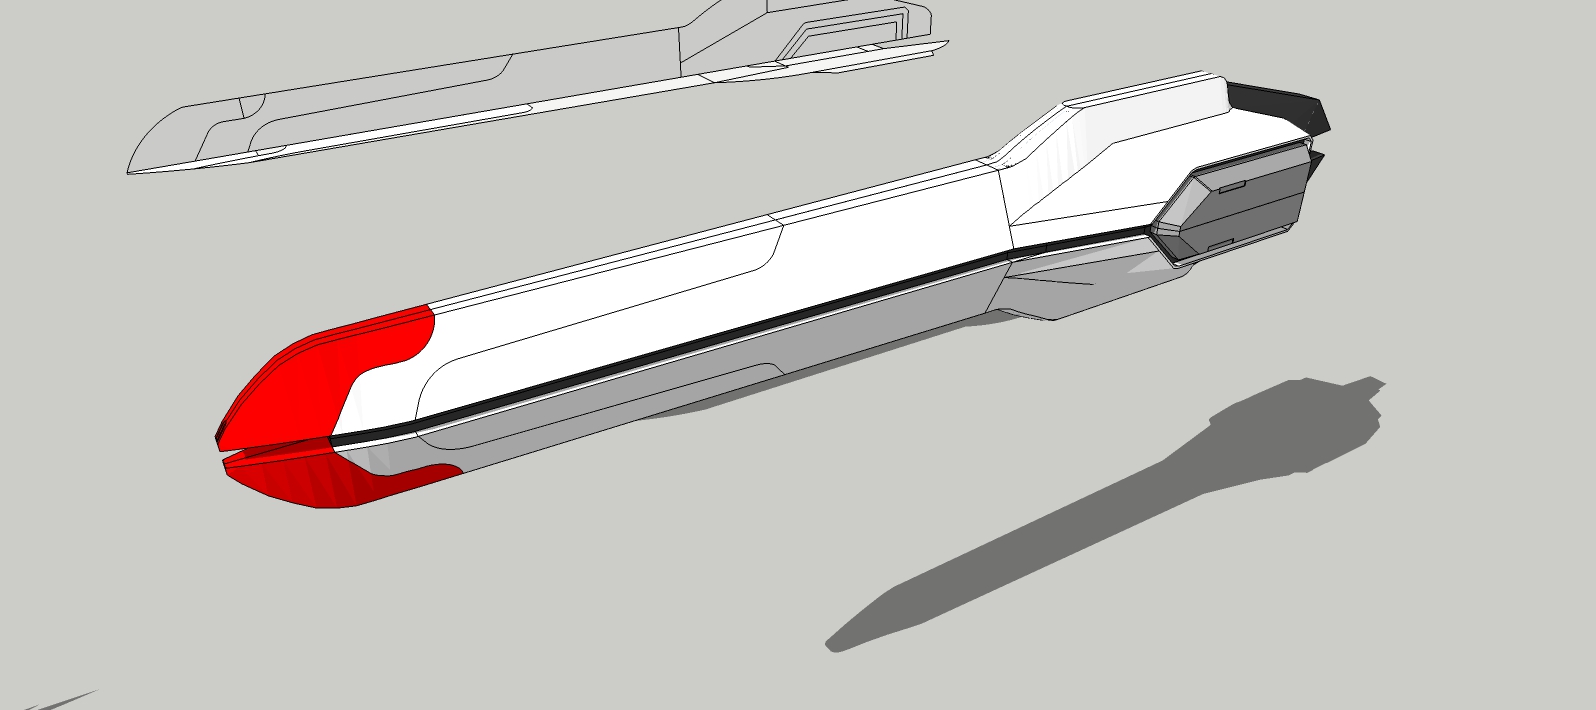

        Nadesico A8.jpg


        Nadesico A9.jpg

        See my portfolio at https://delphiscousin.blogspot.com/

        1 Reply Last reply Reply Quote 0
        • B Offline
          Bryan K
          last edited by 27 Mar 2022, 01:36

          Coming along.

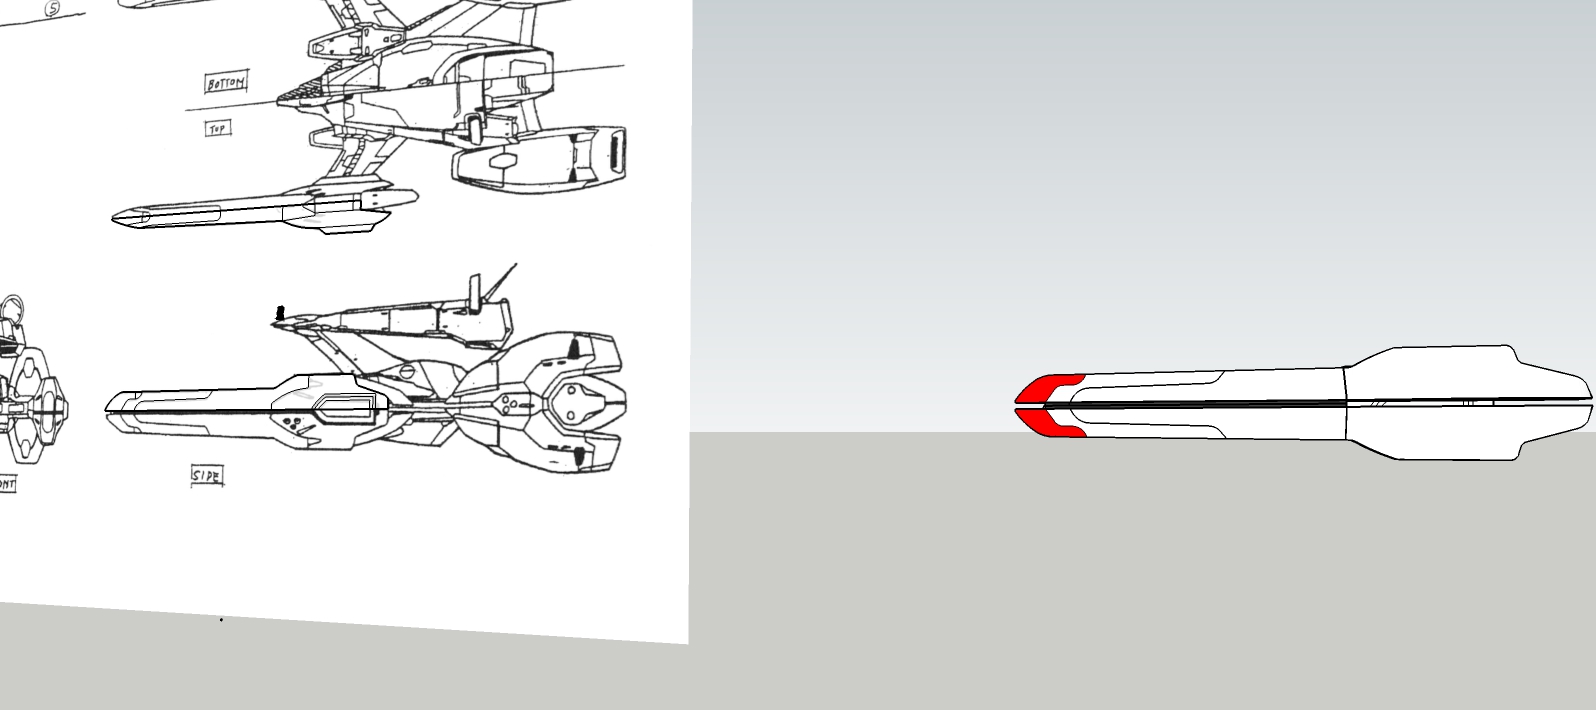
          I tweaked the nose some more. Slightly flattened the curve and made it slightly wider again toward the point.

          I +Push/Pull'd the vertical profile through the component and then intersected (Selection ONLY). Had to erase a LOT of hidden lines after. Then copy and cut the lines I wanted and pasted into nacelle component and then closed some small gaps, but this worked out as I wanted.


          Nadesico A10.jpg


          Nadesico A11.jpg


          Nadesico A12.jpg

          See my portfolio at https://delphiscousin.blogspot.com/

          1 Reply Last reply Reply Quote 0
          • T Offline
            tuna1957
            last edited by 27 Mar 2022, 18:36

            Great progress πŸ‘

            1 Reply Last reply Reply Quote 1
            • M Offline
              Mike Amos
              last edited by 28 Mar 2022, 11:25

              ^ Agreed mate, he knocks out great product. πŸ‘

              1 Reply Last reply Reply Quote 0
              • B Offline
                Bryan K
                last edited by 29 Mar 2022, 20:00

                Thanks tuna. Thanks Mike.
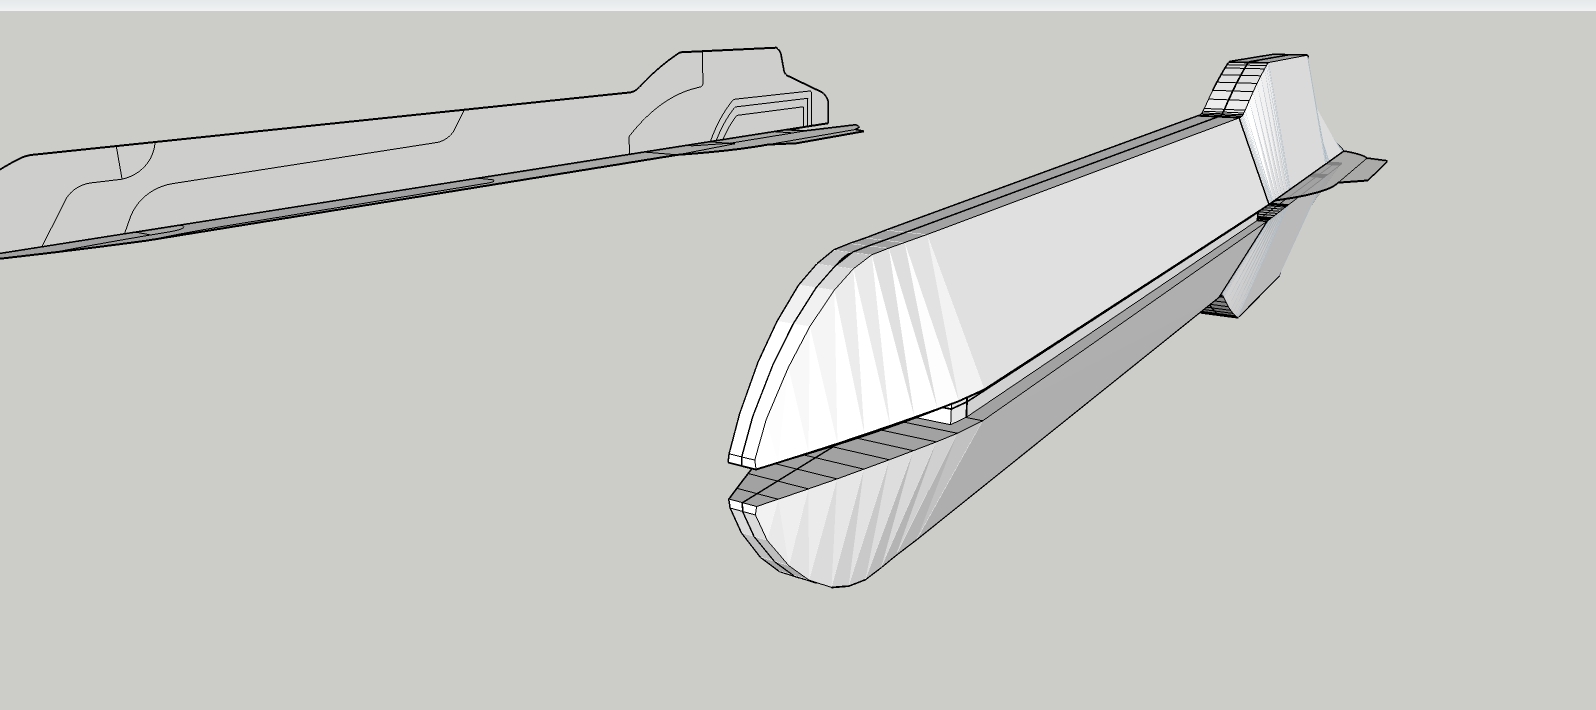
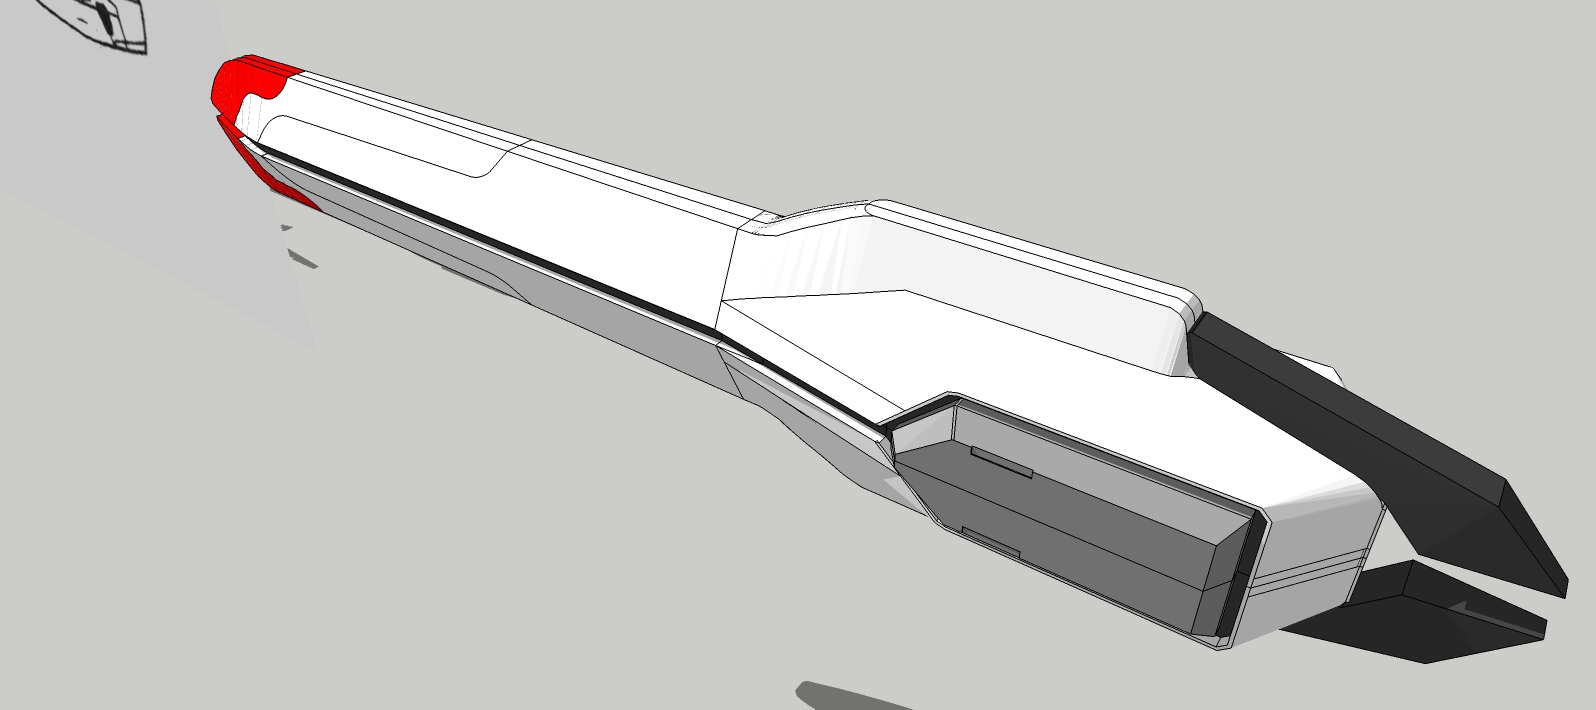
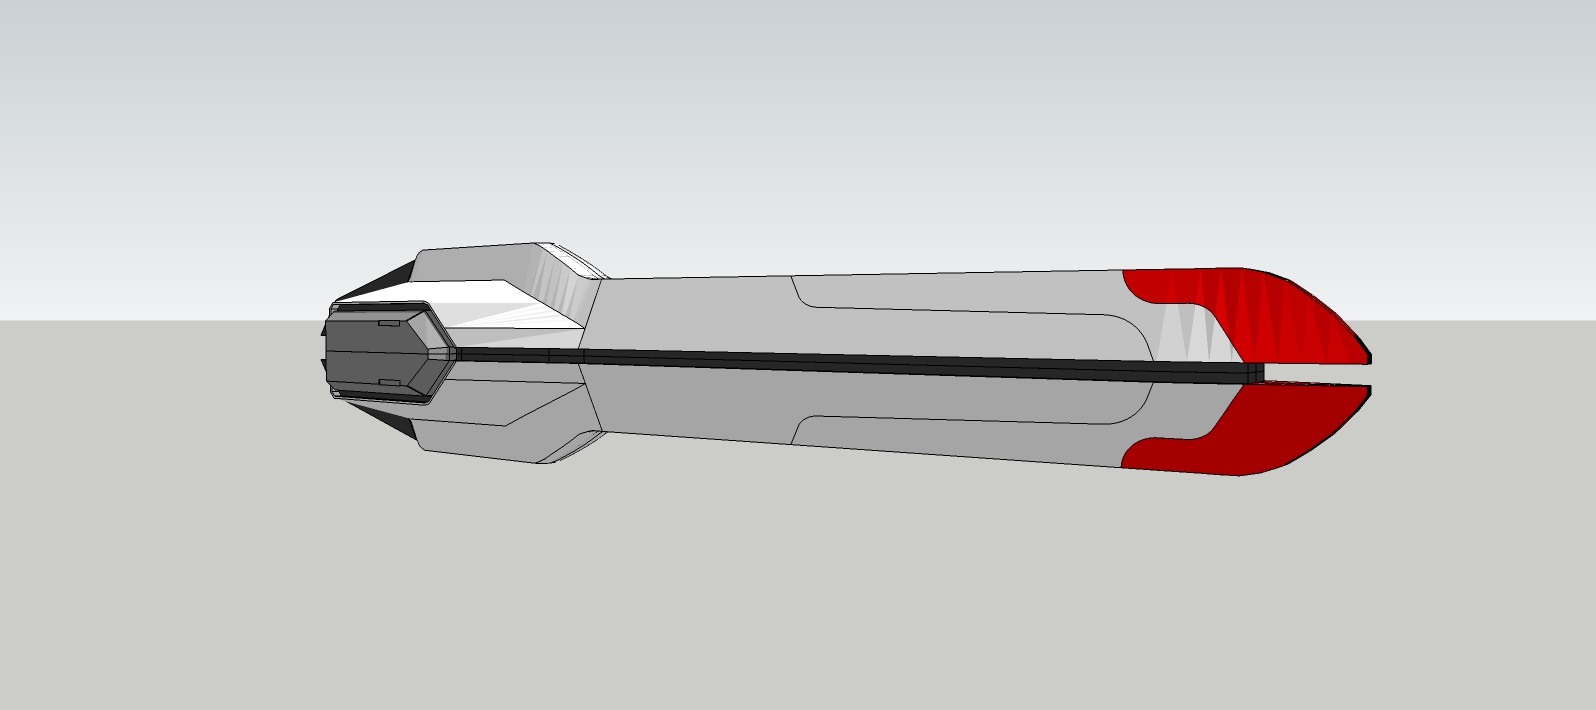
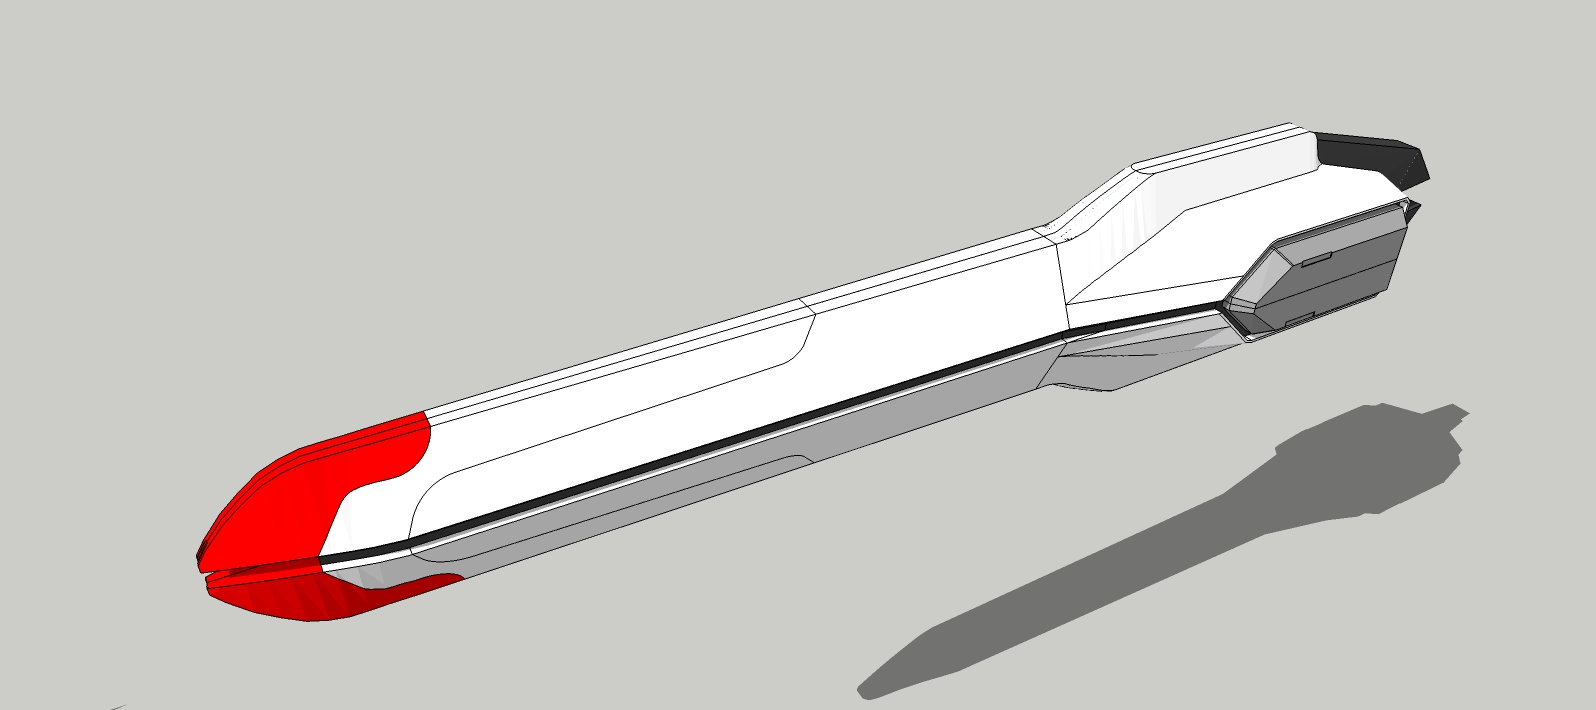
 πŸ‘

                See my portfolio at https://delphiscousin.blogspot.com/

                1 Reply Last reply Reply Quote 0
                • B Offline
                  Bryan K
                  last edited by 3 Apr 2022, 00:10

                  Overview to date.


                  Nadesico A22.jpg

                  See my portfolio at https://delphiscousin.blogspot.com/

                  1 Reply Last reply Reply Quote 0
                  • B Offline
                    Bryan K
                    last edited by 3 Apr 2022, 03:39

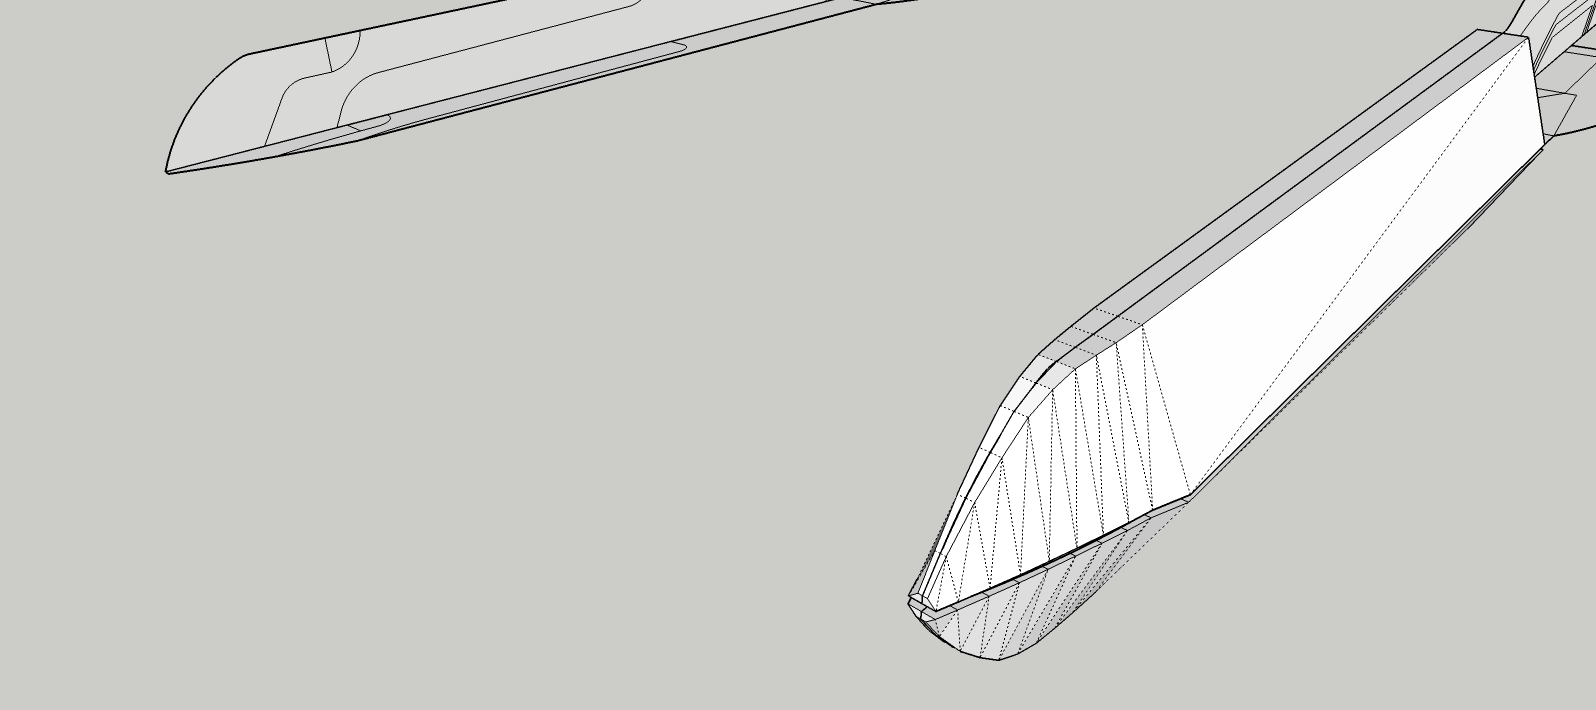
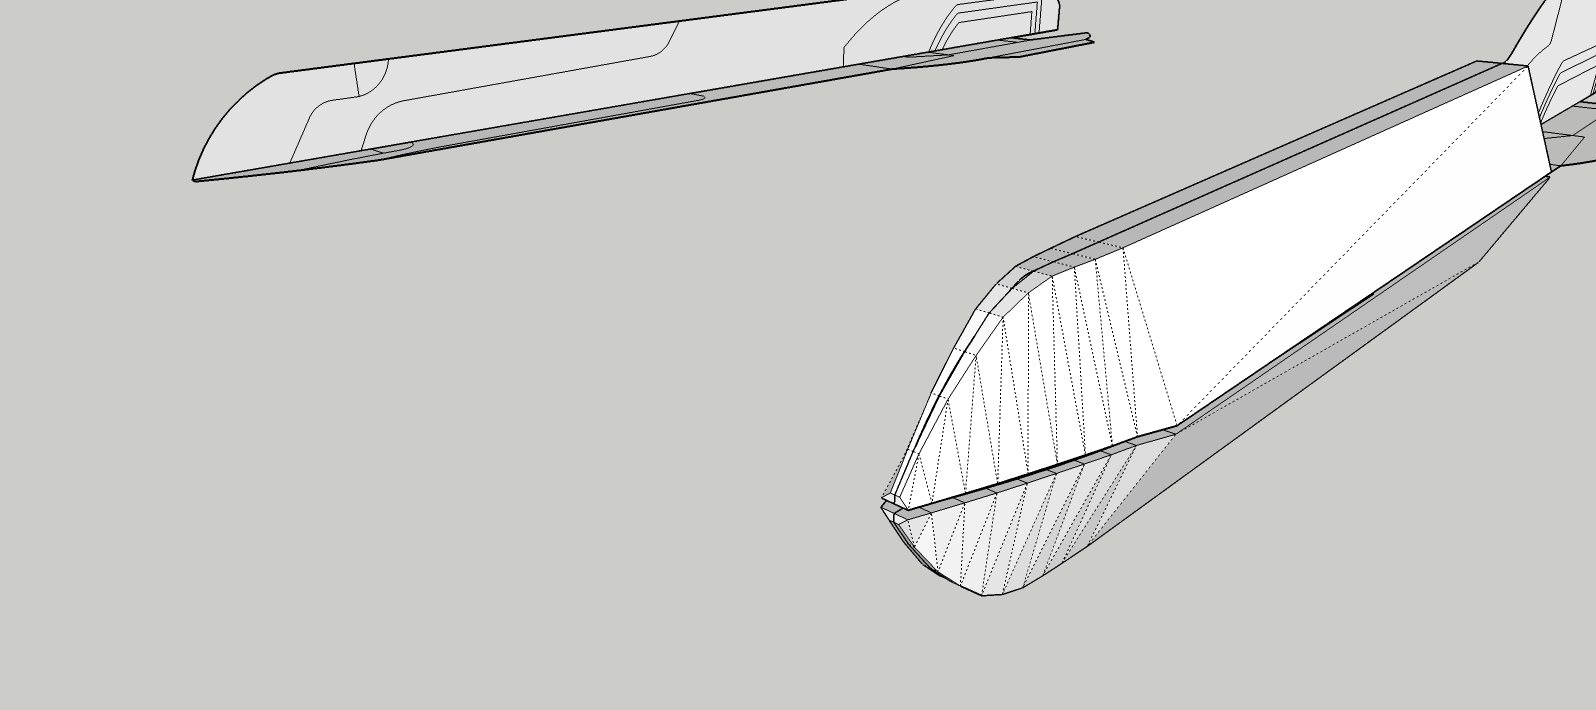
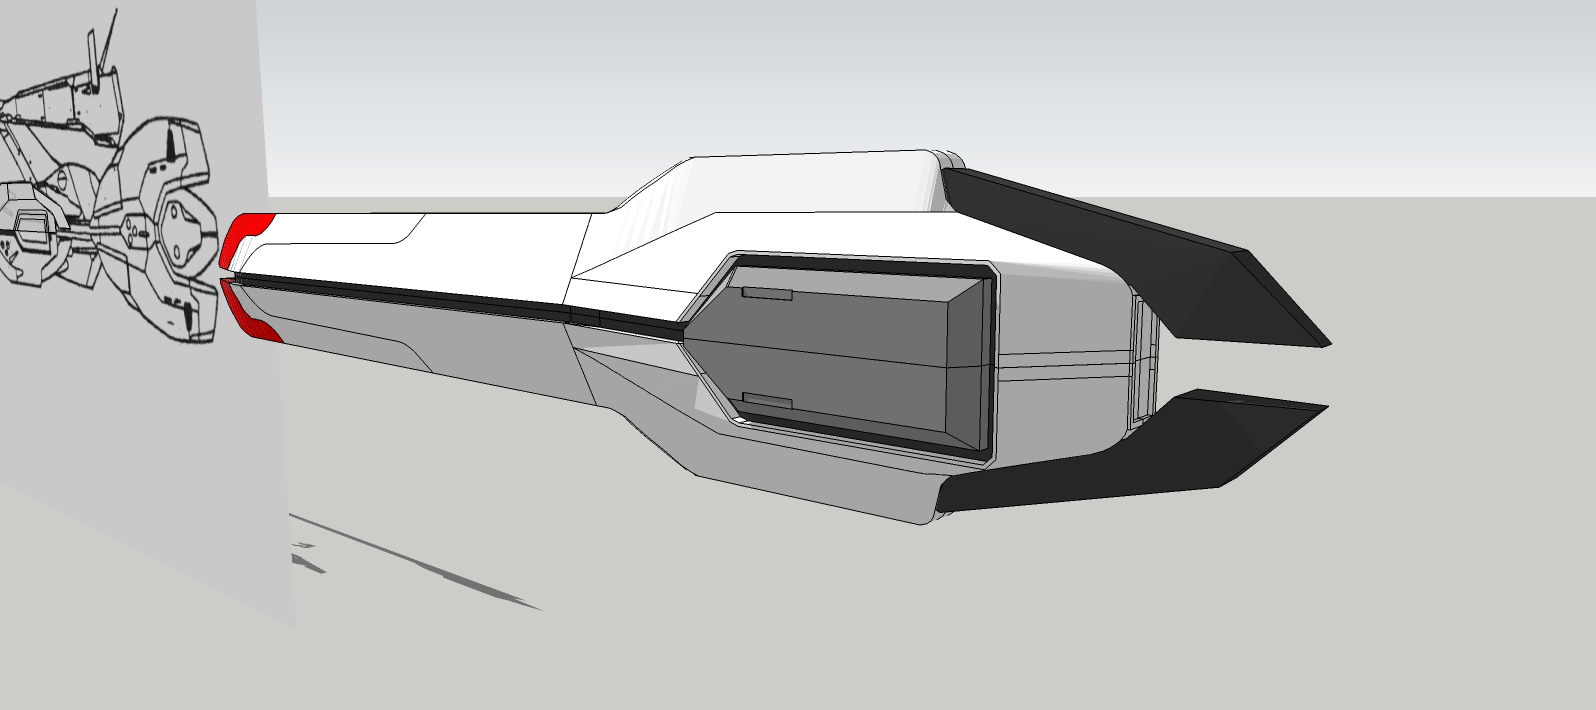
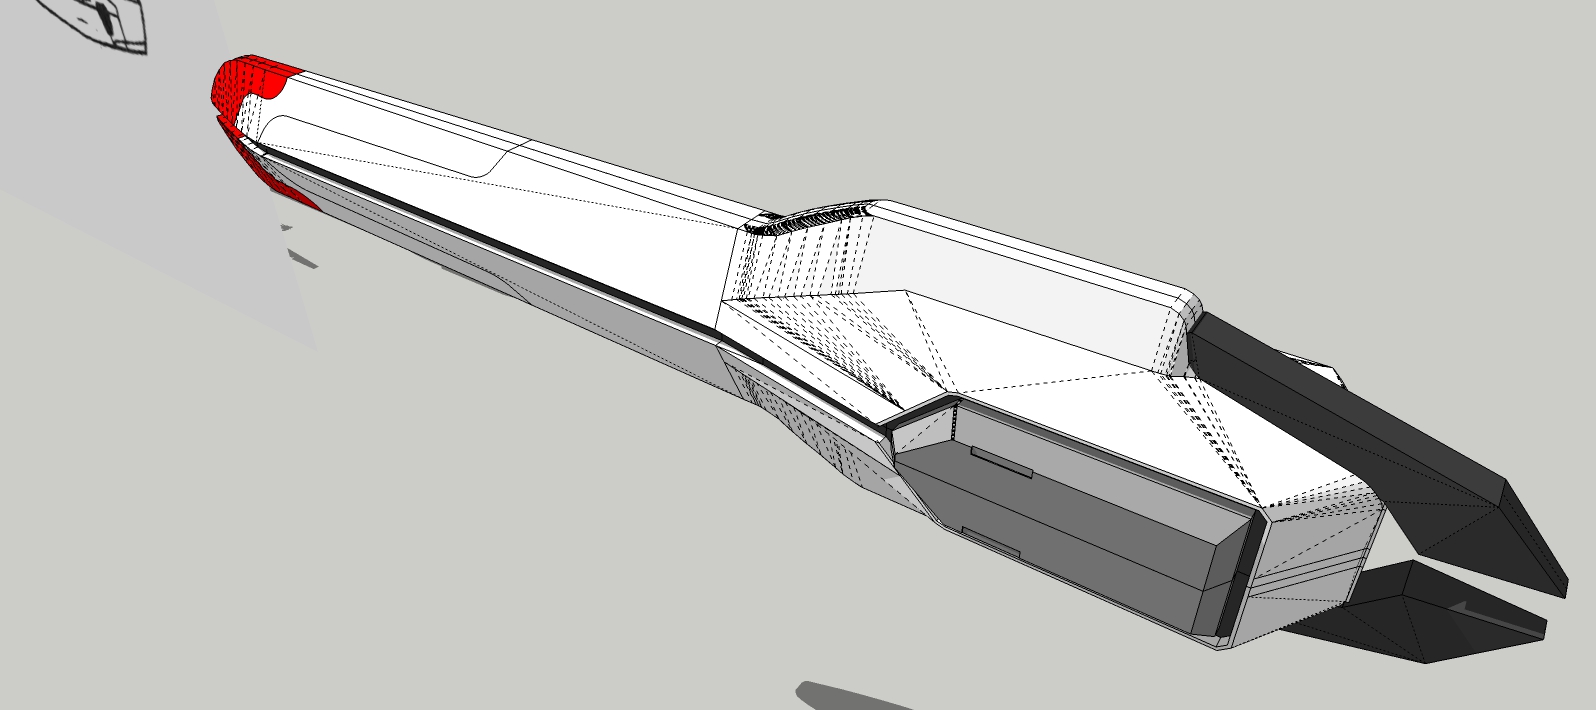
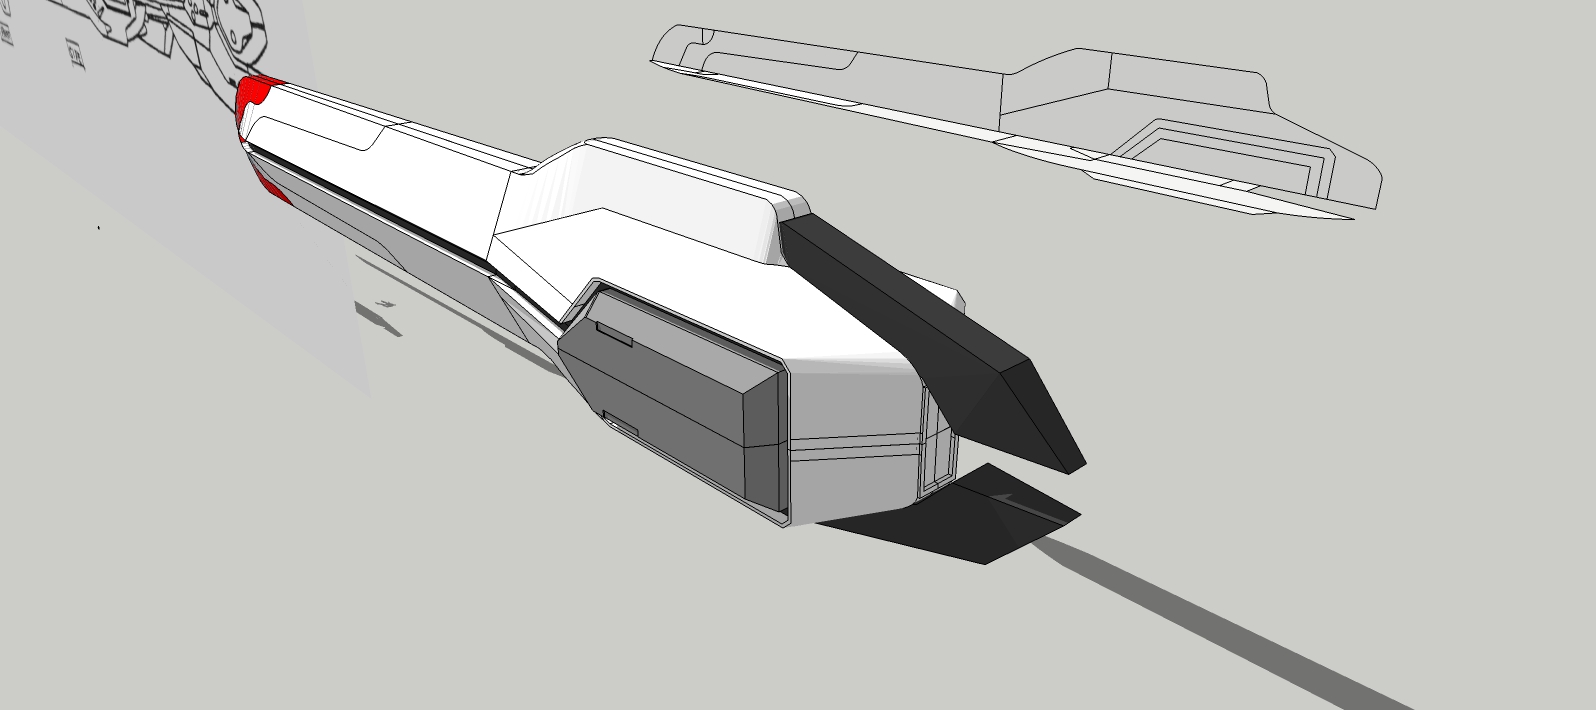
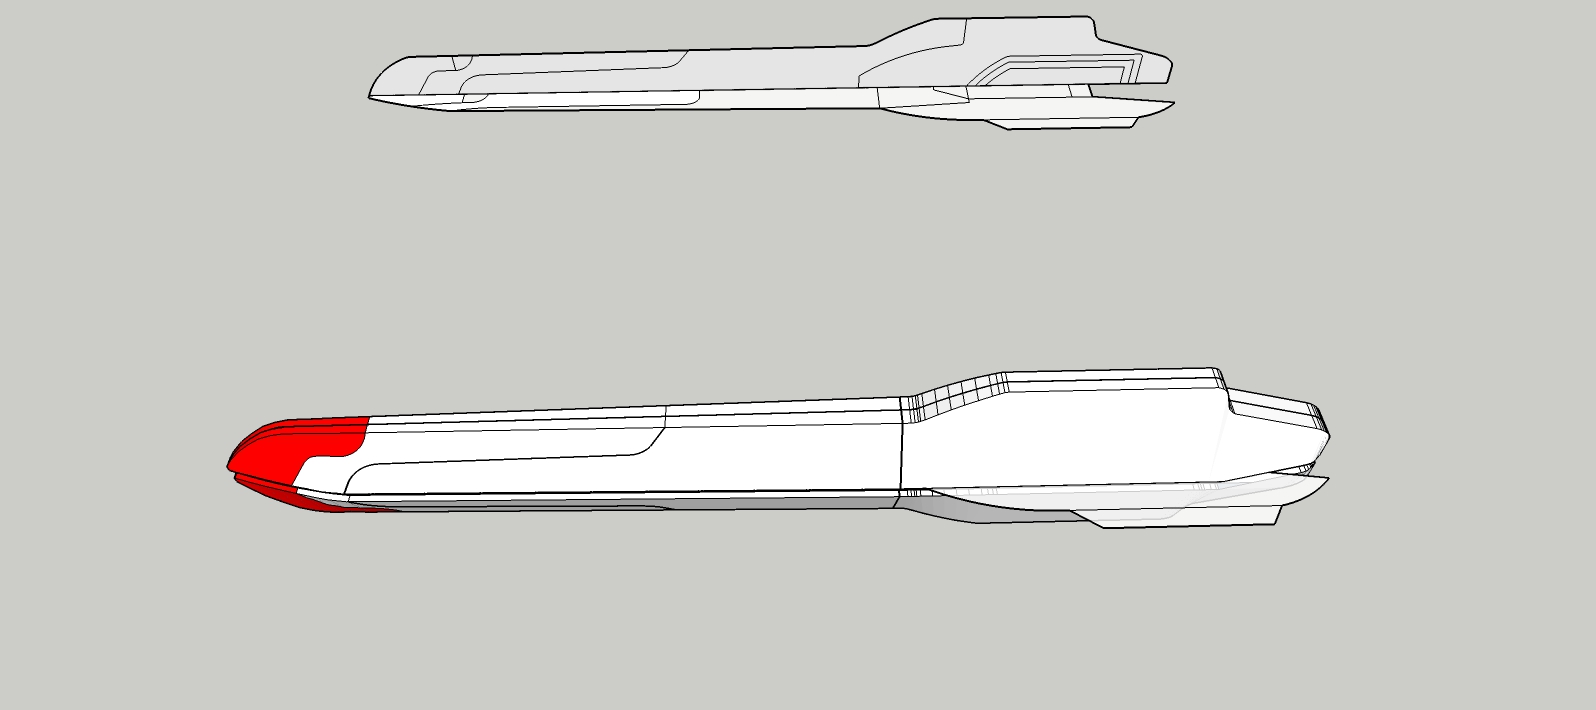
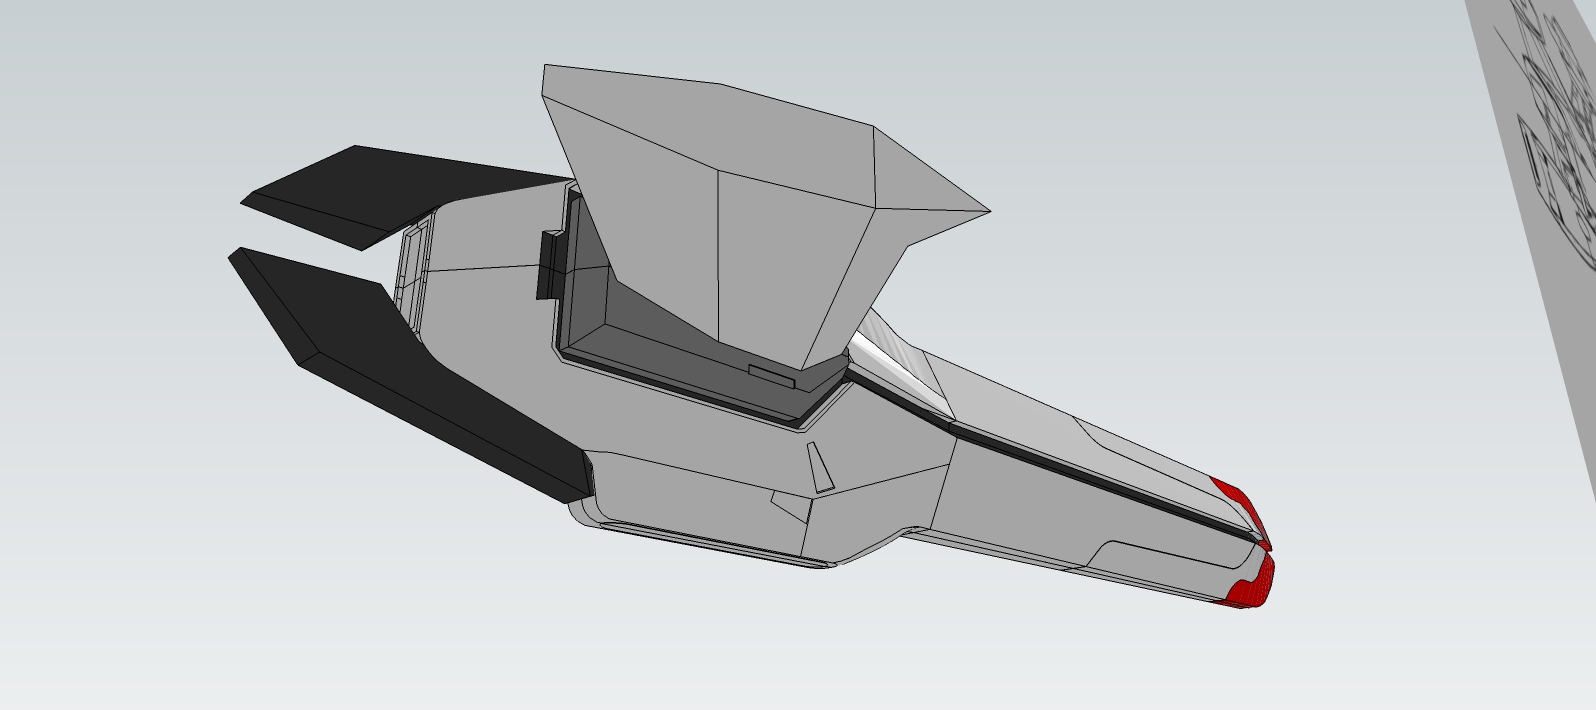
                    2 more views. And one of the geometry. The crazy, crazy geometry.


                    Nadesico A27.jpg


                    Nadesico A29.jpg


                    Nadesico A28.jpg

                    See my portfolio at https://delphiscousin.blogspot.com/

                    1 Reply Last reply Reply Quote 0
                    • B Offline
                      Bryan K
                      last edited by 3 Apr 2022, 03:43

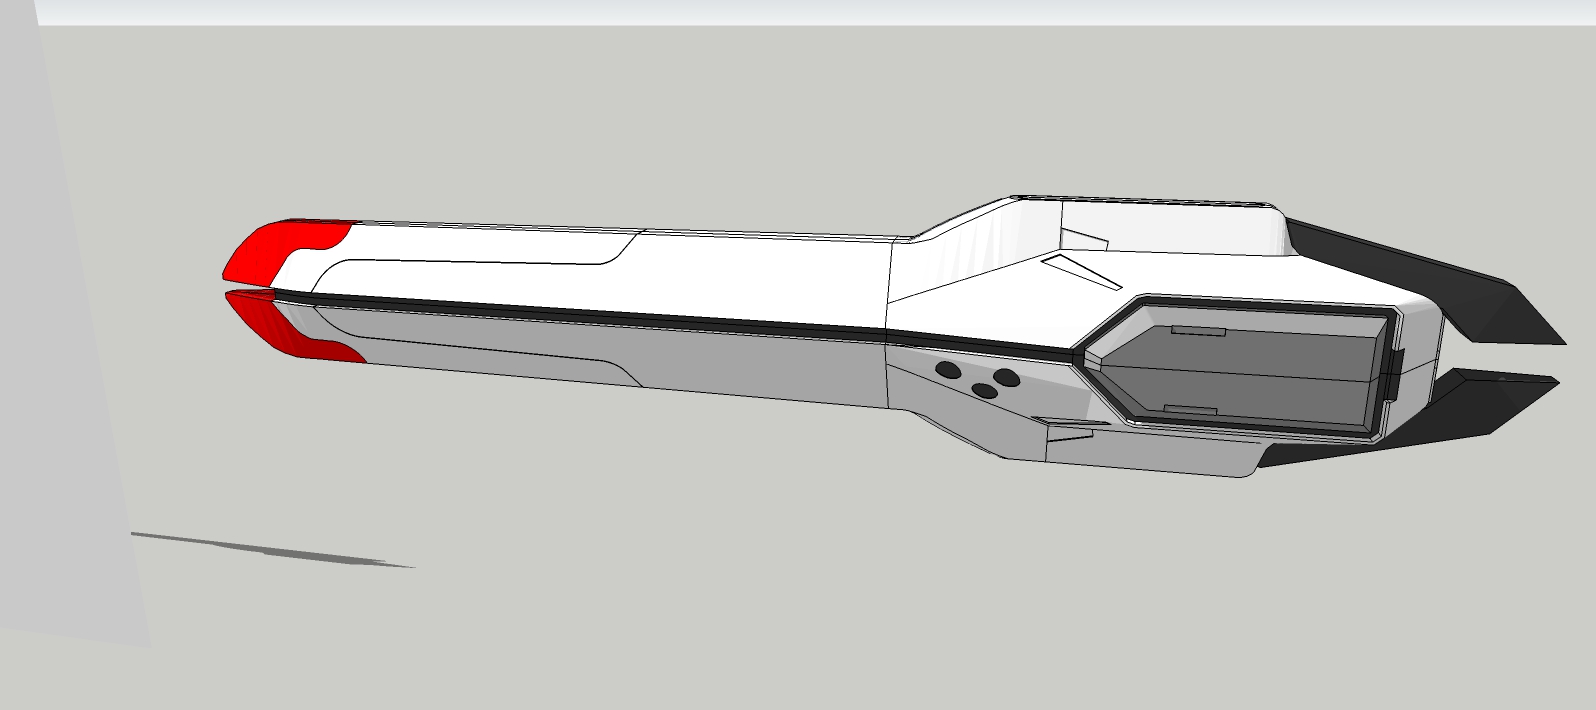
                      Some minor tweaking and detail left and the forward nacelles are done.


                      Nadesico A23.jpg


                      Nadesico A24.jpg


                      Nadesico A25.jpg


                      Nadesico A26.jpg

                      See my portfolio at https://delphiscousin.blogspot.com/

                      1 Reply Last reply Reply Quote 0
                      • B Offline
                        Bryan K
                        last edited by 3 Apr 2022, 07:50

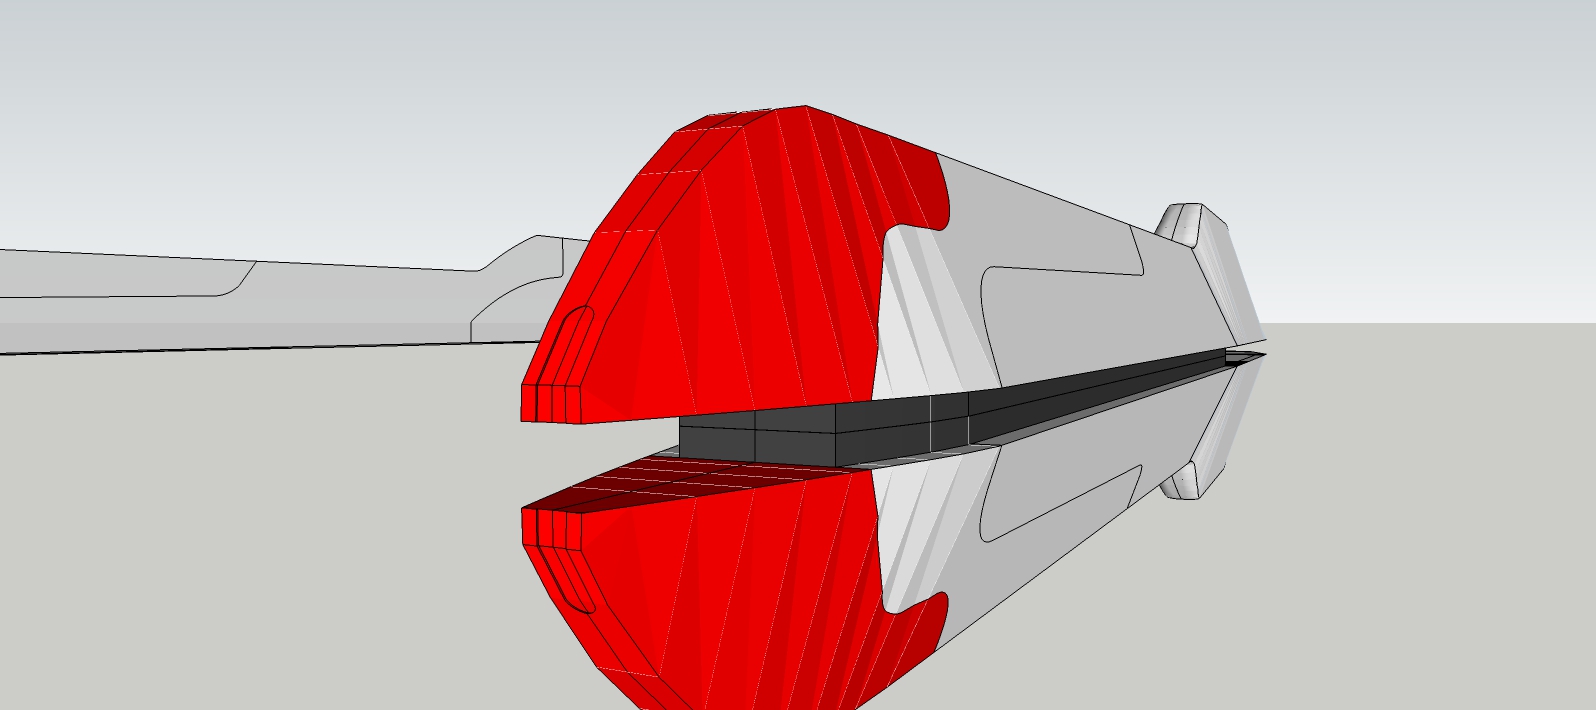
                        Details completed. I'm happy with it.

                        I had to fiddle with the vertex lines, swapping one point to point for the reverse to flip the triangles and smoothing out other faces as best as possible.

                        Also had to make the rear section with the holes a unique component as the other three quarter sections do not have those holes. Drew the holes with Tools on Surface, then indented push/push with Joint Push/Pull tool.


                        Nadesico A30.jpg


                        Nadesico A31.jpg


                        Nadesico A32.jpg

                        See my portfolio at https://delphiscousin.blogspot.com/

                        1 Reply Last reply Reply Quote 0
                        • H Offline
                          HornOxx
                          last edited by 3 Apr 2022, 12:17

                          Bryan, these kind of procedural stories are your brand here and I love them! πŸ‘

                          never trust a skinny cook

                          1 Reply Last reply Reply Quote 0
                          • B Offline
                            Bryan K
                            last edited by 3 Apr 2022, 18:49

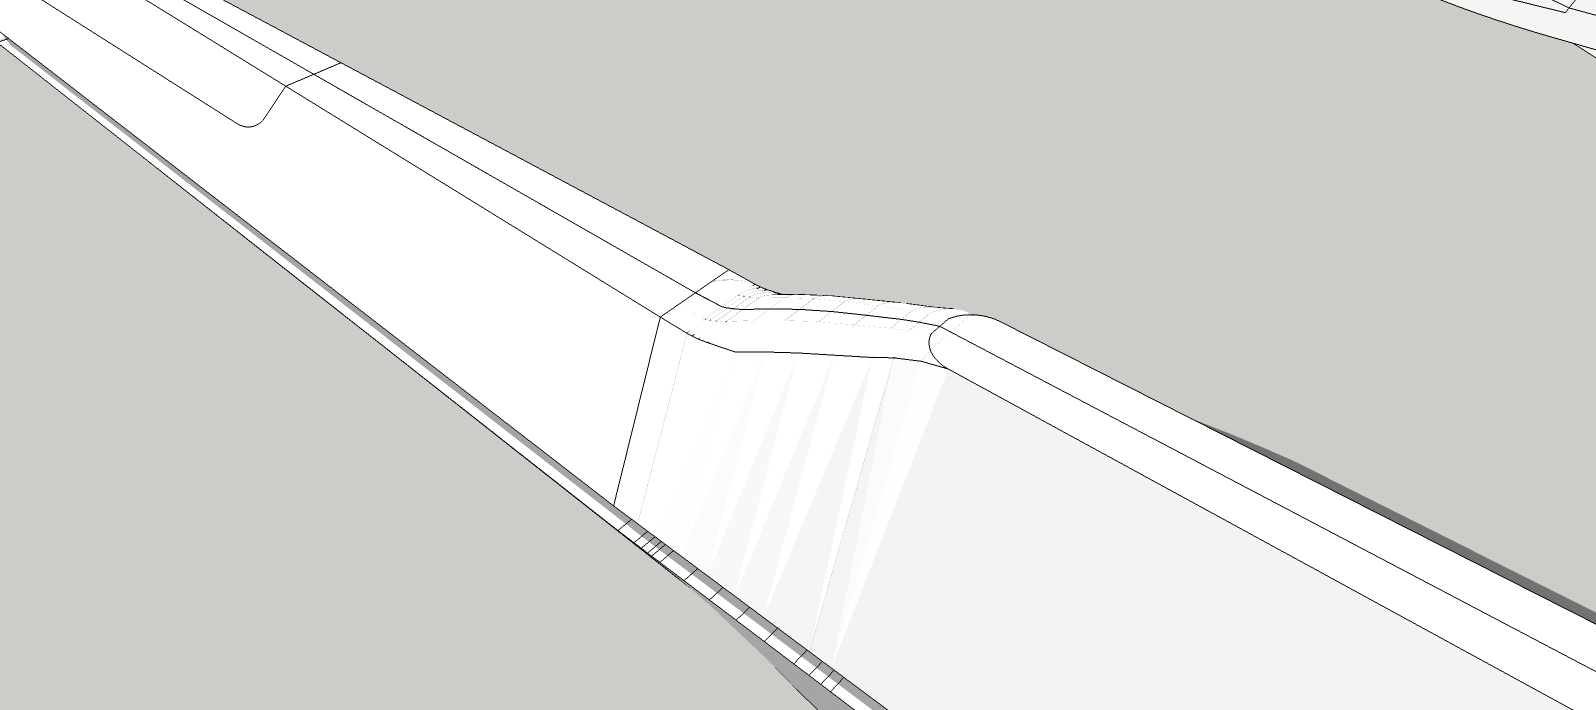
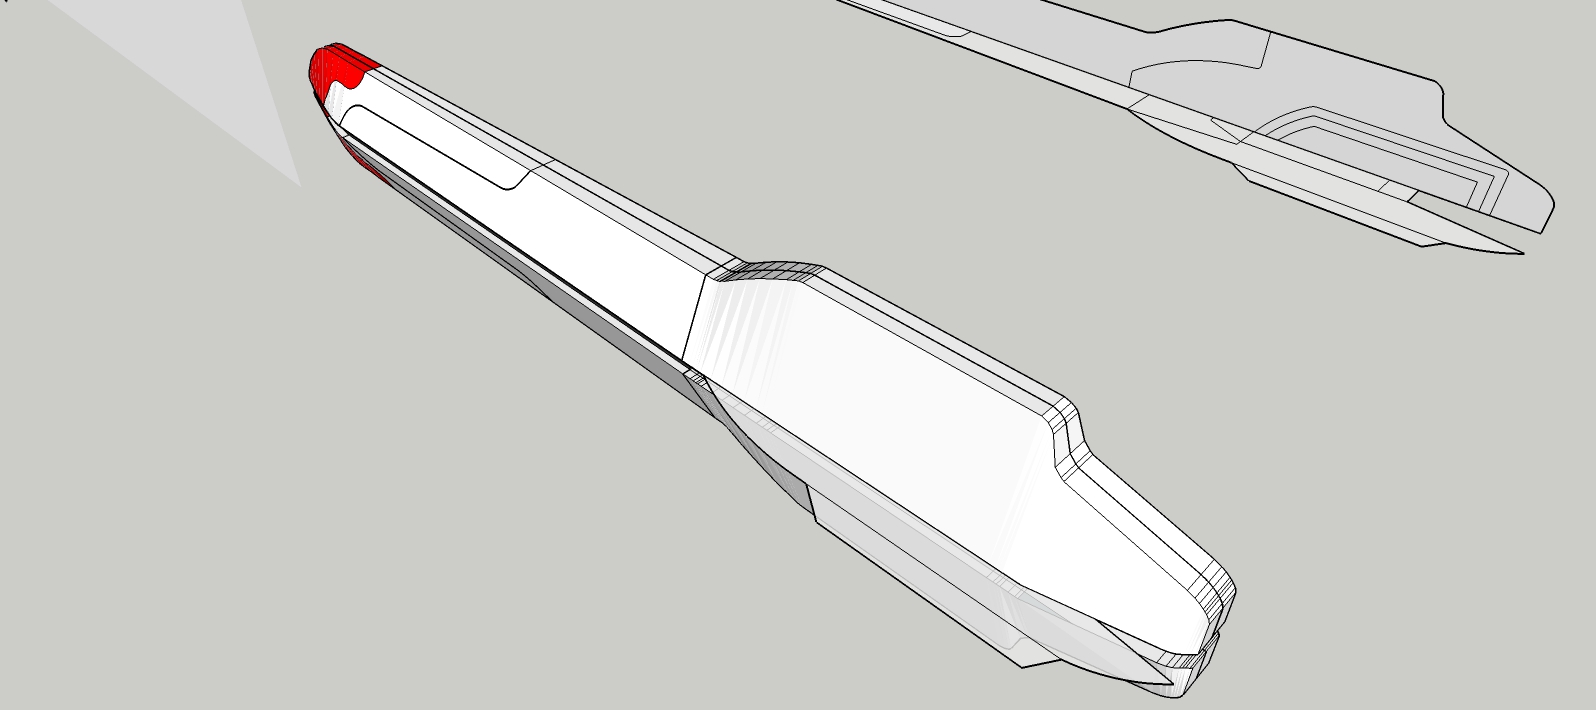
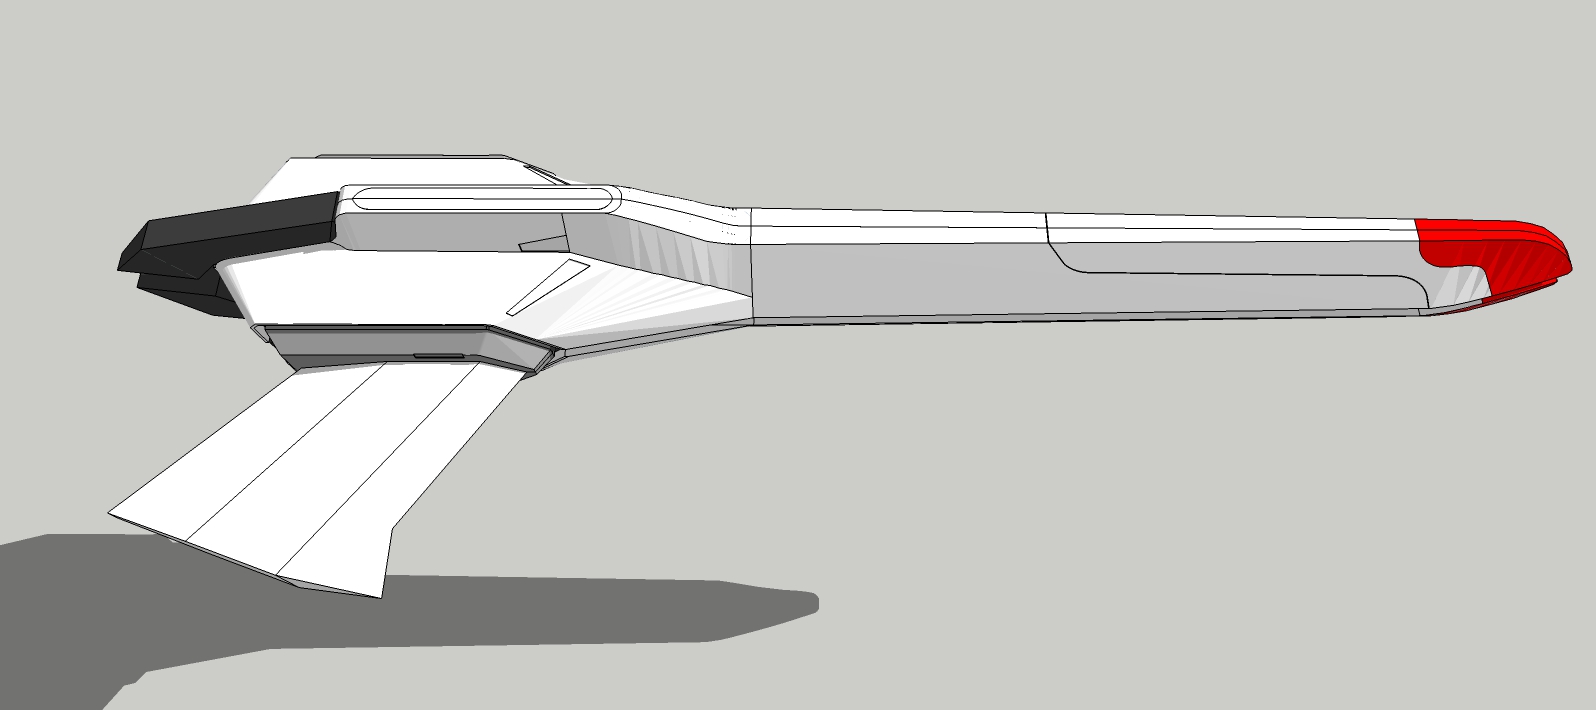
                            Again, not much to look at, but the details are tough on this one.

                            Rounded the leading face of the crest/ridge. This took days to figure out because it's narrow at the top and wide at the bottom AND the profile has a slight curve. WHEW!

                            Changed the nose detail. There were several different versions, but this was the most common one used.

                            Now for the issue that will NOT be fixed. The outer edges of all the main shapes have a slight beveled/rounded edge to them. This will not be included. I cannot be done on this model due to many of the faces having 3 vertex points. I will still do edge breaks where possible.

                            The reason for the 3 vertices on a single point is the old "twisted trapezoid" shape so many designers like to use. Take a trapezoid, then slightly twist one edge. This causes triangle faces to be created to fill in the outline with a face. This prevents ANY type of "follow me" or edge modifications without a ridiculous number of more lines and connecting vertices. Which of course, makes the model bigger and does not guarantee a better look at the smaller scales.

                            So I'm skipping it unless absolutely necessary. It should still look good. After all, this is a hybrid model to begin with and will make the fifth version in existence.


                            Nadesico A17.jpg


                            Nadesico A18.jpg


                            Nadesico A19.jpg


                            Nadesico A20.jpg


                            Nadesico A21.jpg

                            See my portfolio at https://delphiscousin.blogspot.com/

                            1 Reply Last reply Reply Quote 0
                            • B Offline
                              Bryan K
                              last edited by 3 Apr 2022, 18:59

                              @l i am said:

                              I generally am not so interested in anything other than Architecture or Landscape. But I am looking forward to seeing the progress on this project πŸ˜„

                              Thanks L i am! Sorry I didn't reply earlier. I was busy with my new job and my spring time allergies have been kicking my but. Sorry I missed your post.

                              See my portfolio at https://delphiscousin.blogspot.com/

                              1 Reply Last reply Reply Quote 0
                              • B Offline
                                Bryan K
                                last edited by Bryan K 3 Apr 2022, 19:02

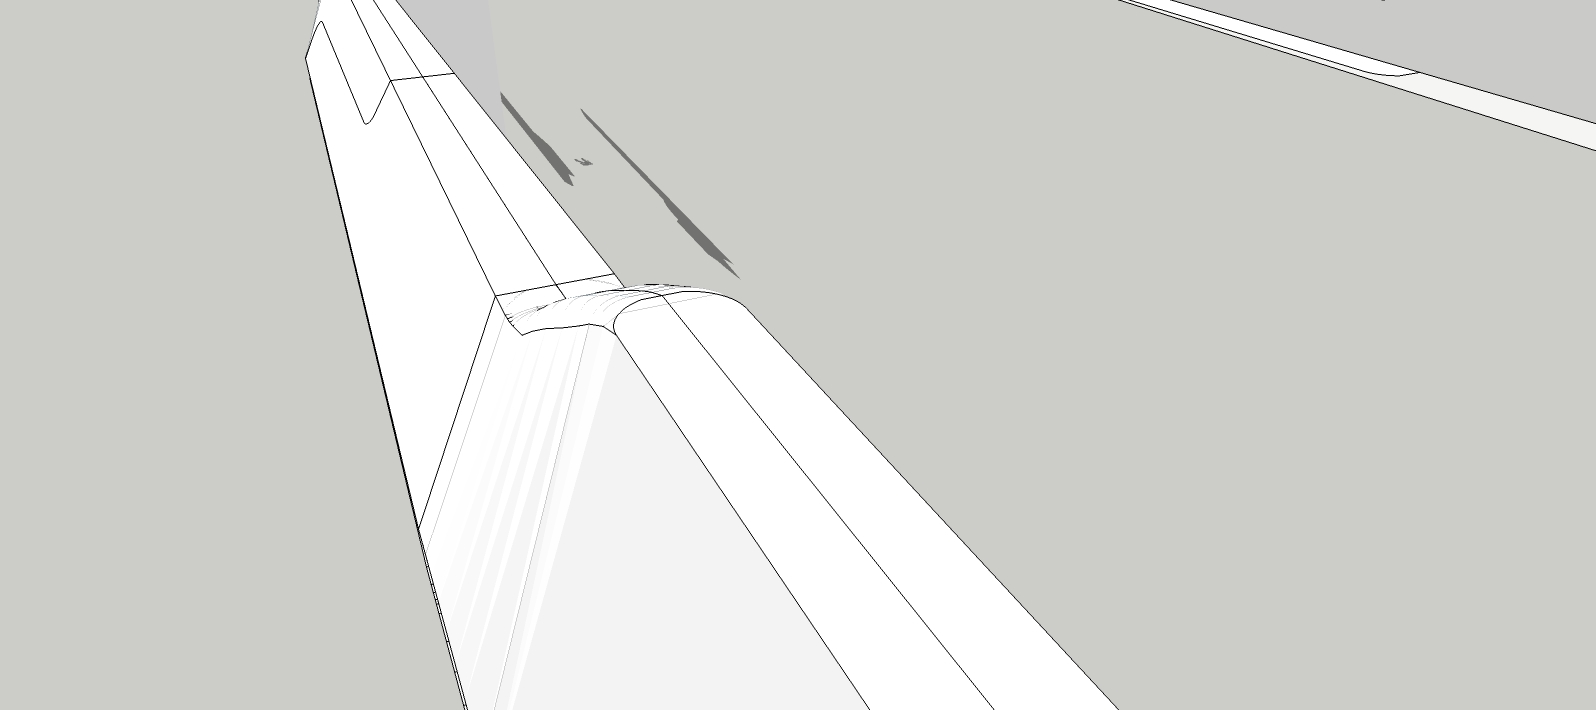
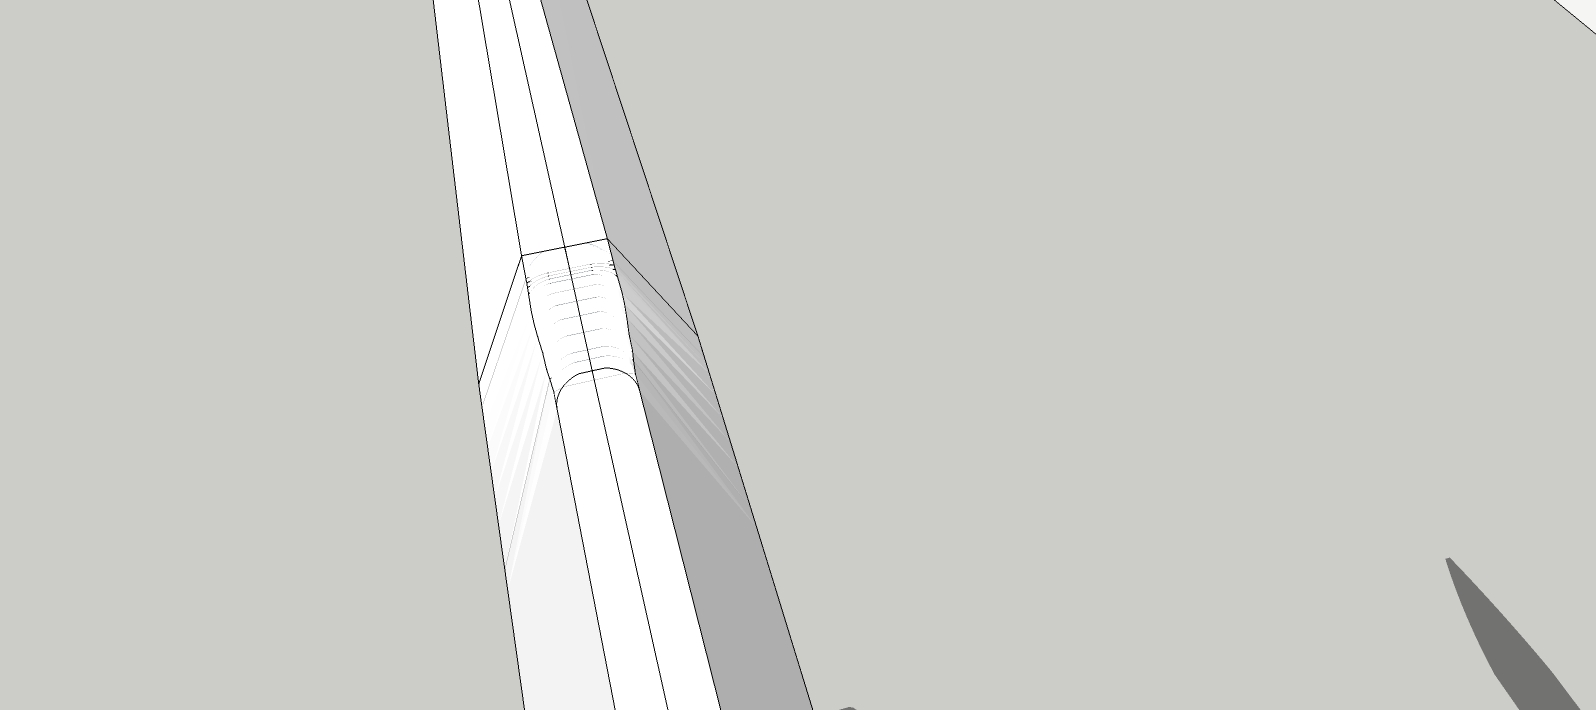
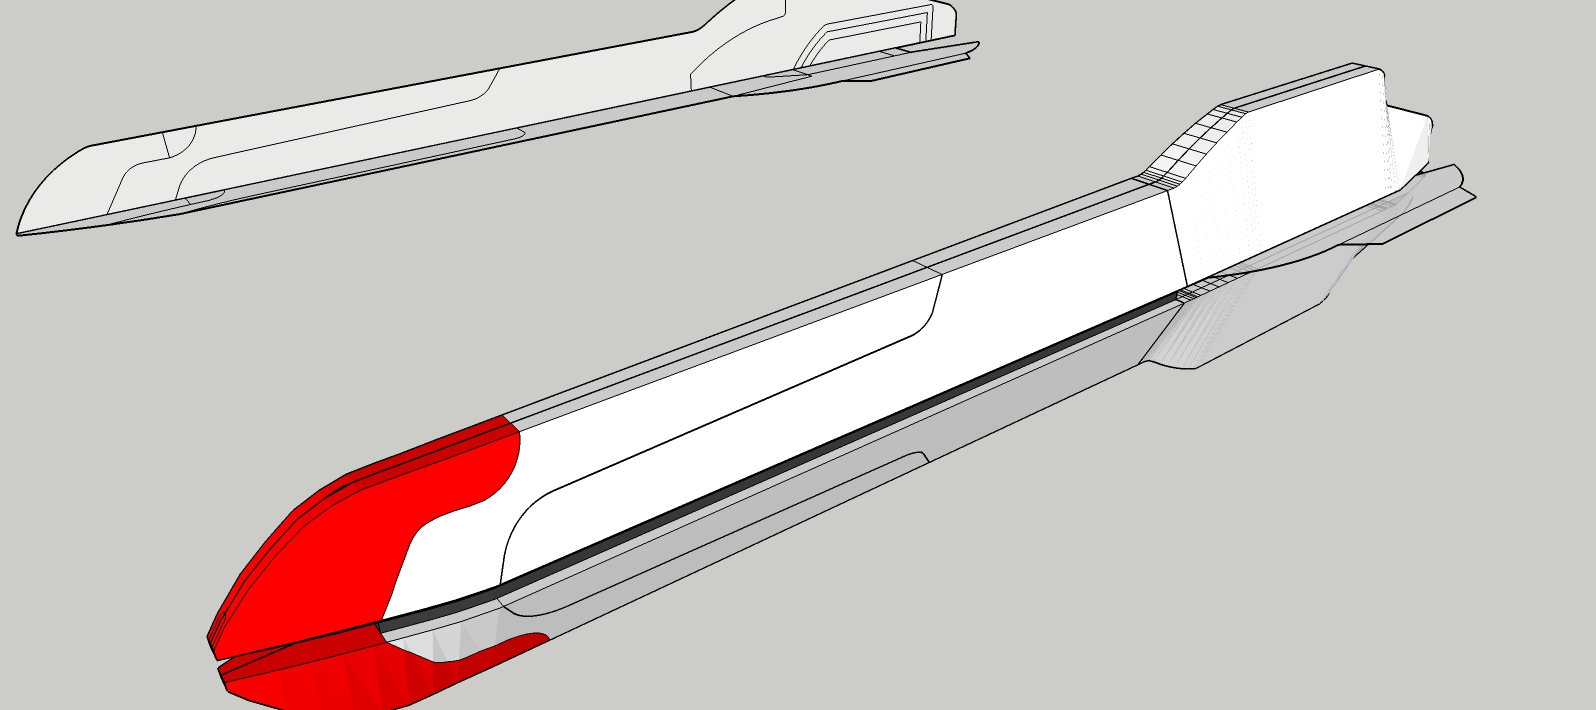
                                Not much to look at but I had to narrow the top crest/ridge and then adjust each section to curve smoothly. I scaled the top rectangle and then used the move tool to adjust each vertices intersection to flow into the lower wider sections. (remember, I'm using components so I only have to do one to get the other three to match. This model now has 8 quarter panels. 4 for the front section and 4 for the rear)

                                I also had to narrow the very back faces as well and make them more square.

                                Tedious, but I have to get the proportions perfect before I commit to the phase of push out of the sides or I'll be push/pulling vertices for ages later on. (update: which I ended up doing anyway)

                                Still more tweaking before I do the side push out.


                                Nadesico A13.jpg


                                Nadesico A14.jpg


                                Nadesico A15.jpg


                                Nadesico A16.jpg

                                See my portfolio at https://delphiscousin.blogspot.com/

                                1 Reply Last reply Reply Quote 0
                                • B Offline
                                  Bryan K
                                  last edited by 3 Apr 2022, 19:06

                                  Thanks HornOxx! It was something I picked up from previous members years ago and it helped me to improve my modeling ability, so I do it hoping it helps others.

                                  Gah! Almost one month to make just this section. To be fair, I have a new job, and my pollen allergies have been bad as well, so there is that.

                                  On to the next section!

                                  See my portfolio at https://delphiscousin.blogspot.com/

                                  1 Reply Last reply Reply Quote 0
                                  • Rich O BrienR Offline
                                    Rich O Brien Moderator
                                    last edited by 3 Apr 2022, 19:55

                                    Its a real shame there's so little reference for this craft.

                                    So far its been a pleasure to follow.

                                    Download the free D'oh Book for SketchUp

                                    1 Reply Last reply Reply Quote 0
                                    • B Offline
                                      Bryan K
                                      last edited by 3 Apr 2022, 21:05

                                      Thanks Rich!

                                      The shapes of this are so deceptive. I thought it would be easier, especially after you helped with those great kit references.

                                      This one is going to take a while. I bit off a lot here.

                                      See my portfolio at https://delphiscousin.blogspot.com/

                                      1 Reply Last reply Reply Quote 0
                                      • B Offline
                                        Bryan K
                                        last edited by 7 Apr 2022, 01:36

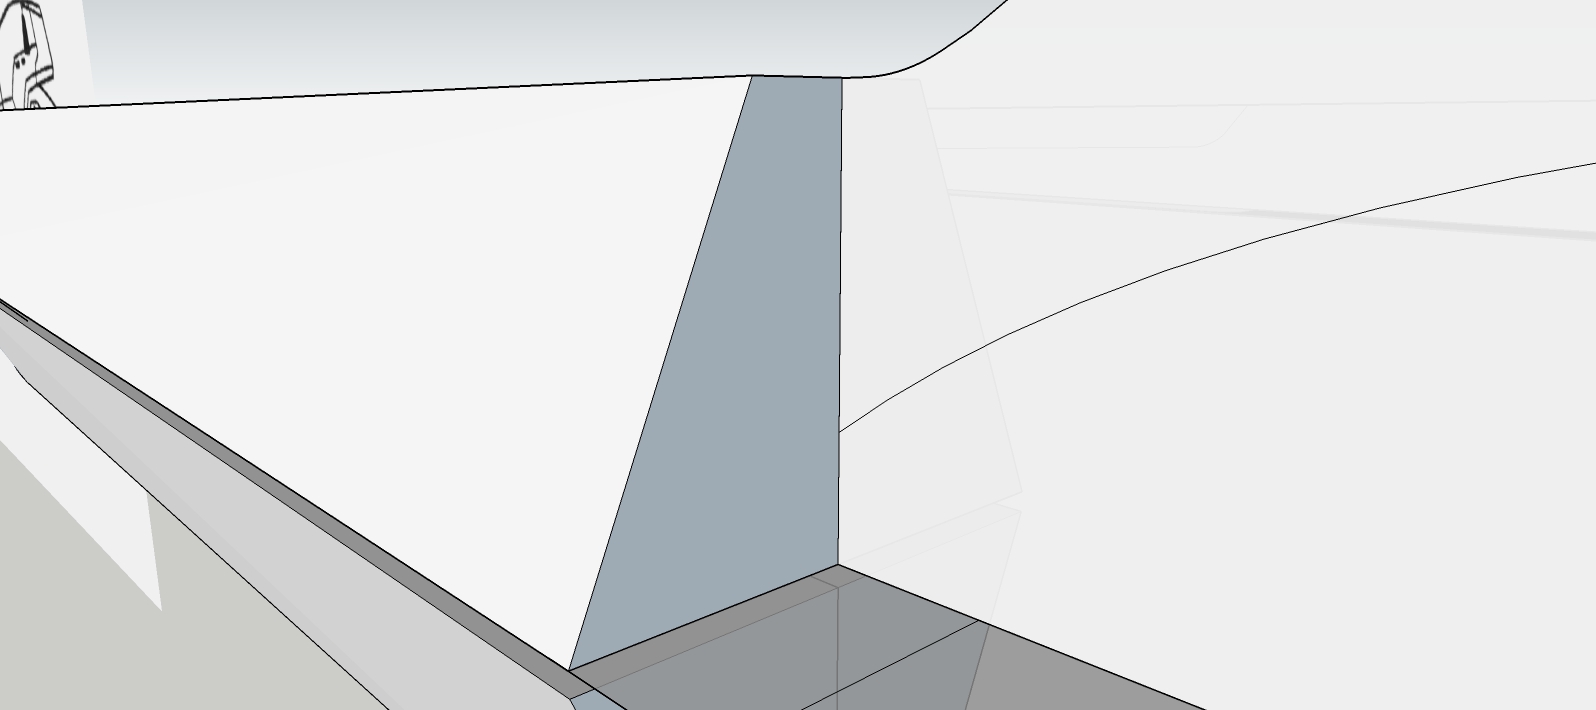
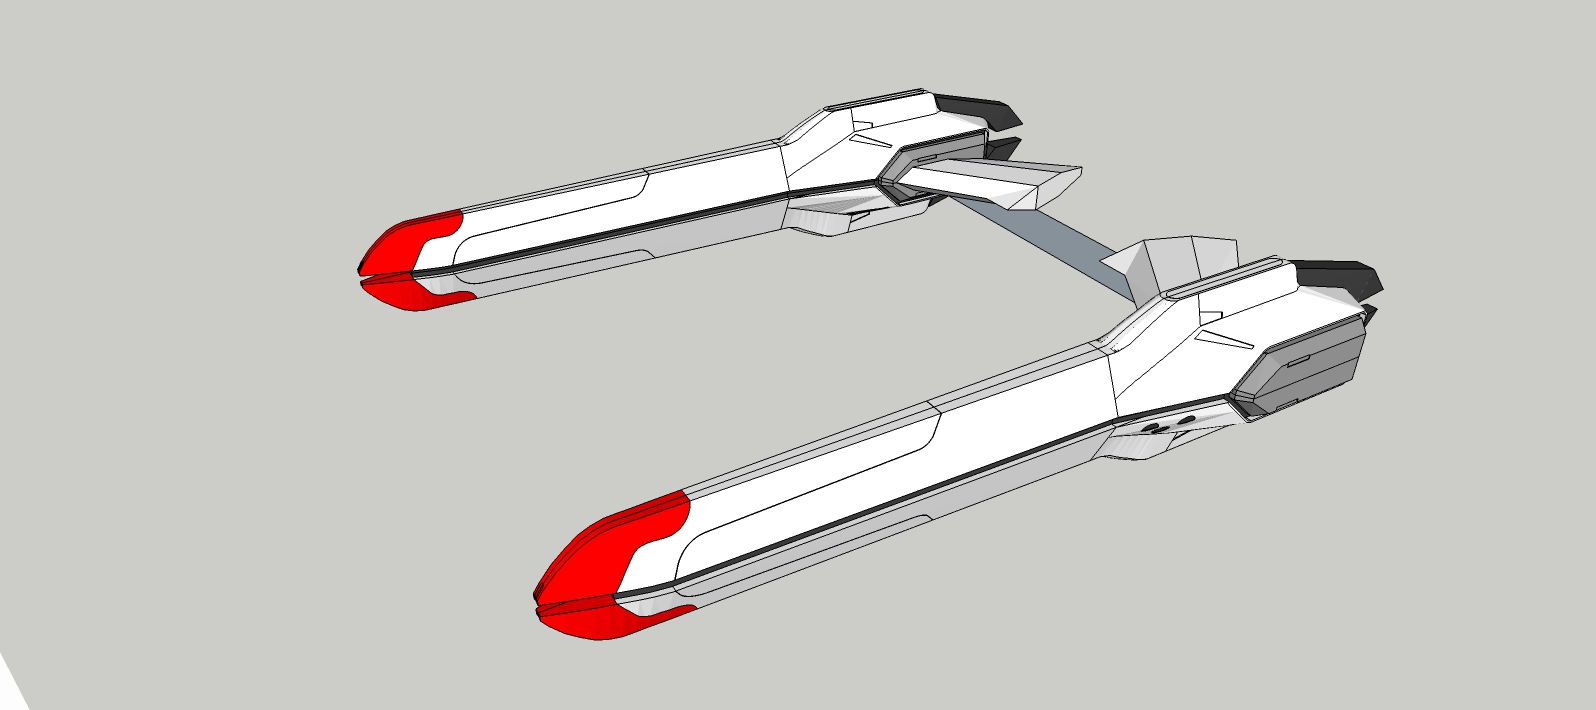
                                        Forward nacelle support pylons. Just rough in place holder for now until I model the main lower hull.


                                        Nadesico A33.jpg


                                        Nadesico A34.jpg


                                        Nadesico A35.jpg


                                        Nadesico A36.jpg

                                        See my portfolio at https://delphiscousin.blogspot.com/

                                        1 Reply Last reply Reply Quote 0
                                        • B Offline
                                          Bryan K
                                          last edited by 7 Apr 2022, 01:50

                                          Port and starboard. The thing in the middle is just a temp measuring block.


                                          Nadesico A37.jpg

                                          See my portfolio at https://delphiscousin.blogspot.com/

                                          1 Reply Last reply Reply Quote 0
                                          • 1
                                          • 2
                                          • 3
                                          • 4
                                          • 5
                                          • 9
                                          • 10
                                          • 2 / 10
                                          2 / 10
                                          • First post
                                            21/194
                                            Last post
                                          Buy SketchPlus
                                          Buy SUbD
                                          Buy WrapR
                                          Buy eBook
                                          Buy Modelur
                                          Buy Vertex Tools
                                          Buy SketchCuisine
                                          Buy FormFonts

                                          Advertisement