Tax_Engineering v10.1 [plugin update]
-
@leohominis said:
Uau, por mais ferramentas assim no SketchUp. Parabéns mesmo. Espero que a trimble um dia se toque e de uma olhada para nós da impressão 3D e modeladores de mecânica. Nem todo mundo usa o SU para Arquitetura. Obrigado
Hey Leo, thanks! I appreciate it.
On 3d printing matter, theres the "SketchUp for 3D Printing" category:
https://sketchucation.com/forums/viewforum.php?f=388As far as I know, SU still missing advanced 3d printing features. But its worthy to keep in tune on that, theres already some functions like import/export stl and slice. May be more.
About mechanics.. theres some great old options
mostly for bolts/screws and gears, such as Bolt maker (by Sam D Mitch):
https://sketchucation.com/pluginstore?pln=Bolt_MakerThere is much more possibilities (like hinges, pistons & structures)
I'm trying to fill some of these blind spots. SU still has a great potential.
Feel free to give some suggestions.Thanks again

-
How about some documentation with some more detailed info about the tools and how to use them.
-
@ntxdave said:
How about some documentation with some more detailed info about the tools and how to use them.
Sure! I may also post a video about it.
Adding it on next updates.Thanks.
-
@tax said:
@ntxdave said:
How about some documentation with some more detailed info about the tools and how to use them.
Sure! I may also post a video about it.
Adding it on next updates.Thanks.
Looking forward to it. Showing some examples (more than just a picture) would be good. As I have looked at your pictures (I.e. the chain links and springs), I wondered how you did it (what did the tool do to accomplish the model).
-
@ntxdave said:
@tax said:
@ntxdave said:
How about some documentation with some more detailed info about the tools and how to use them.
Sure! I may also post a video about it.
Adding it on next updates.Thanks.
Looking forward to it. Showing some examples (more than just a picture) would be good. As I have looked at your pictures (I.e. the chain links and springs), I wondered how you did it (what did the tool do to accomplish the model).
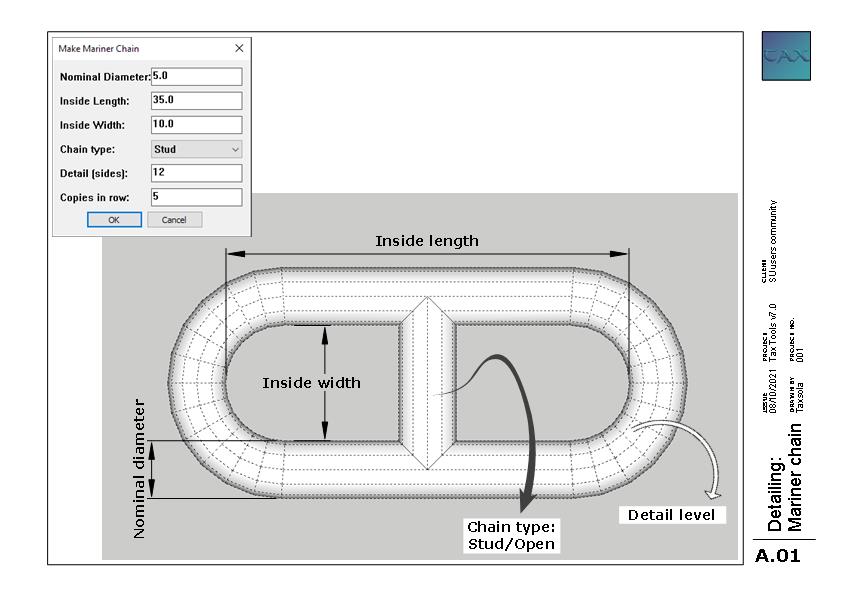
What about that?
For more complex ones I may show some examples variations.
-
Ok, how do you make the chain follow a path (like around an object)?
-
Ok, not all fair advertising.
For physically realistic placed chains I used 6 other extensions:
1. Convexify (by: Fredo6): https://sketchucation.com/forums/viewtopic.php?f=323&t=61145
2. Curvizard (by: Fredo6): https://sketchucation.com/plugin/804-curvizard
3. BezierSpline (by: Fredo6): https://sketchucation.com/forums/viewtopic.php?f=323&t=13563
4. MSPhysics (by: Anton_S): http://sketchucation.com/forums/viewtopic.php?f=323&t=56852
5. ClothWorks (by: Anton_S): https://sketchucation.com/plugin/2053-clothworks
6. JHS Powerbar (by: CadFather, R Wilson, SD Mitch & others): https://sketchucation.com/pluginstore?pln=JHS_Powerbar_2019
Rendering/Composing: Vray + Photoshop.
Usage:
Mariner chains:
Step 1: Make a low poly mesh with same dimensions of final model.
Step 2: Convexify for solid slicing/decomposing, in order to allow MSPhysics to work properly.
Step 3: MSPhysics for physically realistic placing.Roller chains:
Step 1: Make a line path.
Step 2: ClothWorks for physically realistic placing. (yes, it also works with lines)
Step 3: Curvizard for path smoothing.
Step 4: BezierSpline for equalizing path edges length, matching chain link length.
Step 5: JHS Powerbar for disposing chain link component along line path.
Resum:
Currently (for chains) Tax Tools only creates links mesh and displace them in line.
Maybe I add an auto "path placing" feature, but it wouldn't be as much realistic as this method. -
So, if I interpret correctly, your tool just draws the basic shape. We will the need to use other tools to supply them appropriately,
Just trying to clarify.

-
Thats correct for now.
These are the current outputs for mariner and roller chains (using default values):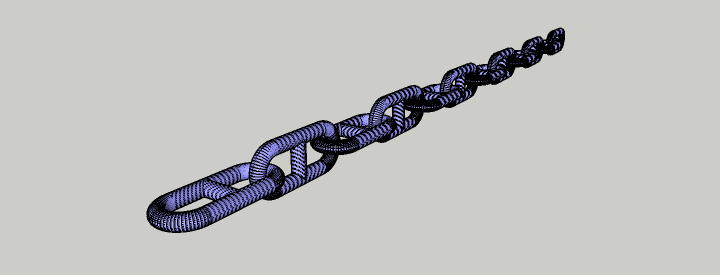
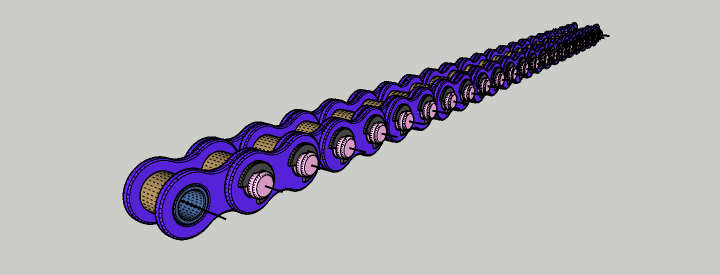
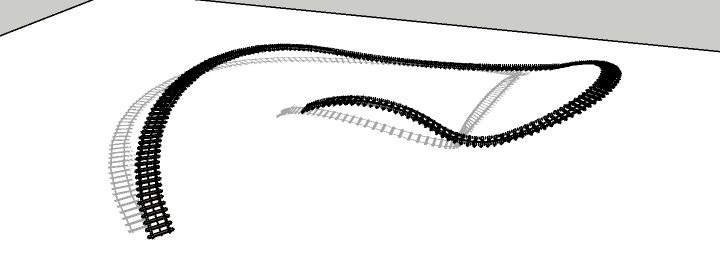
But I'm planning for that auto follow path feature, would save a lot of time.
obs: "Railroad along" already does that by default, it needs a selected path.
-
I think that will make the tools far more attractive/useful.

Hope I am not being a PITA.

-
Thats great to know! thanks.
Then gonna focus on improving them.Your being great, we all need feedback for the things we do.
Otherwise how could we learn anything
-
Mariner chain done!
Recommendation: avoid sharp turns and check last/first chain link attaching.Tell me if you guys find anything wrong.
Coming soon:
- Roller Chain Along (improvement)
- Selection counter (simple one)
- Follow & Rotate (There
s an old one but it doesnt work on newer SU versions)
-
"Roller chain along" done!
Also added "Selection report" and "SU links".
Enjoy.obs: If you use it, feel free to share some images here.
"Follow and Rotate" may be comming next.
-
Base Modus UI implemented.
-
Hi, Thank you so much for this great extension.
I just stat creating a tutorial on this extension for my yt channel.
I have a few questions- in Follow Rotate Scale what is the difference between Truncate and Always Z
and - in Make Roller Chain it's "Roller Tickness" & "Plate Tickness" please review the names I think it should be "Thickness"?
maybe I ask some more questions hope you will answer me.
Thanks again.
- in Follow Rotate Scale what is the difference between Truncate and Always Z
-
This is a very interesting set of tools. I could have used the roller chaiin tool some years ago for some projects.
I wonder if I could make a couple of requests.
- It would be nice if there were no exposed back faces. In these examples the green color is my default back face color.
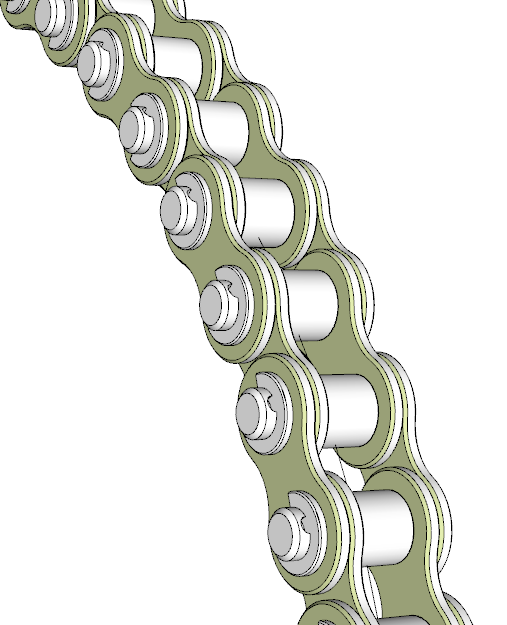
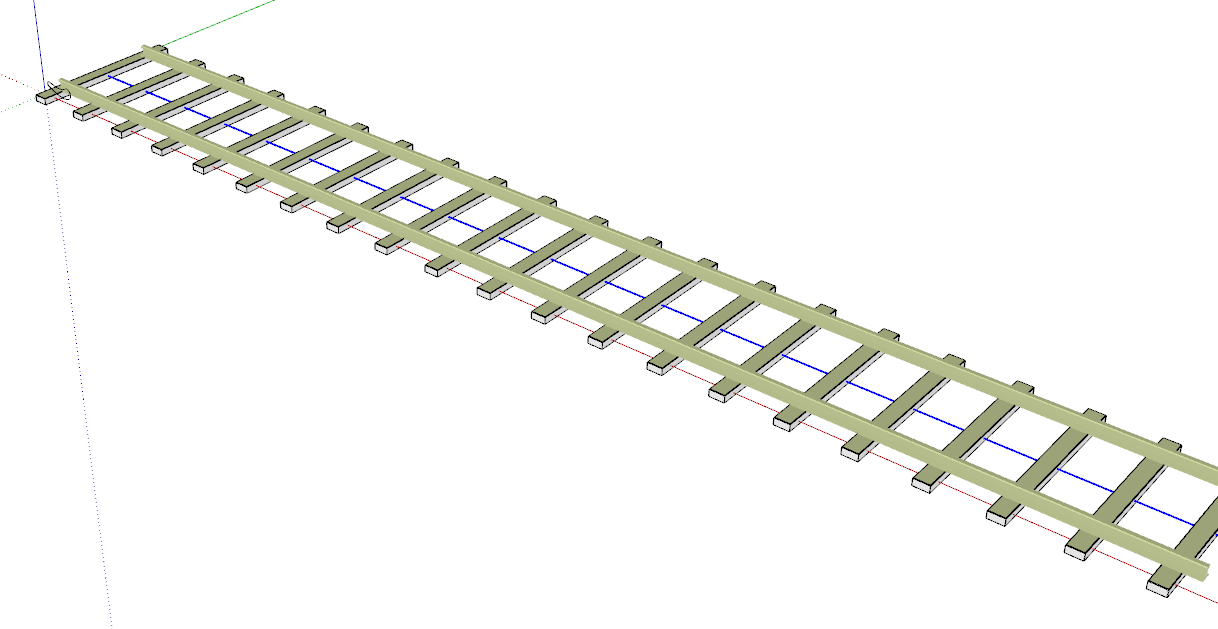
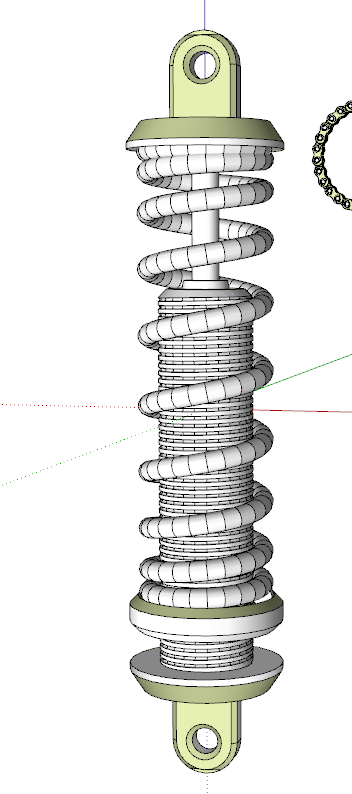
Compared to the time it would take to model these things from scratch, correcting face orientations manually is fairly trivial but it could be nice to not have to worry about that.
- Would it be possible to do something about the definition scale? As it is now, at least with objects like the adjustable sprint and bicycle wheel, the objects are scaled but the definition isn't. That means that you can get clipping and the object will disappear if you open it for editing. Perhaps creating all of the objects as components and scaling their definitions after creation would be a good option. At least in my work flow I would prefer to use components throughout because that makes later edits to things easier.
Thanks again for the tools.
- It would be nice if there were no exposed back faces. In these examples the green color is my default back face color.
-
Hi how are you.
Thanks for your plugin, it's very good.
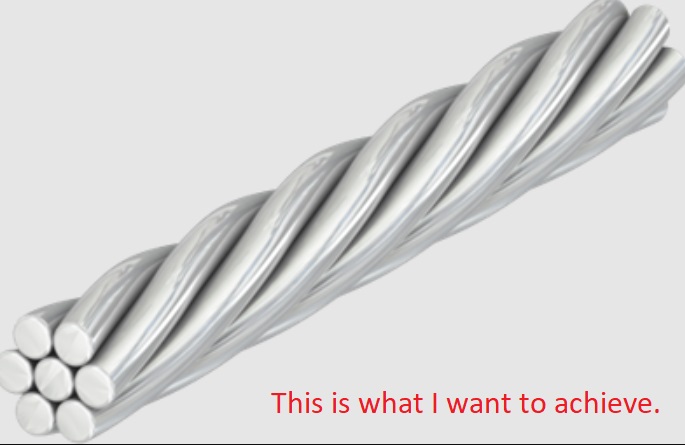
I wanted to ask you if you have any tutorial to create a cable.
When trying to do so, many straight sections are visible.
In what you can help me, I appreciate it.
Thank you.
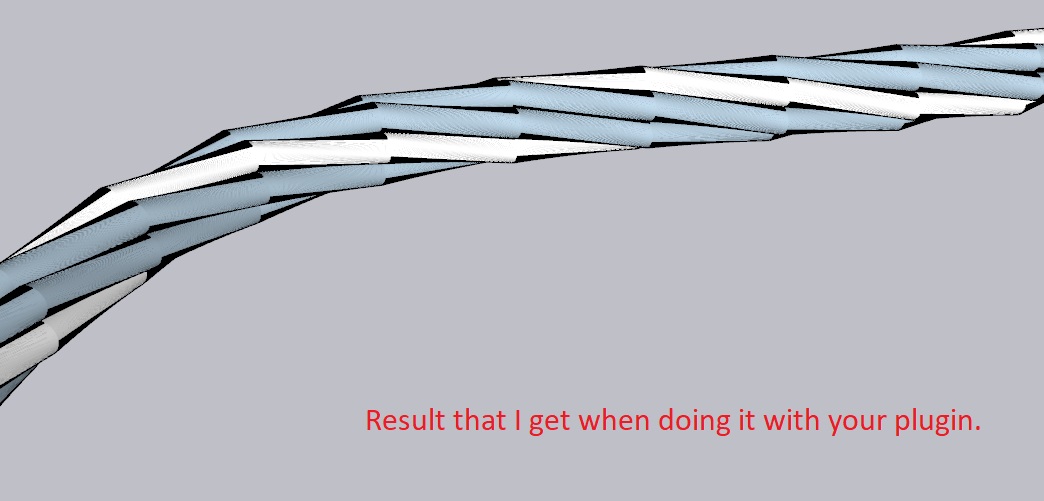
-
@chapalee said:
When trying to do so, many straight sections are visible.
You are using a Sketchy line style which makes the short segments visible. Either don't use a sketchy line style or weld all of the segments together and use a sketchy style that has long strokes or edit the style and turn off the edges altogether.
-
@dave r said:
@chapalee said:
When trying to do so, many straight sections are visible.
You are using a Sketchy line style which makes the short segments visible. Either don't use a sketchy line style or weld all of the segments together and use a sketchy style that has long strokes or edit the style and turn off the edges altogether.
Hello, thank you for your prompt help.
I am working with the BZ_Tools.
I don't know if I'm doing something wrong.
But it shouldn't be, because I also have to do it with straight lines and it also looks segmented.
The problem is that those segments are noticeable when rendering.
As far as you can help me, I appreciate it.
I am attaching the file where I am doing the tests.
-
You're using way too many segments for your profiles considering that they are only about 2 mm in diameter. And as I inidicated, everything is exploded after the extrusion. What looked like a sketchy line style is in reality just the excess edges being displayed. You also have a lot of exposed back faces which will likely lead to problems when you render.
Use a reasonable number of segments for the circular profile. 12 or 16 will probably be more than enough for the tiny diameter of the strands. And after getting the extrusions done correctly, weld the geometry. Eneroth Auto Weld from the Extension Warehouse will make that an easy job.
BTW, your profile says you are using SketchUp 6. Please update that to the correct version.
Advertisement


