Rendering Workshop - Studio - still life
-
In the "learning to render better" theme, I can't help but repeat the sage advice I've heard on these forums many times - "A good render starts with a good model." The first thing that drew my eye in Al's render was the low-poly plate. Although the render wasn't bad, the polygonal plate ruined the whole image IMO. Just an observation from a far-from-perfect render noob

@dermotcoll, I too wish for a "HDR for Dummies" manual! However, from what I understand, Pete's HDR is a stitched-together panorama of a room. In the render program, it is "placed" around the model like the actual room from which the original picture was taken. Some weak lighting is achieved from the image, but mostly it is used for reflections, which you can see clearly in Pete's spoon. It is (at least for me) the easiest way to light the model, and usually(always?) results in soft lighting and shadows. This is why Pete added omni lights in his second render, that way he got stronger shadows, brighter colors, and caustics from the glass.
Pete, please correct me if I'm wrong!
Here is my first try. Studio setup and HDR background - sunlight off. Just some simple tone mapping when the render was complete.
-
Pete already uploaded it in his post above:
http://forums.sketchucation.com/viewtopic.php?p=198656#p198656(Cutlery is from Gully Foyle I believe)
-
@dermotcoll said:
Hi Guys
Forgive my ignorance but I am completely lost here - I am starting from level -10 and I do not see the relationship between a black and white image (HDR ) with different levels of luminance coming off the squashed cubes and the picture of the plate. You then talk about omni lights - what is the connection? I am lost - its me guys not you. Can you point me in the direction of an article / book on this subject as I dont want to waste your time asking really infantile questions from masters like you (SOLO, etc) I will then come back and break your hearts with more educated infantile questions!!!
HDRi gets quite confusing. And, although I use it a lot, I am only just starting to understand it.
HDRi technology
One the one level, HDRi images (the HDRi phrase comes from the fact that the images contains an illumination channel in addition to the RGB (red, green, blue) color channels. As a result two parts of the HDRi image which are the same - say 255,255,255 - white can be marked to illuminate the scene differently. (One can be a flat, white wall while the other is a bright white cloud). In the real world this is accomplished by taking three separate images from the same camera position - one normal, one under exposed and one over exposed. By comparing the pixels in the three images, you (or the computer) can determine how bright things were. In my example above, the white wall would get dark in the underexposed image, but the bright cloud would stay lighter.)
Underexposed image (Note the bright sky is still white - and can't really get any "whiter" in the normal and overexposed images)

(See this tutorial: Beginner's guide to HDR and Tone Mapping
HDri images do not have to be black and white. They can be colored as well.
HDRi Skies for backgrounds
One use for HDRi images - because they are complete 360 degree images, is that they can be used for backgrounds - both providing the background and providing illumination. See this example:

HDRi for illumination only
Another use for HDRI is for illumination only. By letting the HDRi image reflect (for reflective highlights) and illuminate, but not be visible, it creates some good lighting effects.
For instance this HDRi image of a forest (called rnl_probe - and used by a lot of rendering folk), is low resolution and does not provide a good background, but does provide good illumination for studio lighting settings.
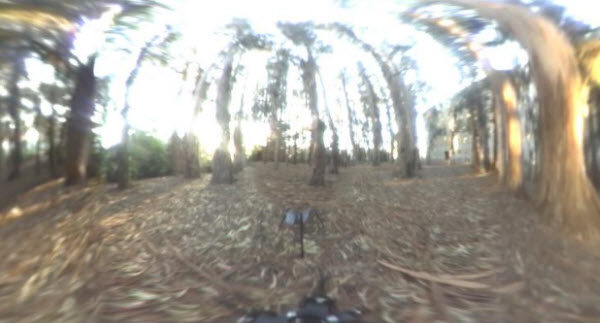
This model was rendered with the forest HDRi -

It provides interesting reflections and illumination without messing up the background.
Creating HDRi images
Purists, go out and create images with cameras, and a lot of nice images are available online.
You can also create an HDRi image by rendering your model in Panoramic mode. For instance you can place lights, buildings, or something interesting all around the camera and then use it to render an image and save it as a HDRi.
I plan to try that later when as I work on renderings for this Workshop.
Al Hart

IRender nXt from Render Plus -
@d12dozr said:
In the "learning to render better" theme, I can't help but repeat the sage advice I've heard on these forums many times - "A good render starts with a good model." The first thing that drew my eye in Al's render was the low-poly plate. Although the render wasn't bad, the polygonal plate ruined the whole image IMO. Just an observation from a far-from-perfect render noob
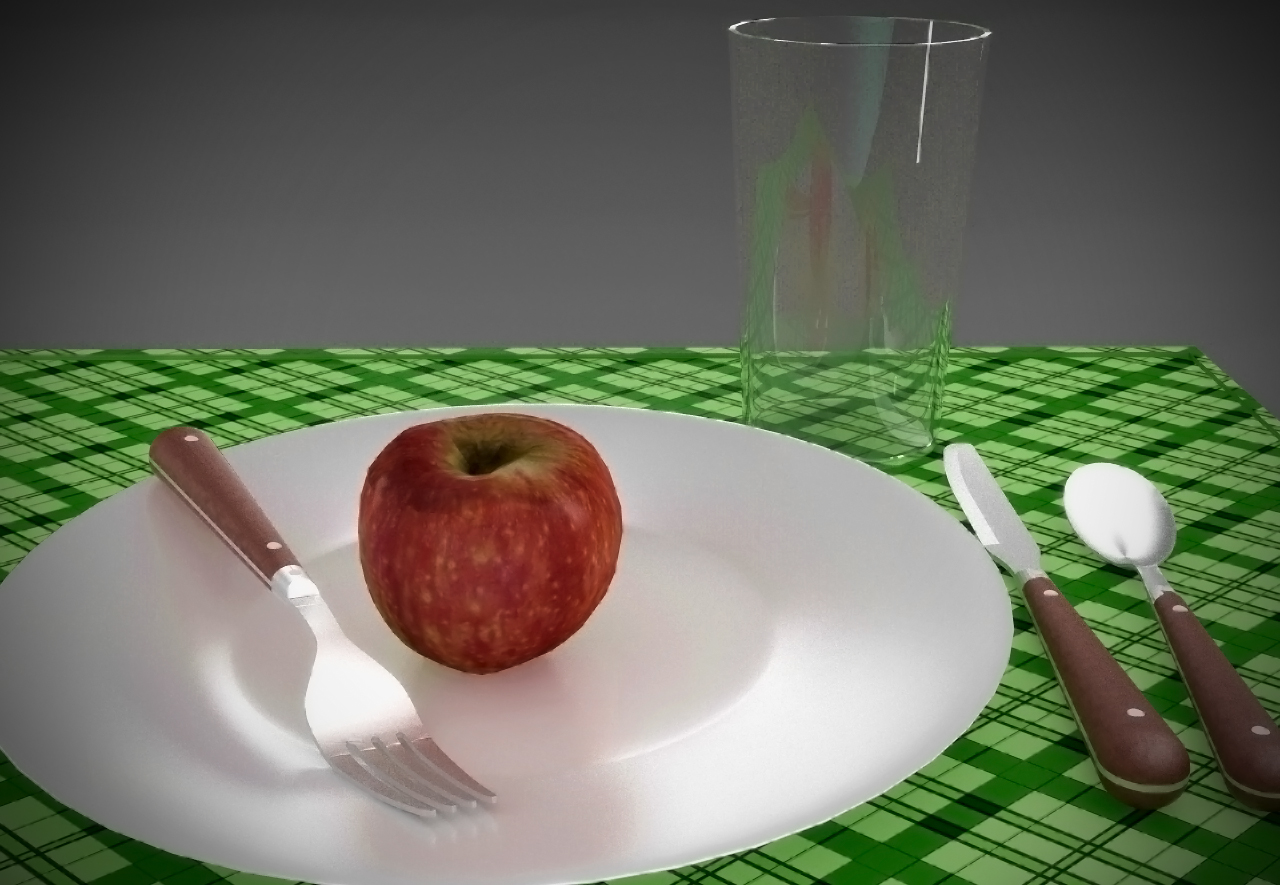
I agree. I just started rendering this model this A.M. and both the plate and the glass (with single face thin - rather than thick glass) are troublesome. Can someone upload a new model for us with a better plate and glass?
[Edit: Ignore this post. Pete had already uploaded a Better model], but I didn't see the attachment.]
Al Hart
IRender nXt from Render Plus -
@gaieus said:
Pete already uploaded it in his post above:
http://forums.sketchucation.com/viewtopic.php?p=198656#p198656(Cutlery is from Gully Foyle I believe)
Thanks. I placed the link to the new model in the first post.
I wanted to get him to create the model for me in the first place. But he didn't grab the hint. Next time I'll be less subtle and just ask.

Al Hart
IRender nXt from Render Plus -
cheers for the clarification solo!
legend.
Al, these render tips are proving very useful, they seem to spark a lot of positive discussion which we can all learn from, so thank you very much!
pav
-
Great thread. Thanks to all. This will take time to digest.
-
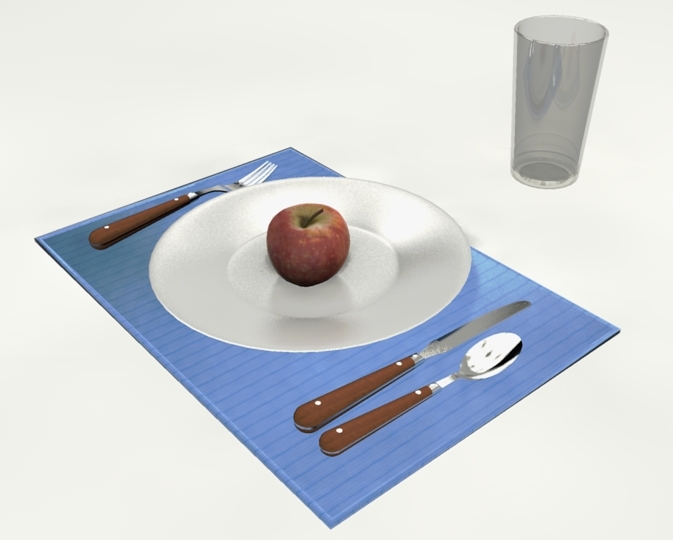
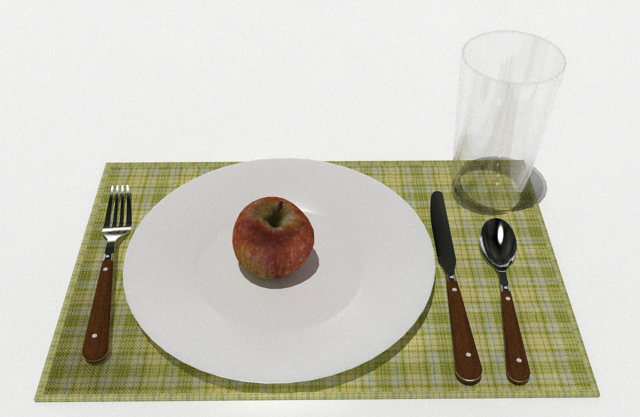
As I expected would happen when I started this week's workshop, some of the rendering pros have already posted better images than I will probably be able to duplicate. But I wanted to try some simple ideas - whether they work well or not - so we can all learn from them.
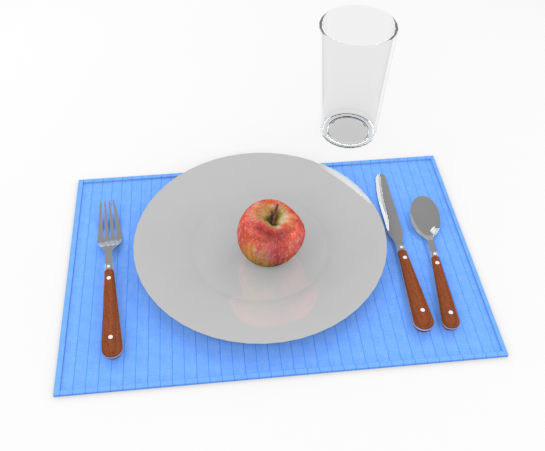
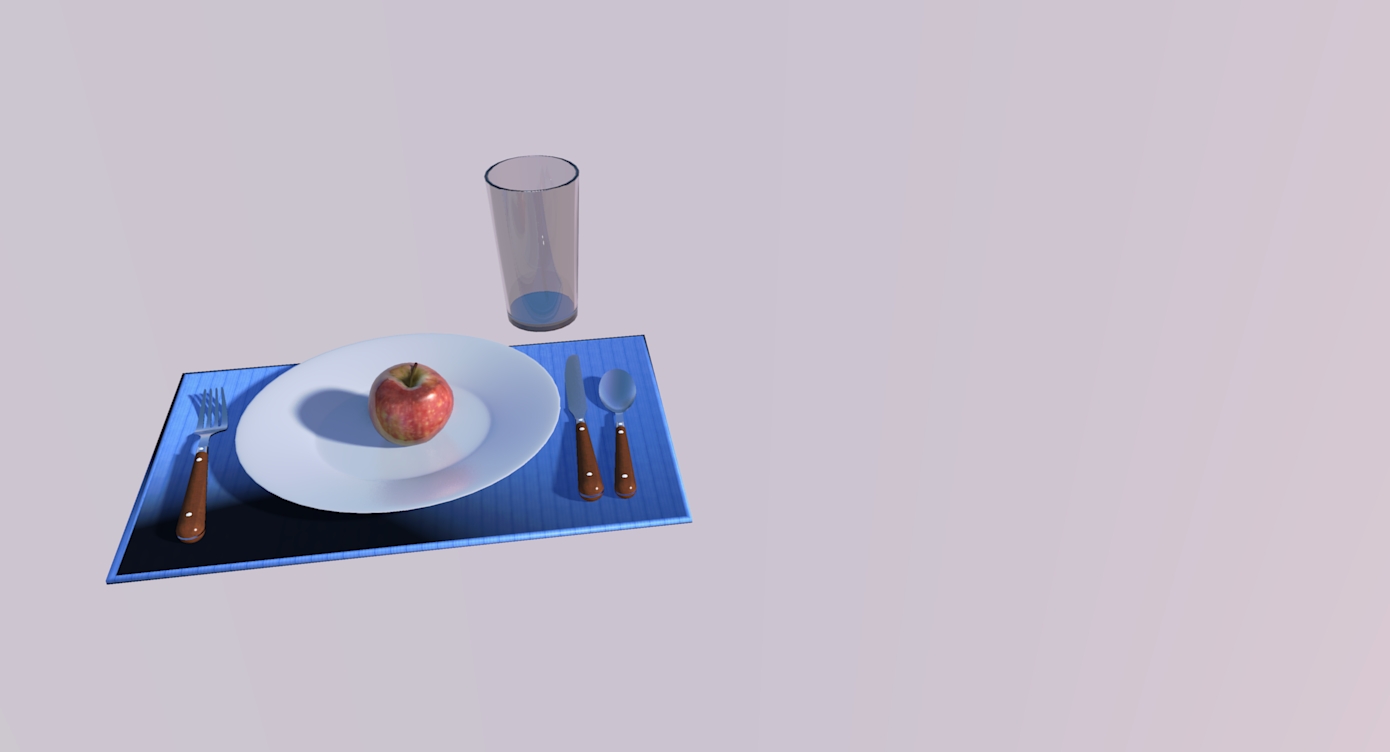
I took Solos model (thanks again for this), made the plate 60% reflective, the silverware metal 90% reflective and metallic, the apple 50% reflective and glossy, the placemat 40% reflective and glossy and marked the glass as "thich glass" and 10% reflective. (Since this is about lighting I figured I might as well make everything reflective.)
Then I added the rnl_probe HDRi (mentioned in the earlier post), and let it render for about 3 minutes. (The longer you let it render, the more points are sampled from the sky).
Al Hart
IRender nXt from Render Plus -
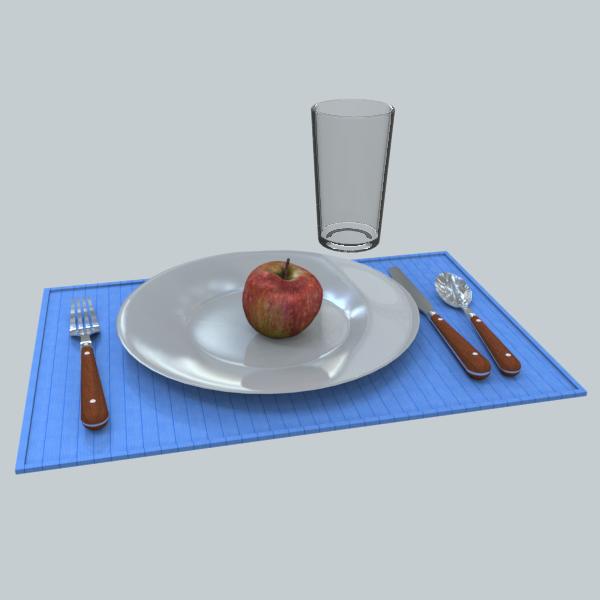
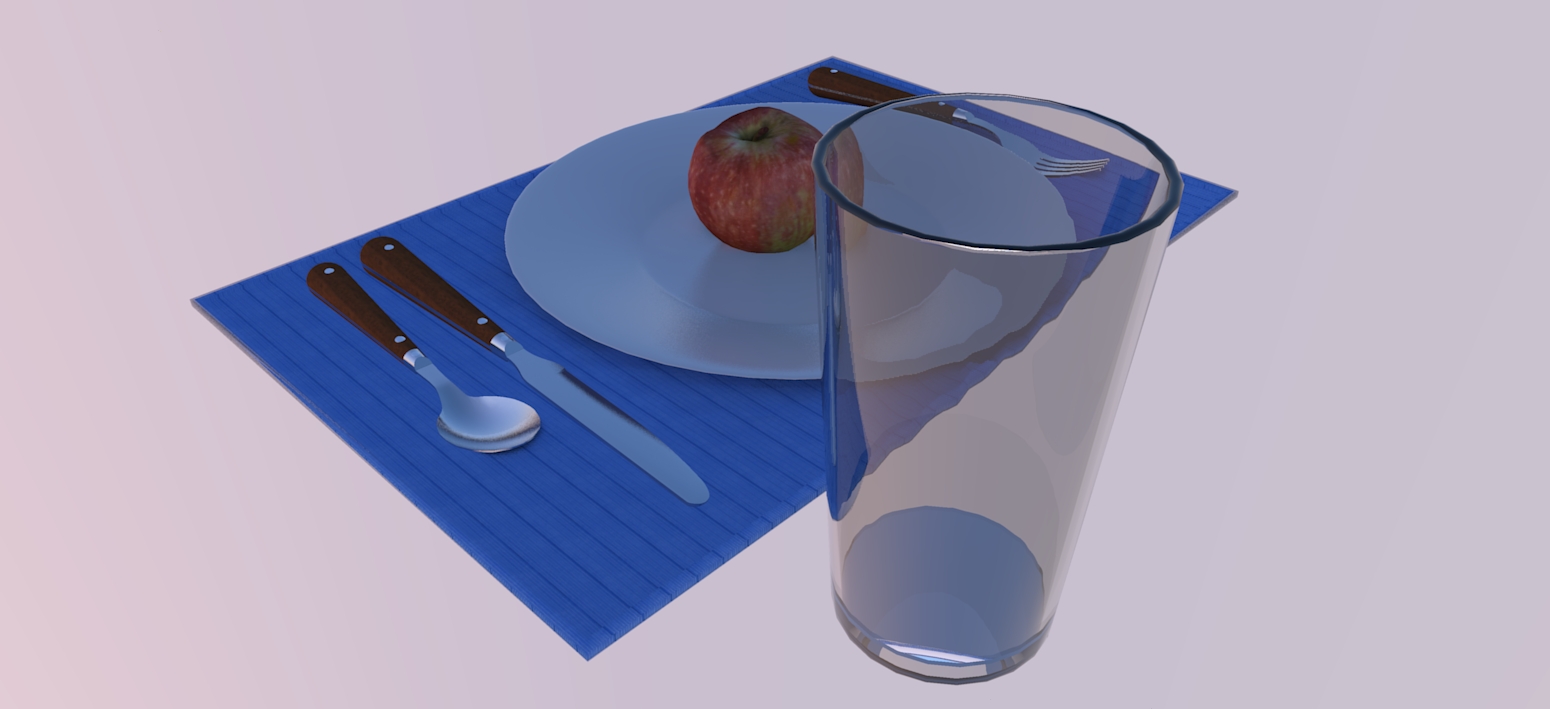
Here's a quick one with Vray using Solo's lighting and studio setup. Composition could be a little better, but I'm pretty happy with the materials.

-
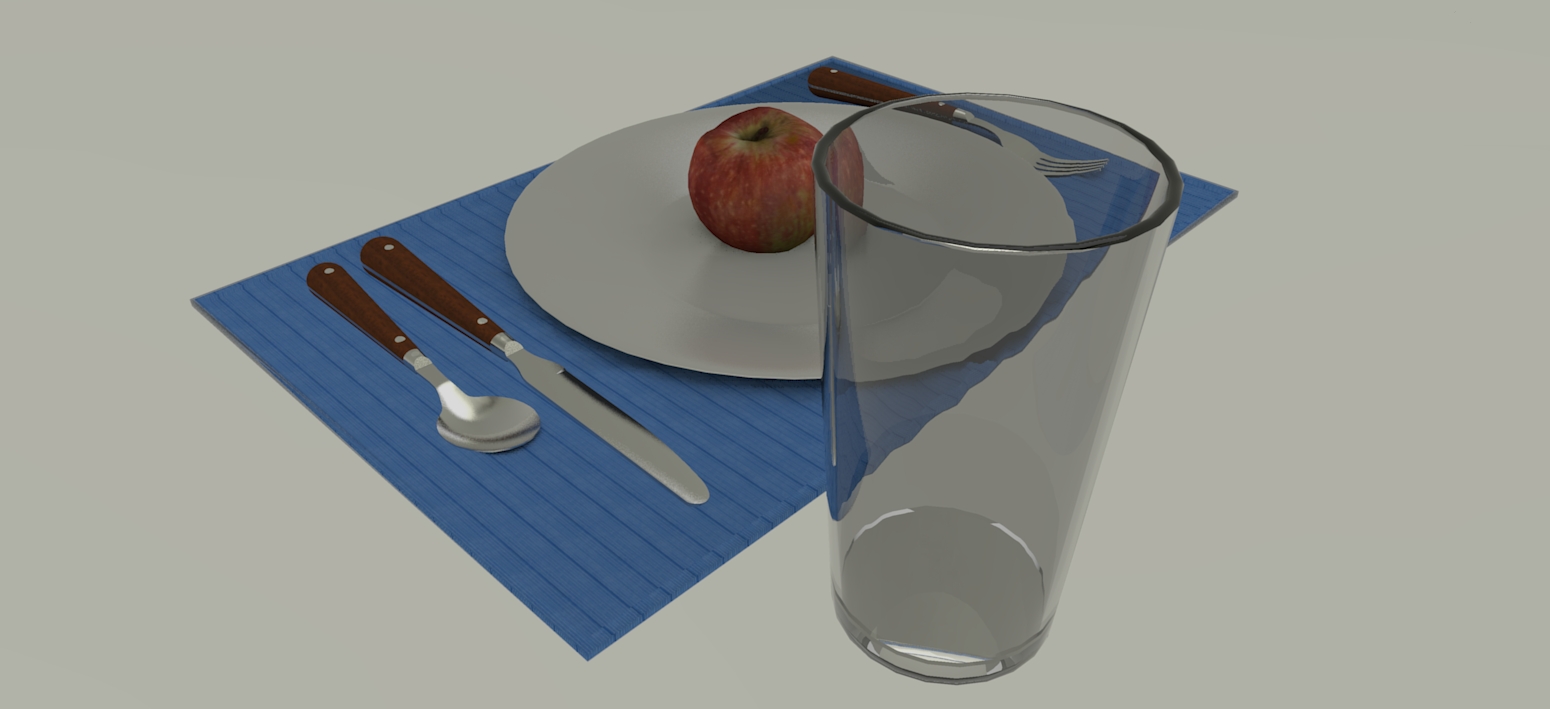
Next, I tried placing a cylinder around the scene and marking it as a light.
Not as good as the "Studio" Solo provided. But a lot simpler to model, and I wanted to see what it would do.
The cylinder is marked as "invisible", so it created lights and shadows, but does not appear in the model.
Here is the result. I think the lighting is too "flat", as you might expect from a symmetrical light source.
Al Hart
IRender nXt from Render Plus -
It's always difficult to explain certain render tricks on a generic basis as every render app has it's own ways of achieving certain results and they often even use custom terminologies.
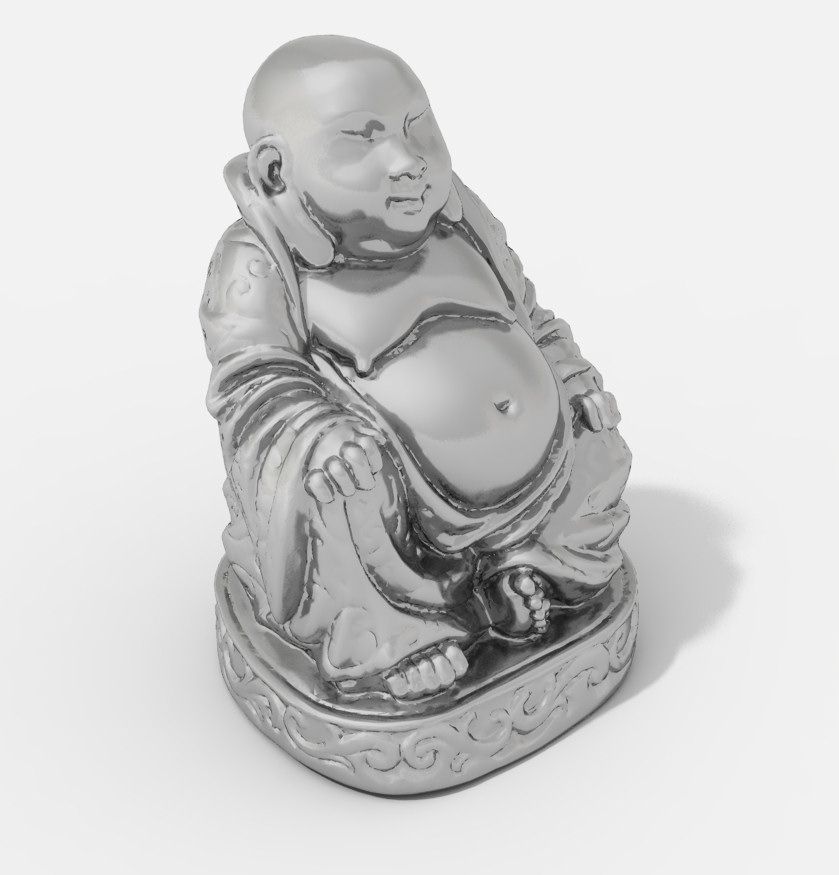
To highlight the Image based lighting again I used a different model, one with a little more reflection and detail as seen below of the SU model. I used the studio setup as described on previous page.
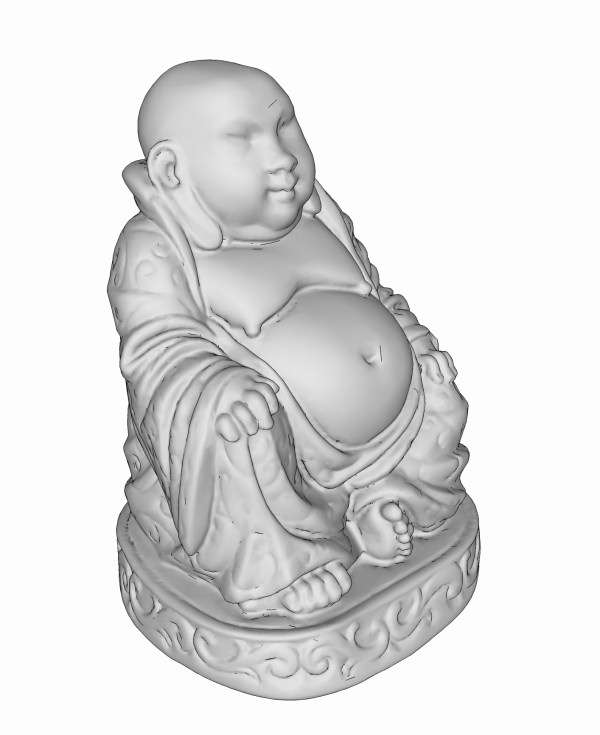
In the first render I used no HDR image, but only a basic sun with soft, light shadows. I made the background color white, notice that the metal looks lifeless and the reflections are very bland.
[attachment=2:1dvi6bu8]<!-- ia2 -->buddha no hdri.jpg<!-- ia2 -->[/attachment:1dvi6bu8]
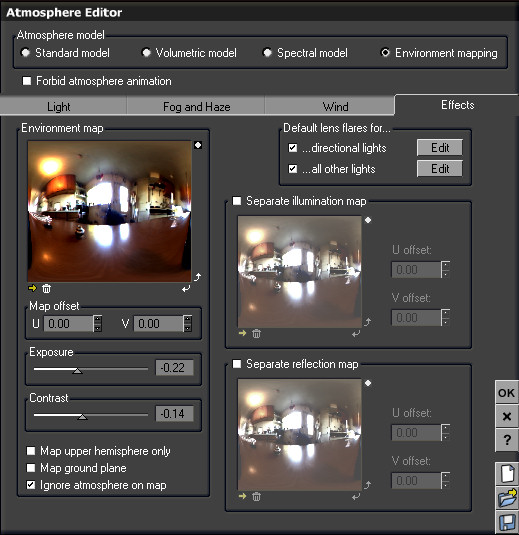
Then I added a HDRI, here is my setting for the folk that use Vue.
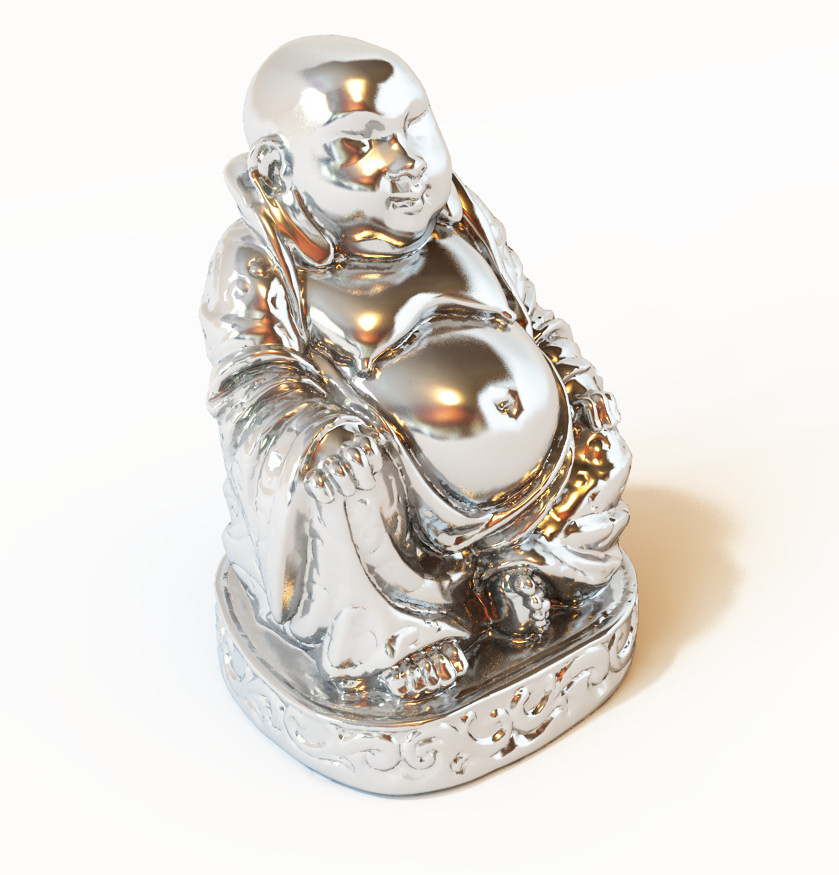
[attachment=1:1dvi6bu8]<!-- ia1 -->hdri settings.jpg<!-- ia1 -->[/attachment:1dvi6bu8]And the result, as you can see the HDR image give the Aluminum statue a lot more interest and detail.
[attachment=0:1dvi6bu8]<!-- ia0 -->buddha with hdri.jpg<!-- ia0 -->[/attachment:1dvi6bu8]
-
Solo thanks for all the information about setting up a still life! It was really helpful to read some of your tips.
This is a kerkythea effort using a 100 passes of MLT. Still needs work but it was educational....
-
@tallbridgeguy said:
Solo thanks for all the information about setting up a still life! It was really helpful to read some of your tips.
This is a kerkythea effort using a 100 passes of MLT. Still needs work but it was educational....
You have setup good transparency and good reflection. I think the next step is to find something to reflect.
Instead of the HDRi which has been shown a lot in this thread, you might try placing some interesting geometry somewhere where we can't wee it, but where it will provide reflection. (This can also be done by placing an offscreen image somewhere)
Al Hart
IRender nXt from Render Plus -
Here is my first effort - I down loaded the studio set up but hadn't a clue what to do withit so this is a materials application only - any tips on this HDRi thingy and studio set up anyone i.e a step by step , blow by blow how to do it workflow - and please, for the love of God (allah etc, etc....) keep it in a language that an irishman can understand!!!!!

-
@dermotcoll said:
Here is my first effort - I down loaded the studio set up but hadn't a clue what to do withit so this is a materials application only - any tips on this HDRi thingy and studio set up anyone i.e a step by step , blow by blow how to do it workflow - and please, for the love of God (allah etc, etc....) keep it in a language that an irishman can understand!!!!!
What rendering engine would you like help with?
Al Hart
IRender nXt from Render Plus -
Twilight Medium+ with no studio
Twilight Medium+ with studio
Thanks Al & Solo for the best Workshop yet
-
Hi Al
These rendering discussions are going way over my head at the minute - where do I need to start - photography, lighting, I dont know!!!- I have bought Twilight and the trial version of podium. I also have purchased Piranesi but I dont think it is suitable for PR renderings.
I would like someone to tell me of a good source of info in print or online where I can go and understand what is required to produce good images. You guys are amazing but to be honest I cringe when asking some of these questions and it puts me off participating in the forum quite a bit. Please give me some references to material where I can go off and get the basics of lighting, etc understood before I come back to bother you guys.
-
Dermot
For the above mentioned exercises you firstly need to use a renderer that is capable of achieving these results.
Twilight is capable of using image based lighting as well as shadow controls, unfortunately Podium does not have anyway of using image based lighting nor can you turn shadows off and on with omni's, which IMO disqualifies it for studio type renders.Do you have a copy of the Twilight manual? if you do go through it and see the sky probe and spherical sky explanations first, that will give you a guide as to how to apply HDRI's.
-
Cheers Solo
As you can see from my earlier post I tried the still life using twilight with preset Medium +. I have watched the Twilight tutorials and have gone through the manual and I understand that you apply materials and that you adjust the properties of those materials to get different reflections, shine etc.
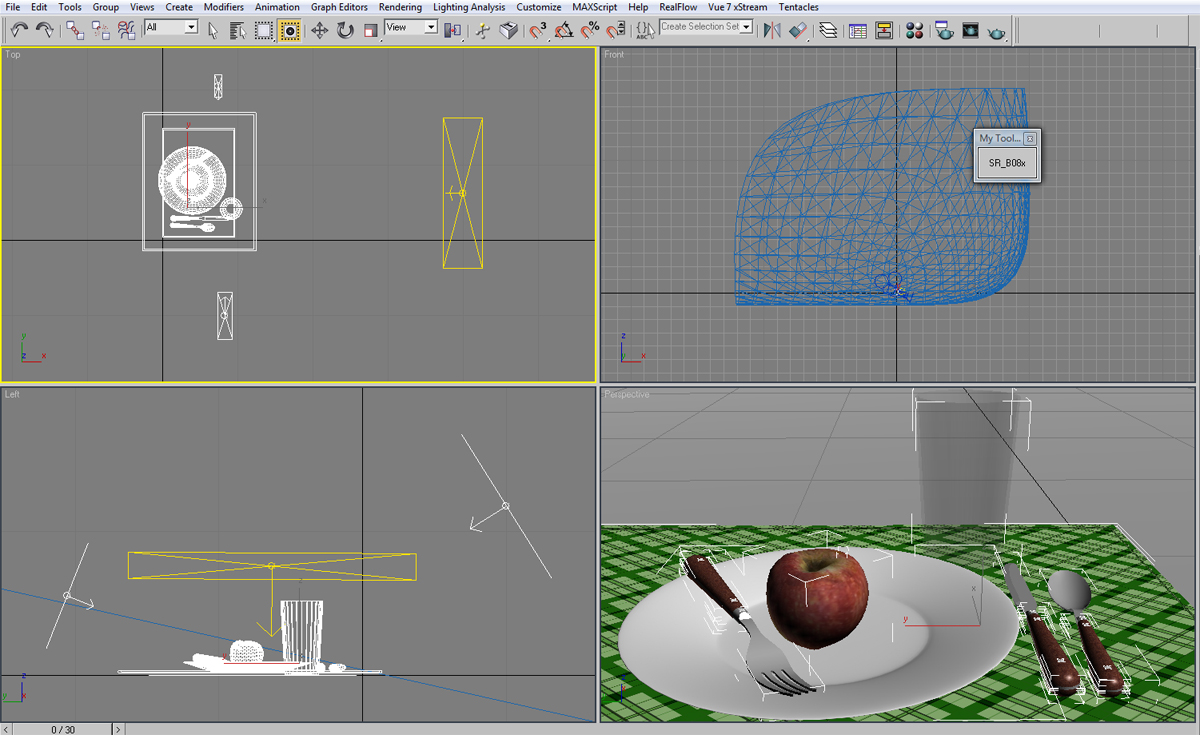
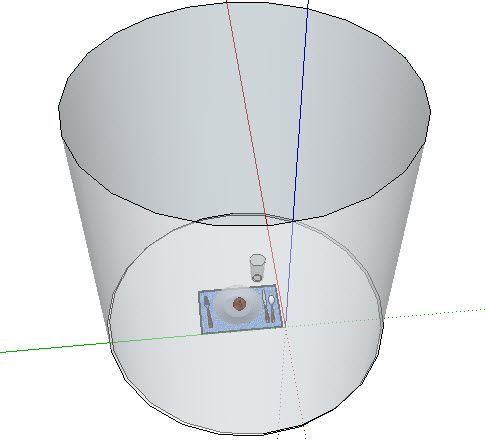
What I do not get is the terminology and how things work. I downloaded the studio set up you kindly posted into the still life model and it took me 10 - 15 mins to finds the bloody plate because the studio was so big!!! Are you getting some idea of how far down the food chain I am here!!
When HDRi comes into it - how do I put that into the mix - how do I place that into the model to give of light - do I apply it as a texture to a face that I create in the model?
These are the really dumb ass questions I need to ask??
-

I forgot about that, yeah the studio is large, purposely also, see how small the place setting is in my version.
Hello! It looks like you're interested in this conversation, but you don't have an account yet.
Getting fed up of having to scroll through the same posts each visit? When you register for an account, you'll always come back to exactly where you were before, and choose to be notified of new replies (either via email, or push notification). You'll also be able to save bookmarks and upvote posts to show your appreciation to other community members.
With your input, this post could be even better 💗
Register Login


Advertisement