sketchucation logo sketchucation
    • Login
    1. Home
    2. TasV
    3. Posts
    ℹ️ Licensed Extensions | FredoBatch, ElevationProfile, FredoSketch, LayOps, MatSim and Pic2Shape will require license from Sept 1st More Info
    T
    Offline
    • Profile
    • Following 0
    • Followers 0
    • Topics 7
    • Posts 32
    • Groups 1

    Posts

    Recent Best Controversial
    • RE: Scaling issues driving me crazy!!!!

      @dave r said:

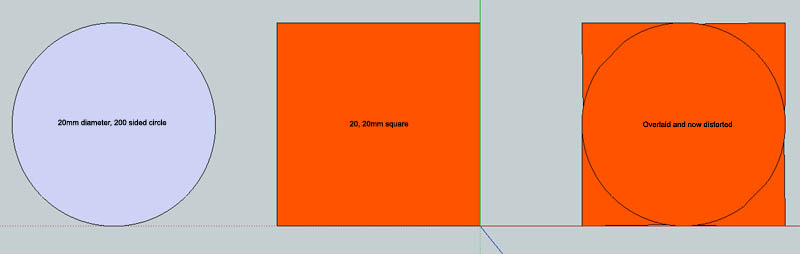
      Yes. You can use the Tape Measure tool for one. In some cases you might use the Move tool instead of scaling. In my work I use Move more than Scale to resize things. Or maybe things would work better if you separated the geometry. For example in your last image, if the gray shape was separate from the vertical lines, you could resize it without affecting the vertical lines at all.

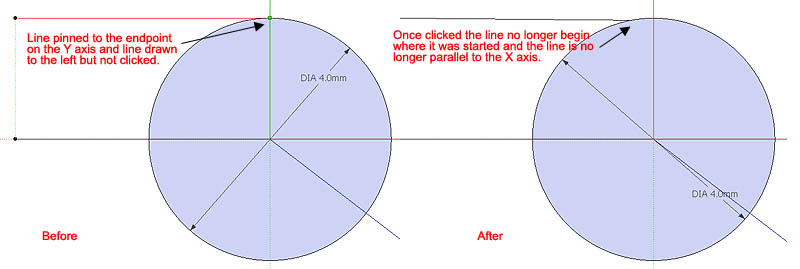
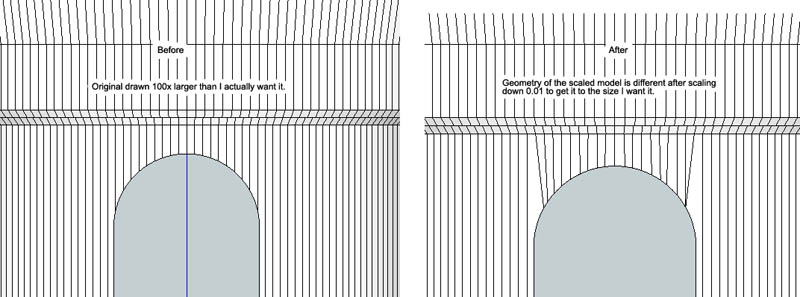
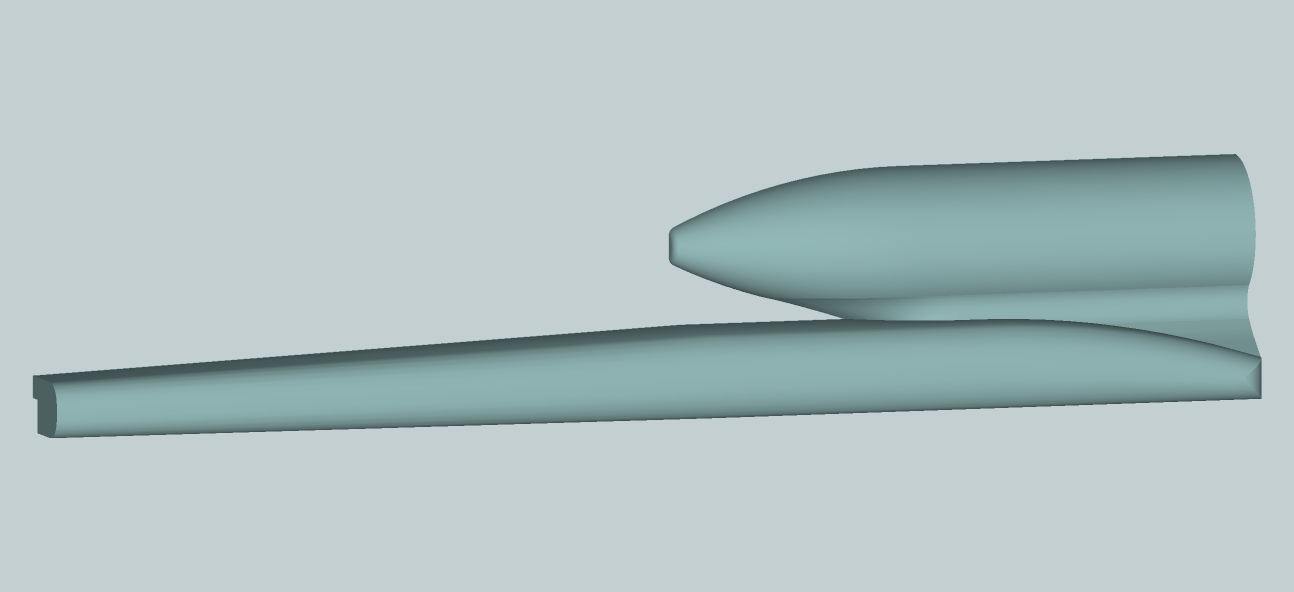
      Ok, not sure that would work with the model I've got as I'm trying to resize a finished product. By the look of things I need to think more carefully about the geometry of my part and then resize it in sections.

      posted in Newbie Forum
      T
      TasV
    • RE: Scaling issues driving me crazy!!!!

      That was done for demonstration purposes...

      posted in Newbie Forum
      T
      TasV
    • RE: Scaling issues driving me crazy!!!!

      @unknownuser said:

      I wonder if in your examples there might not be a better to to use than Scale.

      Is there another way to resize something other than the scale tool?

      posted in Newbie Forum
      T
      TasV
    • Scaling issues driving me crazy!!!!

      If I draw a small circle (say diameter 4mm) and then want to draw a line from one of the edges of the circle in any direction (except along the normal) it shifts the line down from its original starting point to a different one in a different position on the curve as in the first two screen shots below.
      demo.jpg
      demo3.jpg

      To get around this when I'm trying to draw something that is small I just scale everything up by 10, or even 100, and then when I'm finished I scale everything back down again and this seems to work fine except for one really annoying thing. When you scale things back down it often changes the geometry of the parts and does things like adding hidden geometry to flat surfaces that were flat in the scaled up version but had somehow warped during the scaling down process. An example is show below where the lines in the curved surface (I left them unsoftened for demonstration purposes) where nice and vertical and parallel. In the scaled down version suddenly they aren't any more.

      demo2.jpg

      Is there anything I am doing wrong with this? Is there a way to enable small drawings to be made without this bizarre effect taking place? Angle snapping and line snapping have been disabled in these examples. Is there any way to make the scaling process able to shrink something more reliably without changing the geometry? Ideally I'd like to be able to just draw at the scale I want without having to mess around with scaling at all.

      posted in Newbie Forum sketchup
      T
      TasV
    • RE: Split Component and materials issue

      Because the back and front of the chair is a curved surface, and is made from 6 separate faces (seat consists of two faces), you will need to map the texture across them. This should help you: https://www.youtube.com/watch?v=HHsRRLCAOm8

      Another thing I noticed with this model is that if you go to edit-->unhide-->all a centre line up the middle of the back of the chair appears. This is what is making it so the two halves select separately. If you right click on this centre line and soften it (or delete it) then turn off the hidden geometry you can then select the back of the chair as a single face which will assist in mapping the texture over it in one go.

      Hope this helps.

      posted in Newbie Forum
      T
      TasV
    • RE: Concentric Spheres

      Sorry to thread-jack... it seems appropriate to add this query here as an extension of the sphere query. I have downloaded both ThomThom's shell tool and the Fredo joint push/pull tool because I want to add an inside shell to an existing shell so I can print it at Shapeways as a hollow shape (with the appropriate exit holes for the powders, etc). These plugins don't seem to be able to do what I want them to. I want to do this to reduce the amount of material needed to print it and also to allow the object to float once printed. The shape is a complex shape. I've just started to learn to 'sculpt' shapes in 3D... I have a lot to learn... I didn't know printing as a pdf as I have done here 'unsmooths' all the lines!

      scad.png

      Is there are way to select the shell that I have and create an inner contour that is equidistant from the outer shell at all points along the normals to create a thicker wall and hollow interior?

      posted in Newbie Forum
      T
      TasV
    • RE: Converting hidden geometry to non-hidden geometry in bulk

      I have solved it... never mind 😄

      posted in SketchUp Discussions
      T
      TasV
    • Converting hidden geometry to non-hidden geometry in bulk

      Below is a screen shot of a section of a model I'm making. For reasons I am not completely sure of some of the lines I had drawn were converted to hidden geometry lines (not smoothed or hidden). It happened after using the RoundCorner plugin and I think it was because I had the borders and edges set to soft. Anyway, I'd like to convert these back to solid lines instead of hidden geometry but because some of these lines are high resolution curves it would take me forever to go back and redraw them all, going endpoint-to-endpoint. So I was wondering if there was a quick way of converting hidden geometry to solid lines in bulk?

      http://i70.servimg.com/u/f70/13/33/54/62/liftar11.png

      posted in SketchUp Discussions sketchup
      T
      TasV
    • RE: Over rotation with the Follow-me tool

      This is one the kids have designed and made already... good starting point!


      1010965_10200740799255898_1642840619_n.jpg

      posted in SketchUp Discussions
      T
      TasV
    • RE: Over rotation with the Follow-me tool

      Thank you. It will help a lot. I'm putting together a sample model F1 car that will be cut from a block of balsa wood with our CNC router. I'm trying to get the kids in my 'F1 in Schools' class to be a little more adventurous and creative. They tend to get stuck in boring, straight edged, ruts. It's coming along. Still a ways to go but I'm pretty happy with it so far:


      betterf1car.jpg

      posted in SketchUp Discussions
      T
      TasV
    • RE: Over rotation with the Follow-me tool

      Thanks... that's really cool! Making the first segment perpendicular helped with the regular follow-me too.

      posted in SketchUp Discussions
      T
      TasV
    • Over rotation with the Follow-me tool

      I'm trying to do what seems to me to be something easy... but I can't get it to work. I'm just trying to get a face to follow a semi-circular path using the centre of the semi-circle as the rotation point. The problem is, it always over-rotates and automatically extends itself past the original axes. This is a problem for me because I am designing something that is bilaterally symmetrical so I'm only doing one half of it with the intention of duplicating it, flipping it and joining them together. I've taken some screen shots to illustrates what I mean:

      This is the face I'm trying to make the lathed surface with.

      http://i153.photobucket.com/albums/s208/Simonauv/SketchUp/betterf1car_zps4427fc7d.jpg

      I do as I always do and select the path along which I want the face to follow:

      http://i153.photobucket.com/albums/s208/Simonauv/SketchUp/betterf1car2_zps3fce4dc1.jpg

      Selecting the face with the Follow-me tool and everything looks ok...

      http://i153.photobucket.com/albums/s208/Simonauv/SketchUp/betterf1car3_zpsffd2a940.jpg

      But... when you look at it up close you can see the problem:

      http://i153.photobucket.com/albums/s208/Simonauv/SketchUp/betterf1car4_zps3e929451.jpg

      The original vertical side of the face was aligned with the origin of the blue axes. After the Follow-me tool has been applied this is no longer the case as it has been over-rotated. I know I can fix it easily using a vertical face --> intersect with model etc but that's a pain. Is there a way to ensure this doesn't happen?

      posted in SketchUp Discussions sketchup
      T
      TasV
    • 1
    • 2
    • 2 / 2