@dave r said:
It would make it a whole lot easier for us to help you if you upload the SKP file so we can see what you've got and what you're trying to do.
Just uploaded what I have, thanks.
@dave r said:
It would make it a whole lot easier for us to help you if you upload the SKP file so we can see what you've got and what you're trying to do.
Just uploaded what I have, thanks.
Thanks to all for the speedy replies. I had to work backwards in order to redraw the original (base) shapes and then ran Joint Push/Pull after every operation. I determined that the loft function in Soap Skin Bubble is trash. Curviloft was a much, much better tool for generating the skins I needed.
As for the type of mold, Its for a punch and die style mold, so it requires offset for the thickness of the material being bent in order for the bends to clear.
But since the solid tools are actually pretty trash, I have to admit you were right and I was better off intersecting faces once I did have them generated. 
And as for Joint-Push-Pull, and Sketchup in general,
I found a number of things that this plugin doesn't like, and it's most likely glitches with Sketchup Pro 2016 itself that I noticed over time. I find this extremely aggravating, but since for my specific work, JPP was a finishing operation (coming almost at the end of the project), I was able to trace back the problem by using it at every step and checking with Solid Inspector.
You ever mirror something by flipping by a colored axis, or using the scale tool, then try to cut and paste it somewhere else and object appears unflipped? Happens to me alot, happened to me about 15 minutes ago. I found that JPP doesn't work well with flipped faces such as I had described. I think that it what causes the "reference to deleted entity" errors. Which is major pain when you work SYMMETRICALLY. So I had to work in quadrants, and then halves.
JPP and Solid Inspector don't like each other. When doing things, and I can't specifically remember, but I think it has to do with things that don't involve "Removing internal faces." But it's either reversing the faces or removing stray edges cause JPP to fail nonstop.
JPP works much better when pulling a face off of a solid than just pulling the face floating in free space like the skin on the top of my first photo.
JPP doesn't like the Solid Tools as far as I can see. Whether used JPP first or the solid tools doesn't seem to matter. The results, if the operation works at all, is usually very ugly and unusable. As Box had pointed out, better off intersecting faces.
As pointed out above, JPP doesn't like SoapSkinBubble, but hell, I don't like it either.
And since, the majority of my work is solid modeling parts that are around 3" - 3' in size, I had to work at 100x scale from almost the start of the project. I found that JPP doesn't like to be scaled up more than once. What I mean by that is this:
Say you were working at 100x and your project is done and ready to be exported.(For my work typical extensions are STL and SVG, so all of my work is revolved around the ability to export to these formats.)
But you forgot one detail.
If you scale your work back up 100x after scaling down 100x, JPP doesn't like that at all. Fortunately I save many versions and keep my scaled up work separate. Scale back down only at the end, only one time.
Thanks to all that replied and took a look to see if they could help me out. I hope these tips help anyone else having similar trouble with Joint Push Pull and help them develop a strategy to overcome these things. I haven't updated my Pro, as I haven't seen any specific addresses to these issues. I believe the flipped axis cut/copy/paste is a bigger issue than it might seem.
-sk8er6
It's been a while since I made my last mold, and I have forgotten my sketchup workflow. I have made a similar mold using these processes in Fusion 360.
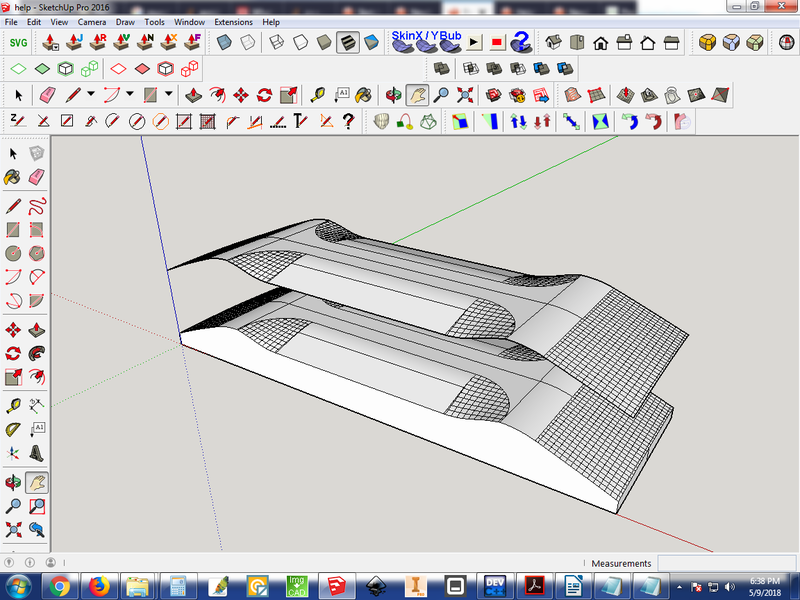
I am attempting to thicken the face upward by 150 in order to subtract or intersect it with another solid in order to create the bottom of the mold. Whenever I try to use joint push pull, I get a long error message.
@unknownuser said:
Date: 09-May-18 18:37:01
An error occurred in Joint Push Pull
Error in generation of the geometryundefined method `target' for nil:NilClass
jointpushpullgeometry.rbe: 453 -- block (2 levels) in geometry_create_top_face
jointpushpullgeometry.rbe: 453 -- collect
jointpushpullgeometry.rbe: 453 -- block in geometry_create_top_face
jointpushpullgeometry.rbe: 452 -- each
jointpushpullgeometry.rbe: 452 -- each_with_index
jointpushpullgeometry.rbe: 452 -- geometry_create_top_face
jointpushpullgeometry.rbe: 251 -- block in geometry_robot_prepare_mesh
jointpushpullgeometry.rbe: 250 -- each
jointpushpullgeometry.rbe: 250 -- each_with_index
jointpushpullgeometry.rbe: 250 -- geometry_robot_prepare_mesh
jointpushpullgeometry.rbe: 206 -- robot_call_action
jointpushpullgeometry.rbe: 177 -- geometry_robot_exec
jointpushpullgeometry.rbe: 160 -- geometry_robot
jointpushpullgeometry.rbe: 75 -- block in geometry_execute
lib6operation.rbe: 332 -- call
lib6operation.rbe: 332 -- step_geometry
lib6operation.rbe: 374 -- start_execution
jointpushpullgeometry.rbe: 75 -- geometry_execute
jointpushpulltool.rbe: 1149 -- execute_validate
jointpushpulltool.rbe: 1344 -- onReturn
I used 2D fillets and the native 3 point arc tool to create a lot of the 2D geometry. The simple things were made with as many native tools as possible, the more complex faces were made with Soap Skin Bubble. I checked the solid with SolidInspector at basically every step to make sure the form was okay.
Please, any help would be appreciated. I've been won over by sketchup's charm and know there's a way to do this.
@sdmitch said:
When you click on it does the entire line get selected or just the segment you clicked on. It matters because curves have to be adjusted differently.
In this example, I use a 10 degree polynomial regression on the curve that is the top side of the face.
For some reason, I couldn't see your attachment until today. That looks like an amazing plugin.
I fixed the problem area by creating edges with a closed loop using sandbox, deleting the face, and then using Soap skin & bubble. The result was much smoother geometry.
The new tools will definitely help in the near future. Thanks to all for the input 
I've tried going over a few times,manually closing what I thought were the holes, using make faces, intersecting with model, nothing. I'm not sure how to make this a solid and this was actually one of the root problems with my last question. Attached is my work file. I enlarged my object by 1000. It was created by offsetting the top surface downward 500 with Joint Push pull. I really want to learn how to fix these problems because I see myself making more similar models in the near future.
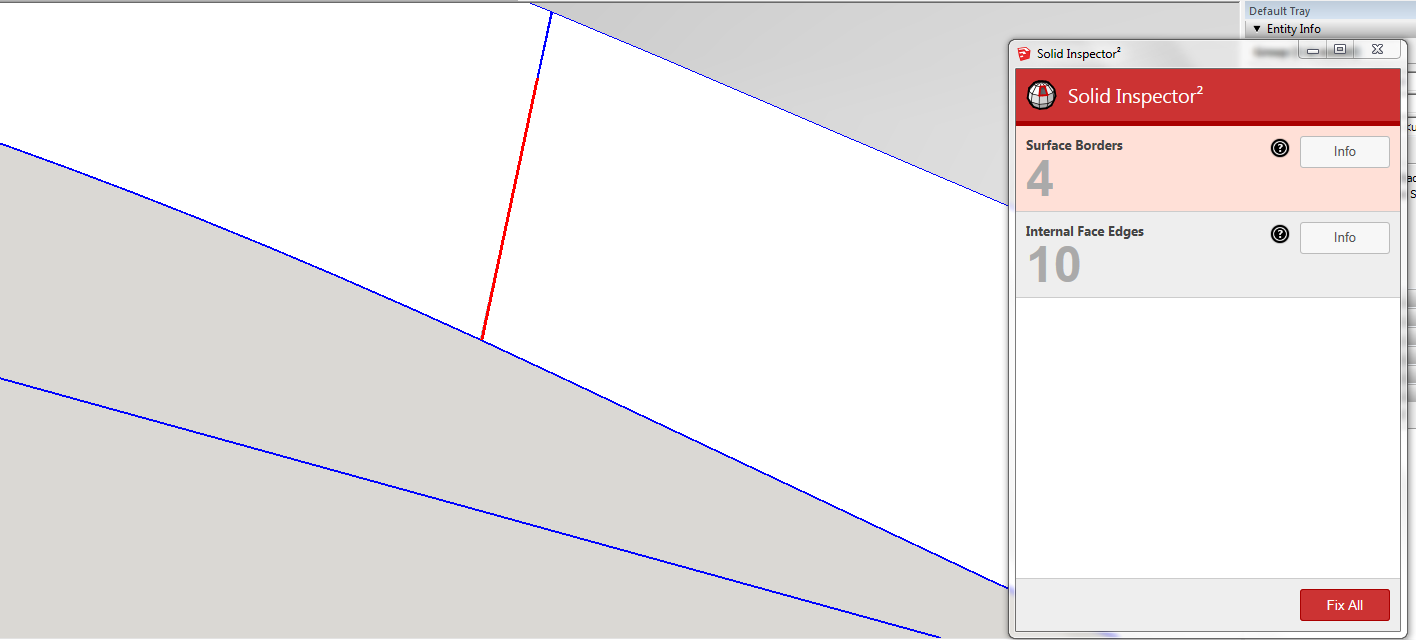
Thanks for your time,
-sk8er6
@sdmitch said:
When you click on it does the entire line get selected or just the segment you clicked on. It matters because curves have to be adjusted differently.
It is just segments
@box said:
Curvizard lets you smooth, or even simplify then smooth.
^^^ That looked amazing. 
Does anyone know of any other skinning tools or any tips to make the sandbox for this area more round?
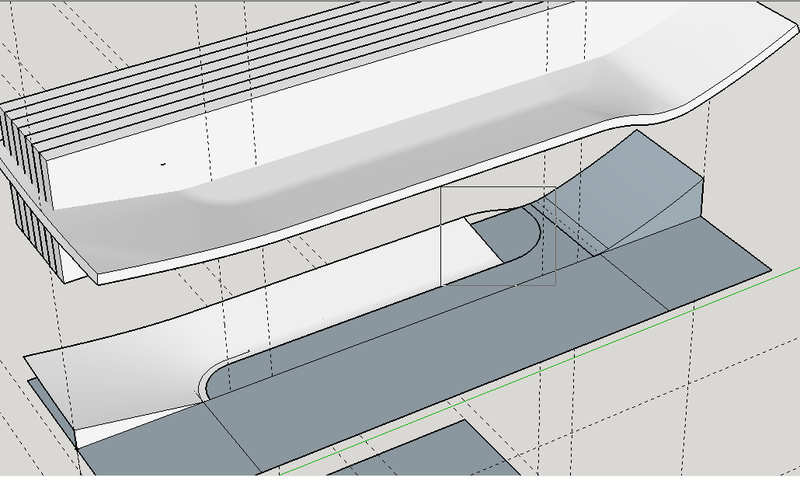
It was this sandbox that caused the only weirdness in my drawing. I've used the sandbox before, but for some reason this time its giving me all kinds of trouble. Maybe I'm not using curviloft correctly.
Downloading curvizard now.
-sk8er6
Thank you for the speedy responses!
@sdmitch said:
@sk8er6 said:
a close up of the problem, mutiplied by 7.
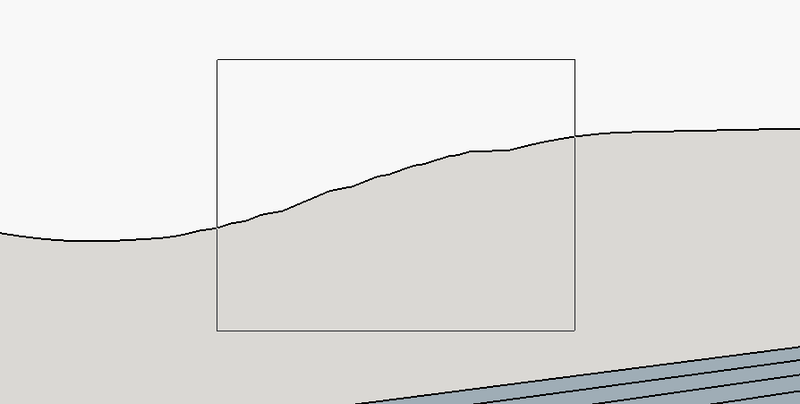
http://s147.photobucket.com/user/sk8er6/media/Help%20Ex%202.png.html
Is this edge to be smoothed a curve or segments?
Not totally sure what you mean... It was a line made from intersecting a sandbox, but I would like it to be a smooth curve. Or smooth segments. I just want a smooth profile I can have CNC'd.
@pilou said:
Beziers Curves by Fredo has a lot of tools for smooth, transform, change etc any curves lines!
Sounds cool, I'm checking it out now.
Need help!!! I've been on this for a week now. I want to know if there is a plugin that can help me smooth the lines, OR another way to create a mesh over the edges pictured. I need them to be more round and less triangular/jagged.

http://s147.photobucket.com/user/sk8er6/media/Help%20Ex%201.png.html
a close up of the problem, mutiplied by 7.

http://s147.photobucket.com/user/sk8er6/media/Help%20Ex%202.png.html
When I intersected the face I made using sandbox, it is a little rough, but very close to the shape I need. I need the face to be more round, almost ball like. I tried using curviloft with mixed results, and soap skin bubble doesn't come close. The lines are measured and fileted using 2D tools at 100 scale.
another view of the problem area:

http://s147.photobucket.com/user/sk8er6/media/Help%20Ex%204.png.html
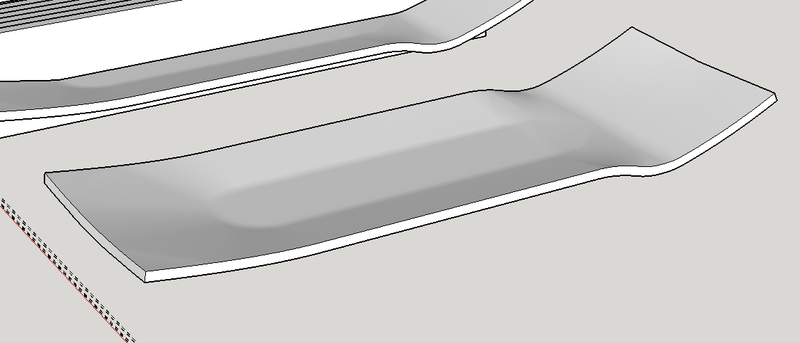
http://s147.photobucket.com/user/sk8er6/media/Help%20Ex%203.png.html
^^^^ This bit is more cosmetic. The most important thing for this project is to smooth those slices so I can get them cut on a CNC router. Is there a tool thats good for this? I really want to somehow consistently smooth those segments, and then I am going to have to offset them then manually draw the rest of the face in order to create the bottom half of this mold.
Thanks,
sk8er6
@dave r said:
It would make it a whole lot easier for us to help you if you upload the SKP file so we can see what you've got and what you're trying to do.
Just uploaded what I have, thanks.
I am trying to offset a curved surface that I used sandbox to create. It is important that the curves are offset, not simply thickened. When I use joint push pull the geometry is, not quite right. Using the extrude option results in a usable solid, but is not truly offset, so it is unusable for my needs. Are there any alternatives to joint push pull that would allow me to offset a surface, or bend a sheet (thickened rectangle) over the face to create what I need?
Thanks.