Version 2.0.4 - 03.27.2025
- Enabled removal of individual anchor bolts for stemwall step foundations.
- Enabled addition of custom location anchor bolts for stemwall step foundations.
Version 2.0.4 - 03.27.2025
Version 3.9.4 - 04.04.2025

This update per customer request.
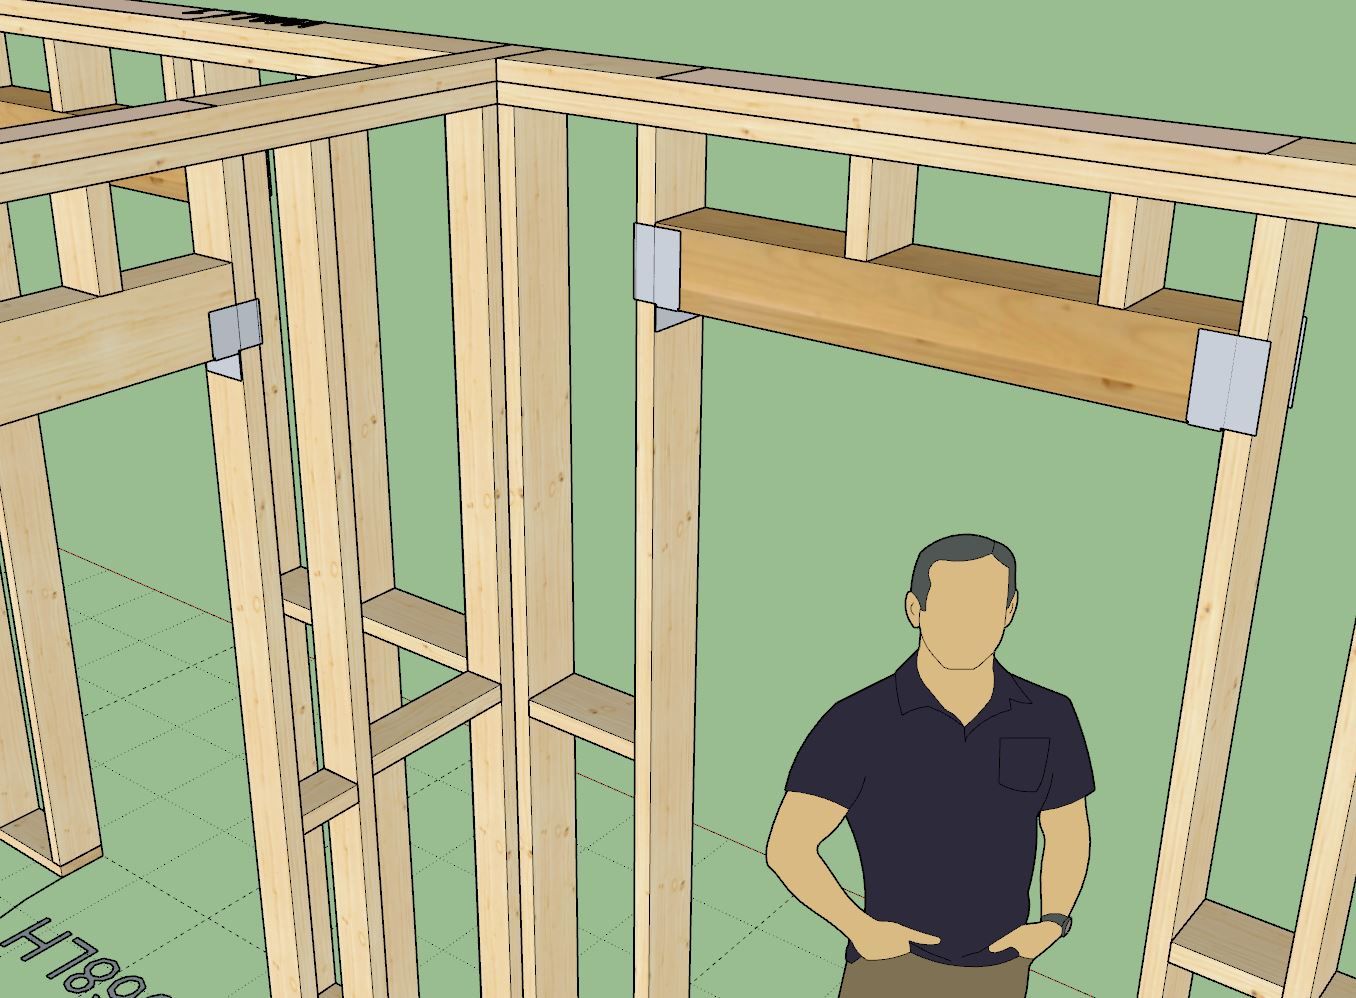
Note that Simpson only manufactures two standard header hanger sizes (HH4 and HH6). However there are quite a few more options for CFS framing. If there is any interest I can add those hangers as well upon request.
Version 3.6.7 - 04.06.2025
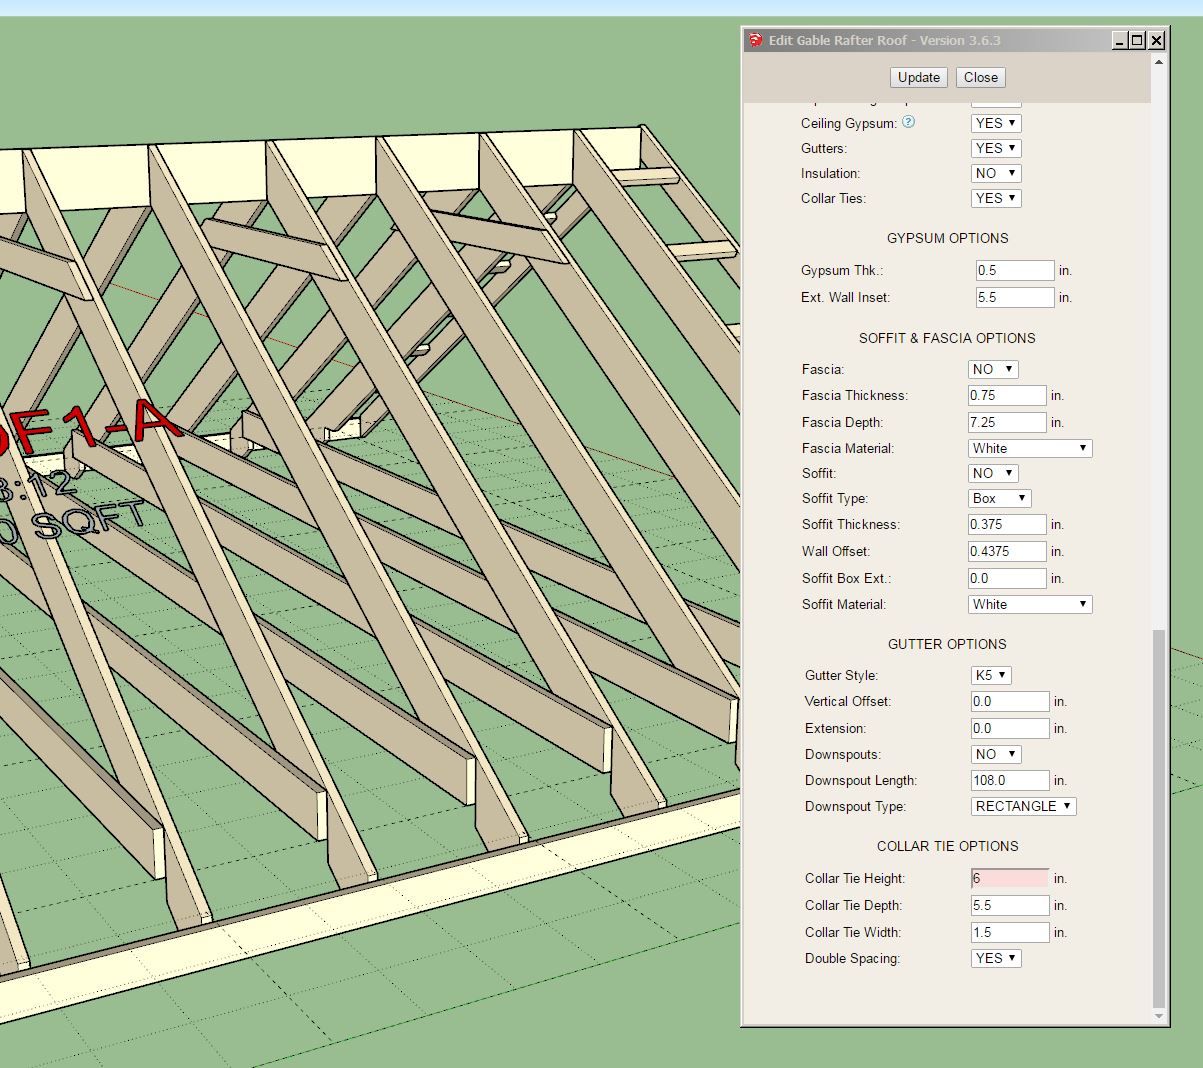
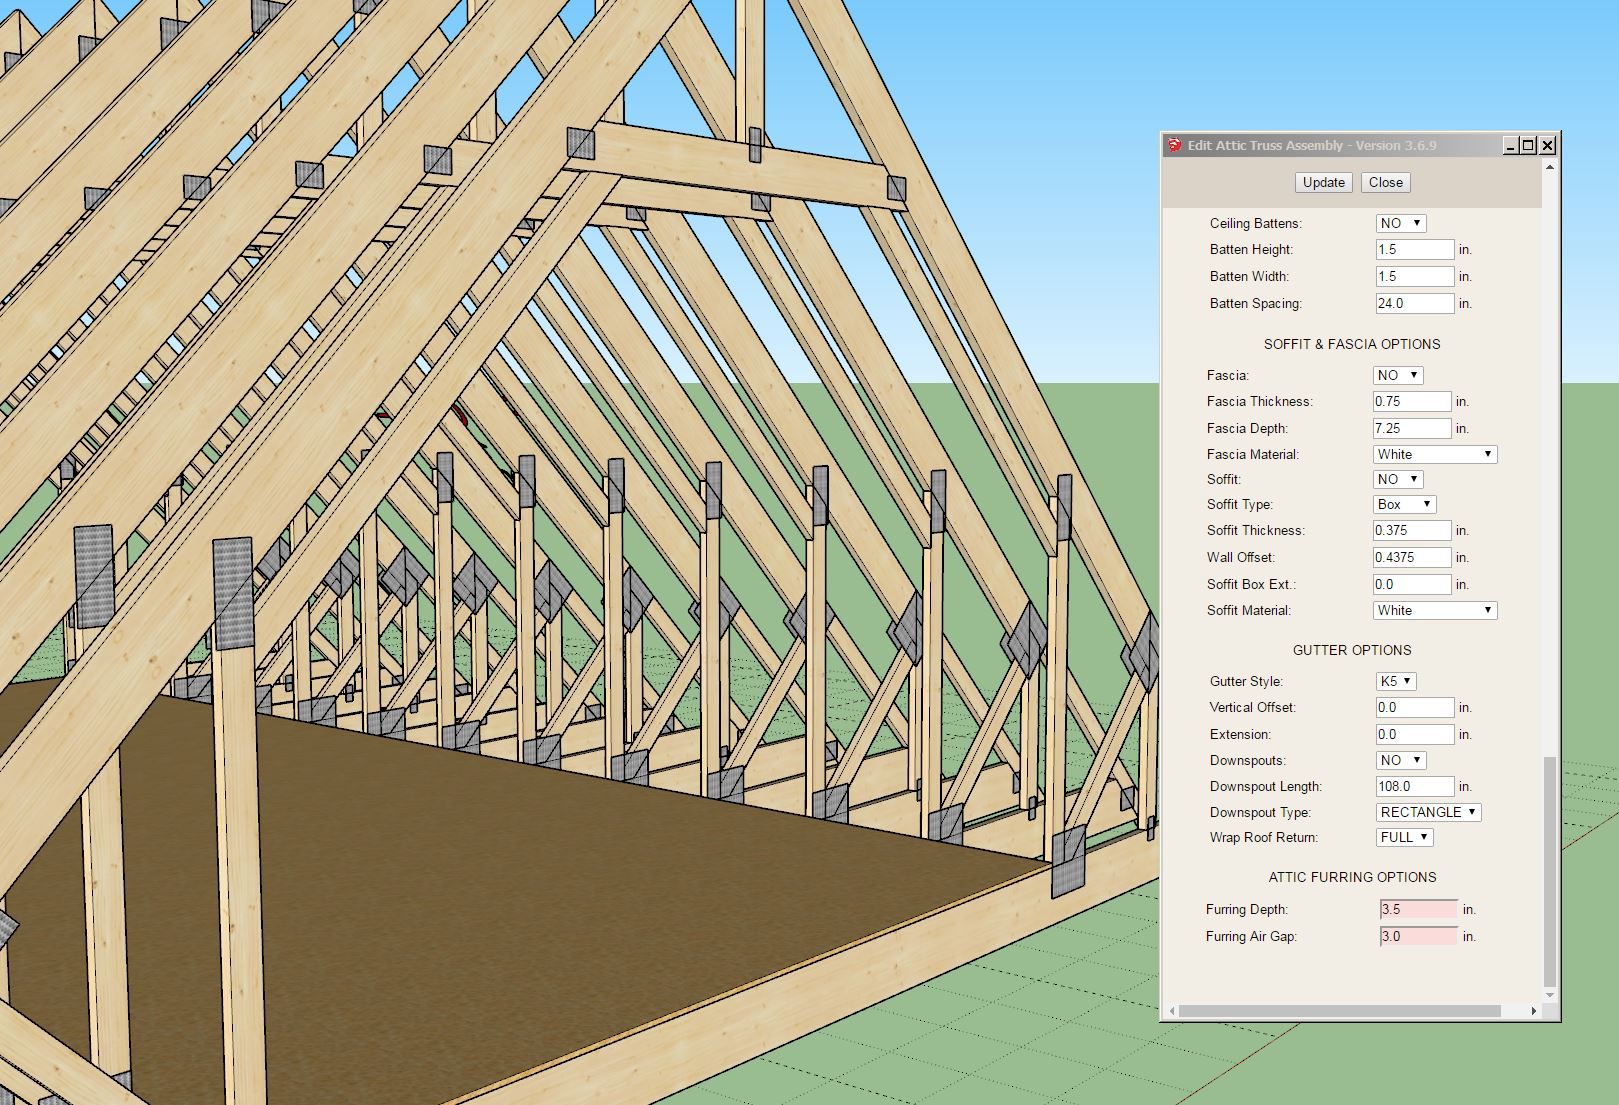
Note that the height of the collar tie is measured from the bottom of the ridge board. A zero height puts the collar tie against the bottom of the ridge board.
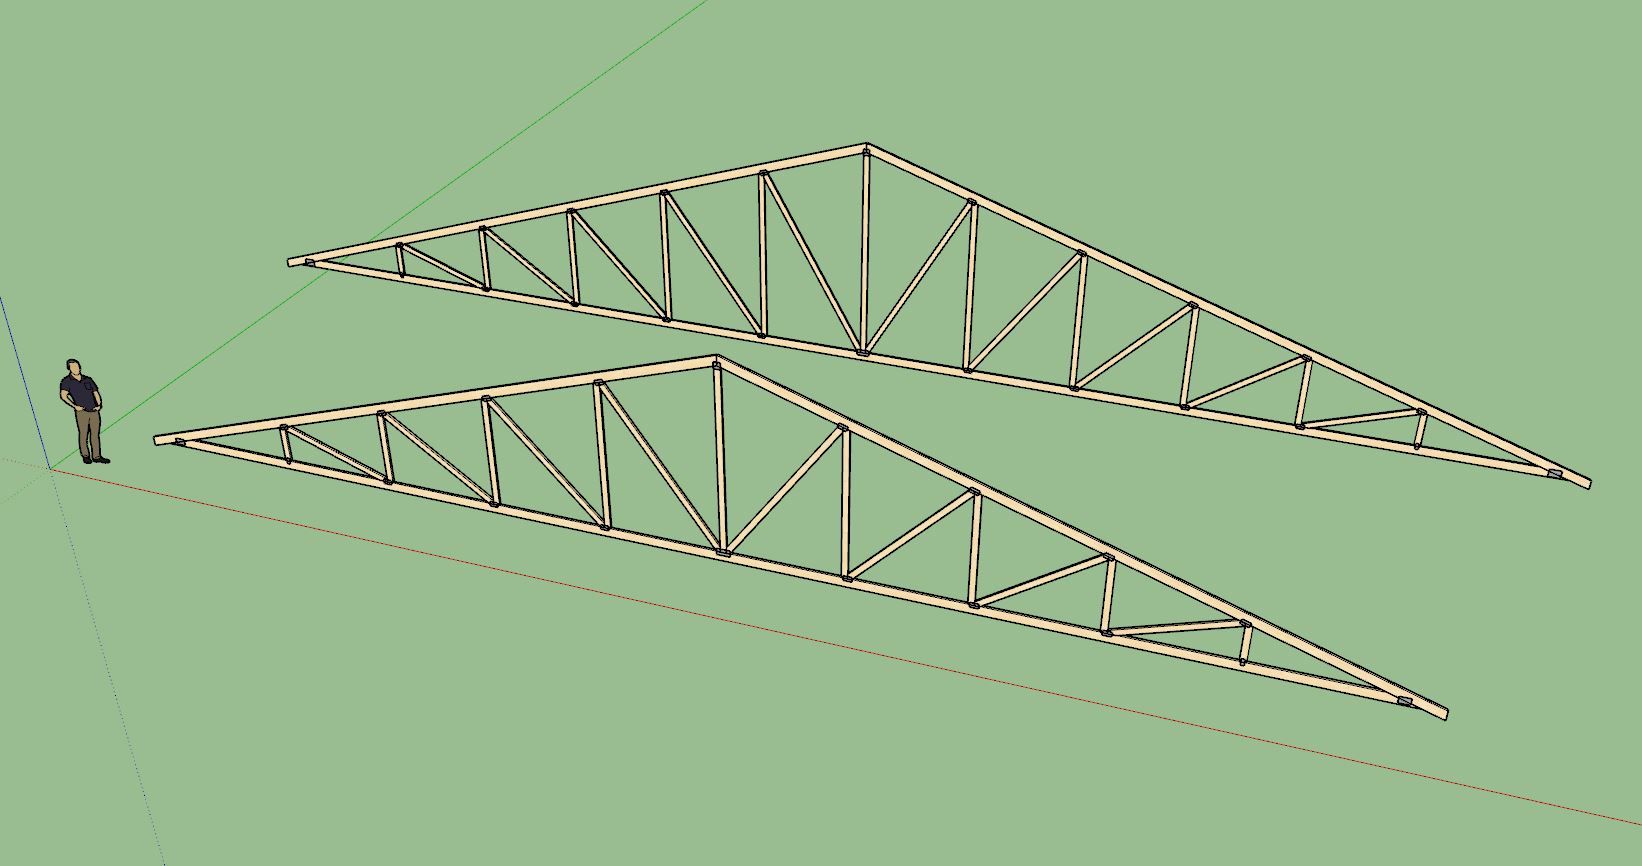
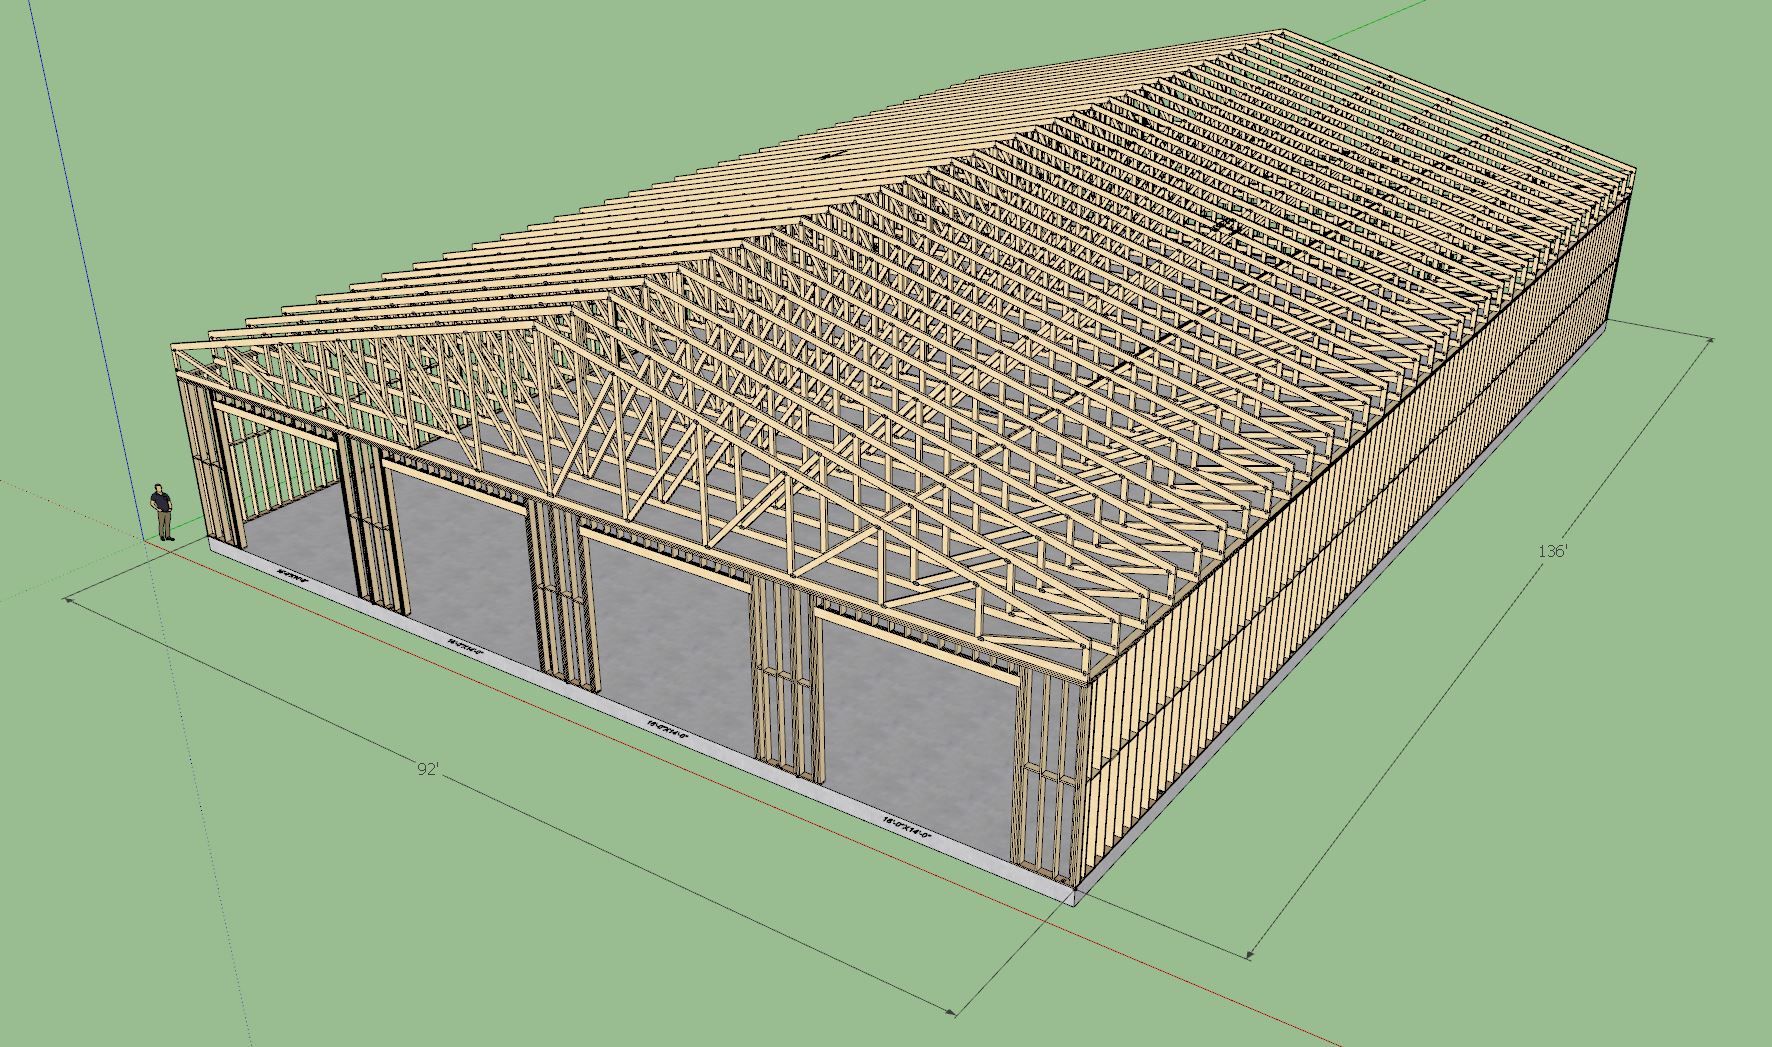
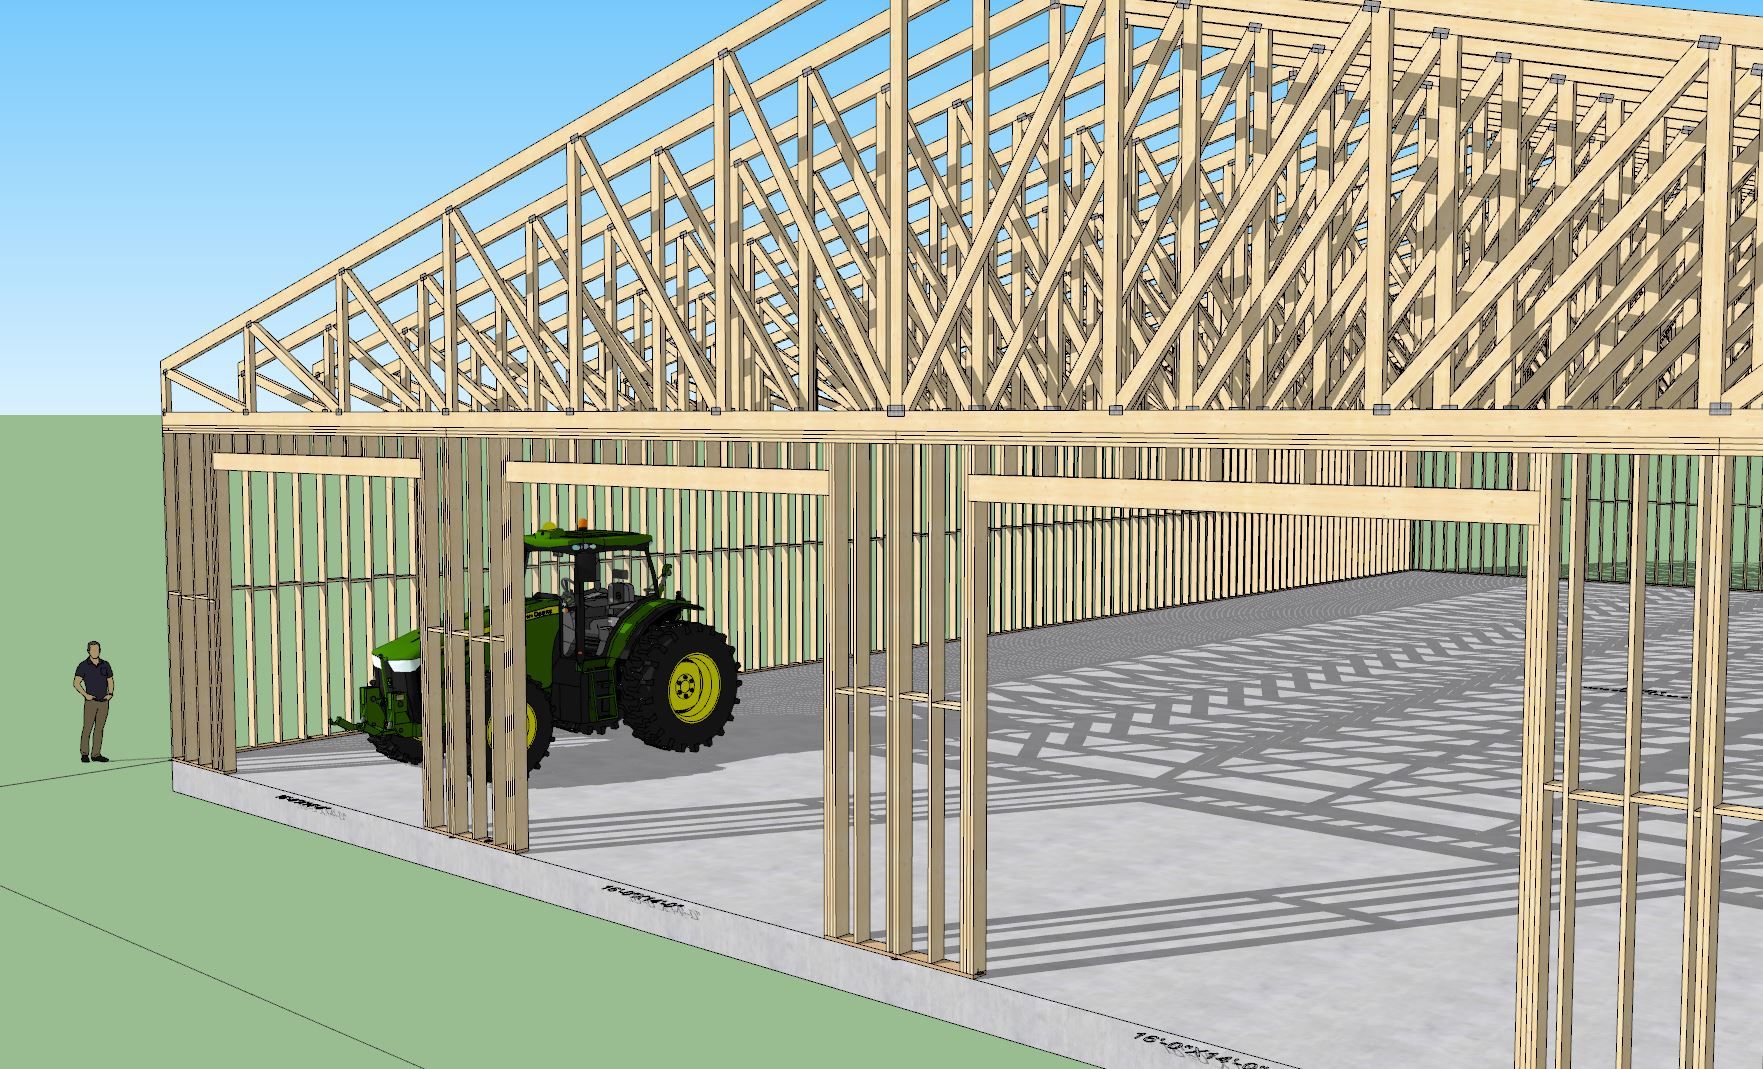
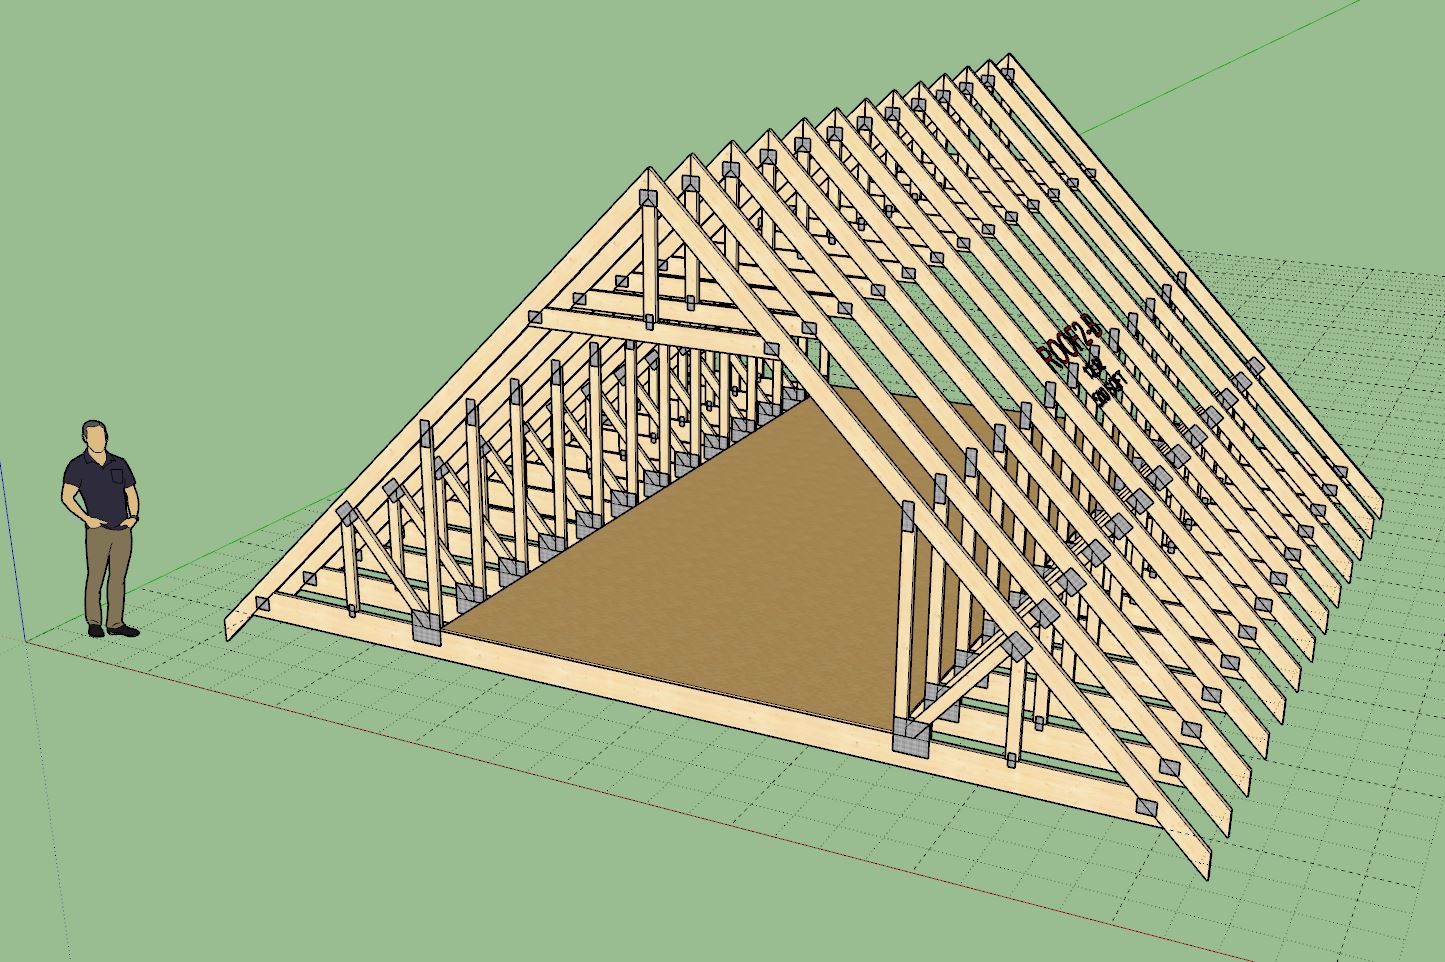
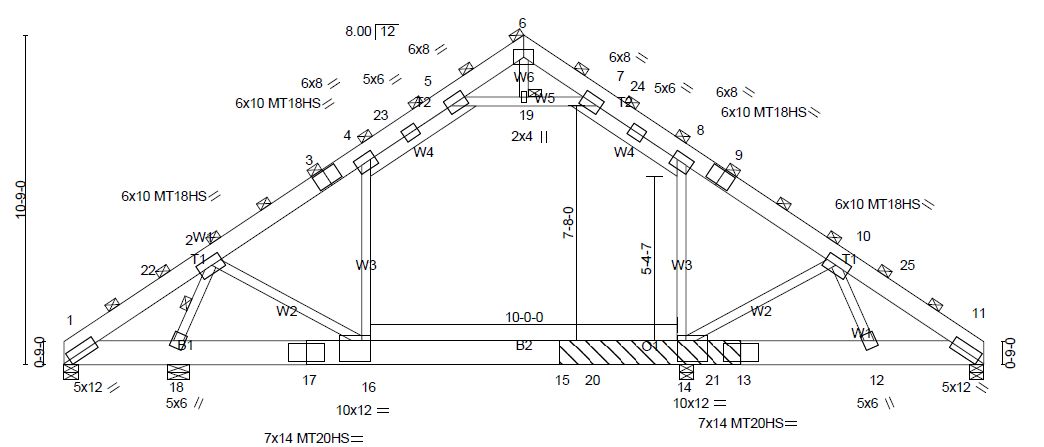
At the behest of some users who use this plugin for large agricultural buildings, I will be adding at couple more options for large trusses. Specifically a “Quad Howe” and a “Penta Howe” common truss option. The “Penta Howe” truss is suitable for trusses that measure up to 100’ in span (or greater). I had a little fun with this :slight_smile:
The barn I show with the tractor has a 92’ span truss with a 36" raised heel. Top and bottom chords are 2x8 with 2x6 webs. The trusses are double ply (3" width) and spaced at 4’ on center.
After I modeled this, I thought, what could a guy do with a garage like this? Okay, realistically I don’t need an aircraft hanger for a garage, but 36’x36’ sure would be nice.


Version 3.7.1 - 04.18.2025
Version 3.9.5 - 04.19.2025

Both of these updates per customer request.
I have been taking care of some miscellaneous items on my todo lists for both the Truss and Wall plugin before I dive back down the rabbit hole that is currently the Floor plugin. Once I jump back into that one I may not emerge again for a couple months so I thought it best that I take care of a few requests first.
Version 3.9.6 - 04.19.2025
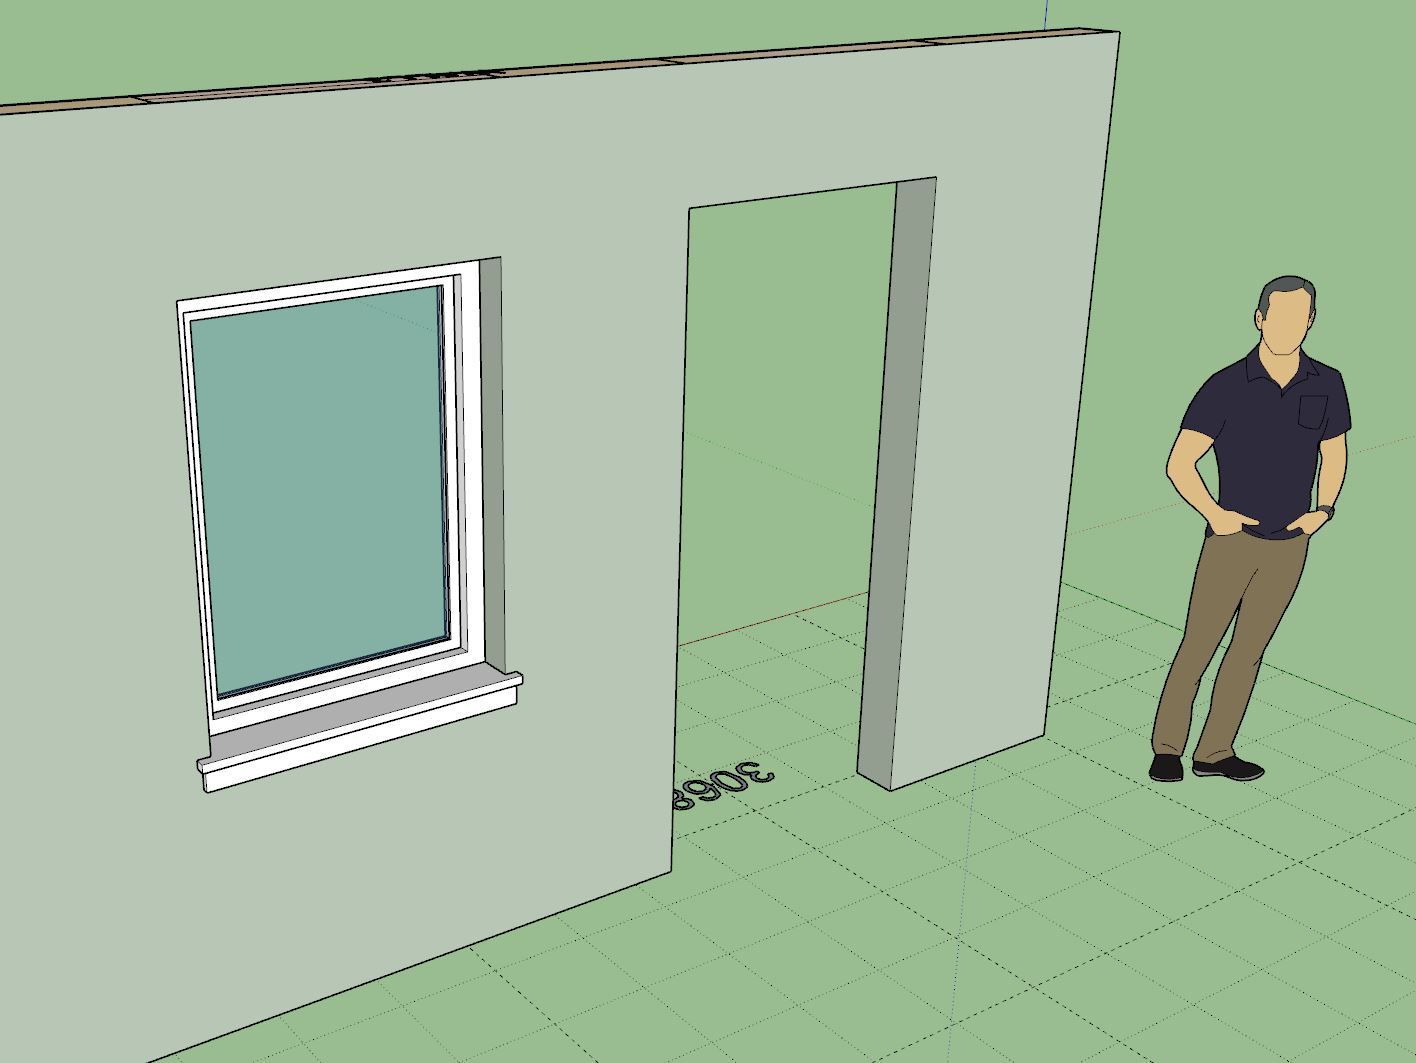
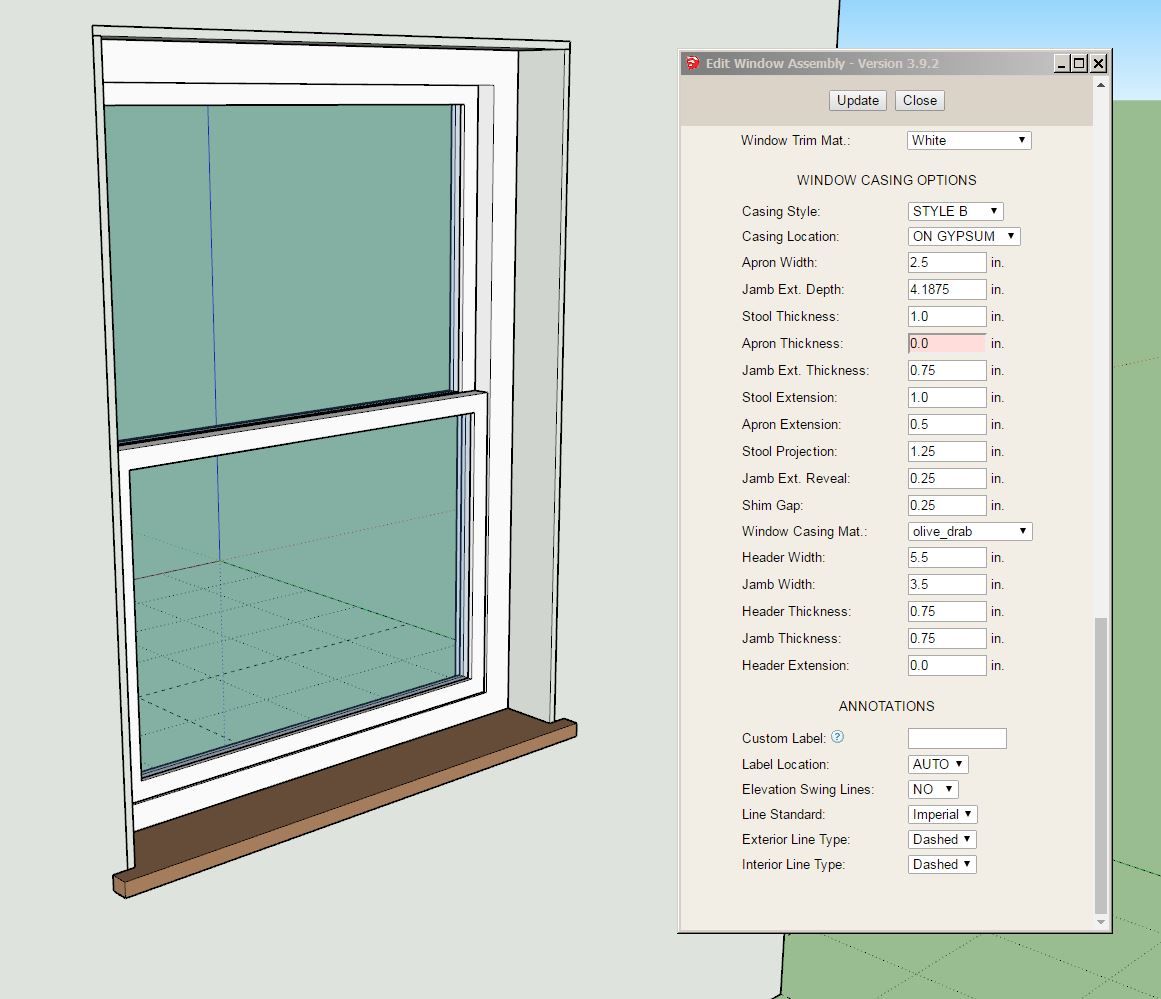
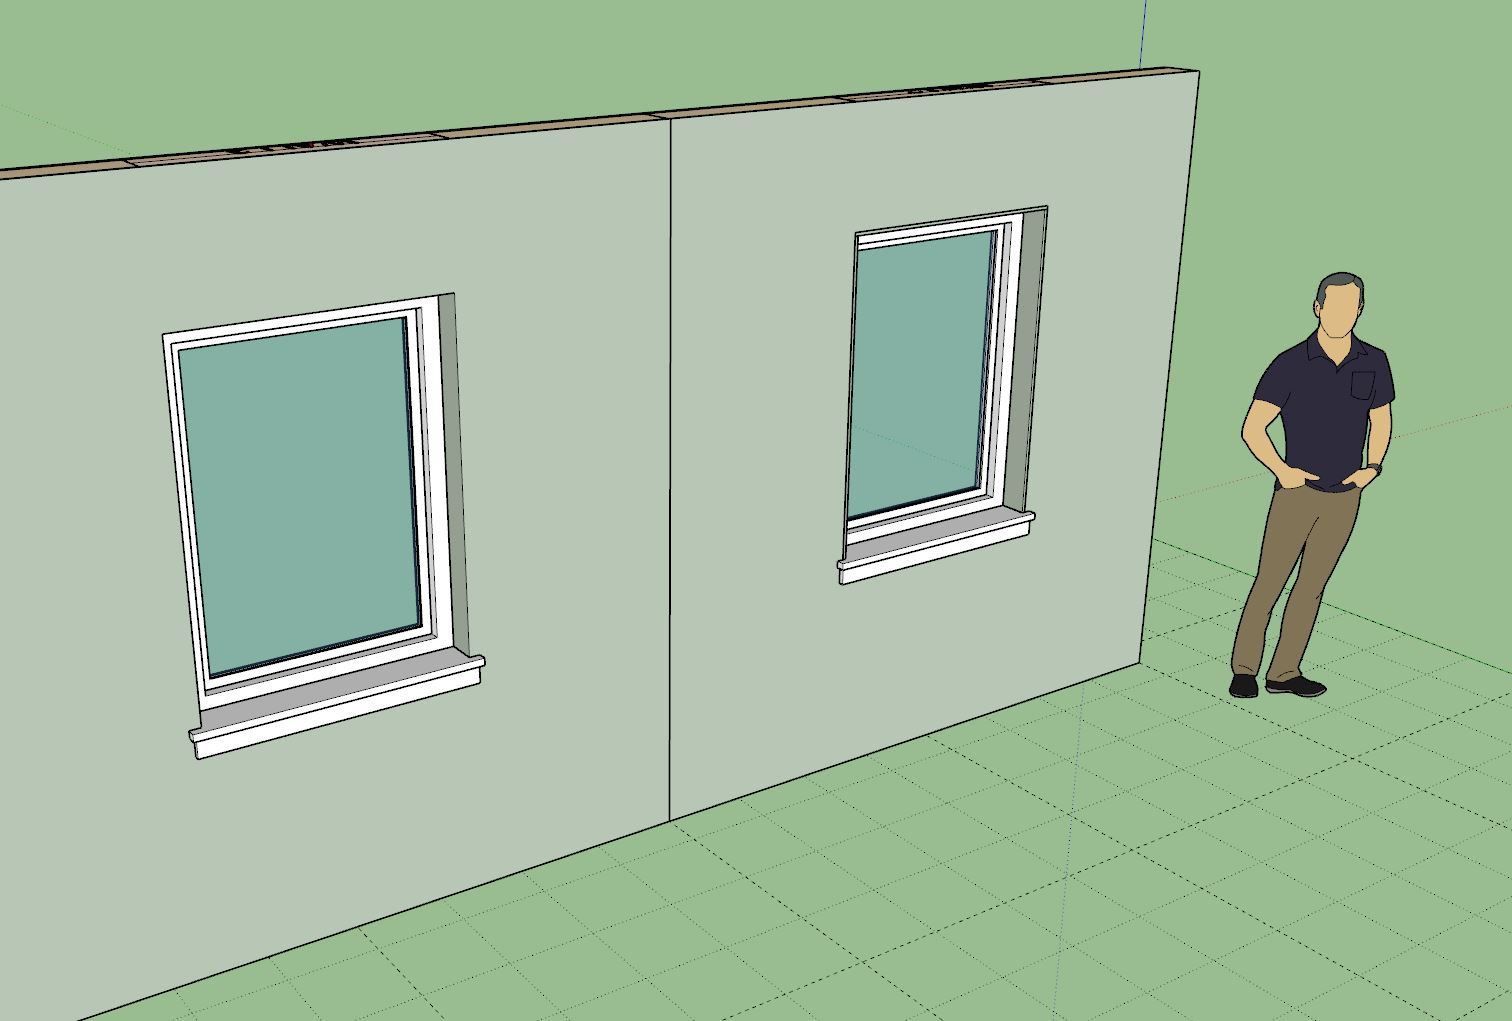
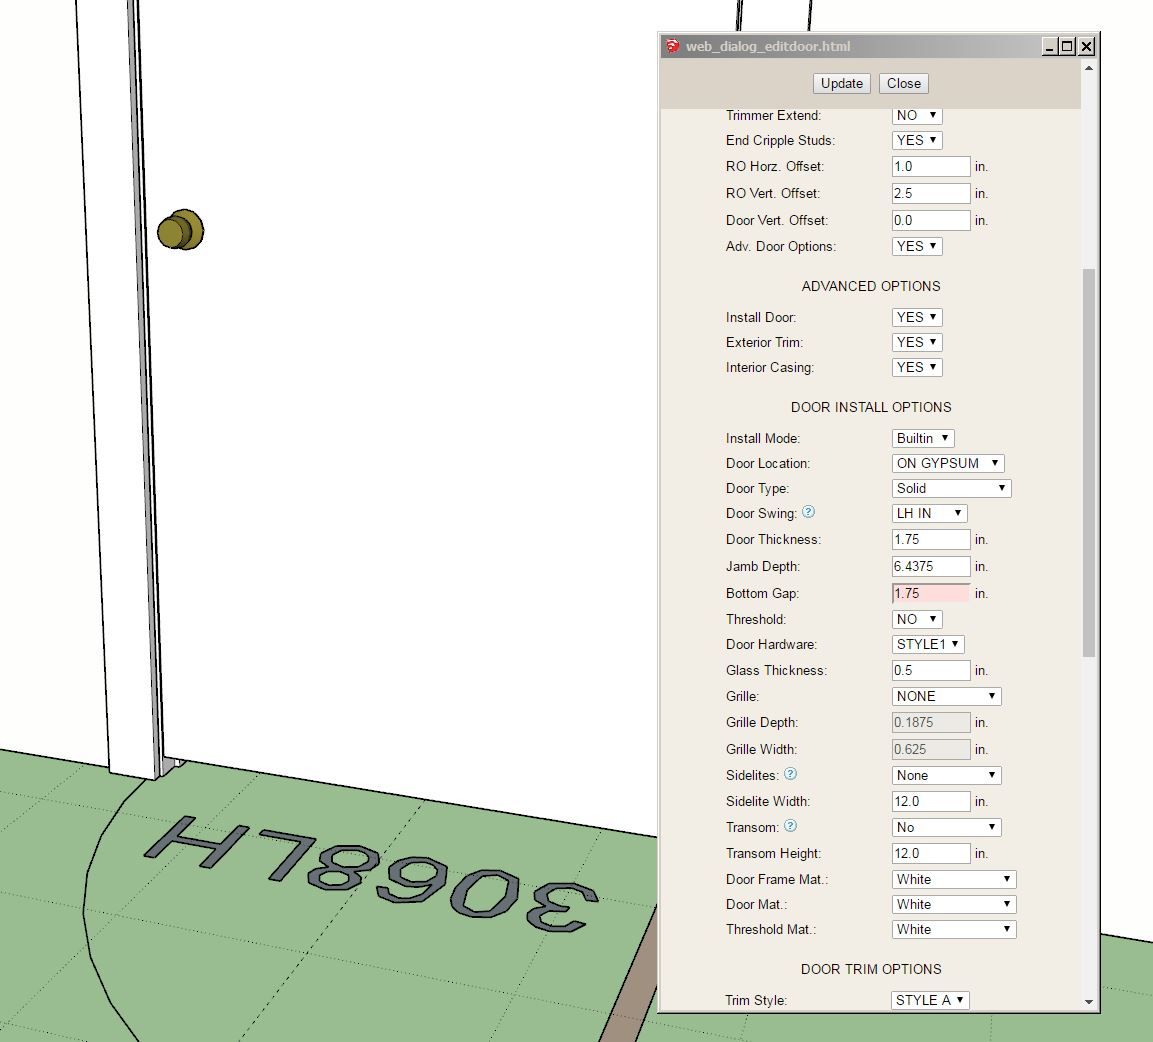
Note the difference between the two windows below:
I've been giving the feedback I received thus far on the new opening tool some serious thought and after further testing I can see that adjusting the header extensions to reach out and grab the correct joist is probably the biggest bottle neck in the process, if you can call it that.
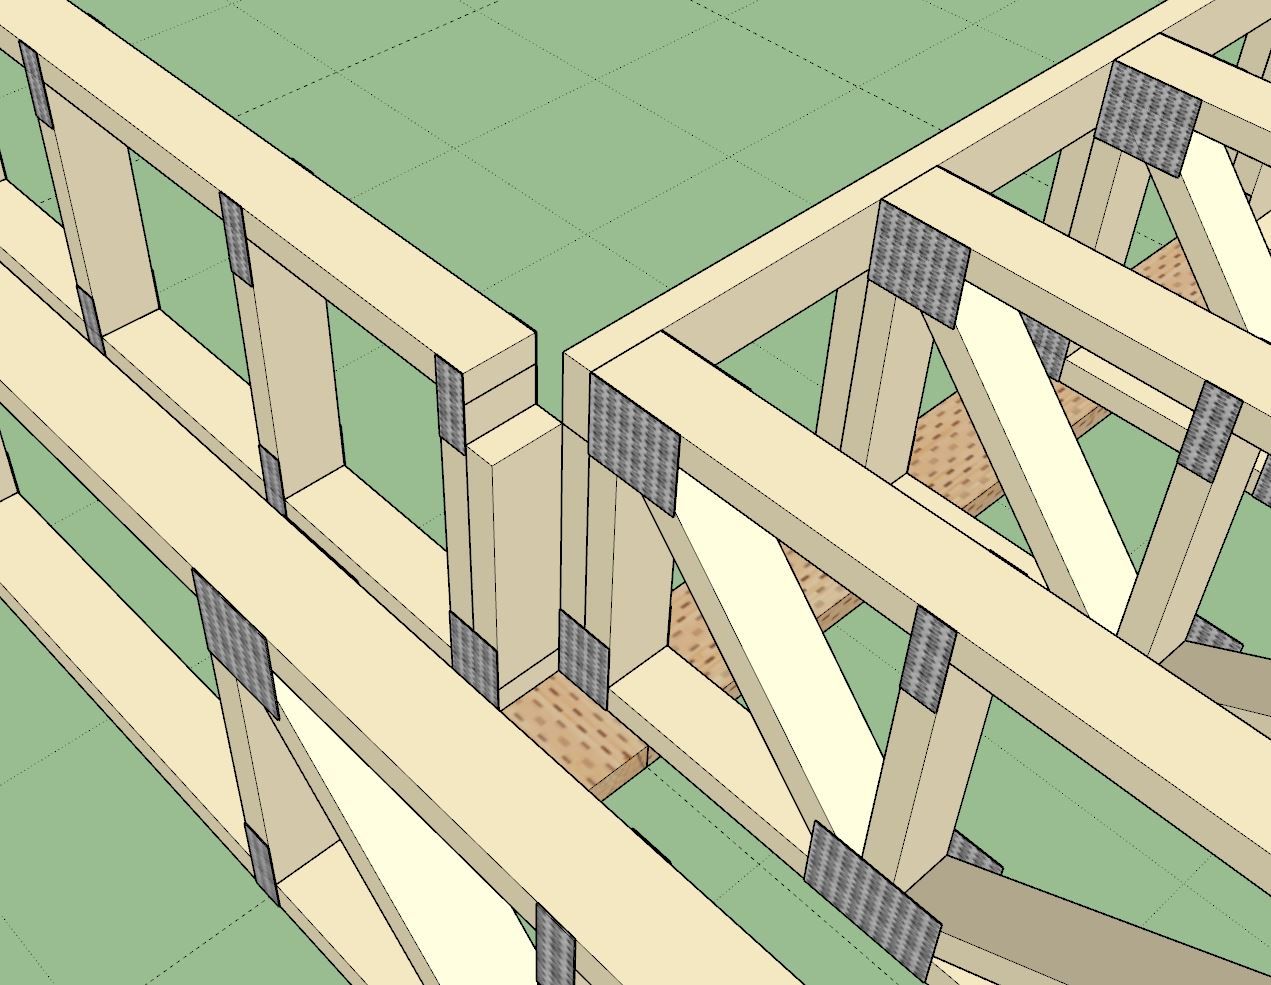
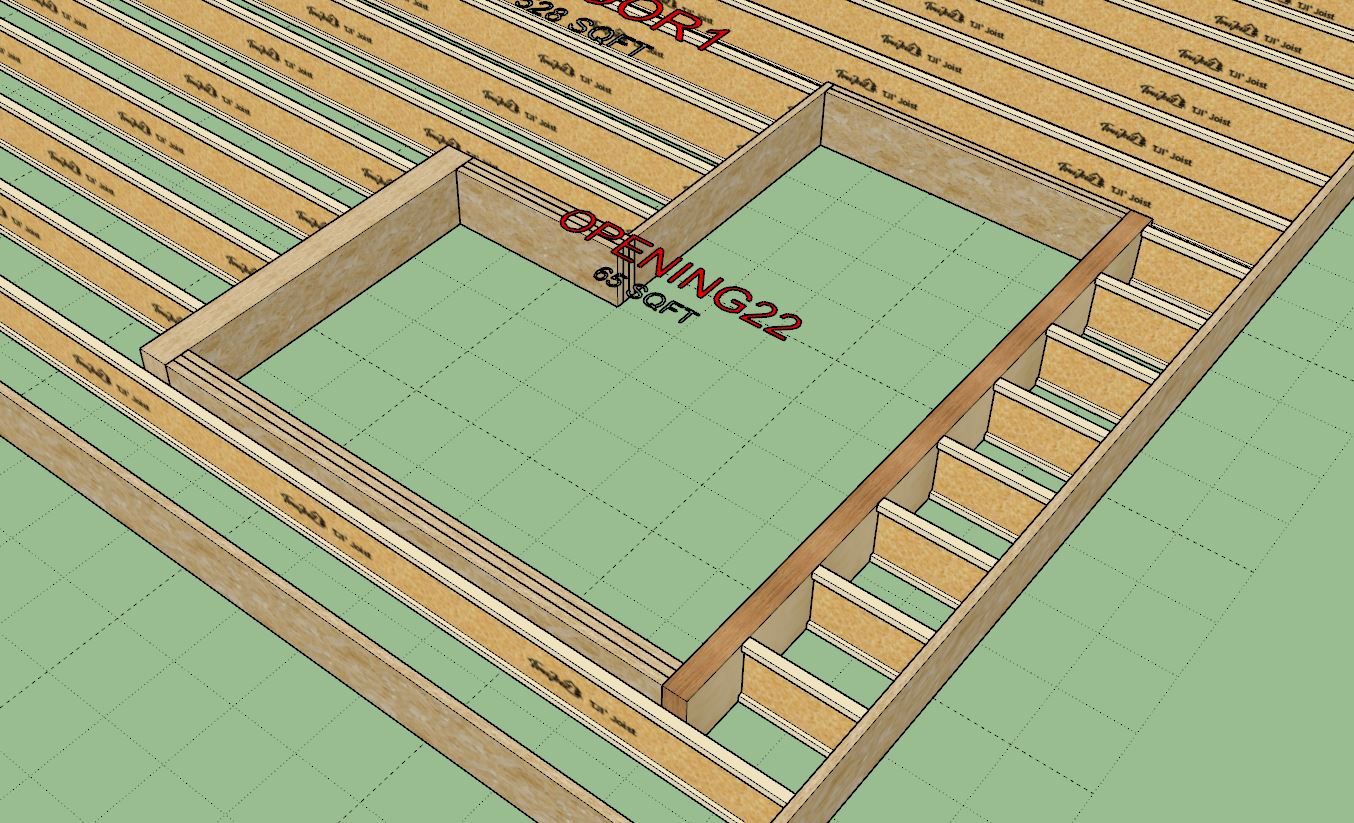
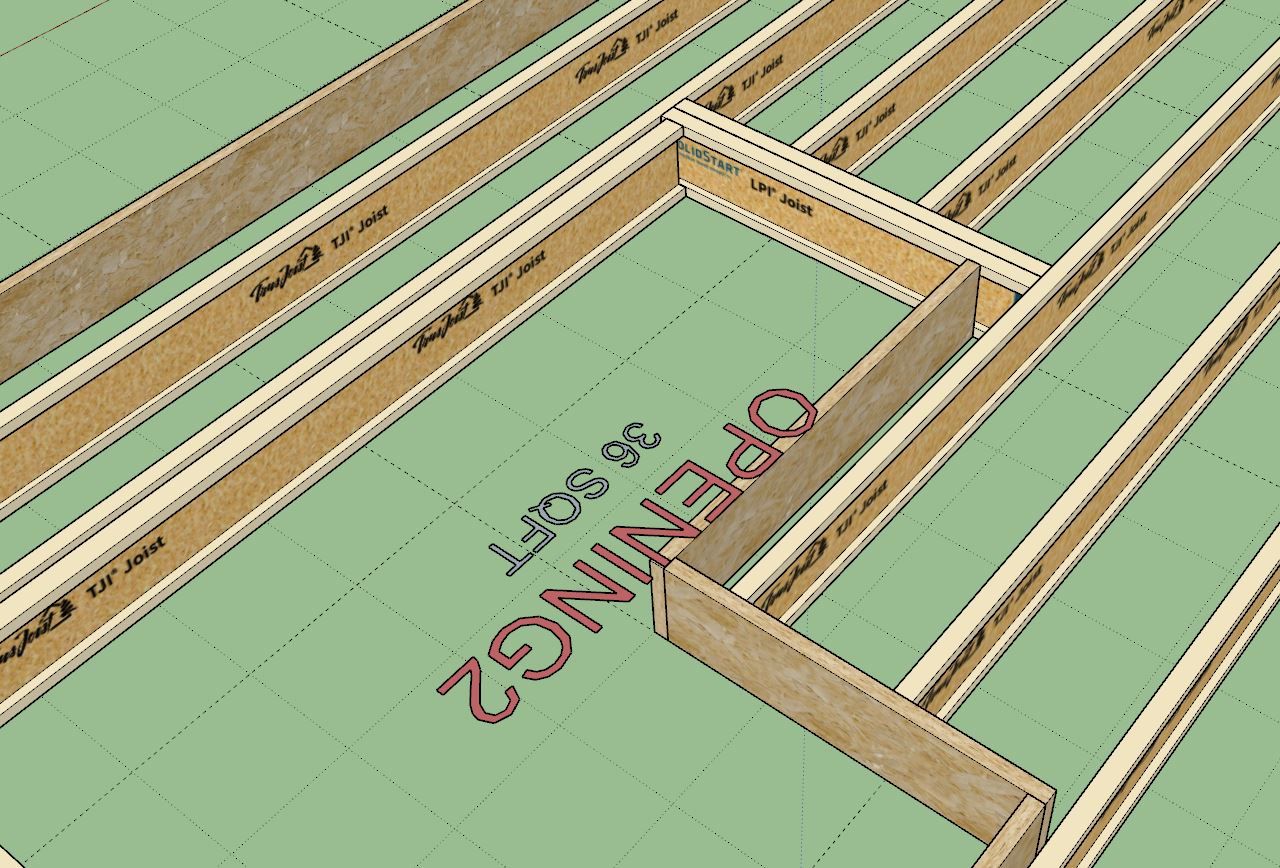
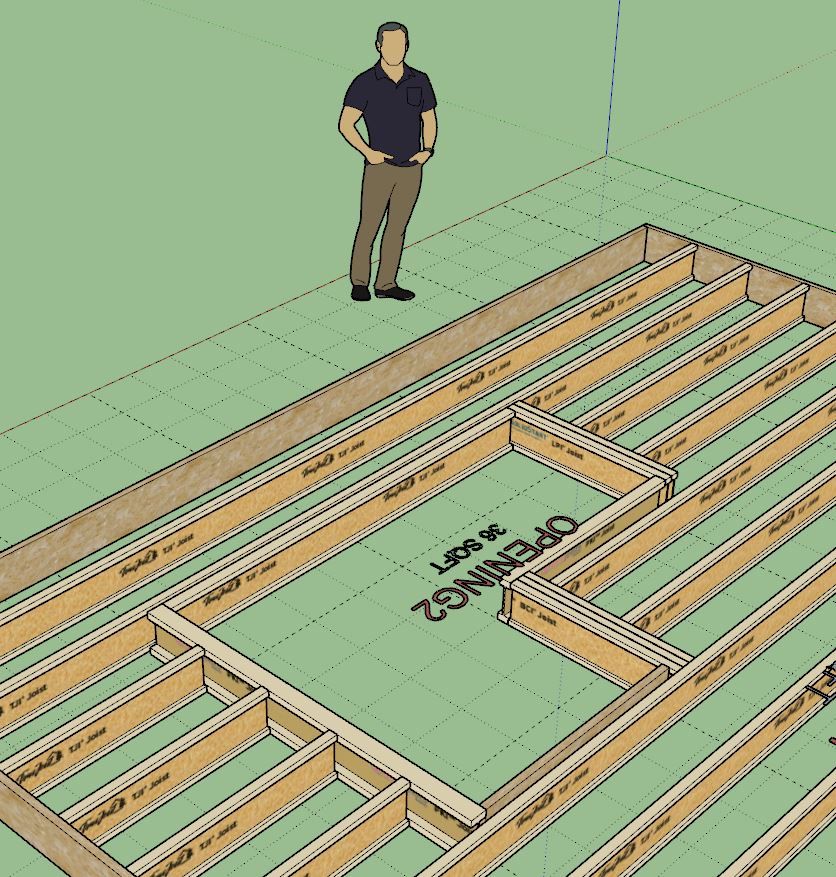
Below is an example of a six sided L-shaped opening in a floor. It has three headers and three "trimmers". Note that headers run perpendicular to the joists however the opening tool really makes no distinction between headers and trimmers, they all have the same ten parameters.
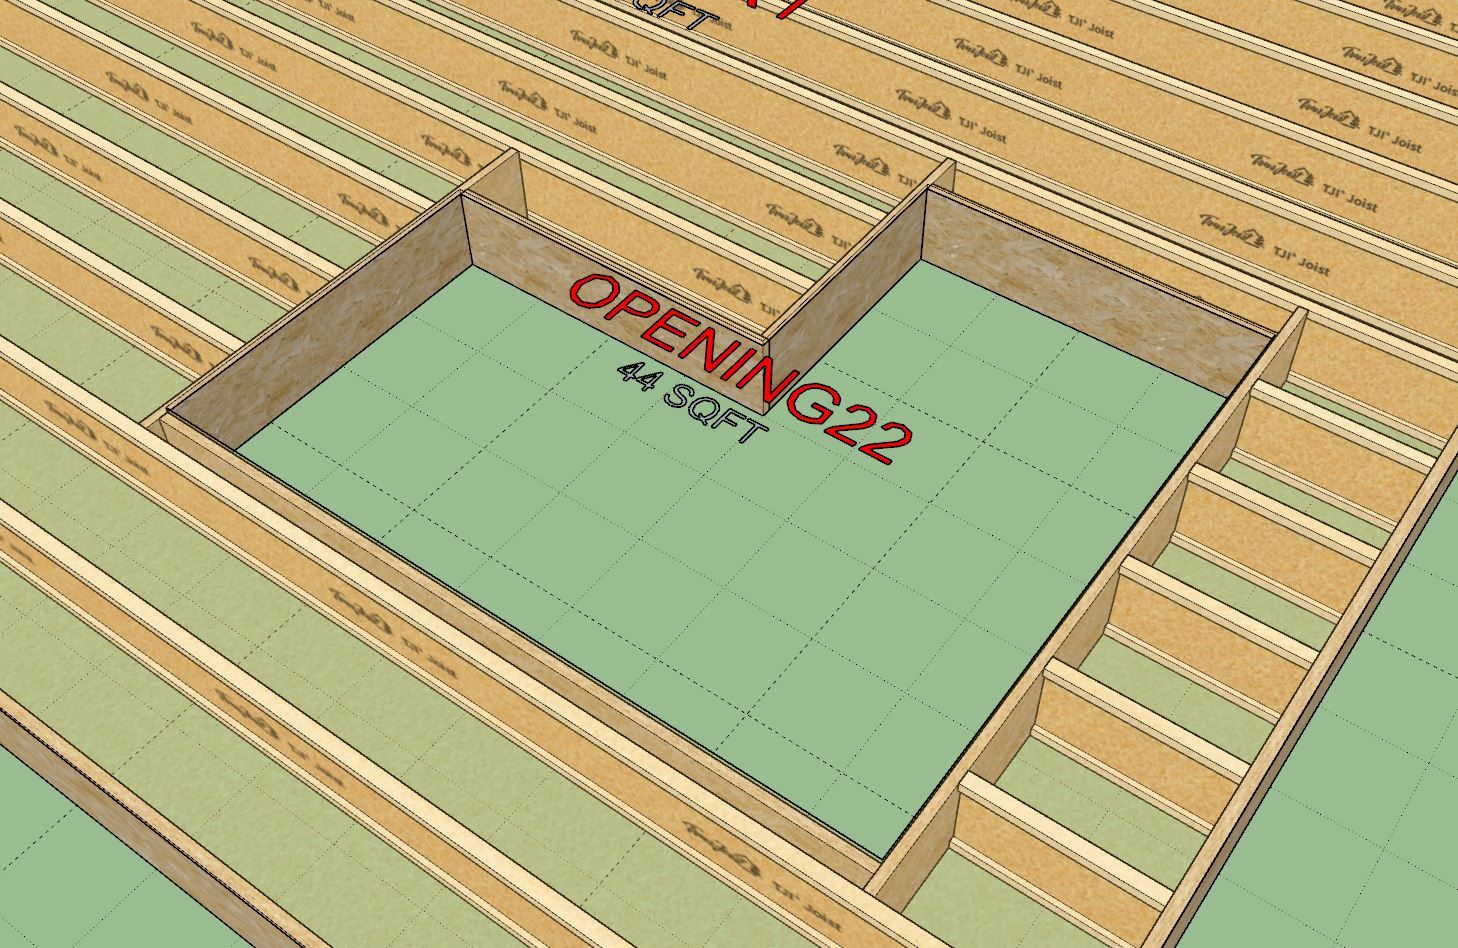
I had to make five entries to adjust the headers to meet the I-Joists as shown. Really not that difficult but somewhat time consuming and tedious in my opinion. The solution to this problem could be to have the plugin somehow detect the nearest joist and auto-extend to it. However, I feel that such an algorithm would be overly complicated and probably not very robust.
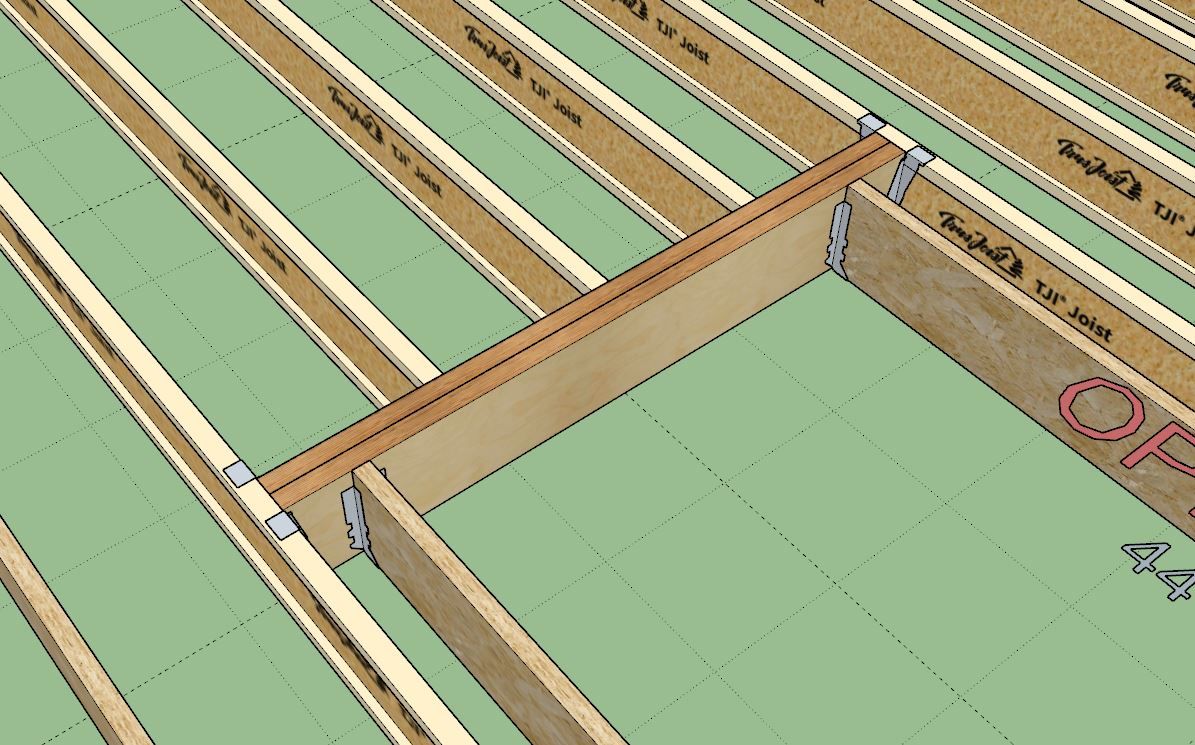
The other option would be to create a "Header Stretch" tool that allow the user to simply mouse over the header, select one end or the other and then stretch it to the desired location. This tool would be very similar to the "Wall Stretch" tool that is part of the Wall plugin. Rather than navigating through the labyrinth of menus one could simply adjust each end with only three mouse clicks.
Again, I have my work cut out for me.
I've also realized that it is not readily apparent to the user which header is which. I may need to incorporate some sort of labeling option that will assist with this.
Version 1.0.2 - 05.22.2025
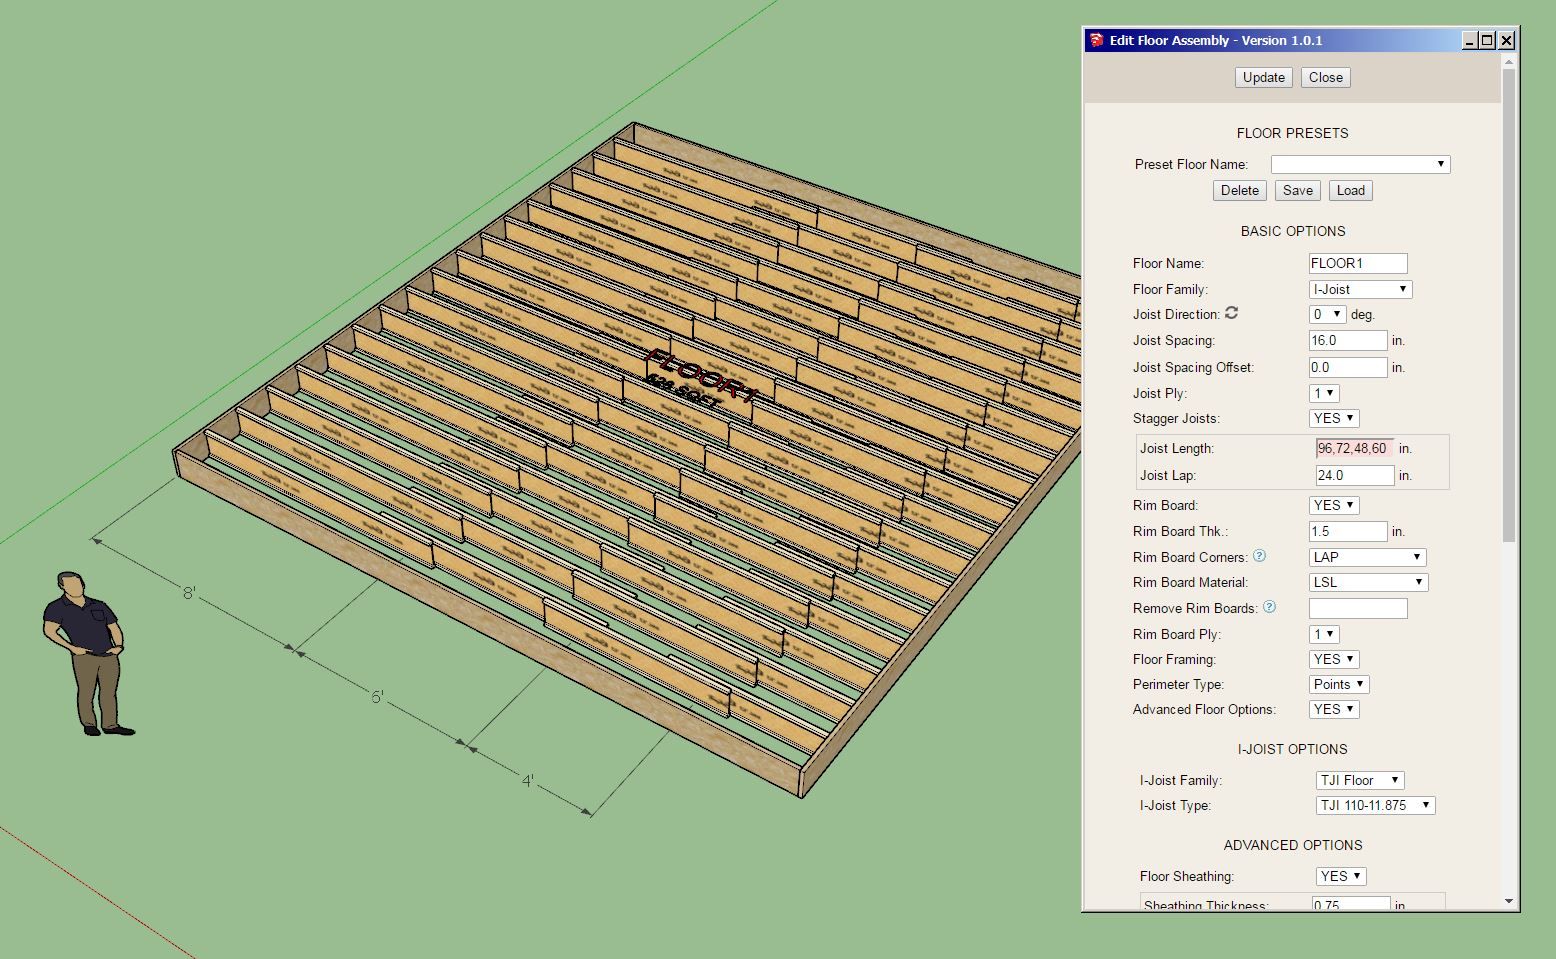
You can now enter in a single value for the joist length or you can enter in a list of lengths deliminated by commas. This update per user request.
Version 1.0.2b - 05.23.2025
-Updated the joist removal function for more granular usage when working with staggered joists.
I apologize for all of these micro updates, I would have preferred to roll this out after adding a few more features etc... However, the user who requested this specific ability obviously needs it to complete their project so it is simply a matter of expediency.
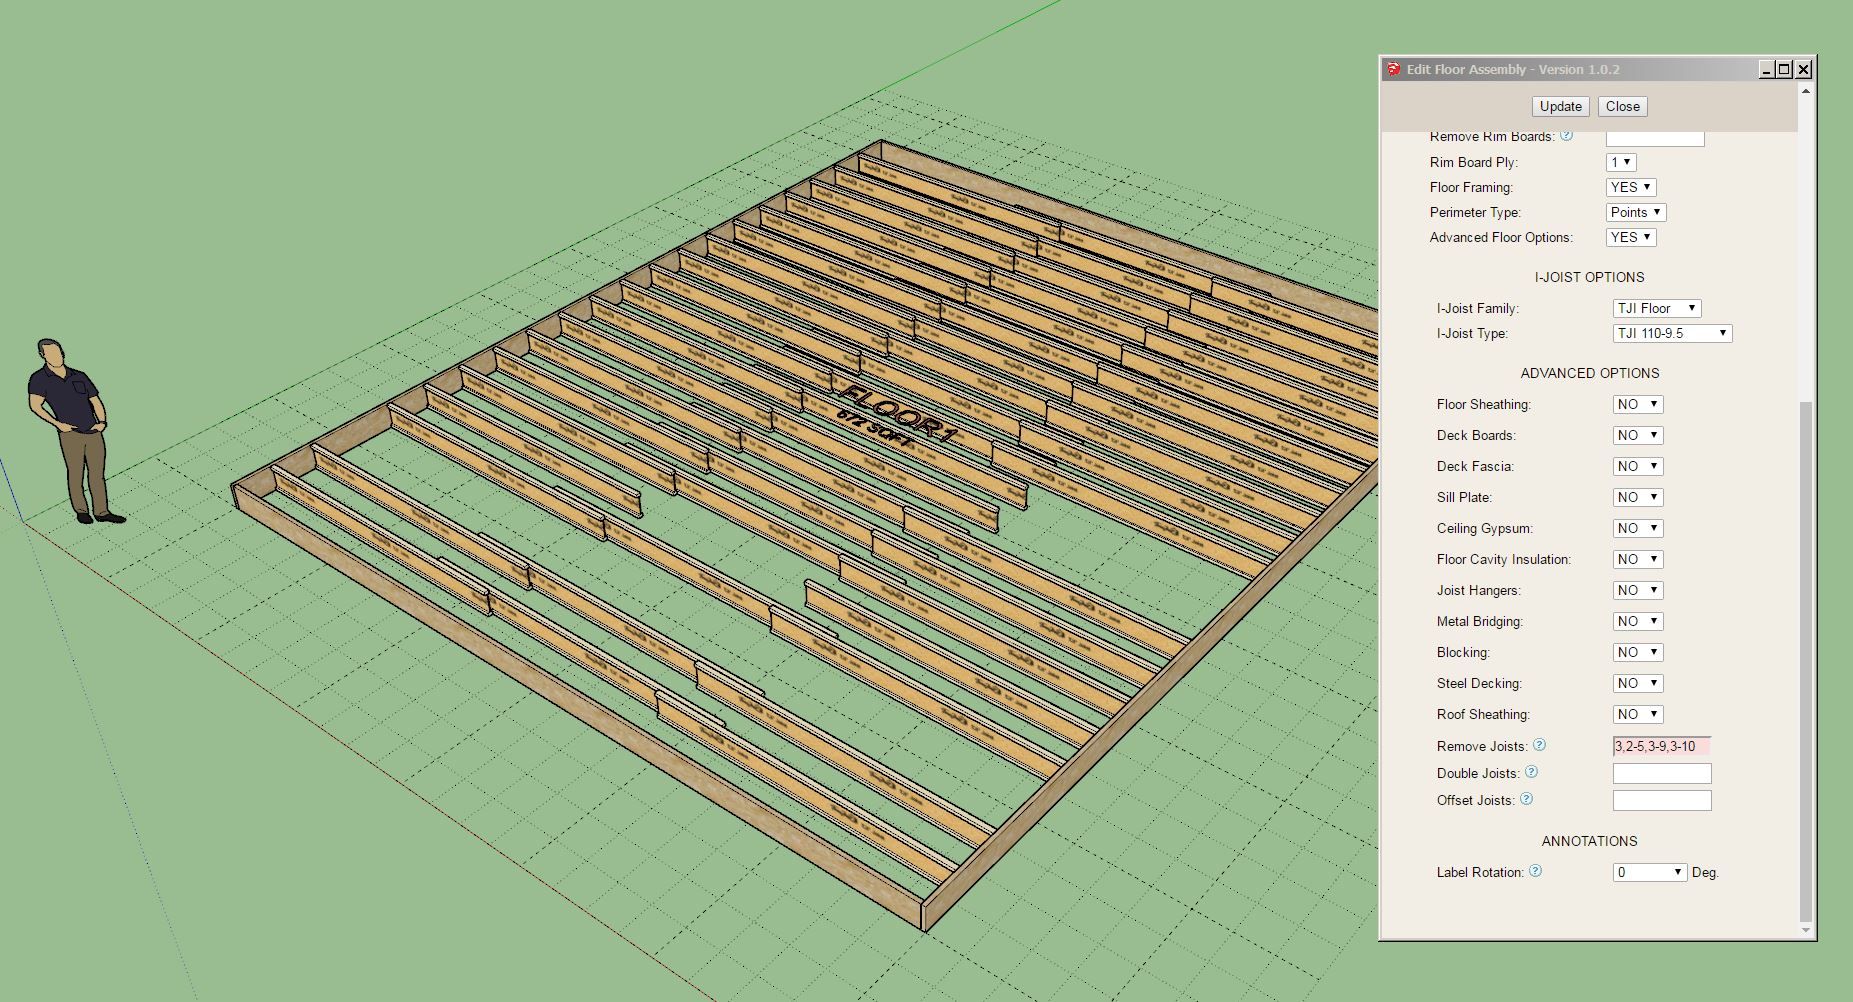
Now one can not only specify a single line of joists to remove but also remove specific joists from a given line, see screenshot above and note the syntax in the Remove Joists field.
Version 1.0.3 - 05.25.2025
Version 1.0.4 - 05.26.2025
Tutorial 24 - Joist Hangers and Openings (7:58 min.)
Version 4.0.0b - 05.28.2025
Version 4.0.1 - 05.29.2025
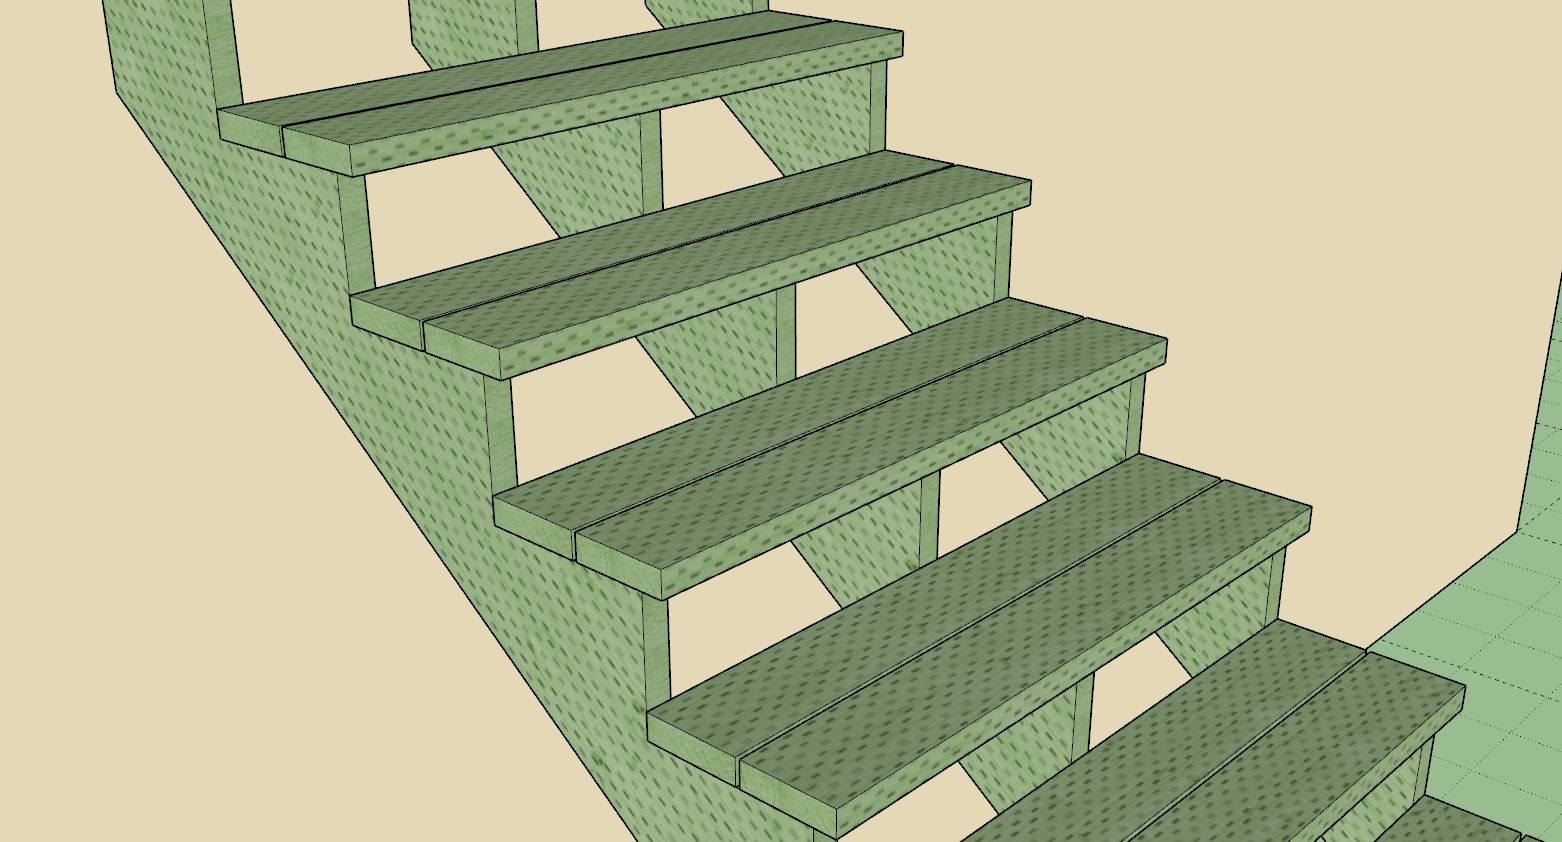
Tutorial 71 - Layers/Tags for Stairs (4:02 min.)
Version 1.0.5 - 05.30.2025
Tutorial 25 - Stretching Opening Headers (7:50 min.)
Version 4.0.2 - 06.01.2025
Version 1.5.2 - 06.02.2025

This update per customer request.
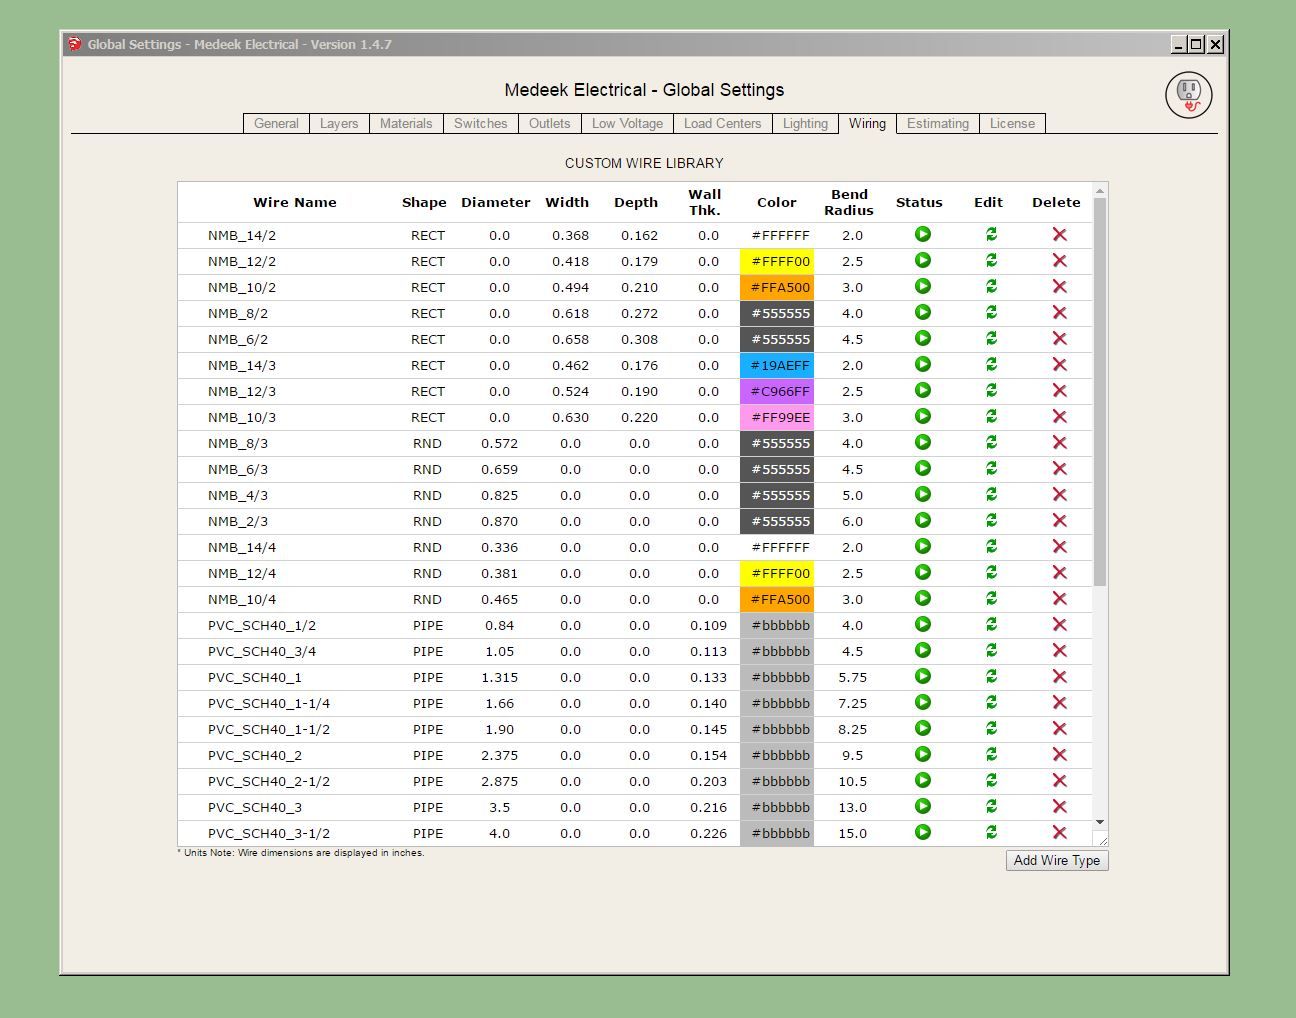
Wire sizes per the Southwire (Romex) documentation:
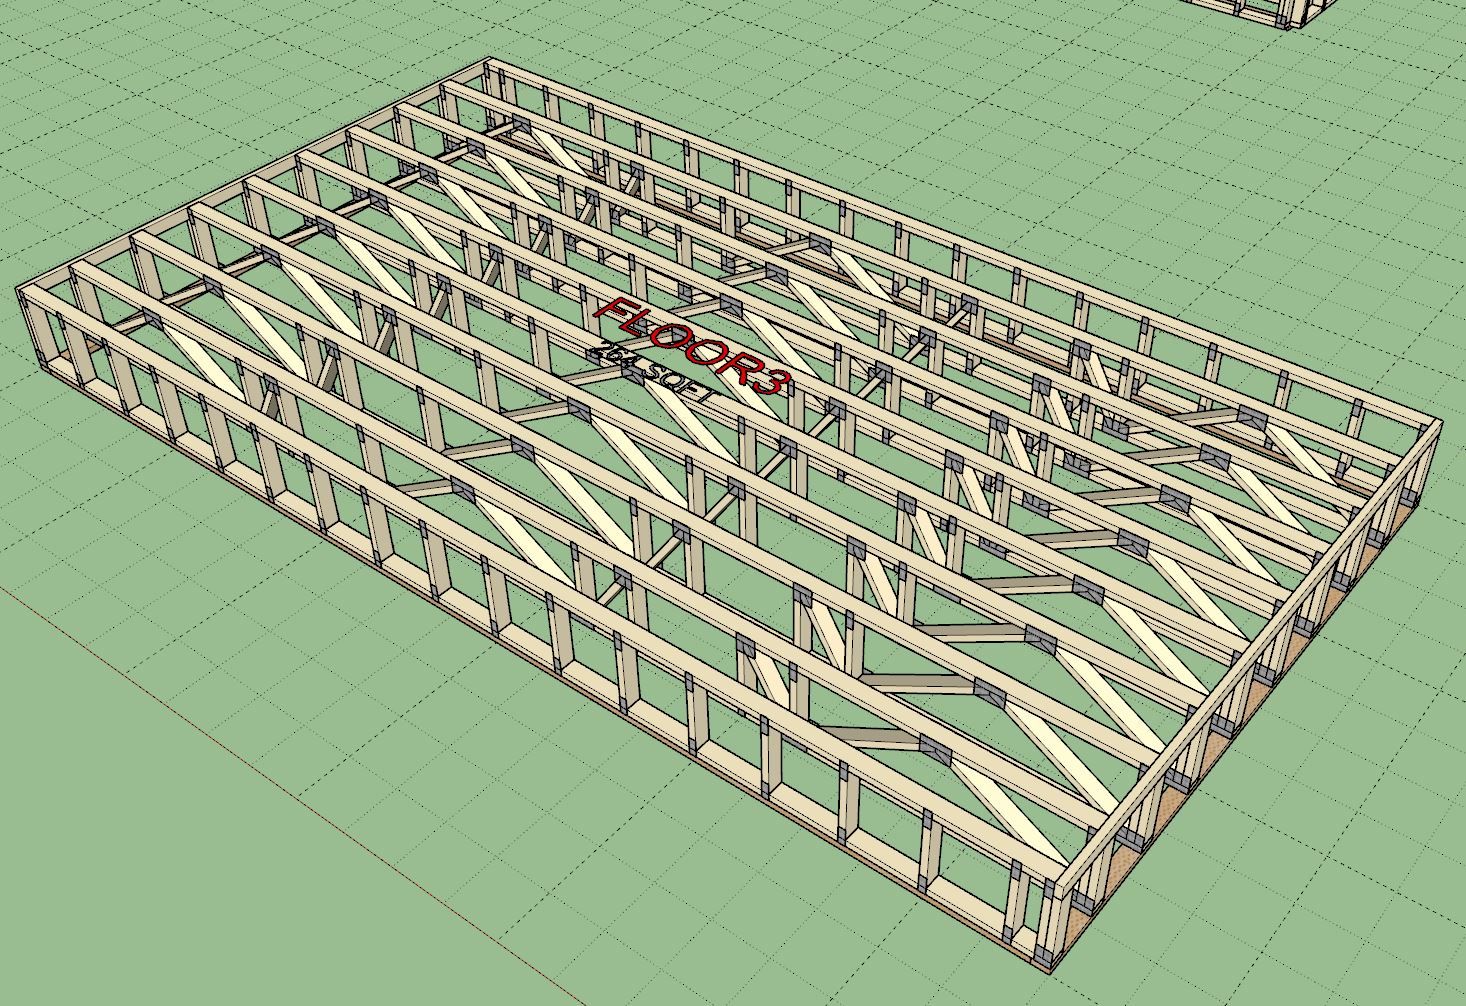
After a full day of tinkering and refactoring a bunch of the original floor truss code I think I now have the multi-chase algorithm working:
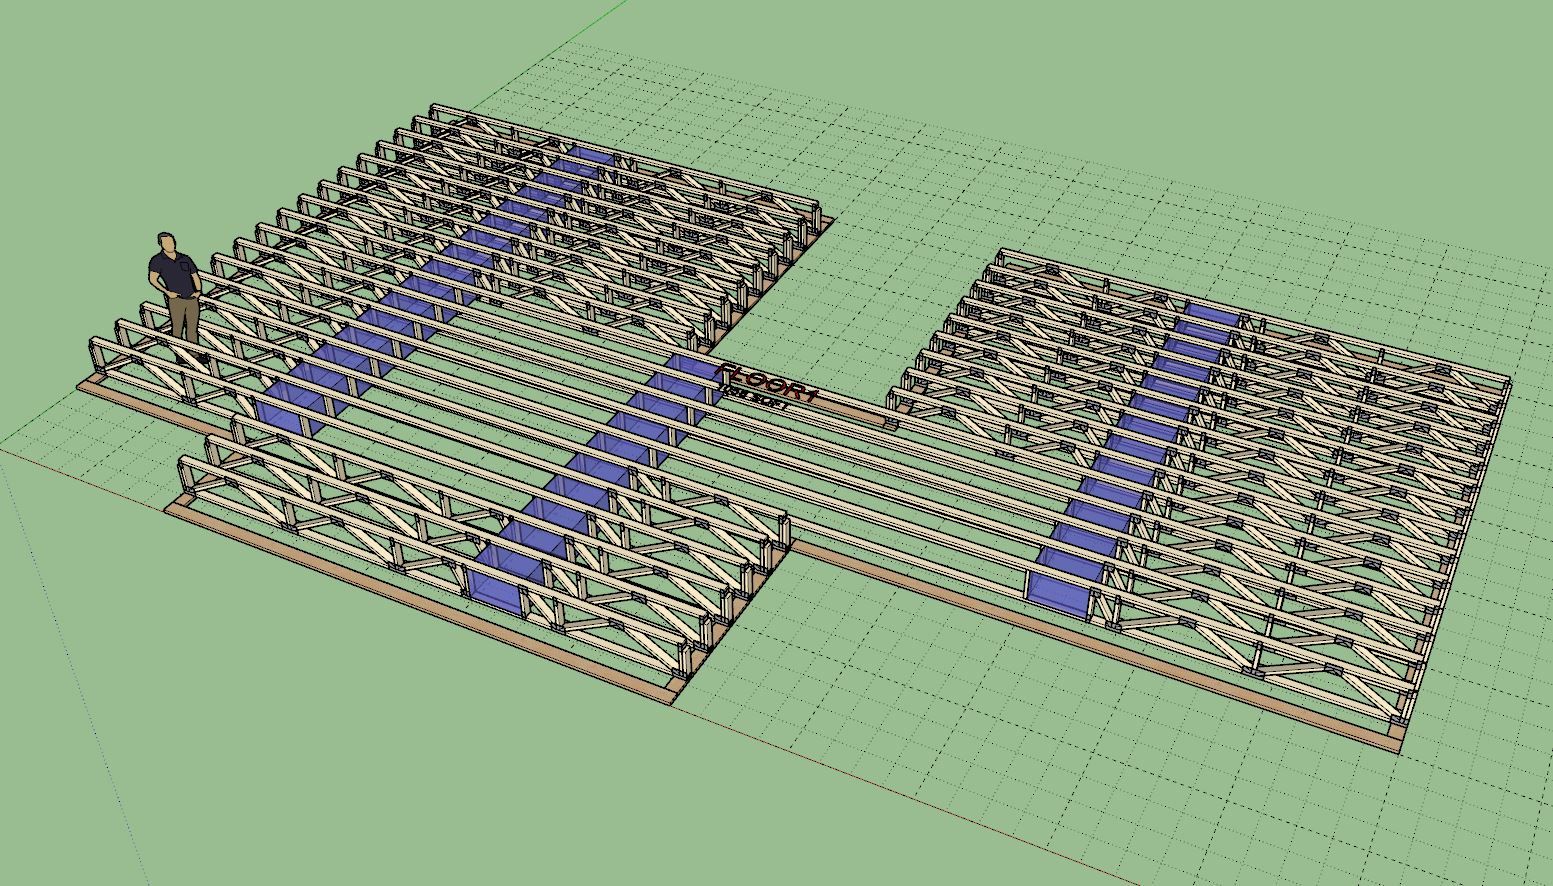
Note how the chases all line up even though there are five or six different truss profiles within this assembly. I still need to create the web generator between the central sections of the truss profile, there is quite a bit going on here. I am still a few days out from completing the programming and then another two or three days of testing and further debugging.
Looks like I’m about 95% there with floor trusses:
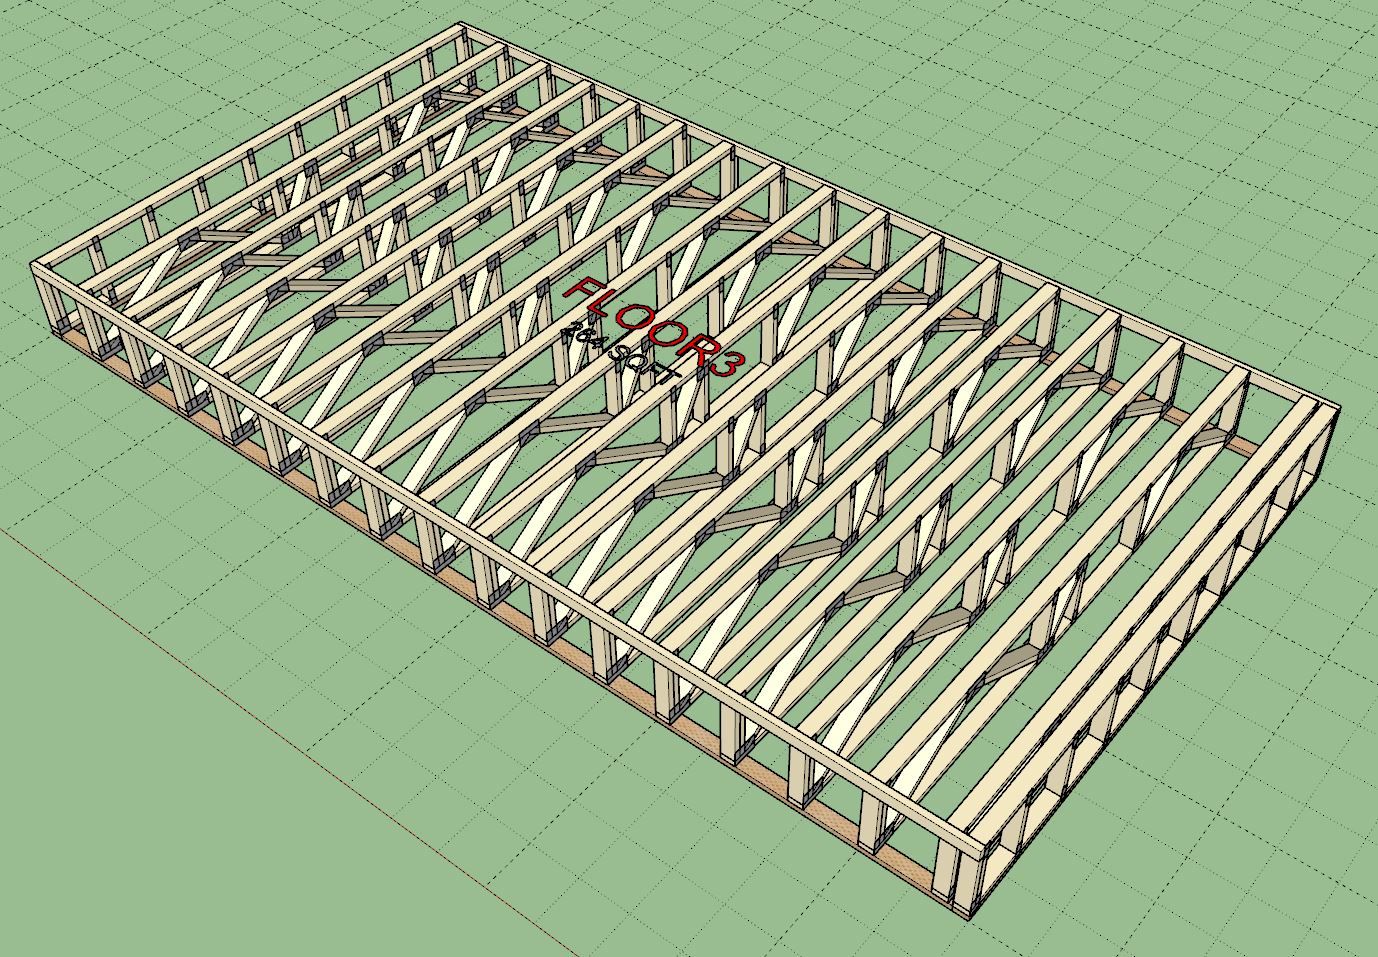
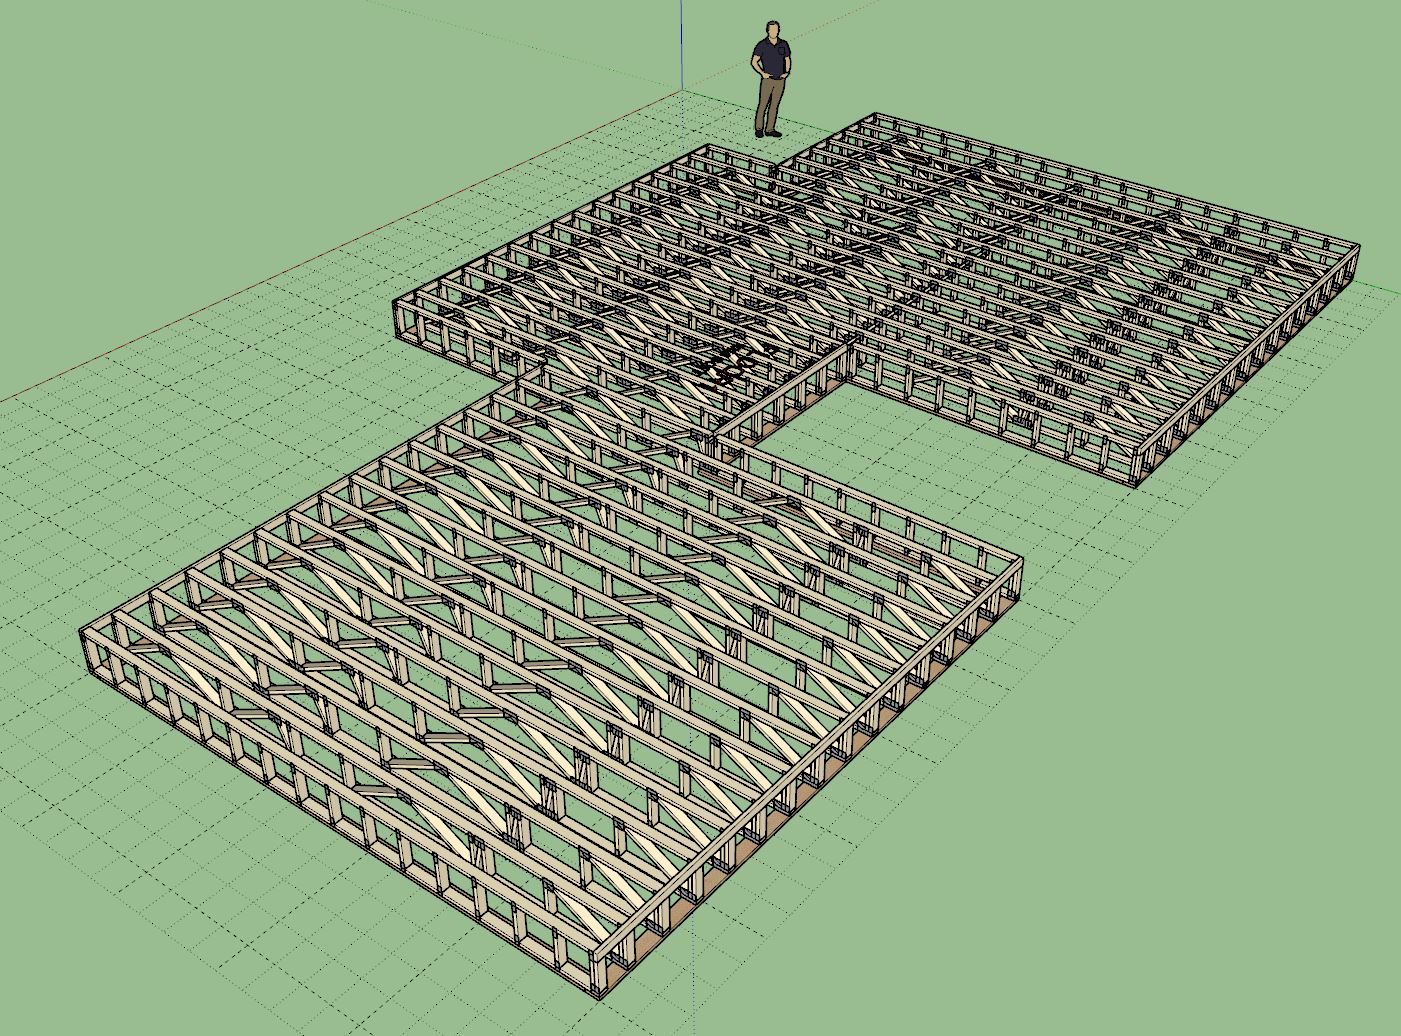
The only issue appears to be what happens when ribbon boards are enabled and you have an inside corner as shown. I probably need to add in some additional logic to eliminate the slot for the ribbon board in these cases.