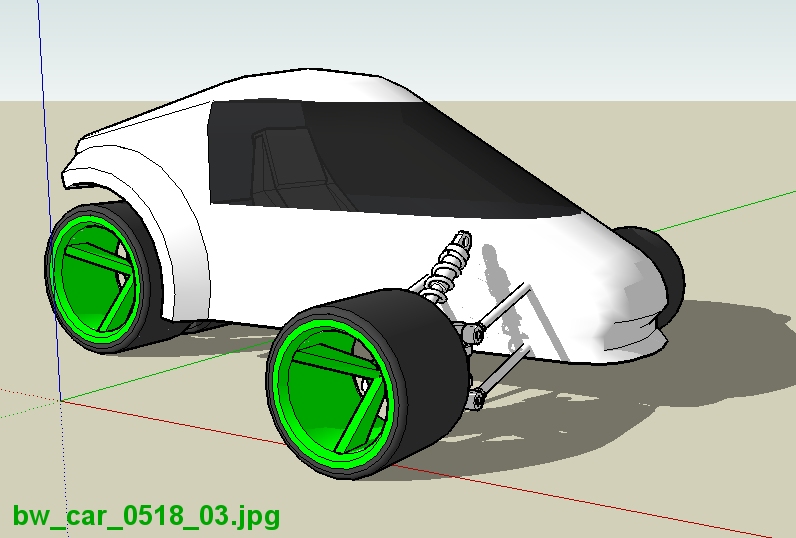
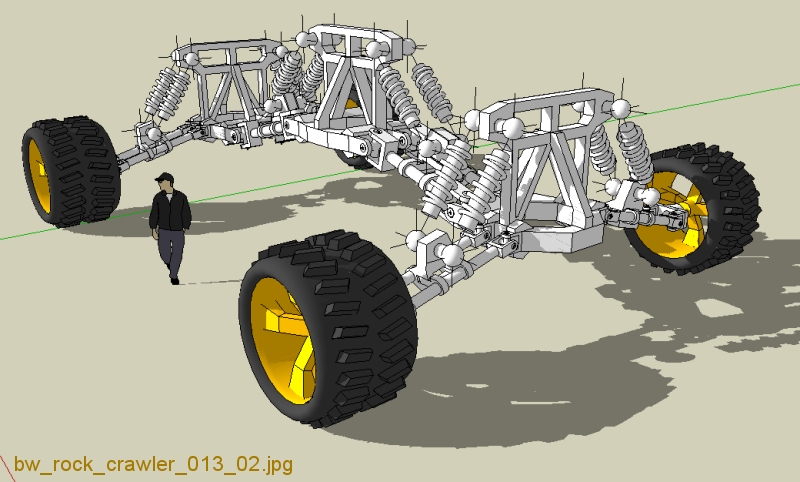
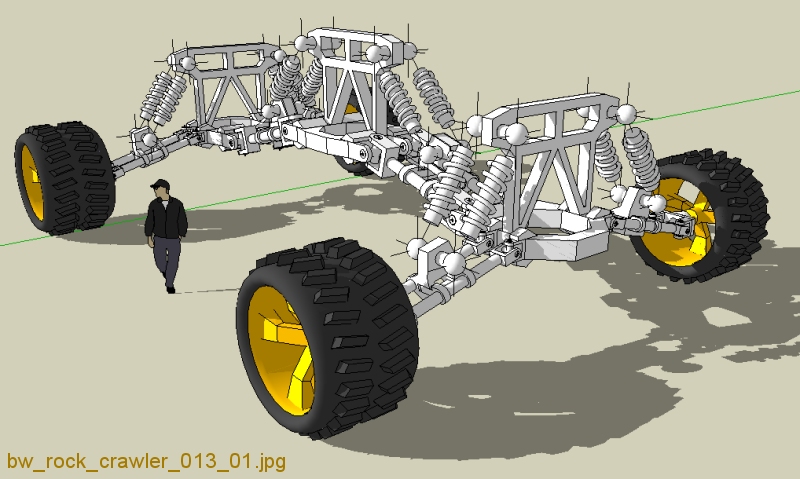
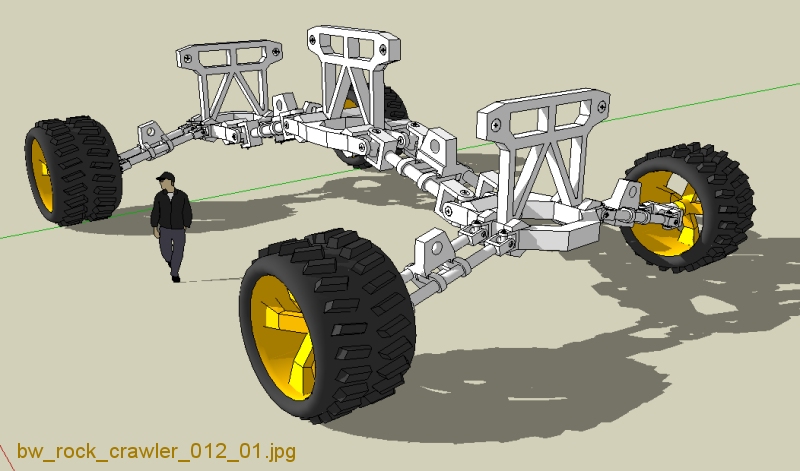
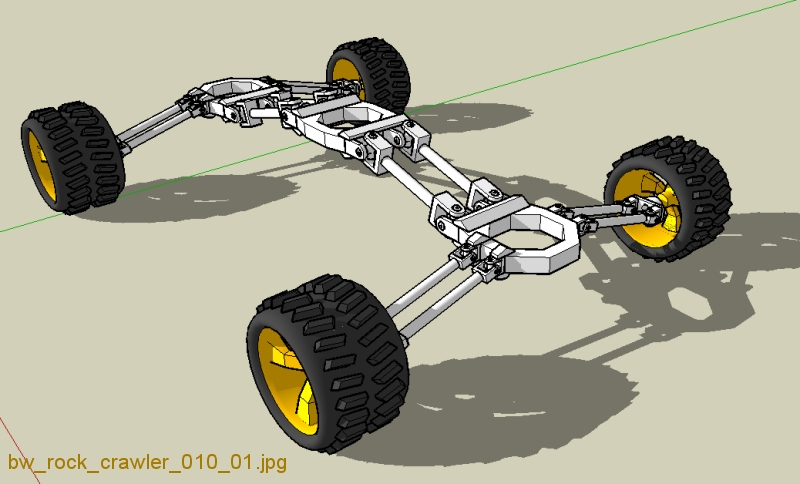
sketchucation logo sketchucation
    • Login
    1. Home
    2. GreenToaster
    3. Posts
    Oops, your profile's looking a bit empty! To help us tailor your experience, please fill in key details like your SketchUp version, skill level, operating system, and more. Update and save your info on your profile page today!
    ⚠️ Important | Libfredo 15.6b introduces important bugfixes for Fredo's Extensions Update
    G
    Offline
    • Profile
    • Following 0
    • Followers 0
    • Topics 27
    • Posts 635
    • Groups 1

    Posts

    Recent Best Controversial
    • RE: Green Toaster's Car Sketches

      @unknownuser said:

      anyway how u gonna turn the weels i didnt see any axel there?
      There are two methods which can either work together or separately:

      [1] - pivot arms, which pivot the drive wheels a total of ~30 degrees

      [2] - drive wheels, which can operate much like a tractor (right side spin in reverse, left side spins forward - this combination makes the crawler turn right - all computer controlled)

      I'll set up the crawler and post some illustrations with the pivot range maxed out - what do they say, a picture is worth 999 words?

      posted in Gallery
      G
      GreenToaster
    • RE: Green Toaster's Car Sketches

      @unknownuser said:

      Also, there's potential for electric cars to have the motors in the hubs.
      Volvo has one like that - this certainly wasn't an original idea. Perhaps other transportation manufacturers use the same drivetrain principle?

      I'm calculating ~15 degrees of front-to-back swing coupled with ~15 degrees of left-to-right side swing - add with this the ~22 degree range of up & down at each pivot center to end pod and also end pod to wheel = ~44 potential up/down swing at each end - thus the ball joints for the shocks. I had to use "slider" mounts on the swing arms to compensate for the parallel arms that will twist and change distance from each other. All movement of wheels is computer controlled, of course.

      Purpose: Remote search & rescue / search & destroy
      Range: 2 hours of operation w/diesel engines, 30 minutes on battery only (for stealth op's)
      Pods: 4 pods, each with video & 2 .50 cal machine guns (easily configurable w/variety of weapons)
      Speed: 72 kmh top speed, flat surface
      Est. delivery cost: ~$4.7M

      posted in Gallery
      G
      GreenToaster
    • RE: Green Toaster's Car Sketches

      . . . I used to teach the class "Large Assembly Management" for PTC - that's coming in pretty handy for this project - same techniques, better software, ya know?

      Here, I'm finishing the shock towers . . . plus, the shocks are now no longer "mirrored" . . . and finally, I spun them around to hide the spring transitions that I'm going to fix later . . . I'll also will create some variable compression rate springs . . . I haven't figured out the cost estimate for this thing yet . . . (yawn) . . . I'm sleepy . . .


      bw_rock_crawler_013_02.jpg

      posted in Gallery
      G
      GreenToaster
    • RE: Green Toaster's Car Sketches

      . . . more blah, blah, blah . . .


      bw_rock_crawler_013_01.jpg

      posted in Gallery
      G
      GreenToaster
    • RE: Green Toaster's Car Sketches

      . . . blah, blah, blah . . .


      bw_rock_crawler_012_02.jpg

      posted in Gallery
      G
      GreenToaster
    • RE: Green Toaster's Car Sketches

      . . . okay, well back to the crawler . . . almost ready for shocks . . .

      . . . I was planning on using a turbo diesel to generator to four dc brushless motors - one at each wheel . . .


      bw_rock_crawler_012_01.jpg

      posted in Gallery
      G
      GreenToaster
    • RE: Green Toaster's Car Sketches

      . . . Okay, Durant, this one was inspired by your remarks . . . I call it "Rock Crawler II" . . . it's got a long way to go . . . but the journey has begun . . .


      bw_rock_crawler_010_01.jpg

      posted in Gallery
      G
      GreenToaster
    • RE: Green Toaster's Car Sketches

      . . . added a few more details . . . the panel editing is super-easy-fast . . . using scale in either direction, I select sections, or sub-sections & blah, blah, blah . . . (as with the tutorial I posted a day or so ago) . . .

      Happy Sketching,

      Brad
      πŸ˜„


      bw_car_0524_01.jpg


      bw_car_0524_02.jpg


      bw_car_0524_03.jpg

      posted in Gallery
      G
      GreenToaster
    • RE: Green Toaster's Car Sketches

      @unknownuser said:

      It's got four wheels.
      True (ha), but three axles.

      It's probably just me, but I find it challenging to model cars well - very fun, and I think I'm making a little progress (compared to the first posts I did here). I am much more confident in being able to create what I want - sketch out on paper, then model it.

      As I've said before, some folks can play the violin well in six weeks - for some, it takes a couple of years of practice to achieve the same level. I guess it's not important how slow I am at learning this stuff - I keep going and improving little by little - that's significant to me.

      If any of you haven't checked out the modeling videos and tutorials, there are some really good ones out there - YouTube, and several others, which I believe might be very helpful.

      Happy Sketching,

      Brad
      πŸ˜„

      posted in Gallery
      G
      GreenToaster
    • RE: Green Toaster's Car Sketches

      @unknownuser said:

      you could jsut scale the whole thing to extend the wheelbase a bit...
      Thanks for the suggestion - I built in a gap so it'd be silly easy to stretch it one way or the other . . . when working in Parallel Projection (side, top, whatever) you can select with precision quickly & easily, do the drag-n-drop, then it's done.

      I've tried stretching large sections and get frustrated with oval or elliptical shapes inside the wheel wells . . . I've even made boo-boo's and ended up with oval tires & wheels - can you imagine riding in a car had oval tires? Bumpy, for sure.

      Happy Sketching,

      Brad

      posted in Gallery
      G
      GreenToaster
    • RE: Green Toaster's Car Sketches

      I think I shortened the wheelbase a bit too much . . . I also need to rip out the windshield and add something smoother, no biggie . . . I think I'll take this one a bit further and add some details like mirrors, vents, lights, interior, the lines for doors, hood, et cetera, b/c I've never done that before and it should be a good learning experience.

      Happy Sketching,

      Brad
      πŸ˜„


      bw_car_0522_01.jpg

      posted in Gallery
      G
      GreenToaster
    • RE: [Tutorial > Modeling] Fast & Crude Front End Of A Car

      @unknownuser said:

      Then I remembered that I don't really have much interest in cars.
      LOL! C'mon, really? If that's true, I can't understand it - doesn't compute, but I bet you do really great architectural models &/or other equally cool stuff.

      @unknownuser said:

      The only different procedure I used was to use "follow me" to make the curve up into the hood. That way it already had faces. I found that to be quicker than angle move/copying and adding the faces. I also added some variety in colors so that even when things are smoothed out, I could see some details.
      Yes, great suggestion. Perhaps one advantage of the way I described would give the user freedom to vary the path in two directions instead of just one (like scaling the width sometimes, then scaling the height, for example). Also, I've had trouble getting the FollowMe tool to keep the original plane in it's original angle which can get messy after creating the sweep - this is most likely due to my lack of user understanding.

      posted in SketchUp Tutorials
      G
      GreenToaster
    • RE: Green Toaster's Car Sketches

      I started this one a few days ago . . . it used the technique in the tutorial I posted earlier . . . this isn't really a good example - very bland car but I couldn't resist taking just a few minutes to almost finish it . . . it's ready for a rear end, and detailing . . . I have some more ideas I've sketched up (on pencil & paper) . . . hopefully, I'll be able to model them accurately in the next few days using SketchUp . . . what else?

      Happy modeling,

      Brad
      πŸ˜„


      bw_car_0517_01.jpg

      posted in Gallery
      G
      GreenToaster
    • RE: Green Toaster's Car Sketches

      There's a crisis on the farm - I've gotta go do some work so no more cars for the rest of the week 😞 bummer!

      Here are a couple of sketches I started this morning . . . see ya'll next week.

      Happy Sketching,

      Brad
      πŸ˜„


      bw_front_end_tutorial_02.gif


      bw_car_0520_01.jpg

      posted in Gallery
      G
      GreenToaster
    • RE: Green Toaster's Car Sketches

      . . . thought I'd revisit the 3-wheeler . . . need shock mounts on the body and some front end fairing stuff, tail lights, exhaust, door lines, & so forth, but, it's gettin' there . . .


      bw_car_0518_01.jpg


      bw_car_0518_02.jpg


      bw_car_0518_03.jpg

      posted in Gallery
      G
      GreenToaster
    • RE: Green Toaster's Car Sketches

      I posted a quick tutorial in the tutorial section . . . my tutorial isn't very good, but it might inspire someone to do something really cool . . . hope so.

      Happy modeling,

      Brad
      πŸ˜„

      posted in Gallery
      G
      GreenToaster
    • [Tutorial > Modeling] Fast & Crude Front End Of A Car

      Hello,

      Hope this helps - this tutorial was very fast & assumes the user knows some basic functionality like how to copy w/mirror, how to rotate w/copy, how to use scale, blah, blah, blah.

      I realize this ends up with a very rough front end, but it might get someone excited about drawing stuff . . . like cars, maybe.

      Enjoy,

      Brad
      πŸ˜„


      bw_front_end_tutorial_01.gif

      posted in SketchUp Tutorials sketchup
      G
      GreenToaster
    • RE: Green Toaster's Car Sketches

      I'm creating a tutorial for this front end - I was almost done when I ran out of "undo".

      This front end literally takes 3 minutes, 4 with the scoop, & the tutorial might be useful for someone - it's super easy. The design is "flexible", meaning, if you set it up with layers, you can smush, stretch, pull, tug, rotate, move, et cetera, fairly easily for some decent "what if", on the fly design changes.

      BTW, does anyone know if there's a way to use the Drape tool without having to tilt the model vertical?

      Happy modeling,

      Brad
      πŸ˜„


      bw_car_515_01.jpg


      bw_car_515_02.jpg

      posted in Gallery
      G
      GreenToaster
    • RE: [Tutorial > Modeling] How To Create A Potato Chip

      . . . did anyone else make a chip and then . . . see a hat?


      bw_potato_chip_03.jpg

      posted in SketchUp Tutorials
      G
      GreenToaster
    • RE: [Tutorial > Modeling] How To Create A Potato Chip

      Nice Pete - thanks.

      posted in SketchUp Tutorials
      G
      GreenToaster
    • 1 / 1