3 more from a different project

The first is maxwell,the others are vray.
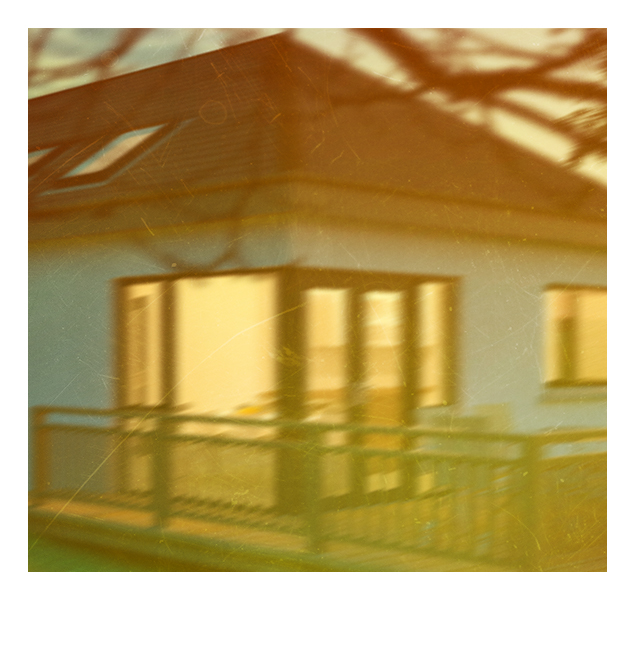
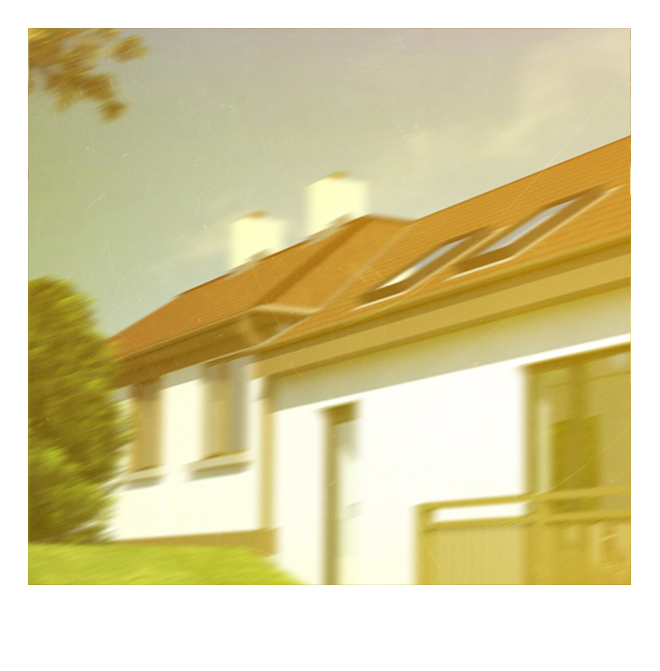
a couple of more "polaroids"(camera shake included!) based on 2 models previously uploaded.
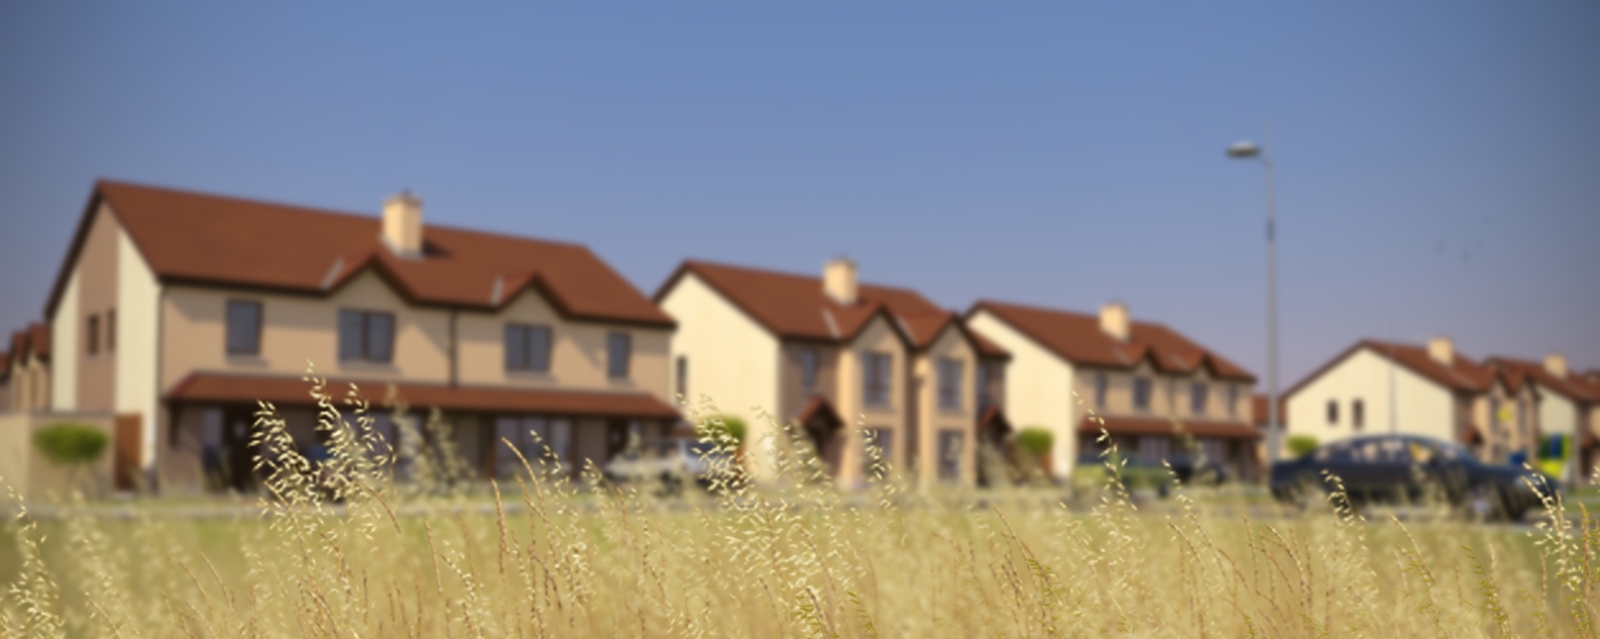
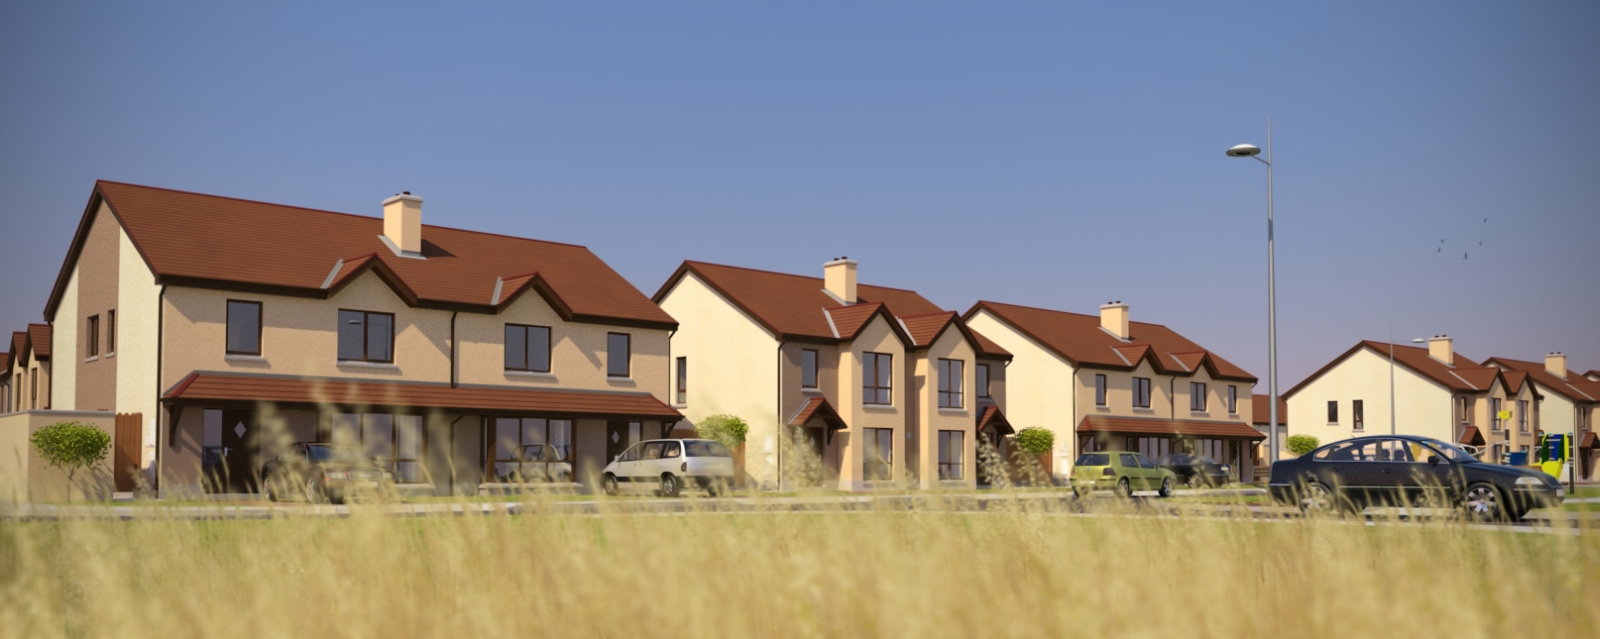
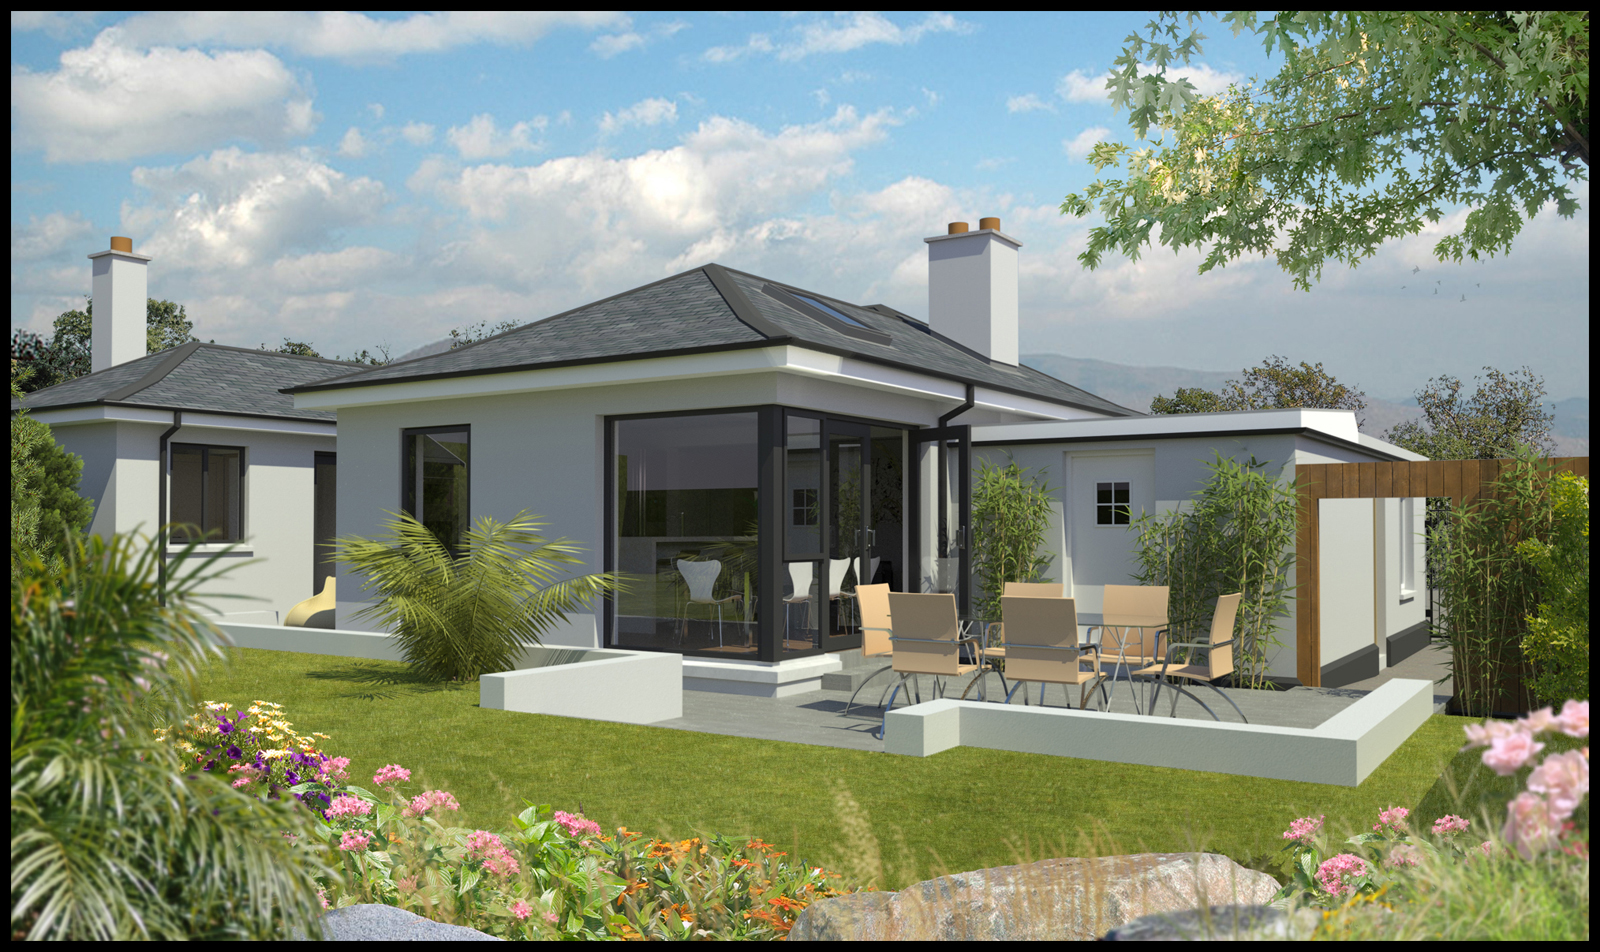
There was a step missing at the edge of the grass in the previous render but here is another view from the same project
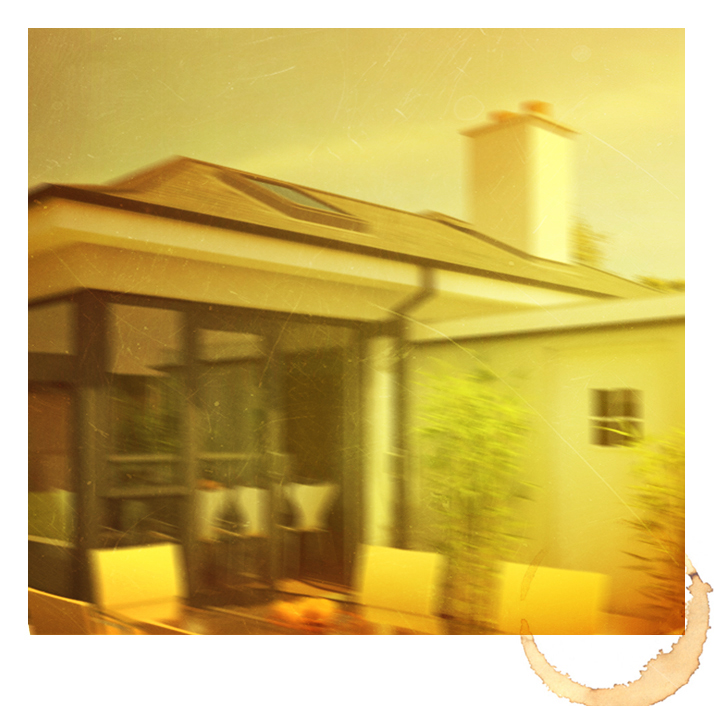
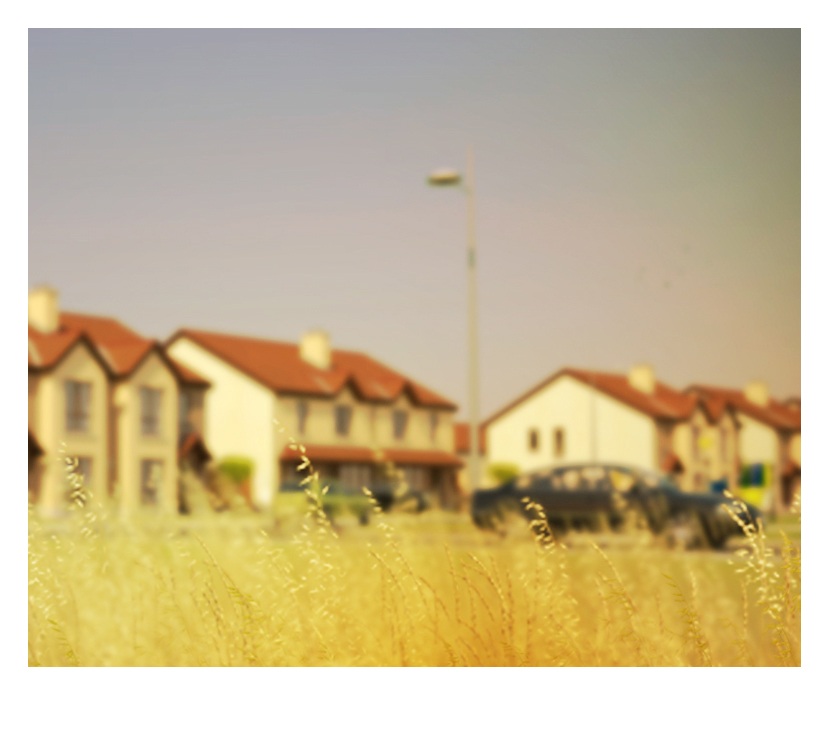
attached are 2 images from the same render with depth of field added in photoshop,made easier because the foreground planting is added in post processing.The third image is my attempt to create a 1970's polaroid picture feel from the image.
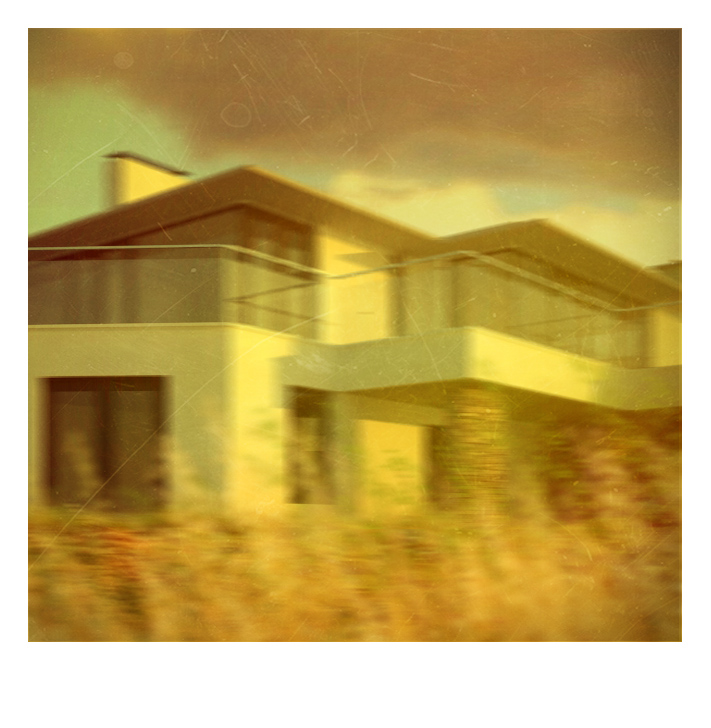
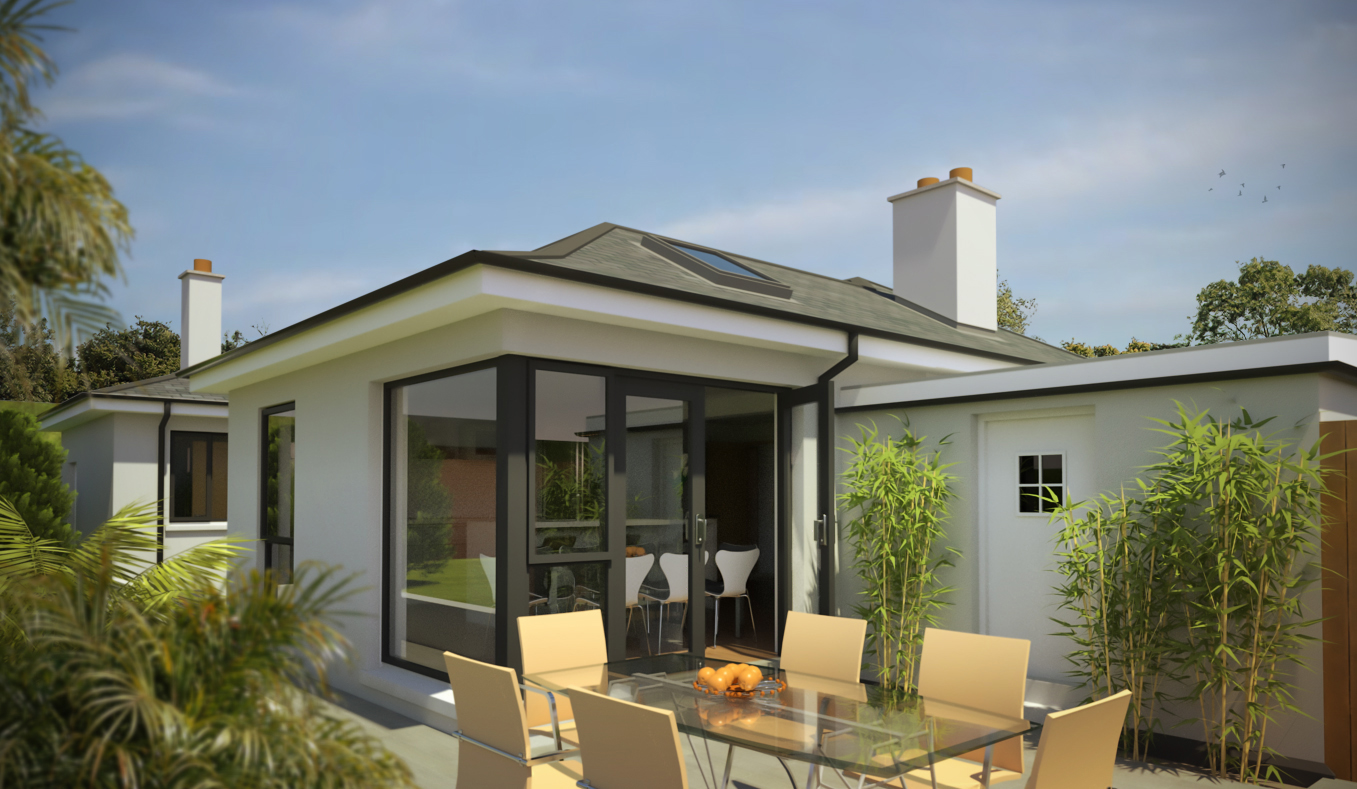
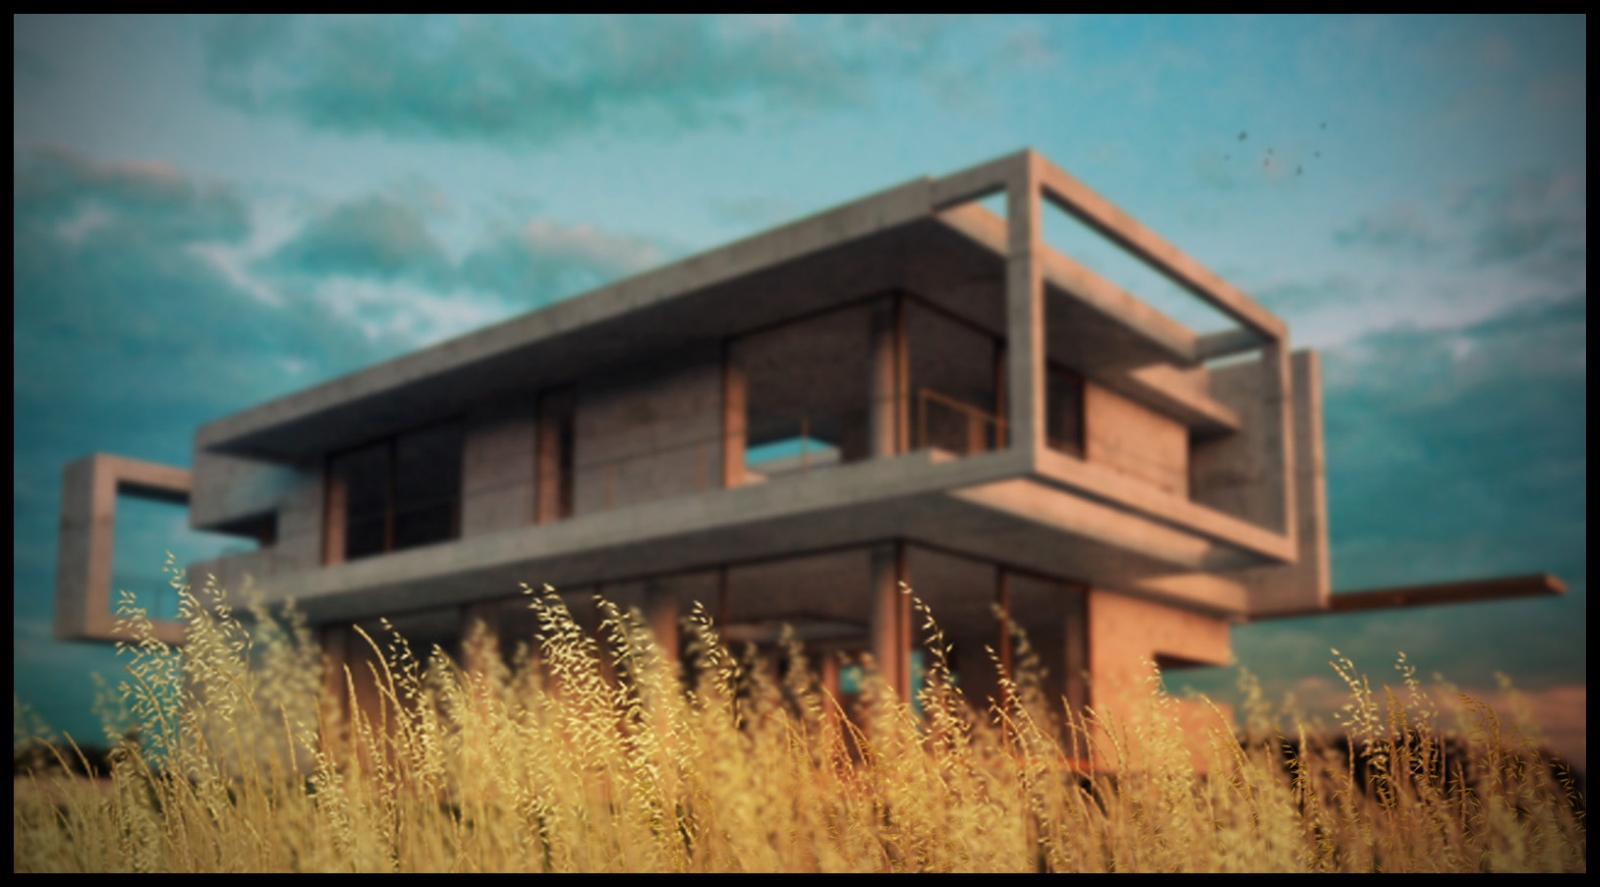
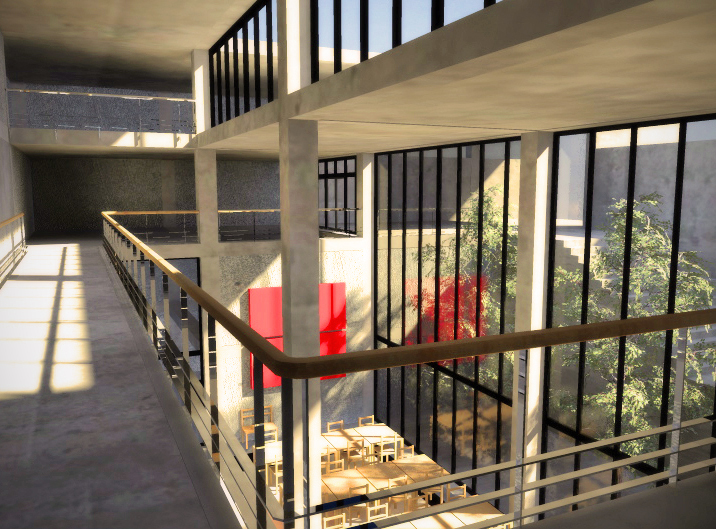
Attached is a vray render of a small project I'm working on at the moment.The grass needs more work but I'll upload a few more as the project goes on.
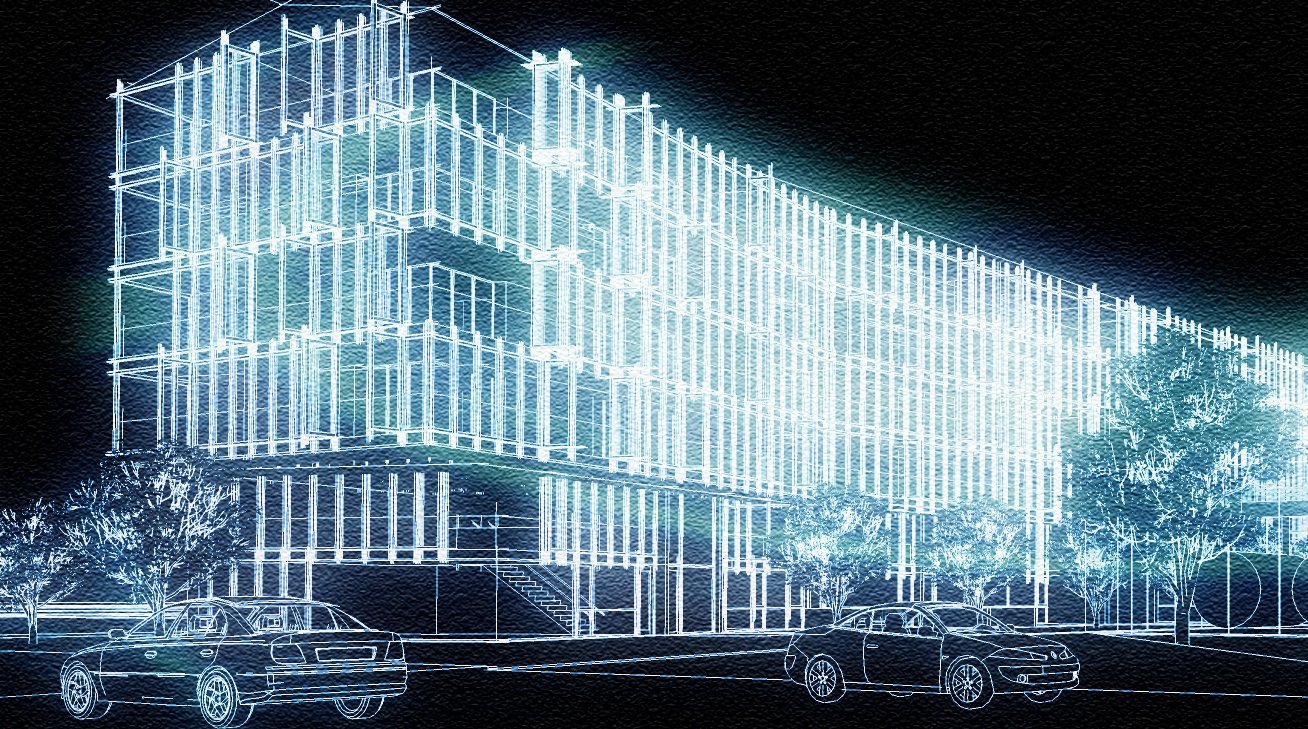
attached are screensnaps of the actual resolution of the image,to say it broke my heart would be an understatment.
Thanks Richard,http://www.hennessyassoc.com is our website,lots of 3d images,vray,twilight and recently maxwell.Our colleague Andre Negri,/www.studionegri.ie/.What I would like to do is show our process over the last 4-5 months of selecting the buildings,arranging the composition,editing the compostion ,changing the materials and post processing.
As this was a quite a large undertaking, in order to get the correct compostion,I have only saved certain screensnaps as we went on,as sometimes the permutatons were looking unlimited.I do actually try to keep things limited to a certain degree,but,as my background is painting,once I get into photoshop I usually ended up with close to a gigabyte of "saved as".(then copy and paste!)but there are a few tricks that are available to anybody that has CS2 or above that make things easier.
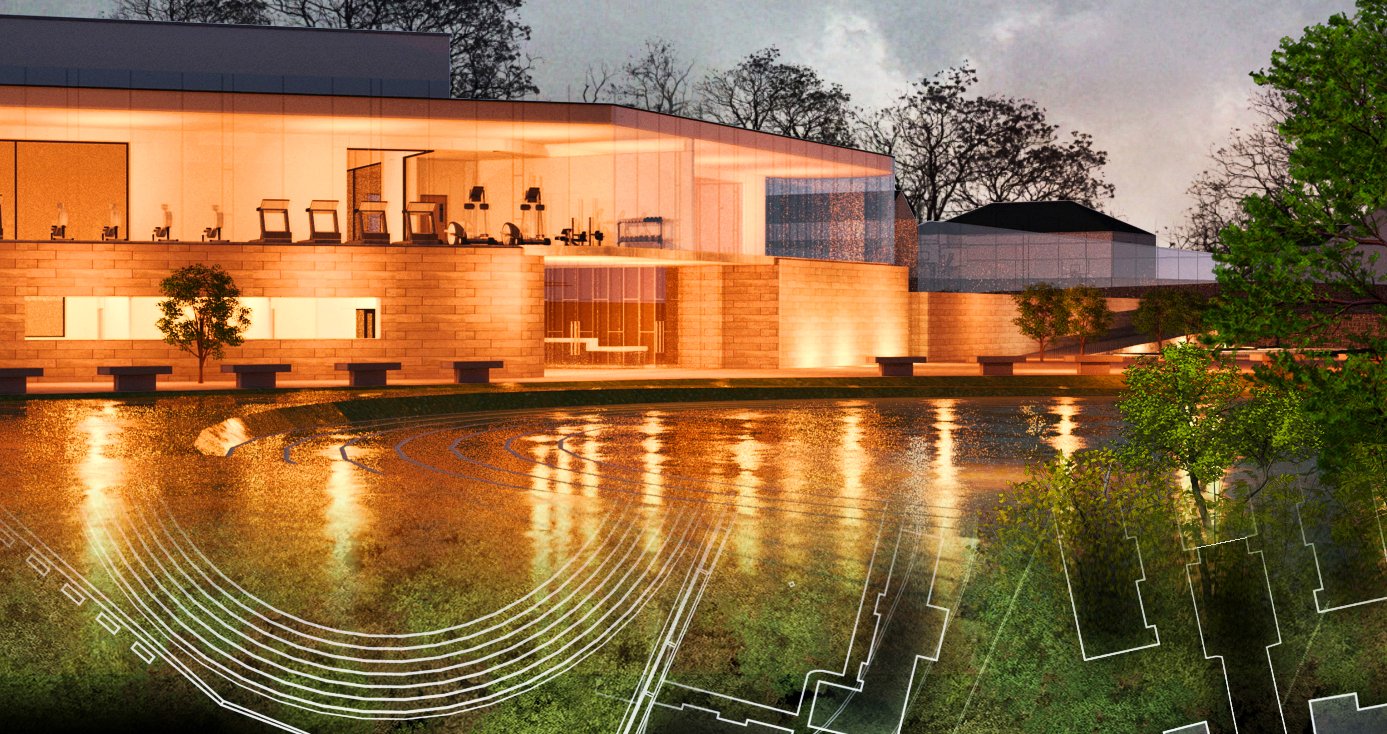
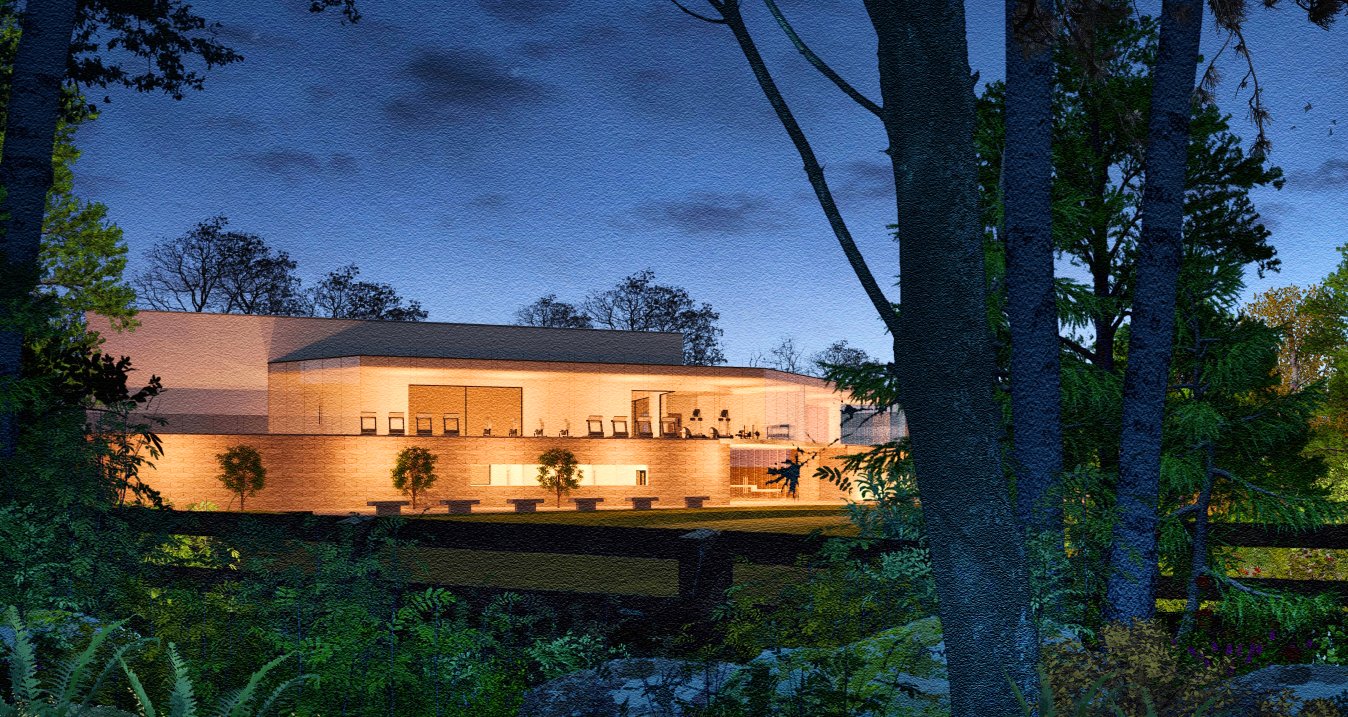
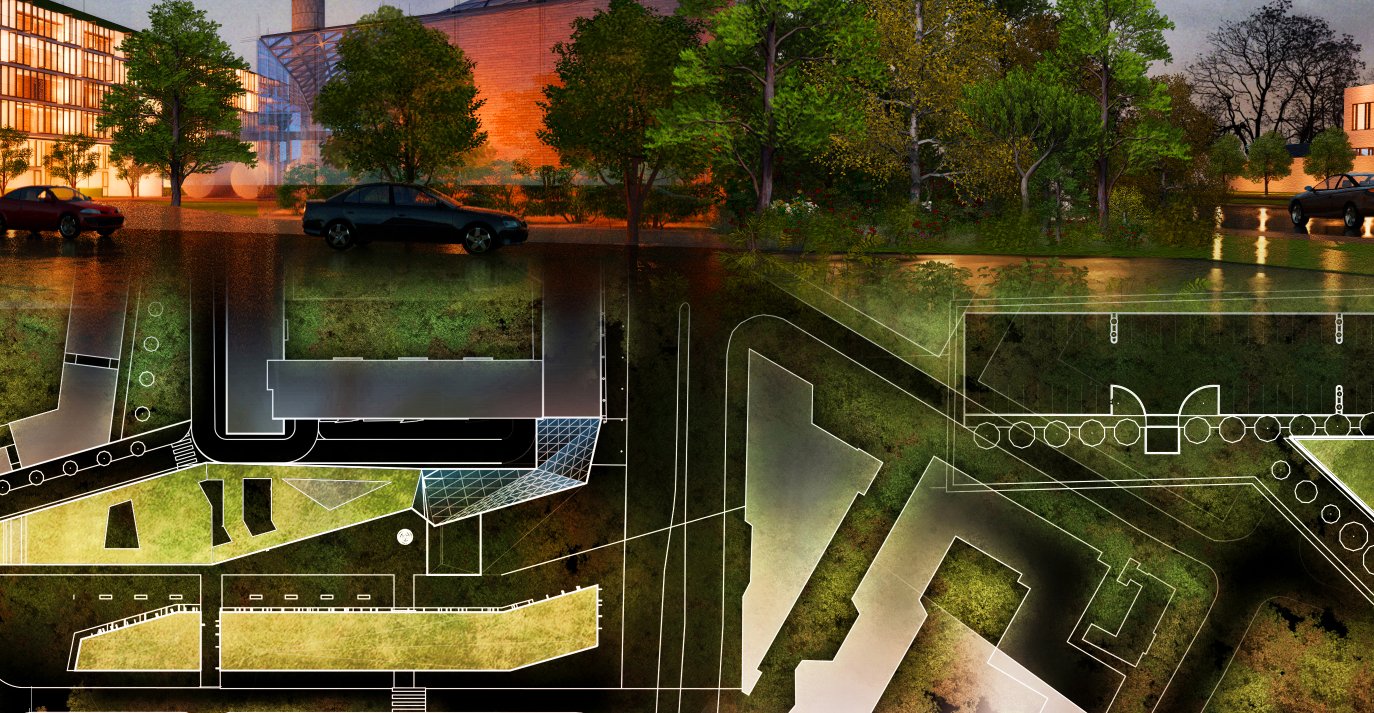
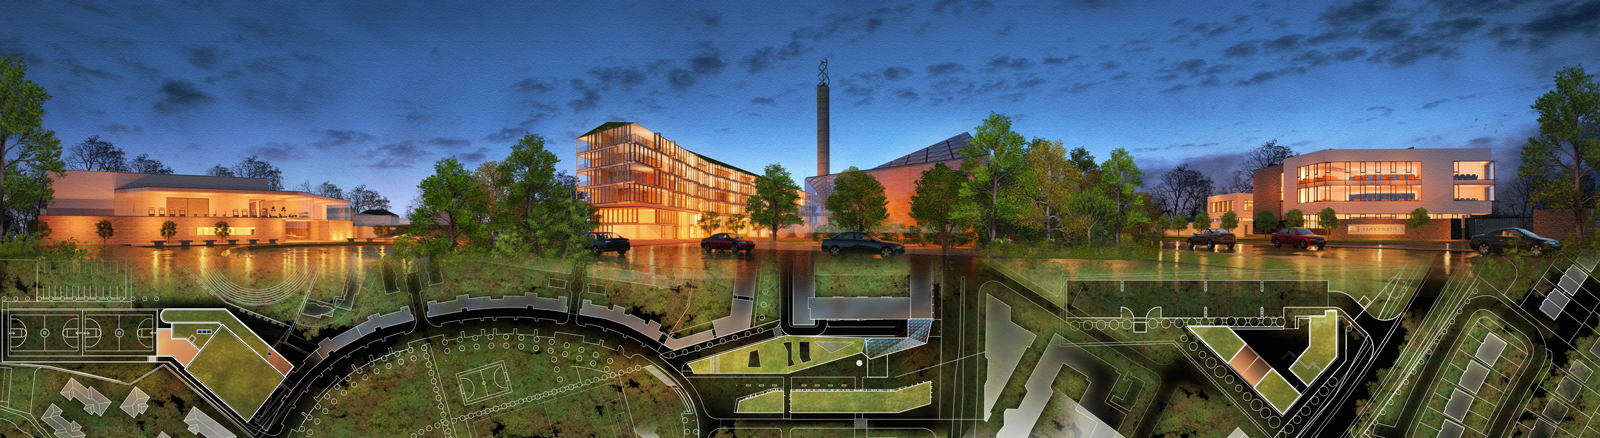
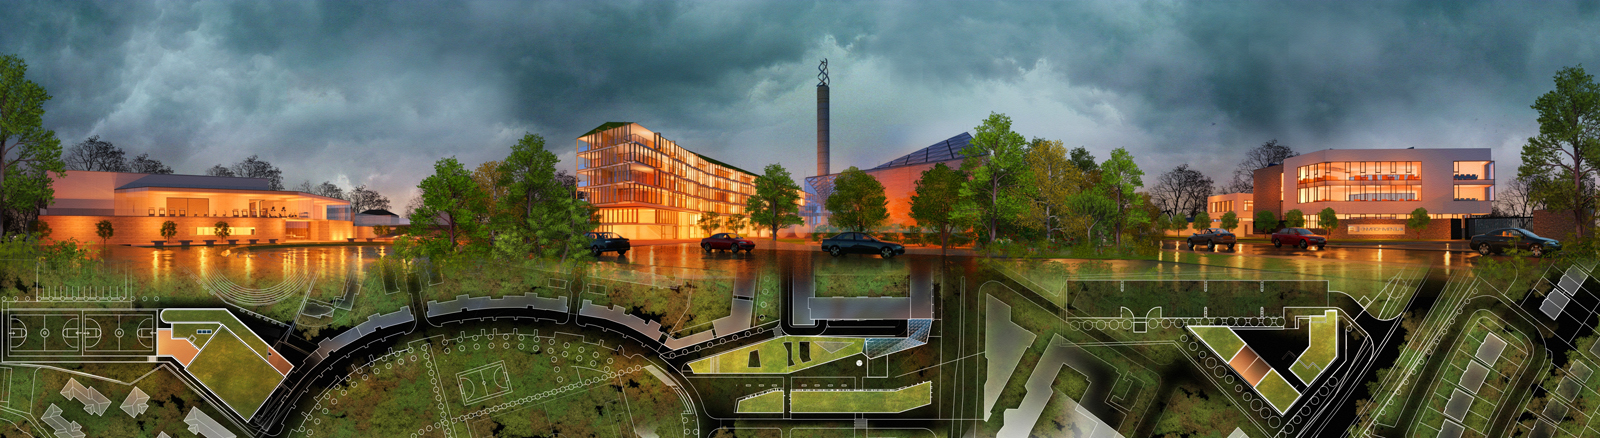
Attached is the final site image presented at the RIAI(The Royal Institute of the Architects of Ireland) presentation this month.I have also attached revised images with additional information.All buildings are designed by Hennessy and associates(my company) and our colleague Andre Negri.I'm not clear on what the rules are for linking to websites,so I will update later.Images rendered in twilight and post processed in photoshop.The first image is what was presented,and was 1500mm long by 500mm high.

These are very good,very clean and very much an individual style,I like them a lot.The vegetation is particularly well done.
Hi Rich,
The main reason I didnt add dirt maps in maxwell is because I was originally just playing about with the HDRI lighting and when I had the photoshop file open I decided to play around with the textures as well.The car does look a bit out of place but its really there to catch reflections on the bodywork and glass,just to help to accentuate the contrasts with the materials.I have attached 2 more images here.As I said before its a great model to test render with but its all about the lighting for me at the moment.
Heres one with some additional foreground elements and a very dead tree!
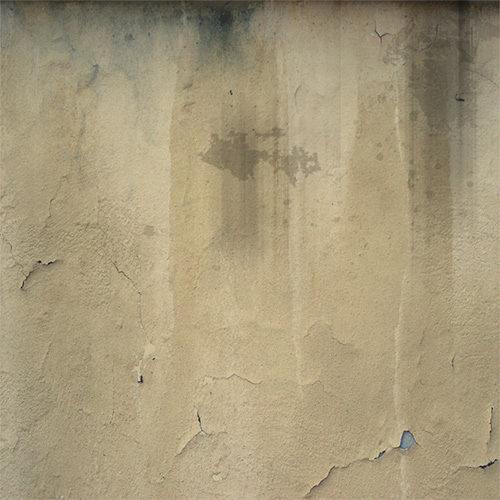
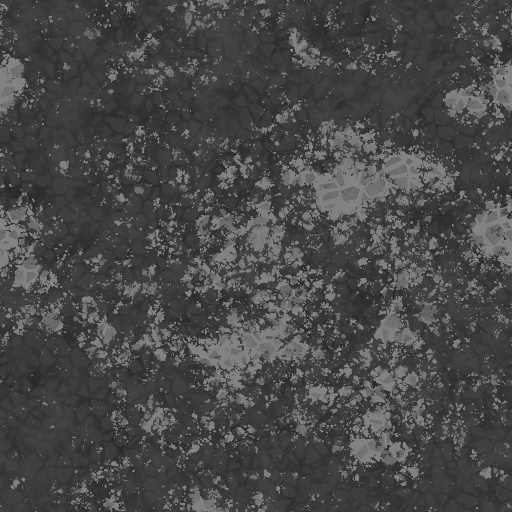
I have attached the 2 dirt maps i used in photoshop.I will upload a more detailed tutorial later but basically what I do is copy the dirtmap image into the rendered image in photoshop and use the distort tool (EDIT -TRANSFORM -DISTORT in the pull down menu)to align it over the area I want to grunge up.I then use the overlay blend and set this to about 40 -60% and thats it.If you do this with multiple textures in the same area you can really start to build up interesting textures.
Regarding the background,it was a free download, a very hi res jpg .(sky 0008)
the website http://vknt.be/free/skies/
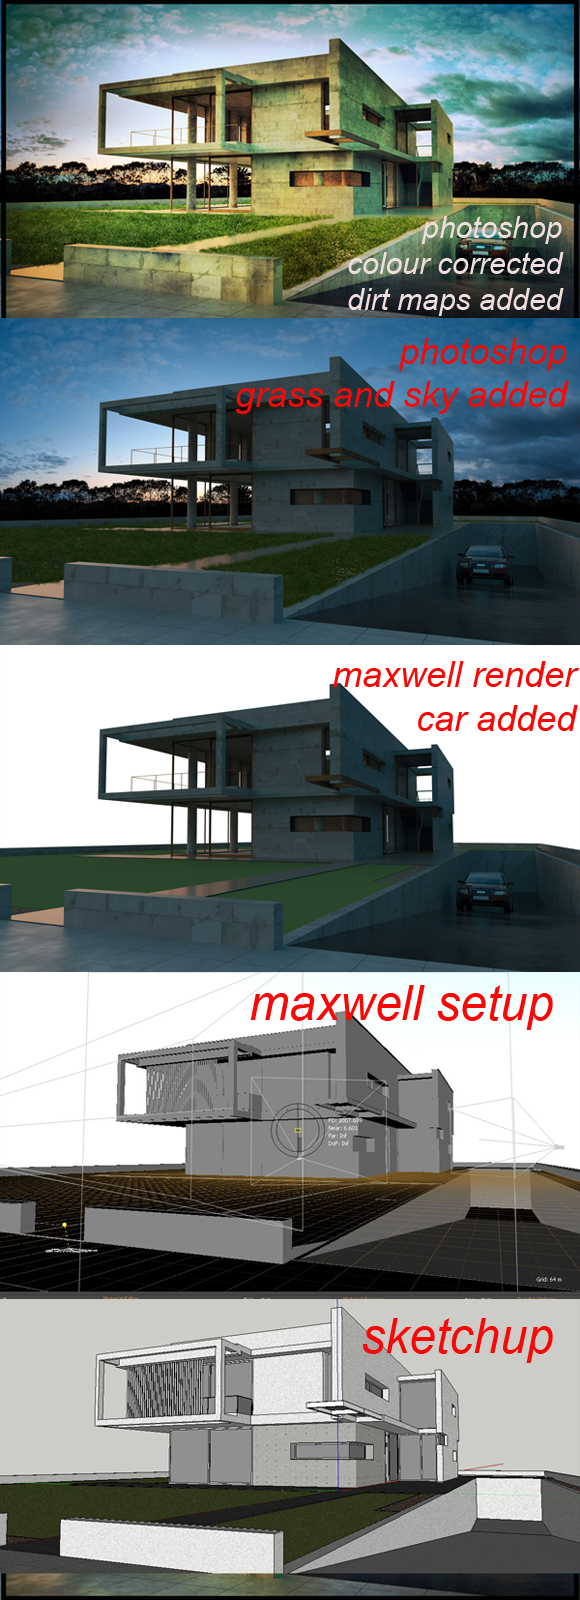
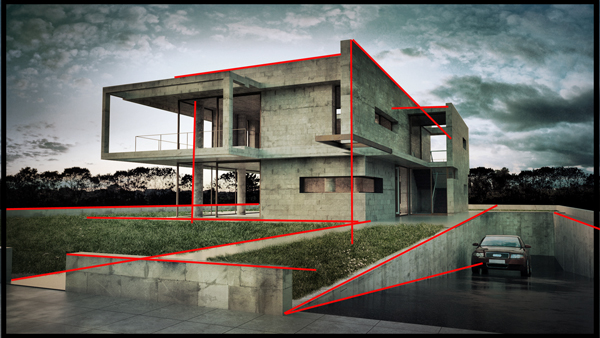
Attached is a maxwell render of the Villa PM uploaded by Hieru.I have also attached a small step by step showing the process from sketchup to maxwell.The maxwell render is lit by a HDRI file and there are only 3 materials added to the model,the vast majority of the work was done in photoshop.Overall,from render to finished image it took about 3 hours.Regarding the model,I think it is one of the best models uploaded recently and is perfect for rendering setups,basically because there are a lot of different angles and popouts to the building along with many diagonals, that make it very easy to come up with dynamic views.(I have shown what I mean in the bottom image)I think these diagonals can really help to achieve better compositions.Again thanks to Hieru for uploading the model.
Andretbms,Bryan K
attached is a step by step from sketcup to final image.As you can see,the original maxwell image was washed out and had quite a bit of noise on it.needless to say there are numerous layers in the finished photoshop file,not because of the planting but I like to overlay the final image on top of itself numerous times and play with the blending,selectivley erasing as I go.Often this results in a "happy accident" i.e something turns out different to what I expected but also better than I expected.An example is the 2nd image where I wanted to add some ivy to the top of the wall.It didnt turn out any good but I discovered if I change that layer to overlay and reduce the opacity -hey presto- "plant staining" along the top of the wall.


Attached is an extended image of the same view.Ive played around with adding some dirt maps in photoshop and just adding more "grunge".What I want to do next is add some broken glass to the windows and,If I can,rust up the car a little bit in photoshop.

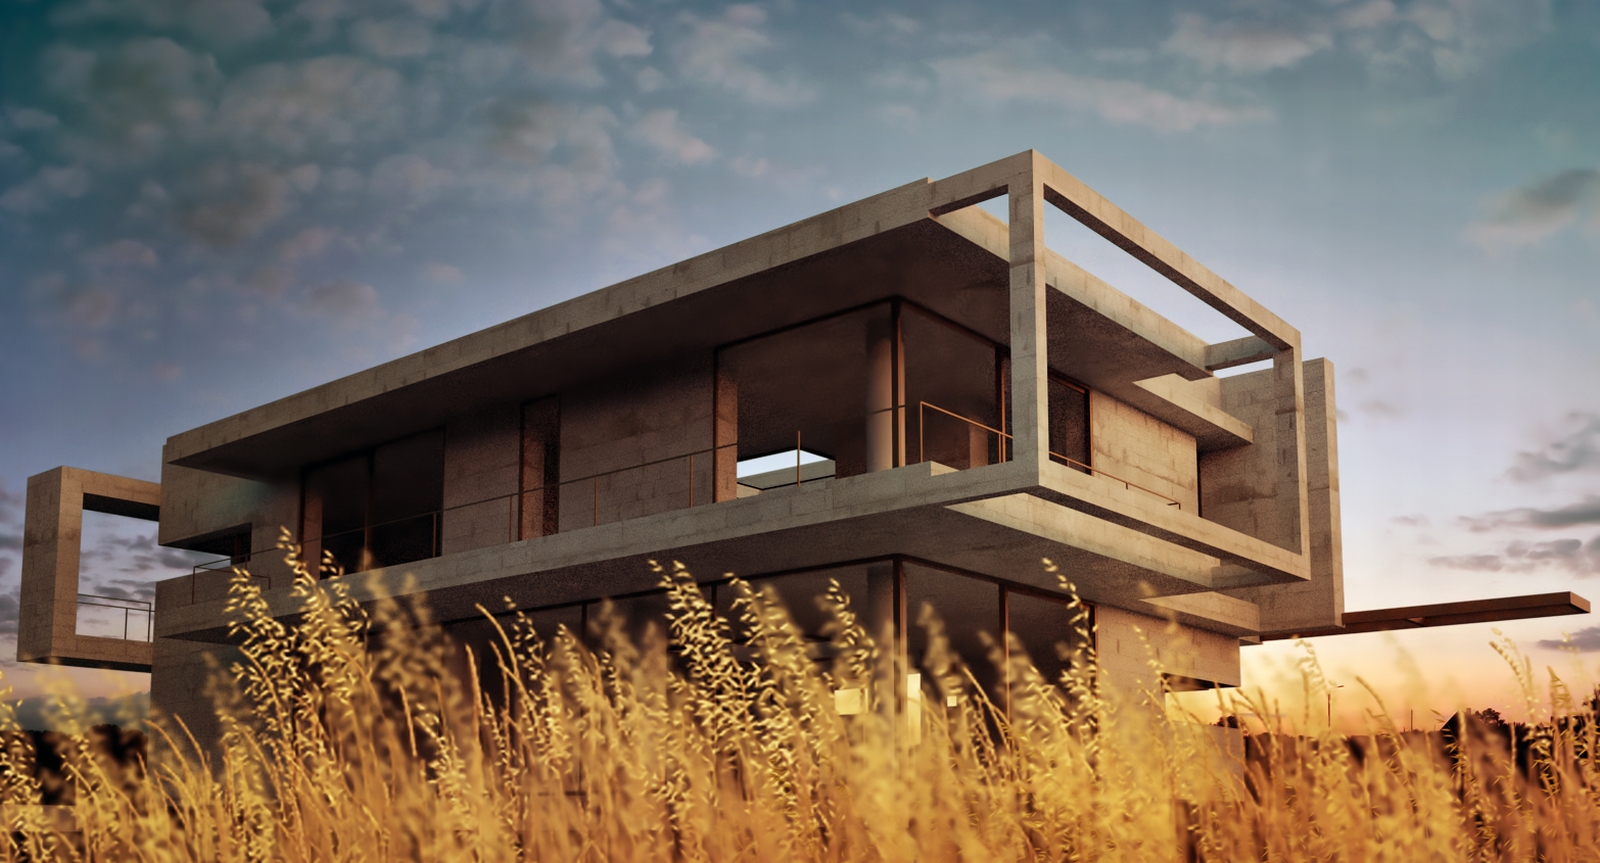
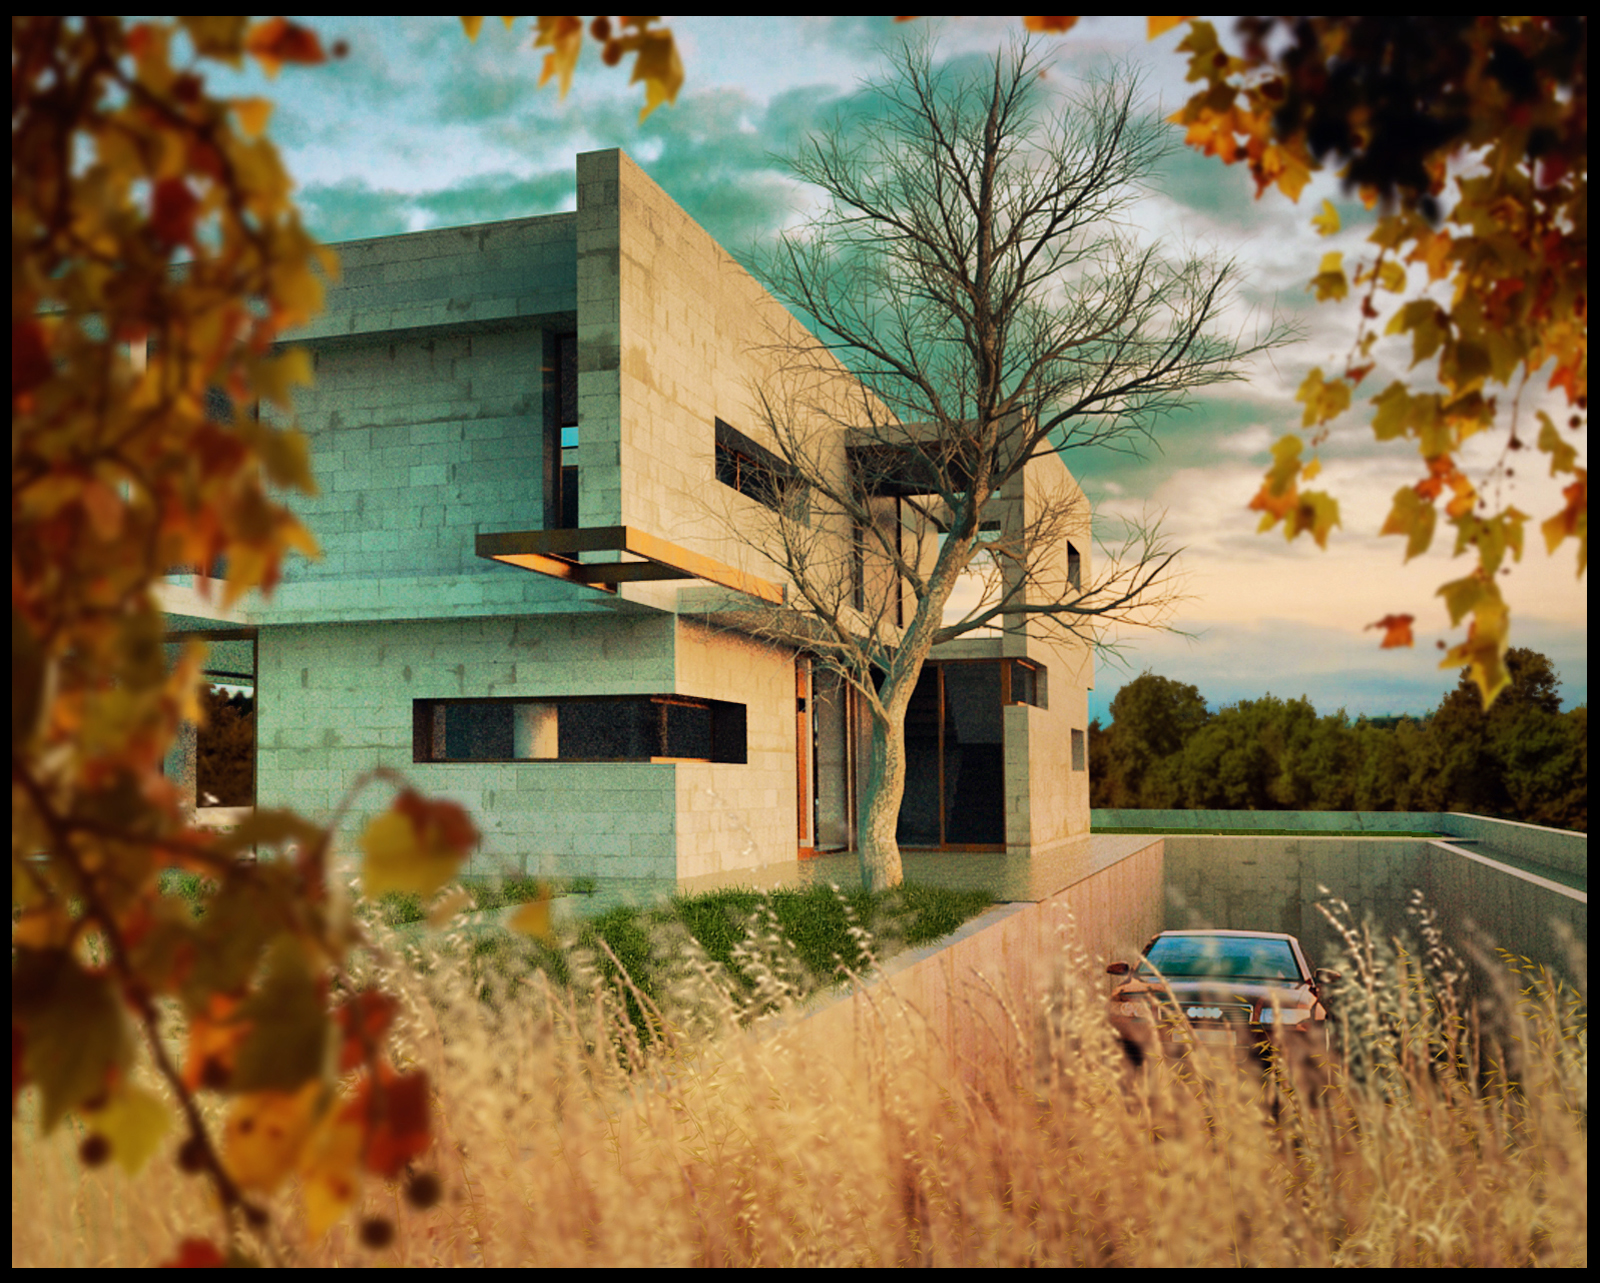
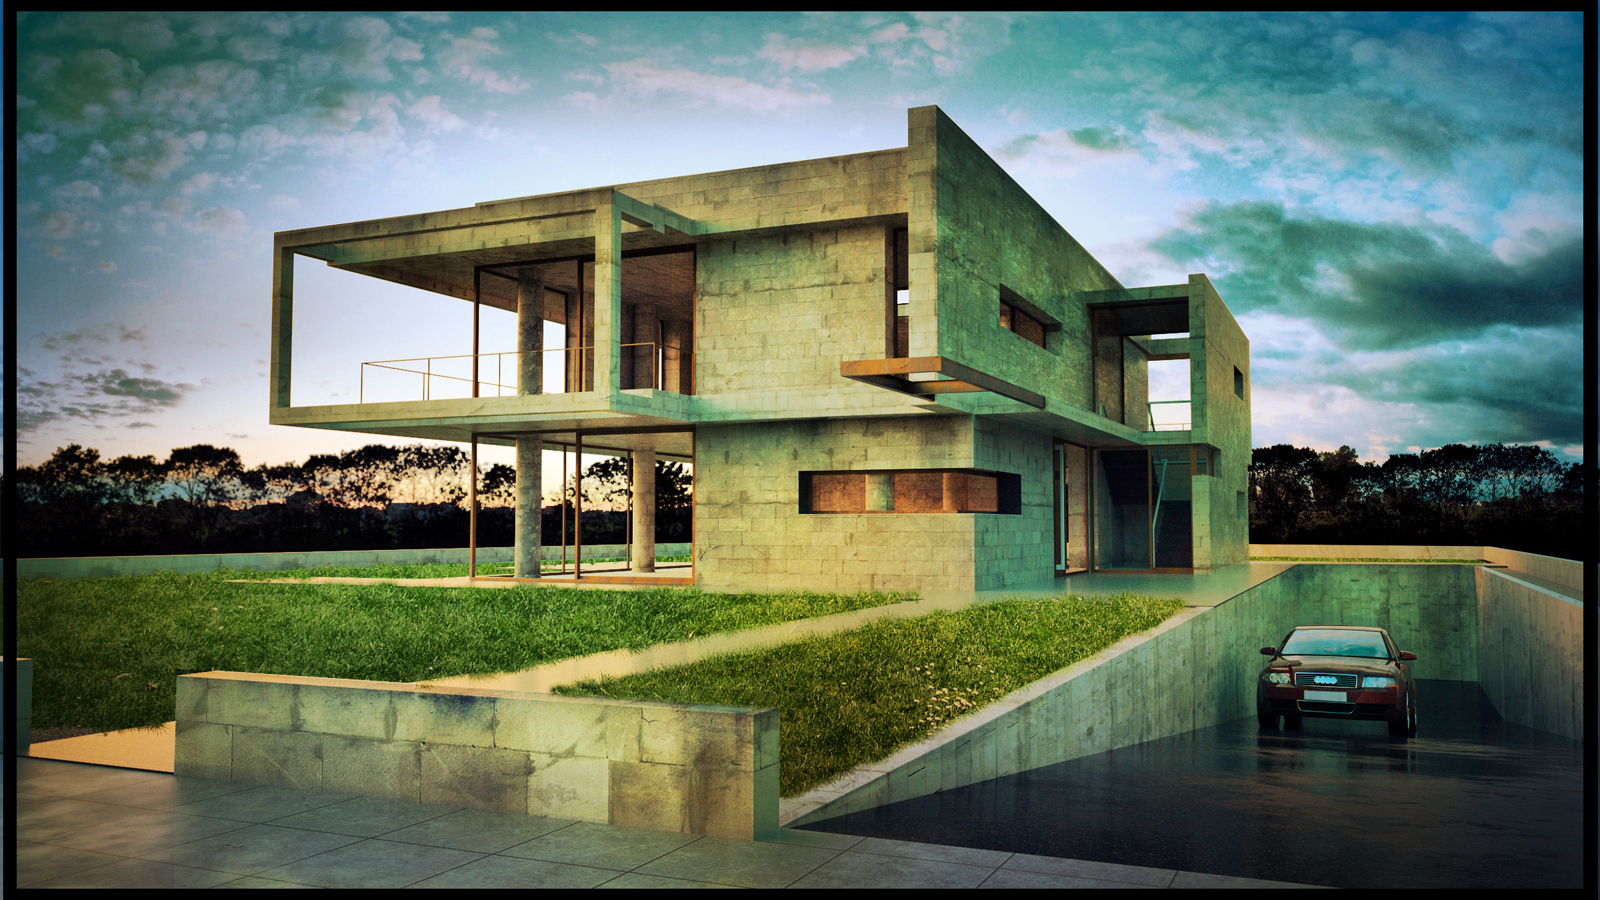
I havent used maxwell for a while.this is a version of a previous model uploaded a while back,modeled in sketchup and rendered in maxwell 1.7.I used a hdri for lighting and all vegetation is photoshoped.The image was taken thru a few filters like bleach pro and a couple of others to finish.I like adding cars/reflective elements to my images primarily to catch the lighting,especially if Im using hdri.The original image was also taken thru a denoiser filter but run a couple of times Specifically over the car to get a bigger contrast .

Attached are 3 more images playing with lighting.The model isn't mine,It was downloaded from a website offering tips on using vray,so I tried to see what I could do with artlantis.the name of the model is "study hall",I dont know if it is still available to download as it was quite some time ago when originally downloaded.(the trees are artlantis vegetation)


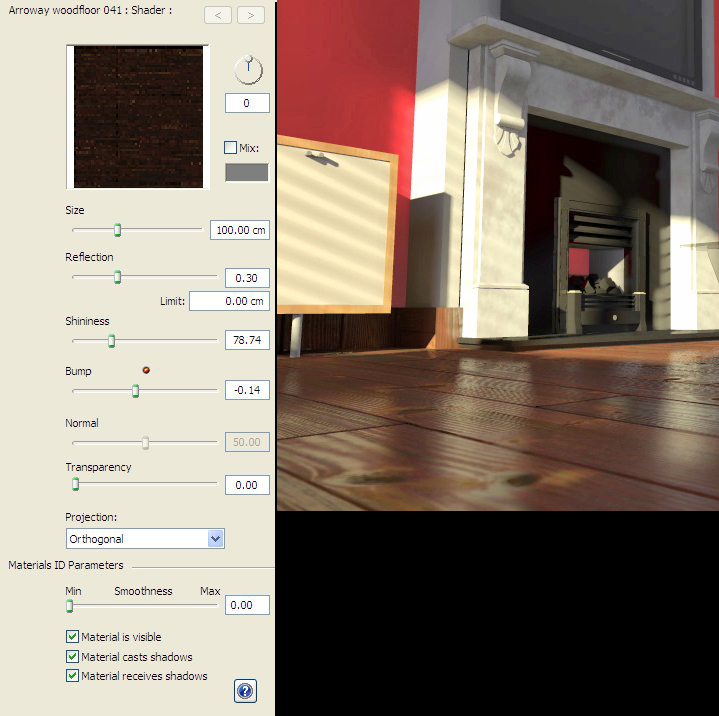
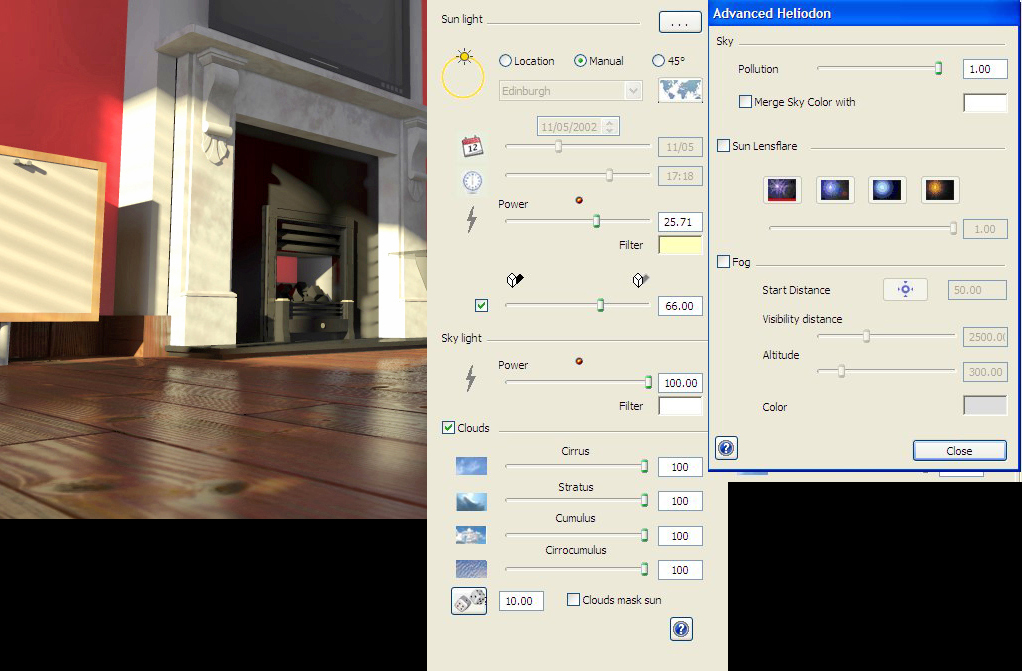
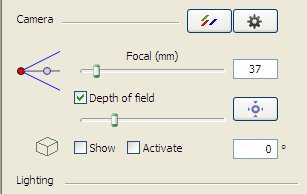
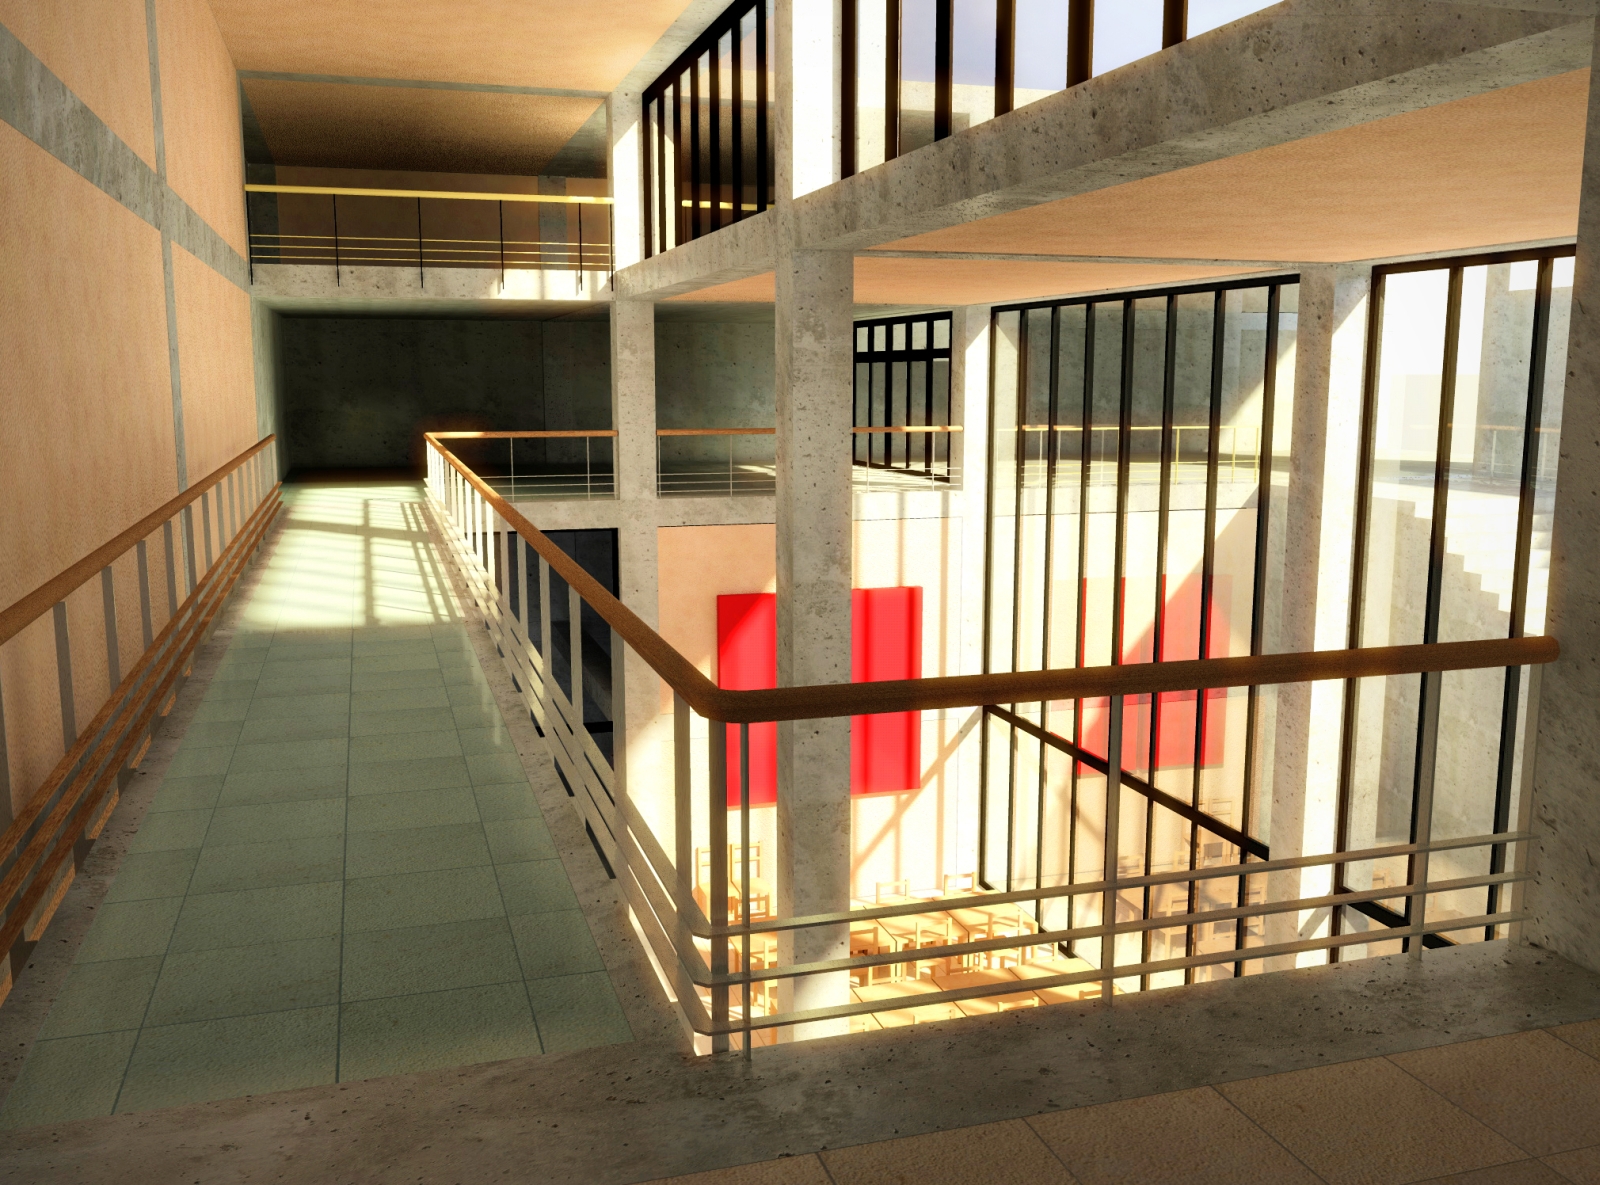
Thanks for the comments guys.The Artlantis version I use is Artlantis studio 2.0.I have attached the shader settings for the floor for the low eye level image.It is based from an Arroway floor texture 041 that can be downloaded with bump and reflection maps from arroway.Also attached is the lighting set up for this image.The shadows are soft shadows,which can take longer to render but are much better for evening lighting(The 4th image is the depth of field settings for this view.)
The third image is a set up for a low level horizon sun which will give a very warm light.I prefer using only the stratus clouds for externals as the others can very quickly become overpowering.the sun here is set to manual,moved to the horizon line and a lens flare at 0.43 added.
Regarding the lighting in Artlantis,I normally use low level sunlight as not only is it warmer as I said ,but it also creates much more interesting shadows from the simplest of geometries.