have you seen these already?
http://iabuberlandia.blogspot.com/2011/05/s-l-e-e-p-b-o-x-novidade-no-aeroporto.html
have you seen these already?
http://iabuberlandia.blogspot.com/2011/05/s-l-e-e-p-b-o-x-novidade-no-aeroporto.html
@jennifert said:
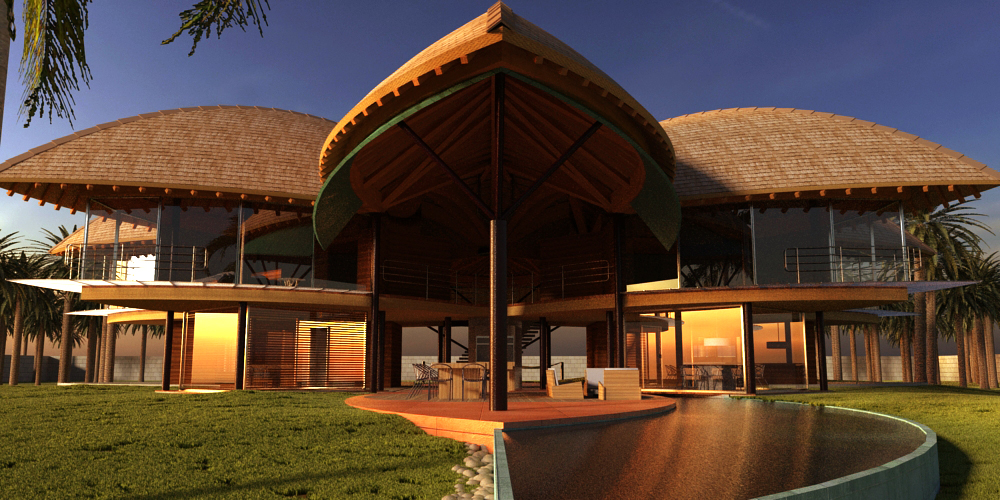
The one question I have is about the extended roof section over the patio. It kind of threw me off and was wondering what the purpose of it was? I like it but was wondering what your thinking behind it was? Was it to extend the patio out further while still retaining the roof symmetry?
well, i can only guess on this one as (i mentioned in the first post) i tried to get as close to the original building as possible. i would say its kind of a sun/rain protection for the part below. the same metal panel material is also used on the other sides overlapping double roof section.
if you like to know more about the house and understand some french you can have a look at this video with the architect: http://vimeo.com/23444194
solo you might have a look at this beautiful project that was an entry for a 70.000$ competition on jovoto. too bad its already finished. you could have participated with the BoxPod....
modelhead: thy! i read the "circle" post aswell. funny i always thought it´s exactly the other way around. i haven´t been able to find any tool on the market that comes close to the speed and flexibility for architectural modeling. preferences are different i guess?
rombout: cool you like it. thea is on top of my list. it looks great. on the other hand i want to take some time to evaluate the vast multitude of engines on the market at the moment before i invest in my "new tool".
wow, inspiring work. makes me wanna go back to beautiful thailand immediately!
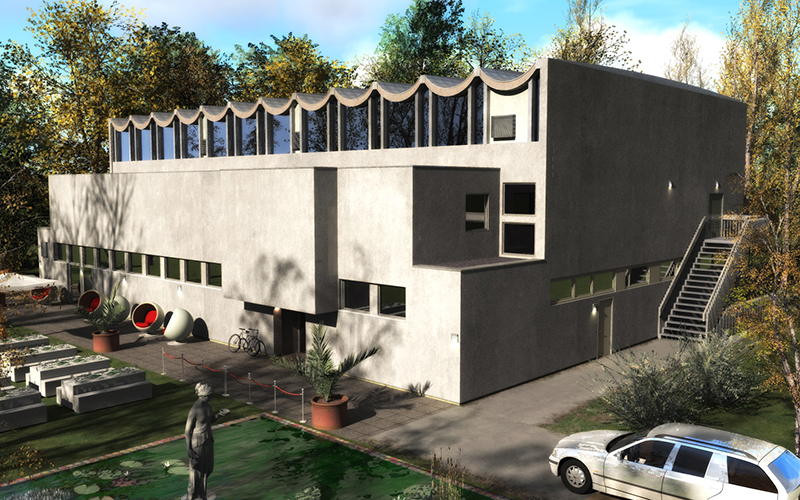
this is some old work, actually one of my first render attempts at all from 2 or 3 years ago. i stumbled upon it while cleaning my HDs.
the scene was rendered in artlantis, which i thought then was the greatest renderer in the world  i loved the simplicity of it and the fact that it was easy to place plants and everything that looked quite ok. by the time i found its limiting if you are going for realism...
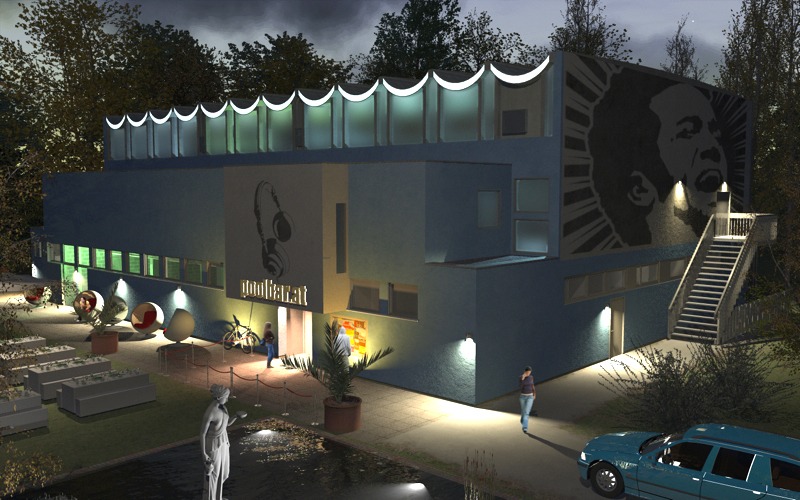
btw the building is a former military indoor swinmming pool that is now used as a concert venue for the so called poolbar-festival which takes place every summer (lasting a few weeks) near the place i live. they bring some of the best alternative acts you can get to this otherwise quite rural and sleepy region. they have an architectural contest for the design of the festival each year which is a great concept and always gives an additional motivation to go there and see the winners design....
i´m not an expert in the field of anything your system has to do with - actually i´m glad my few plants live a happy live in my own four walls, but IMO your concept sounds great and even if it shouldn´t work or help to solve the worlds problems i love to see people thinking about ways to help.
i´ve been thinking about a micro-power-plant design that could make people worldwide independent from external power supply for the longest time. It should be a "non patented open-source blueprint" everybody could build on its own from common materials with a medium effort and produce enough power for the daily needs. no big companies should be able to earn a dollar from it. sweet dreams i know 
unfortunately my knowledge in the matter is not sufficient to tackle this on my own and my financial and timely resources are too limited as well...
anyways love your idea and hopefully someone will make something out of it.
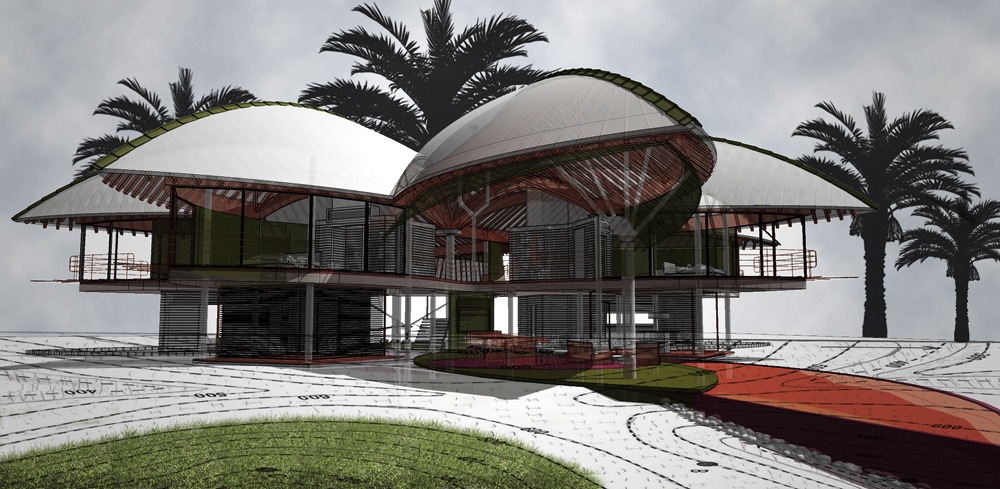
another update: here is a blueprint version of the building. for those of you who don´t know those tutorials already (some of the best i´ve ever seen online) checkout this link http://www.alexhogrefe.com/tutorials/
and another one following the daylight tutorial from the link mentioned above - not the best model for it but you can guess that this is a powerful technique.
ok - here is another shot i wanted to share. this time i used kerkythea MLT (metropolis light transport) for the rendering. it was my first try with kerkythea and think i fell in love with it although its quite outdated and works only in x11 emulation mode on osx its free and it produces great results with much less setup time than vray. the grass and plants were placed with kerkys instancing brush (great tool). a lot of things could have been done with more attention to detail (for example grass, plants were placed directly from the repository without further tweaking) but i´m quite satisfied for a first try. with some tweaking in the MLT engine and a little more time to let the grain clear up completely this could easily get my preferred render engine (or thea probably).
what´s your experience with kerkythea?
here´s the shot:
here i played with depth mask:
you´re right andybot. i now changed my glass material as i seem to have less problems when using a material without refraction (as you mentioned already). with creating a materialID it should be no big problem to get rid of this problem in photoshop.
thx a lot for your support.
thx for this great plug - used it a lot in my projects.
one question though - would it be possible to add a feature that lets you specify the angle of projection. not all shapes are easily aligned to the red or green axis all the time. so in my imagination if you could choose any angle between the red and the green axis (+90/-90) or maybe even taking the blue axis rotation into account that would be perfect. i hope you understand what i´m talking about 
the light and textures are perfect. very realistic.
you´re absolutely right about the textures and materials. looking at some of the work on this forums there is still a lot of potential for improvement in terms of photo-realism.
i´m trying to catch up with Vray for SU but found it hard to get the right hdri/ sun light balance and look for my materials so far. another thing that makes it hard for me with this model is the fact that you simply cannot texture most of the shapes arcs, skins satisfyingly directly in SU and i really failed to work myself into external UV mapping so far. it looks like so much work to export every single curved beam to external UV mapping application just to apply the texture (and all those UV applications i tried so far are everything but intuitive IMO). maybe it isn´t if i just jumped into it and tried
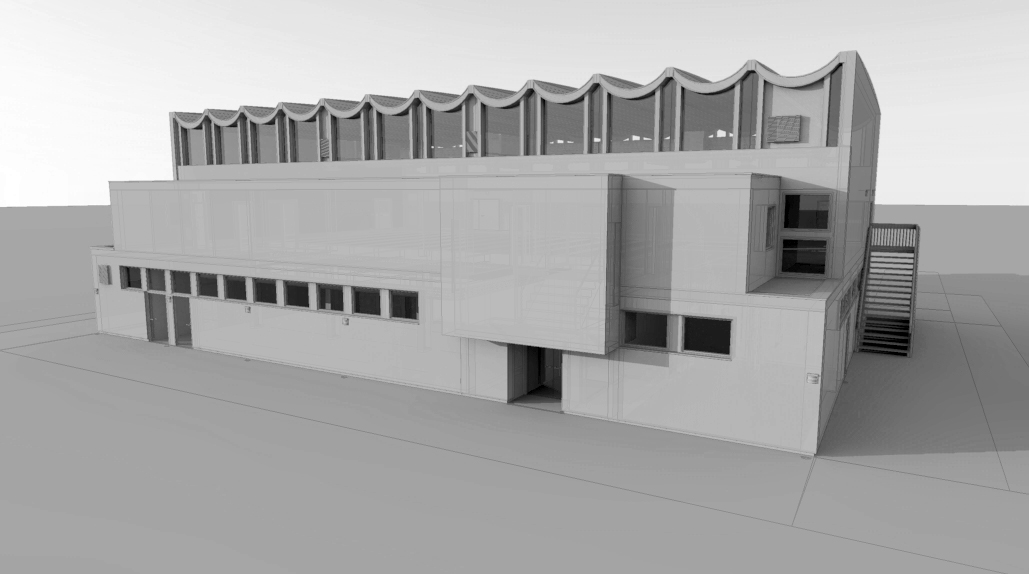
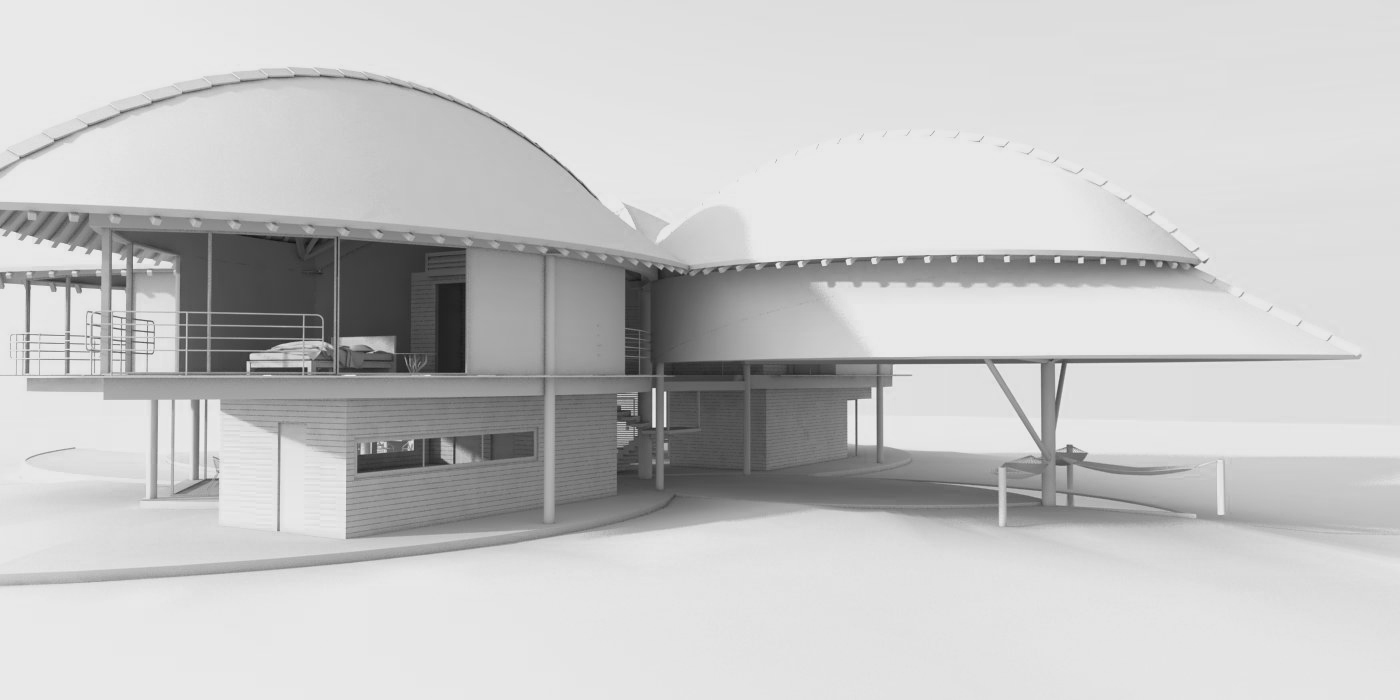
edit: in the meanwhile i could stick to B/W rendering - covers the texturing and accounts for the model
looking at these i really feel like a complete texture, render and postpro noob. shame on you for making me feel bad
breathtaking realism - unbelievable
@unknownuser said:
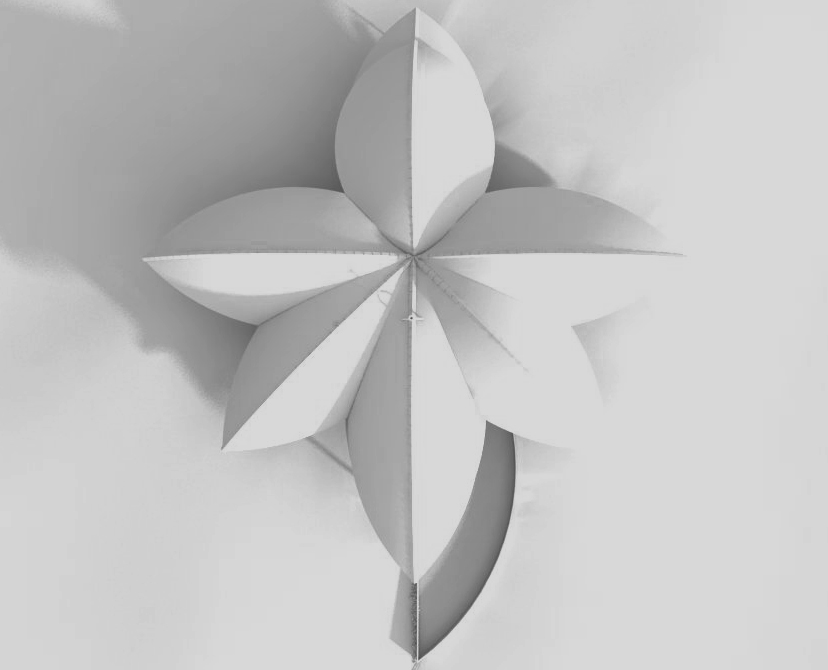
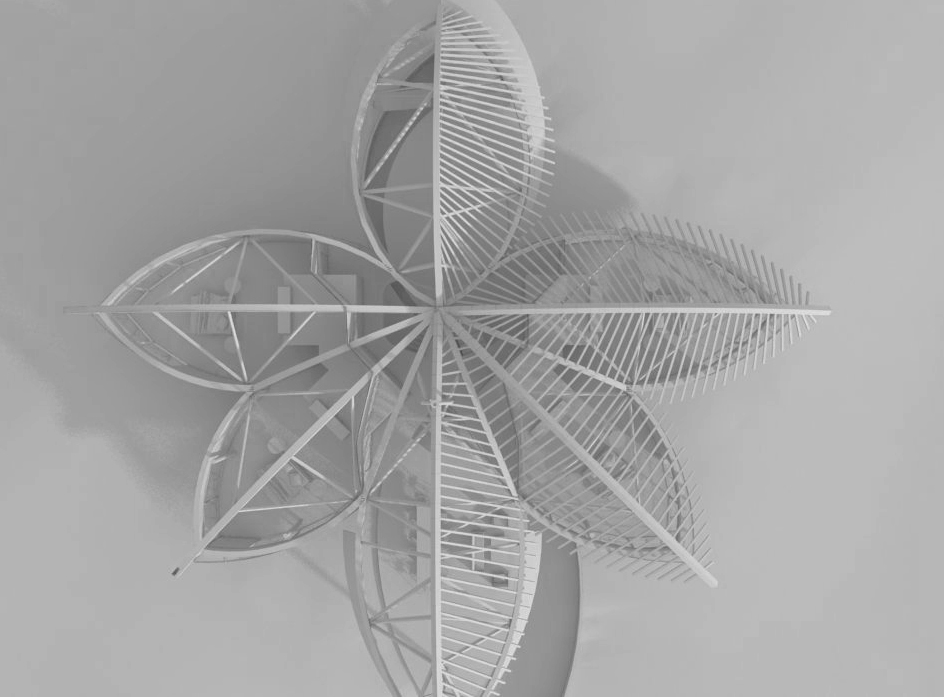
Nice shape....The leaves look like hulls, specifically the Peterborough Cedar Strip from the 60's. The ribbing and gunnels are much the same...if it rains hard they can just flip it over and move on...
yes, actually they do - that´s what i call functional architecture. the guy that lives there is called noah, favourite hobby: collecting animals
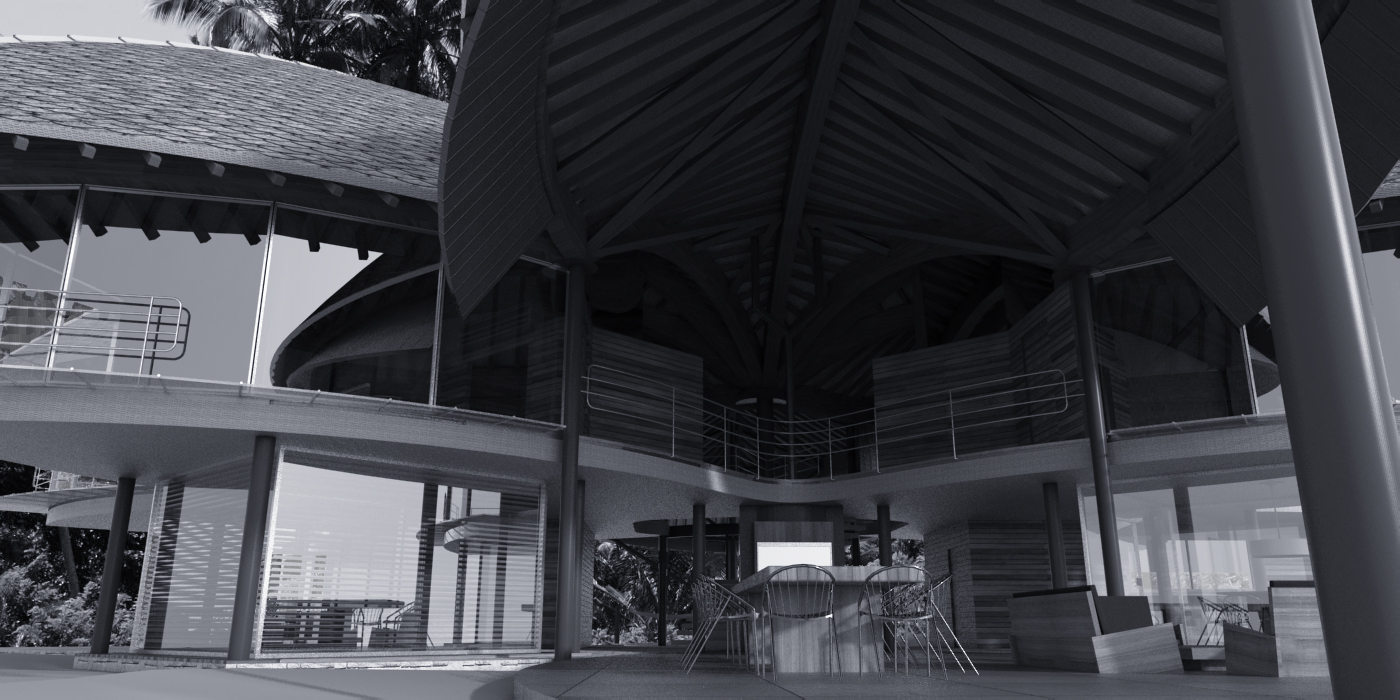
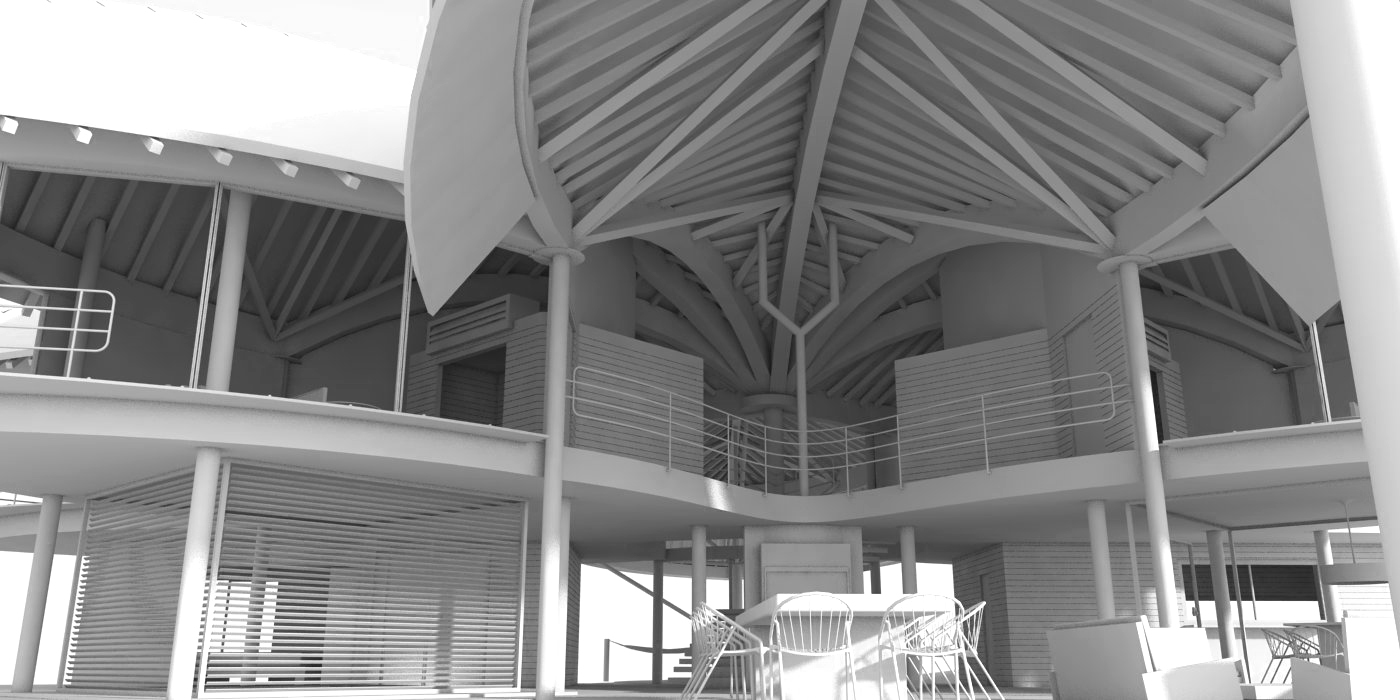
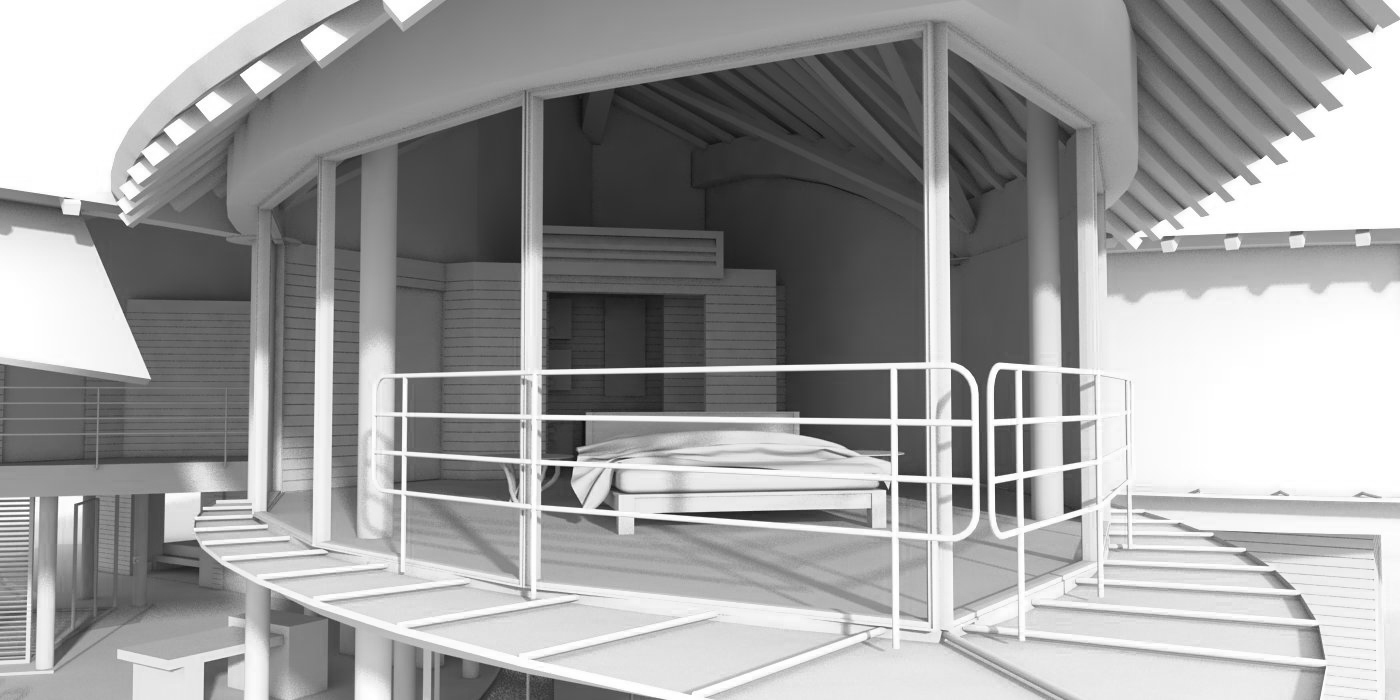
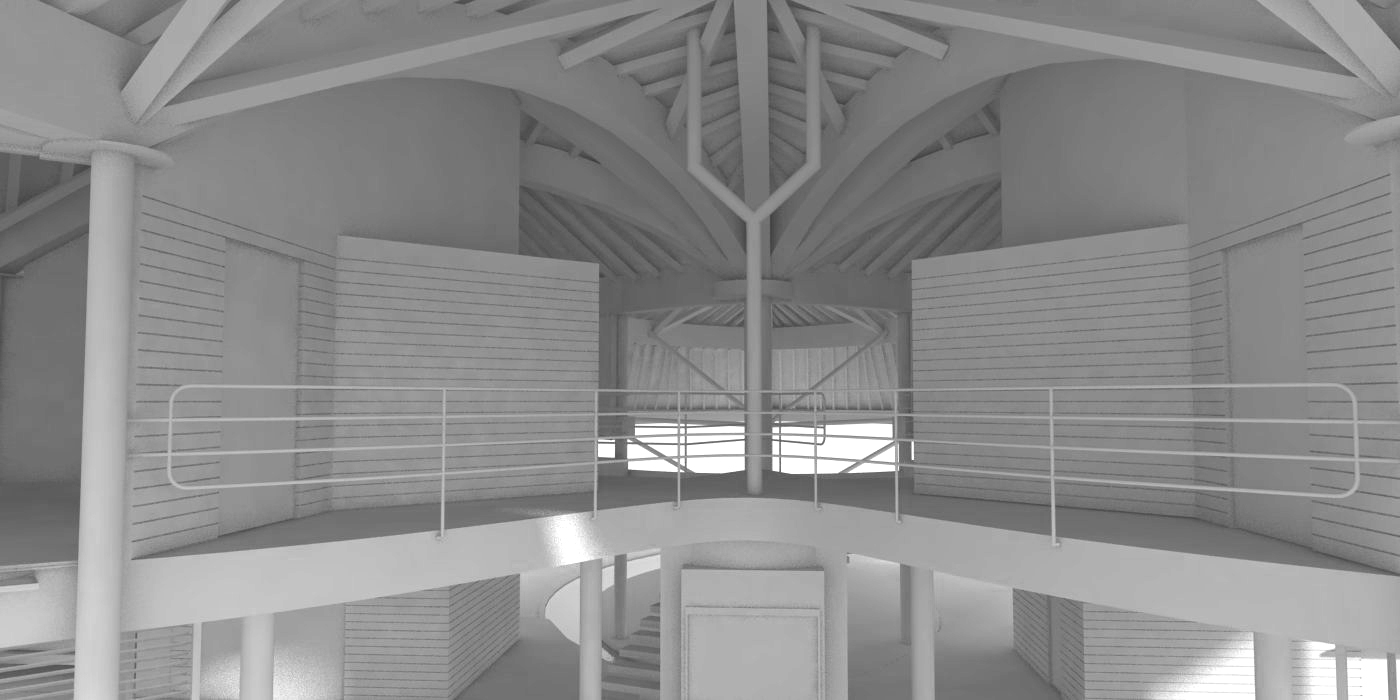
as promised the monochromatic detail shots - i didn´t have the time to play around with the lighting so please excuse for the the mediocre quality.
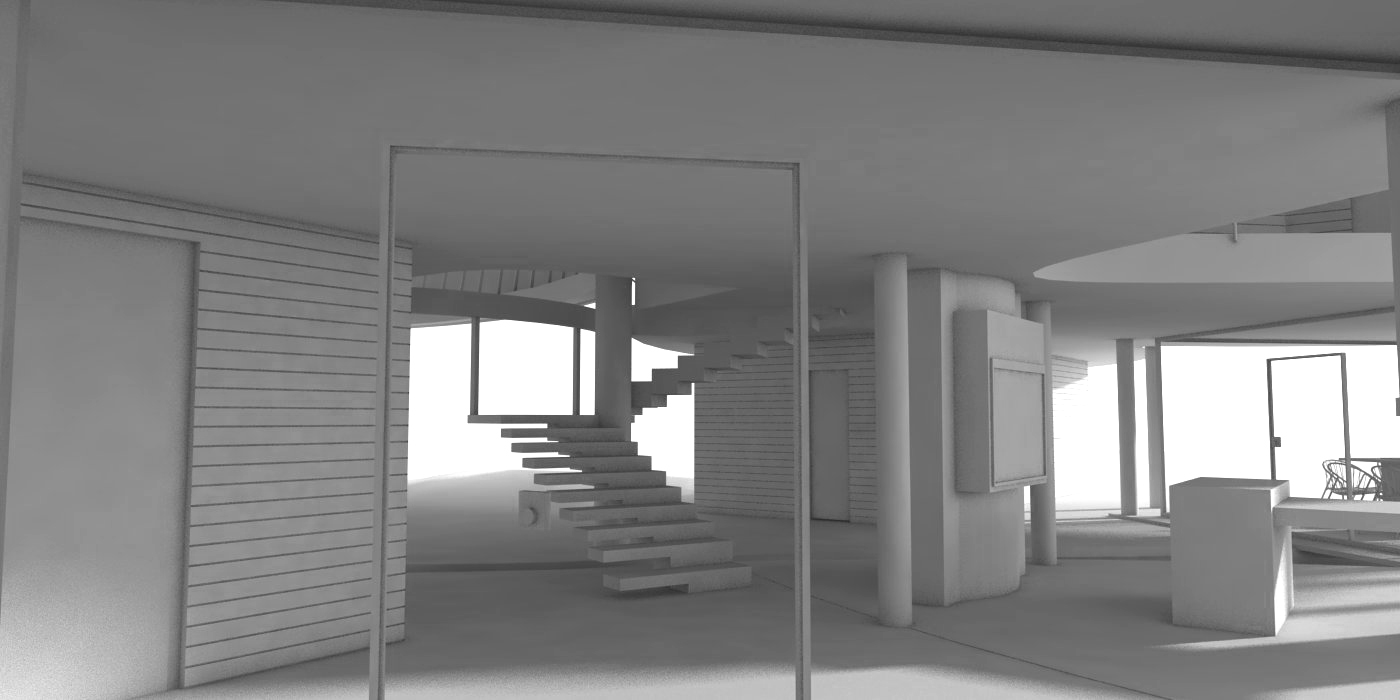
more pictures with textures to come another day.
@mike lucey said:
Very intricate work Castromann. Did you manage to get some to the floor layout plans done, even in sketch form. I would be interested in seeing how the house 'works'
Mike
unfortunately i didn´t do sketches. all the reference i had were the jpg drawings and images you can find following the link of my first post and my visual judgement.
in the detail shots i will remove some parts of the roof. so you can see inside the structure easily. i think that will help with "understanding" the house....
had to look up the meaning of "intricate" - love that word already
@unknownuser said:
May I as how you modelled the ridge? Or is that a material with displacement?
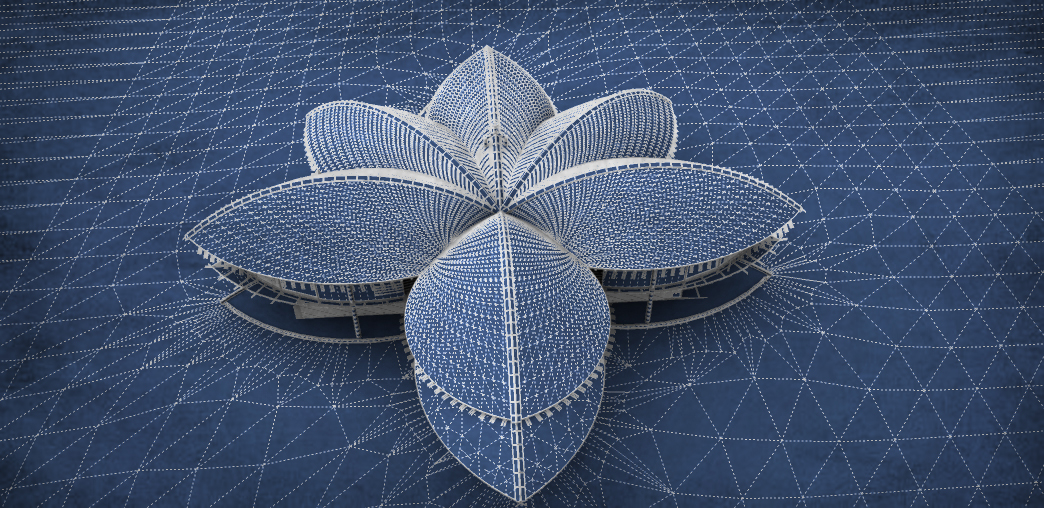
the roof and the ridge were complicated. i first made outlines for the complete leaf shape with splines. then i used curves (z-height) to connect the separate leafs to the center. with that shape finished i was able to build the bearing wood beams (extrude tools) and wood beams that run to the center of the building overhead. inbetween each leaf there are shared beams runinng to the middle as well. this were done with the same method as the overhead beams. still from the spline shape i isolated the tensile structure boarders for the half of each leaf (12 segments alltogether)and did a redraw to fit the overlapping. now i used edges by rails (drawing only profiles)to get the even subdivision for the small rafters running along the roofs inner side and extruded them along path with the beam shape - rafters done!
again with extrude edges by rails i skined the 12 separate shapes. first the inner part the runs exactly along the bearing wood shape but overlaps to the sides and then the outer skin which uses a slightly modified version of the inner skin to give it the smooth bubbely shape (note: each leaf on on side of the house uses a completly different base shape). finally i connected inner and outer skin.
in the end i did the intermediate beams the run inbetween the bearing beams and the shade panels that you can see on the front and back of the house.
the precision needed to get it all working in the end was exhausting in parts. although now it sounds quite easy i needed a lot of thinking to figure out this workflow. a tricky part for example was to calculate the angel needed to get the rafters overlap with the bearing beams and still run along the skin and not through it.
the overhead roof shingles (the ones running to the center) were done with component stringer.
hope that answers your question?
i´ll post some monochromatic detail views shortly.
