Makes it so simple!
I just downloaded and ran the True Tangents plugin. I guess it is called "Tangent-Tools" in the extension toolbar. Oh so much faster and easier! Thank you again!
@Dave-R
That's exactly what I need, thank you! Is that the True Tangents plugin that you referenced? I agree with using arcs instead of circles for anything that is not perpendicular to one of the vertices that would be created by using a circle (I know I am not saying that correctly, but I am sure you understand). Basically arcs for anything that is not at 90 degree increments.
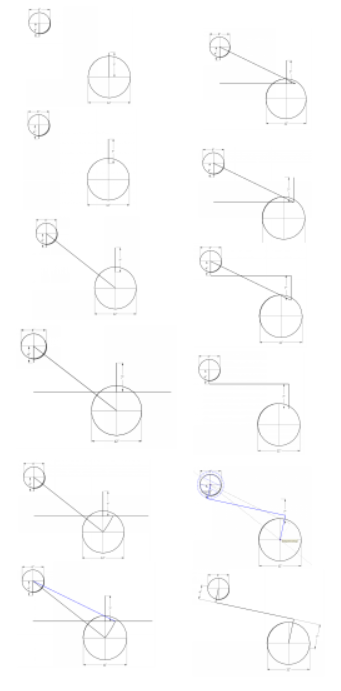
I struggled a good bit this morning to find a way to do it with Sketchup's native tools. It takes a few more steps, but I don't regret the struggle because of what I learned. My biggest struggle to overcome was trying to figure out how to rotate a line around a point to exactly meet another line. The Rotate tool doesn't do it. The protractor tool doesn't help. Finally I stumbled upon drawing an arc from the pivot point to the end of the line, over to intersect with the other line. Bingo! I should've known, but silly me.
Thank you very much, I will look at that.
Good morning,
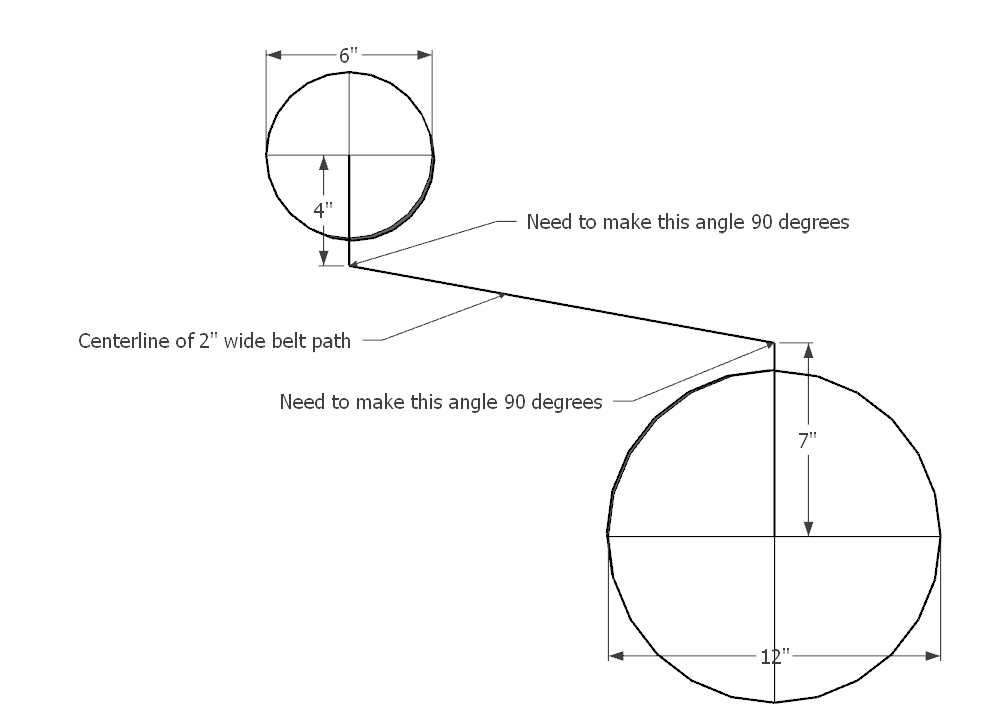
I am trying to figure out a way to model a simple (square cross section) belt around 2 pulleys that do not have easy 90 degree references to each other. They way I typically do this would be by drawing the route, then using the follow me tool to extrude the cross section around, completing the task. My problem is creating that route. In this screenshot, I created example wheels of 6" & 12" diameters, set some arbitrary distance away from each other. I chose a 2" wide belt for this example to simplify the numbers, meaning that they distance from the center of each wheel to the centerline of the belt would need to be 1" greater than the wheel radius, and at 90 degrees from the wheel axis. I have tried drawing lines of the correct length out from each wheel axis, connecting them, and then rotating the line coming out from each wheel axis around said wheel axis, thus preserving the line length, but I cannot find a way to rotate this line so that it is perpendicular to the belt path centerline. I do hope that I am overthinking this, and that there is some easy way to accomplish this task, but it has evaded me thus far. Any help would be greatly appreciated! Thank you!

True that. Options are wonderful things to have.
Ah ha, just drag the unwanted tools off the toolbar, and let them disappear into oblivion, why didn't I think of that?! It's people like me that "tips & hints" are designed for. This is perfect, thank you Dave. I haven't created any new toolbars, but there are some toolbars that I only use one or two tools from, and don't want any extra tools cluttering up the joint, especially when I use keyboard shortcuts for many of them. Gone, ha!
Top o' the mornin' to ya Dave.
I'm experiencing the same problem as the OP. I finally upgraded my 2010 HP Pavilion running Windows 7 (no GPU) to an HP Victus w/ Intel Core i7 & RTX 3060 GPU, running Sketchup Pro 2020. Still getting used to NOT having to take a coffee break between hitting the "Sketchup" icon and actually being able to start work  Looking forward to actually being able to render images w/ Twilight Render, something the old HP just couldn't handle w/out a GPU.
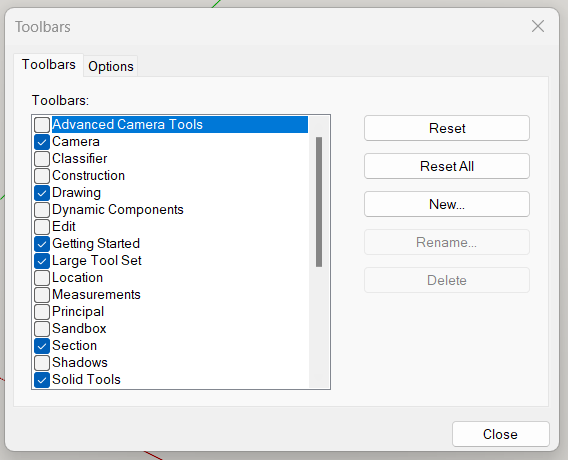
Anyways, I'm getting SU 2020 set up how I like it on the new rig, and I'm not finding an option to actually customize the toolbars, as in the OP's question. I admit it, I forgot to install as admin, so I ran the repair that you mentioned in your reply, then shut down & restarted computer & SU. Still no "customize" option, see attached screenshot. I don't know how I did it on the old computer running SU 2020, but those toolbars are definitely customized. Do you happen to have any ideas up your wizard sleeves (for surely you are a SU wizard)? The OP didn't post back after your reply, so I'm not sure if their problem was alleviated.
Thanks Dave!
Thank you for your reply, Dave.
I am using SketchUp/LayOut 2020.
That is certainly a workaround, but I would need to adjust my workflow to accommodate that... I use guidelines all the time, but I am a heavy user of the Edit -> Delete Guides function. It would be strange (for me) to leave a guideline in my model, is that something "normal" to do?
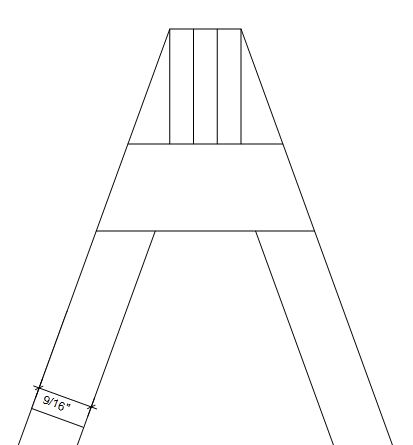
The other workaround that I found was to draw a line on top of a model edge in LayOut, then draw a perpendicular line via the inference engine which creates points for me to snap a dimension to. The only problem there is that it does not snap to the model, and therefore does not reflect the scale of the model (see "9/16" dimension on attachment). I can remedy that by deleting the lines drawn in LayOut, then moving one of the "legs" of the dimension so that it snaps to the model, and therefore reflects the model scale. It's a workaround, but I guess it works. Would you have any other suggestions that I could try?
Thank you again, Dave, I appreciate your expertise.
[attachment=0:1s7smbvm]<!-- ia0 -->Layout 2020 Screenshot - Delete Lines & Snap Dimension Points to Model.JPG<!-- ia0 -->[/attachment:1s7smbvm]
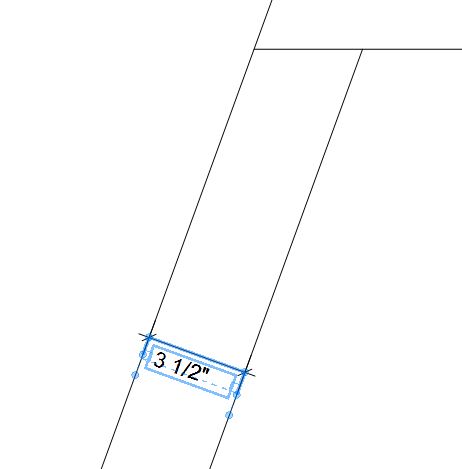
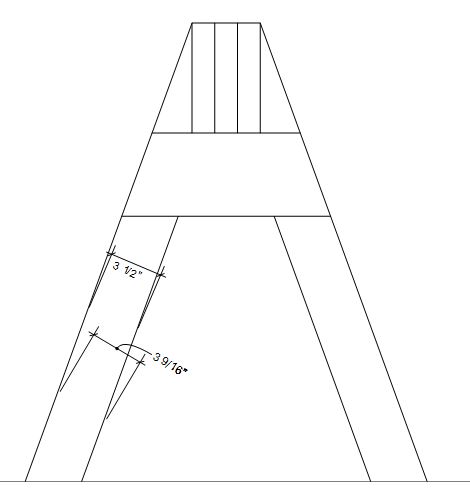
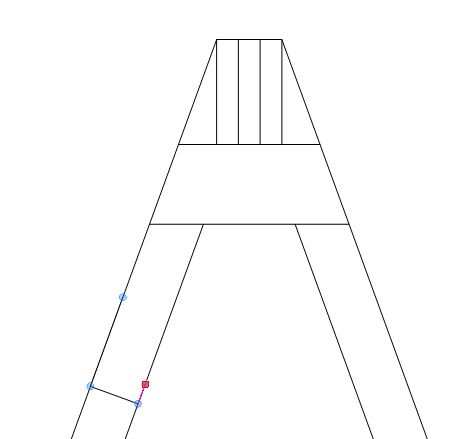
I am trying to snap dimensions on an object which is at an angle in Layout (in this case it is a 4x4 lumber post for the kids swingset, actual dimension is 3-1/2" x 3-1/2"). The post is at a 20 degree angle from vertical. This is a detail where I cannot see either end of the post, so I don't have an intersecting edge to inference off in order to get a dimension that is perpendicular to the post. I have not found a way to get the dimensioning tool to inference off anything other than the green or red axis, which seems to be useless for this task. I can eyeball it, but I hope there is a better way to accomplish this so the dimension is actually perpendicular to the post. I have attached a screenshot of what I am trying to accomplish, with a few dimensions snapped for visual reference. The further away from perpendicular the snap points are placed on the object, the further off the dimension is. Can somebody please help me with this?