Medeek Wall Plugin
-
Version 4.0.7 - 07.20.2025
- Enabled the polyline draw mode for all wall justification options: Front, Center, Back, Sheathing.
Tutorial 72 - Wall Justification (7:16 min.)
-
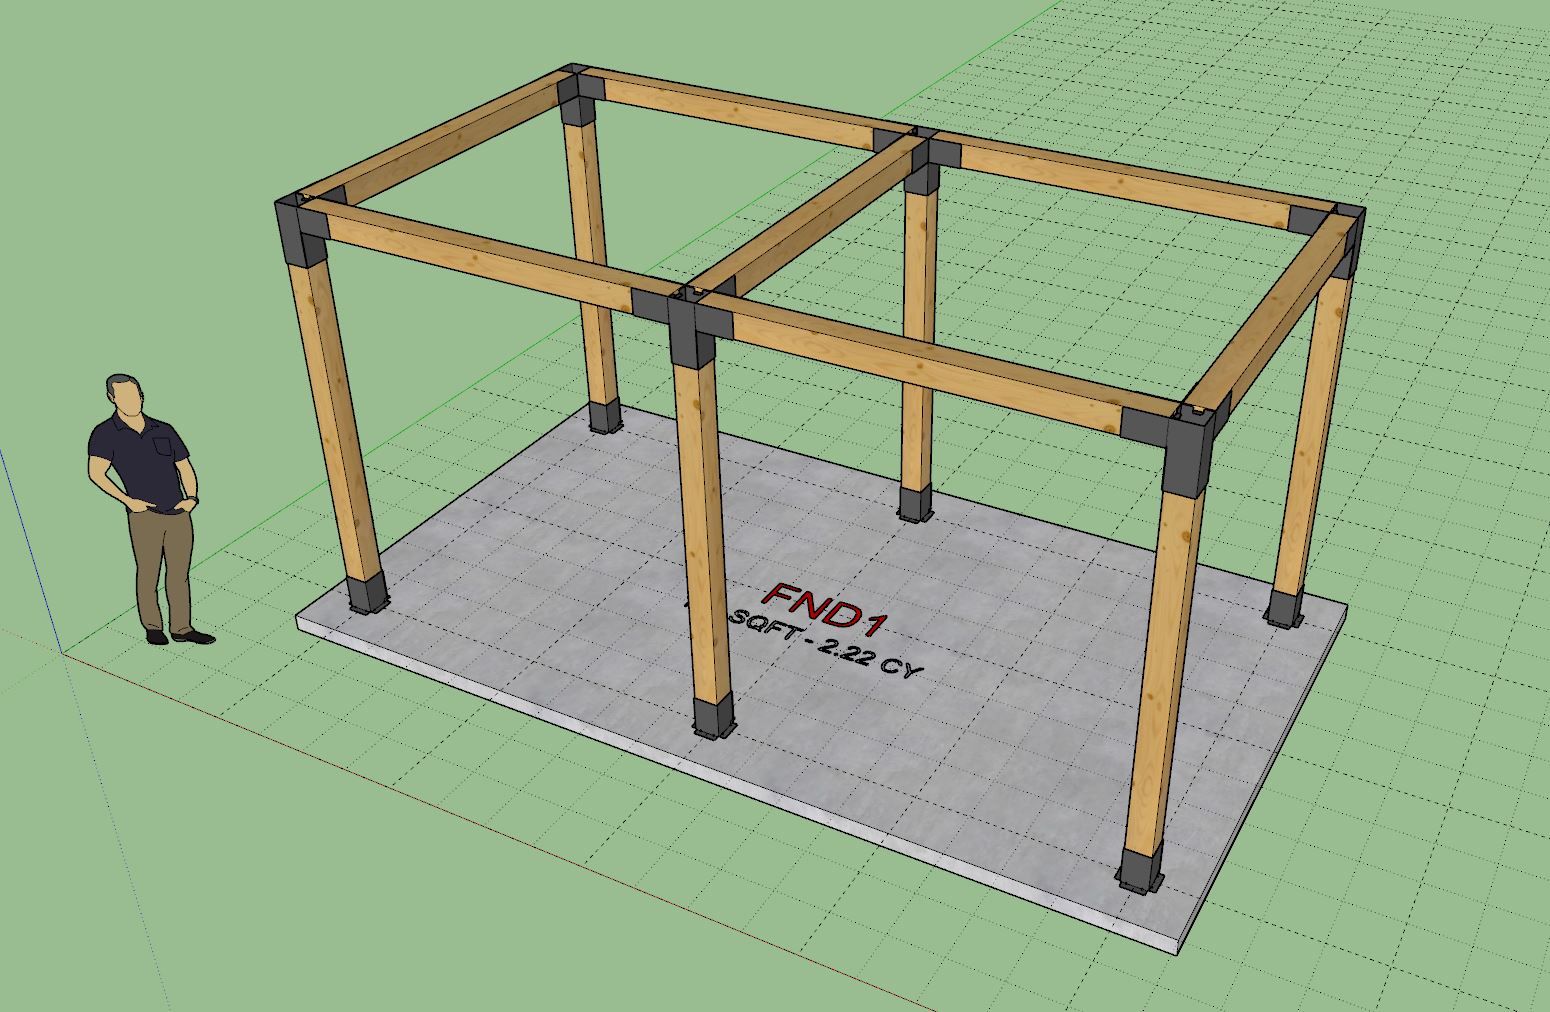
mdkBIM Tutorial 6 - Building a Ham Shack
My initial concept of the ultimate Ham Shack (16' x 12') designed in SketchUp using the Medeek extensions.
The model can be found here:

3D Warehouse
3D Warehouse is a website of searchable, pre-made 3D models that works seamlessly with SketchUp.
(3dwarehouse.sketchup.com)
My call sign is KK7UXO, but I don't get on the radio much, mostly I'm programming. :slight_smile:
-
Per customer request I will add in an LSL option for the framing very shortly:
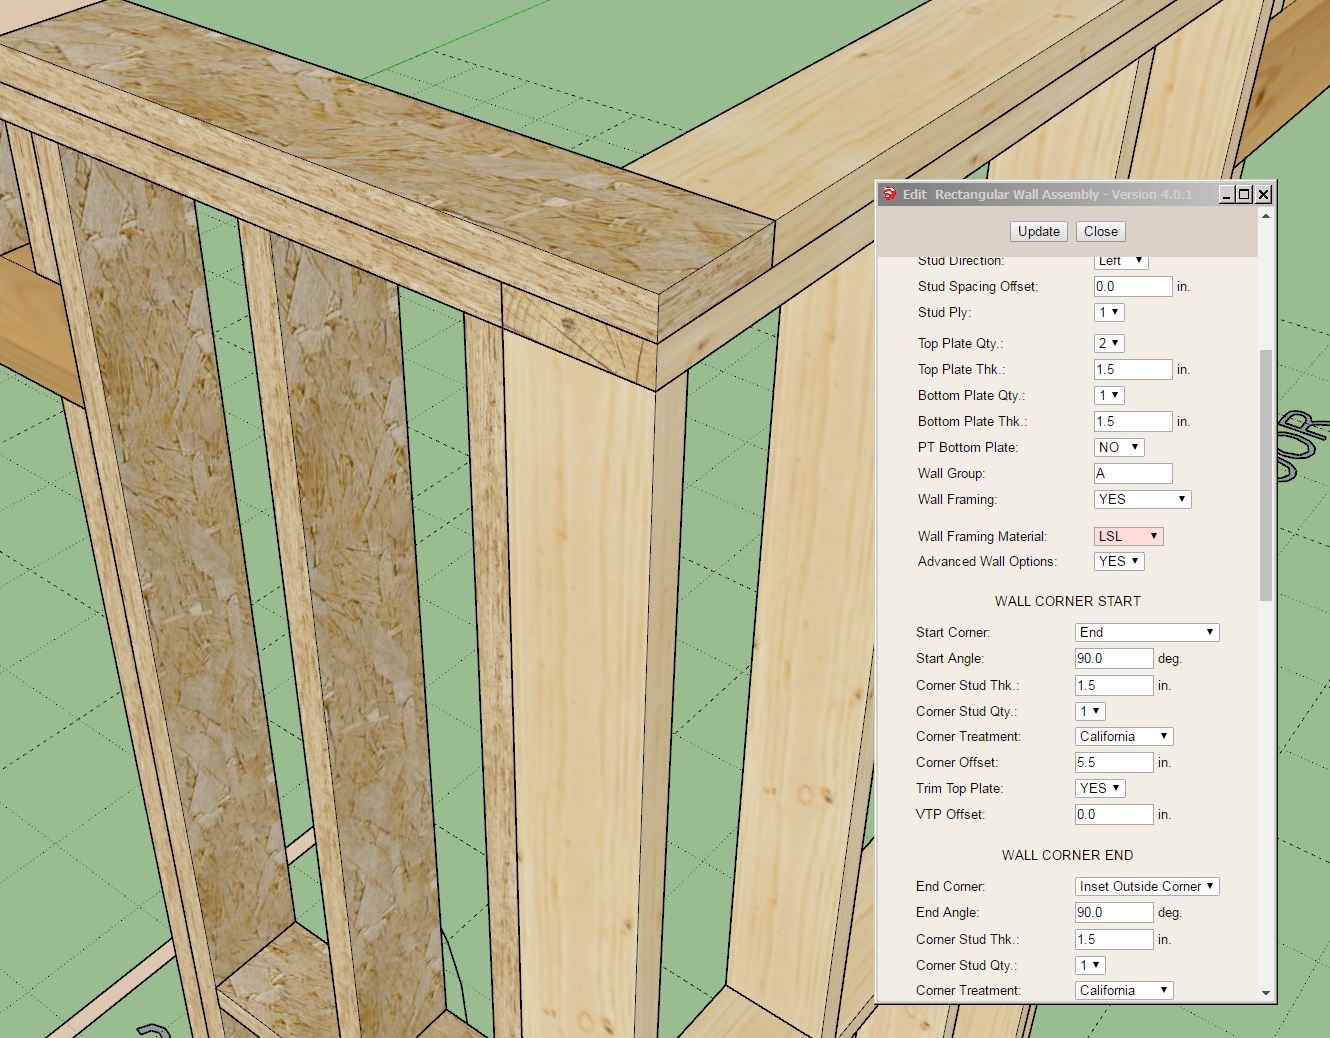
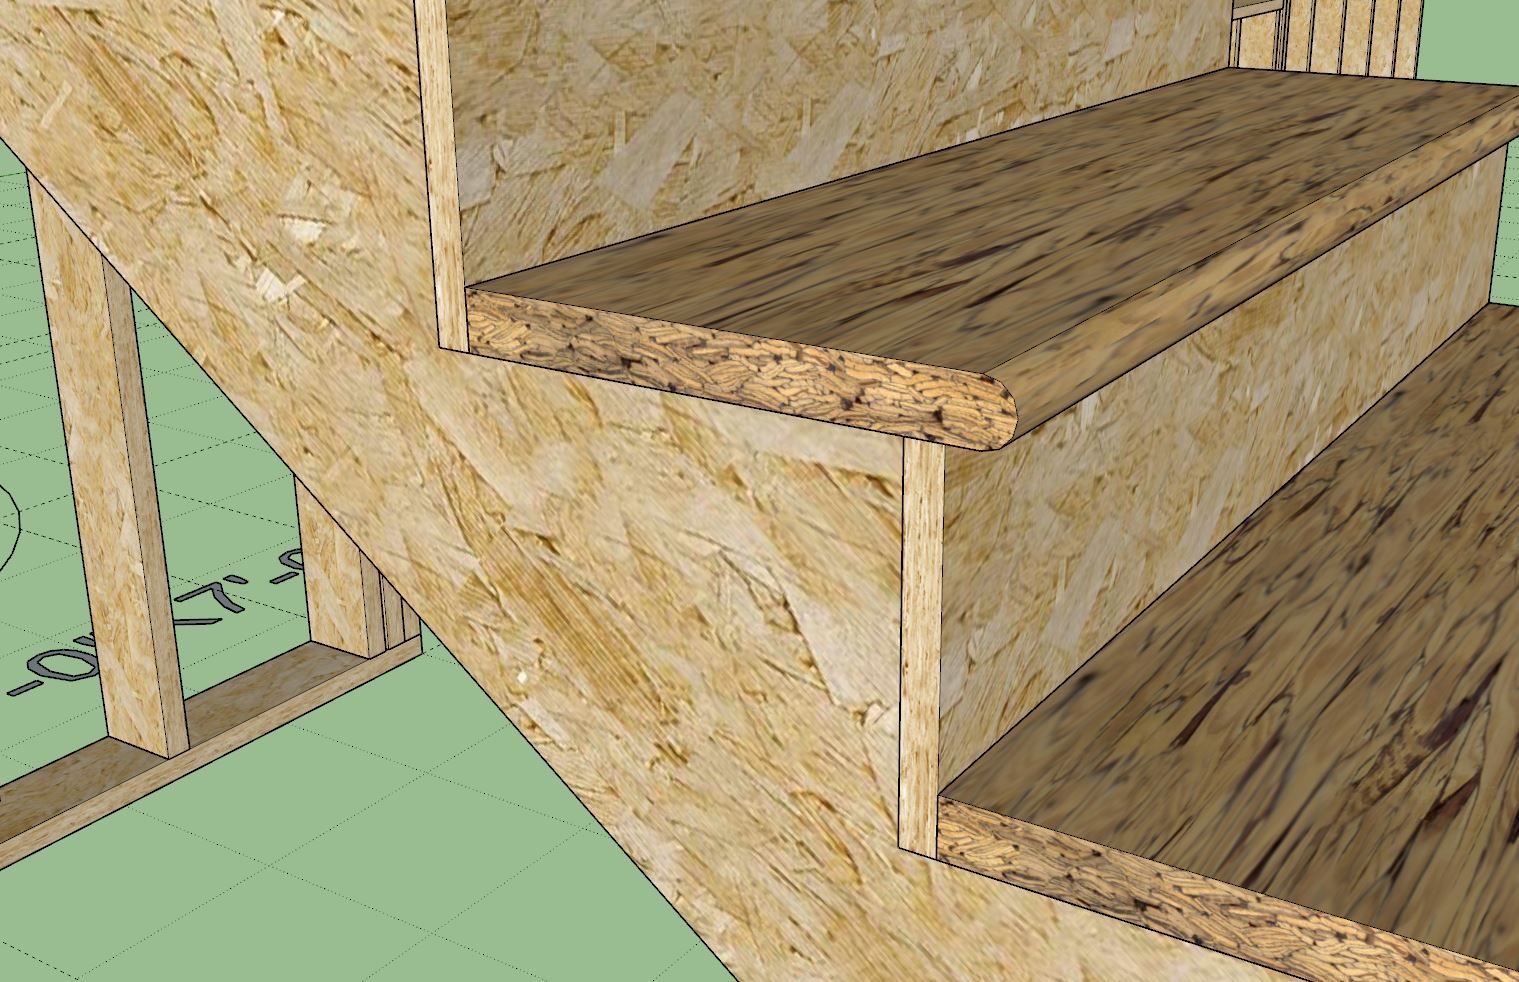
I'm using the updated LSL texture I created for the Floor plugin, but I still feel like it is a bit dull or dark compared to my previous texture (OSB). It could be a bit more vibrant or saturated. I will need to spend some more time on this.
Weyerhaeuser sells their Timberstrand line of LSL framing and studs:
However, I would always worry about water damage. What happens if the LSL gets wet? We all know what happens to OSB, and plywood is a much more robust product in comparison. Standard lumber seems like a much more resilient choice when it comes to potential water damage, but I could be wrong.
-
Some Youtube viewers of this video reached out and told me that they had more equipment than could reasonably fit within such a small structure. I agree, maybe a 16'x12' space is a bit cramped for anyone, especially if you are also using it for a content creation studio. This is where the parametrics of the extensions come in real handy:
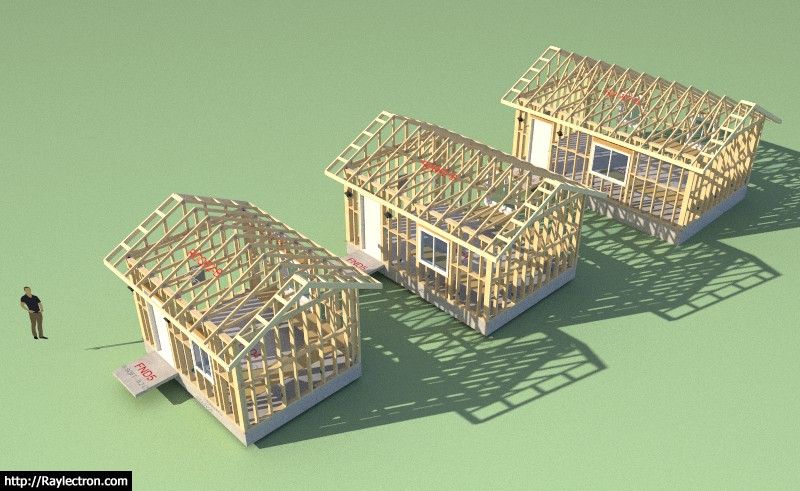

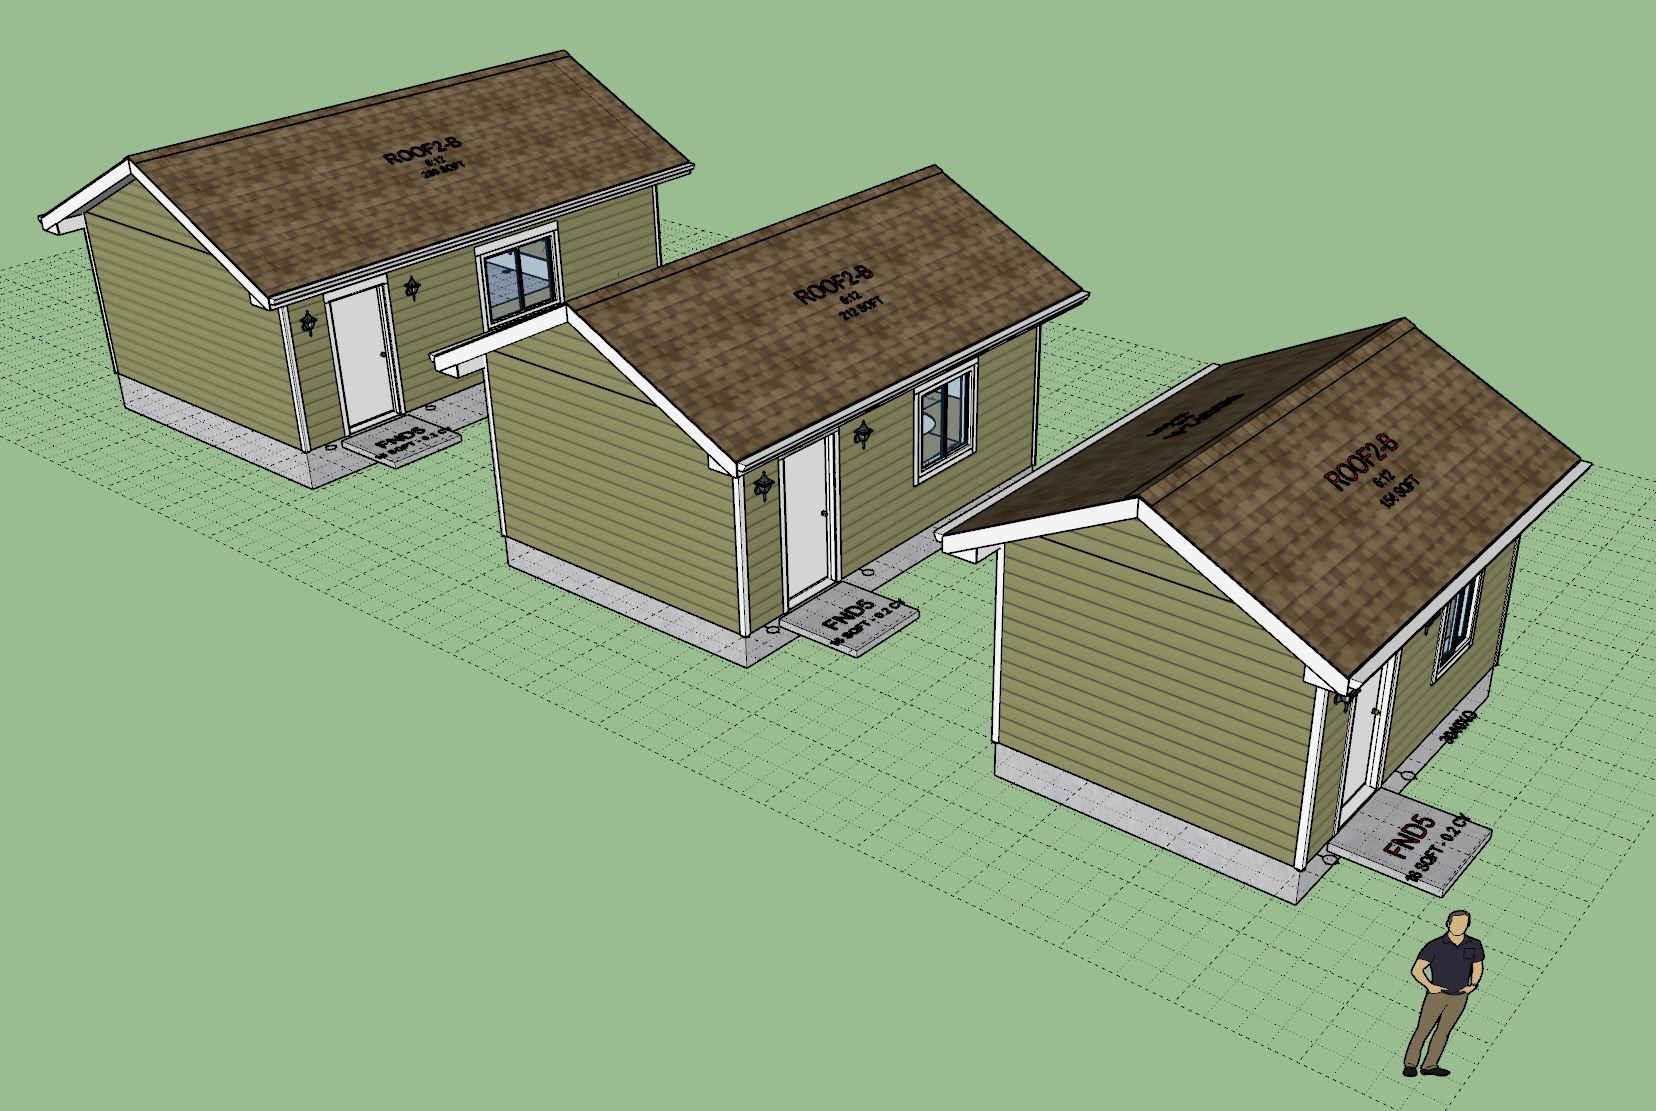
The model(s) can be viewed and downloaded here:
3D Warehouse
3D Warehouse is a website of searchable, pre-made 3D models that works seamlessly with SketchUp.
(3dwarehouse.sketchup.com)
-
yeah, definitely depends on the gear a content creator needs. many will simply need a good computer, possible a good music keyboard or two, good video monitors, good audio monitors, and fresh air. many would fit into a 9x11 room but more would be better in a 12.4' W x 15' L due to best ratio for acoustics assuming 8' H ceiling.
-
Version 4.0.8 - 07.25.2025
- Enabled LSL as a wall framing material.
- Updated the material textures for LSL and PSL.

These don't seem like major updates however there are numerous places within the plugin that required updating and also during the process I was able to further refine and compress the code so it is now more efficient and better organized. Updates were made to the following modules: Walls, Stairs, Columns, Beams, Posts and Shearwalls.
-
Version 4.1.0 - 07.28.2025
- Added the following Simpson "Sage" post caps and bases to the post module: SAGE_B66, SAGE_C66, SAGE_T66
- Fixed a critical bug for custom materials within the stair module.
- Updated all of the move tools with upgraded wireframe previews and dimensions.
- Updated the window, door and garage door draw tools with a filled wireframe preview.
-
Version 4.1.1 - 08.17.2025
- Added Fixed - Slider (L) and Fixed - Slider (R) windows to the window module.
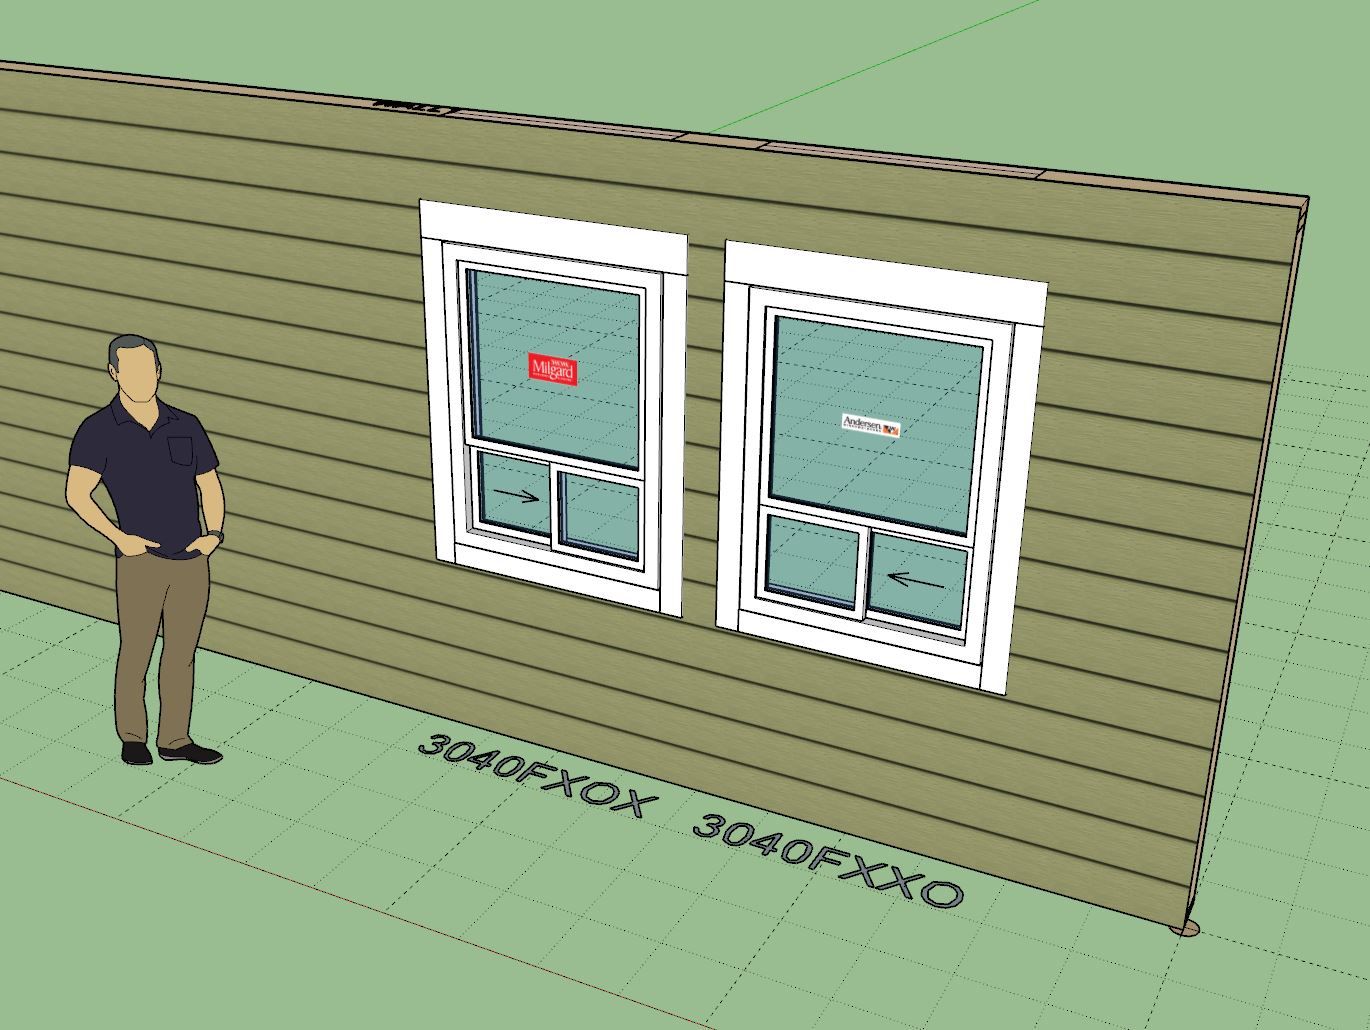
These two window types added per customer request.
-
Version 4.1.2 - 08.18.2025
- Added hexagon windows to the window module.
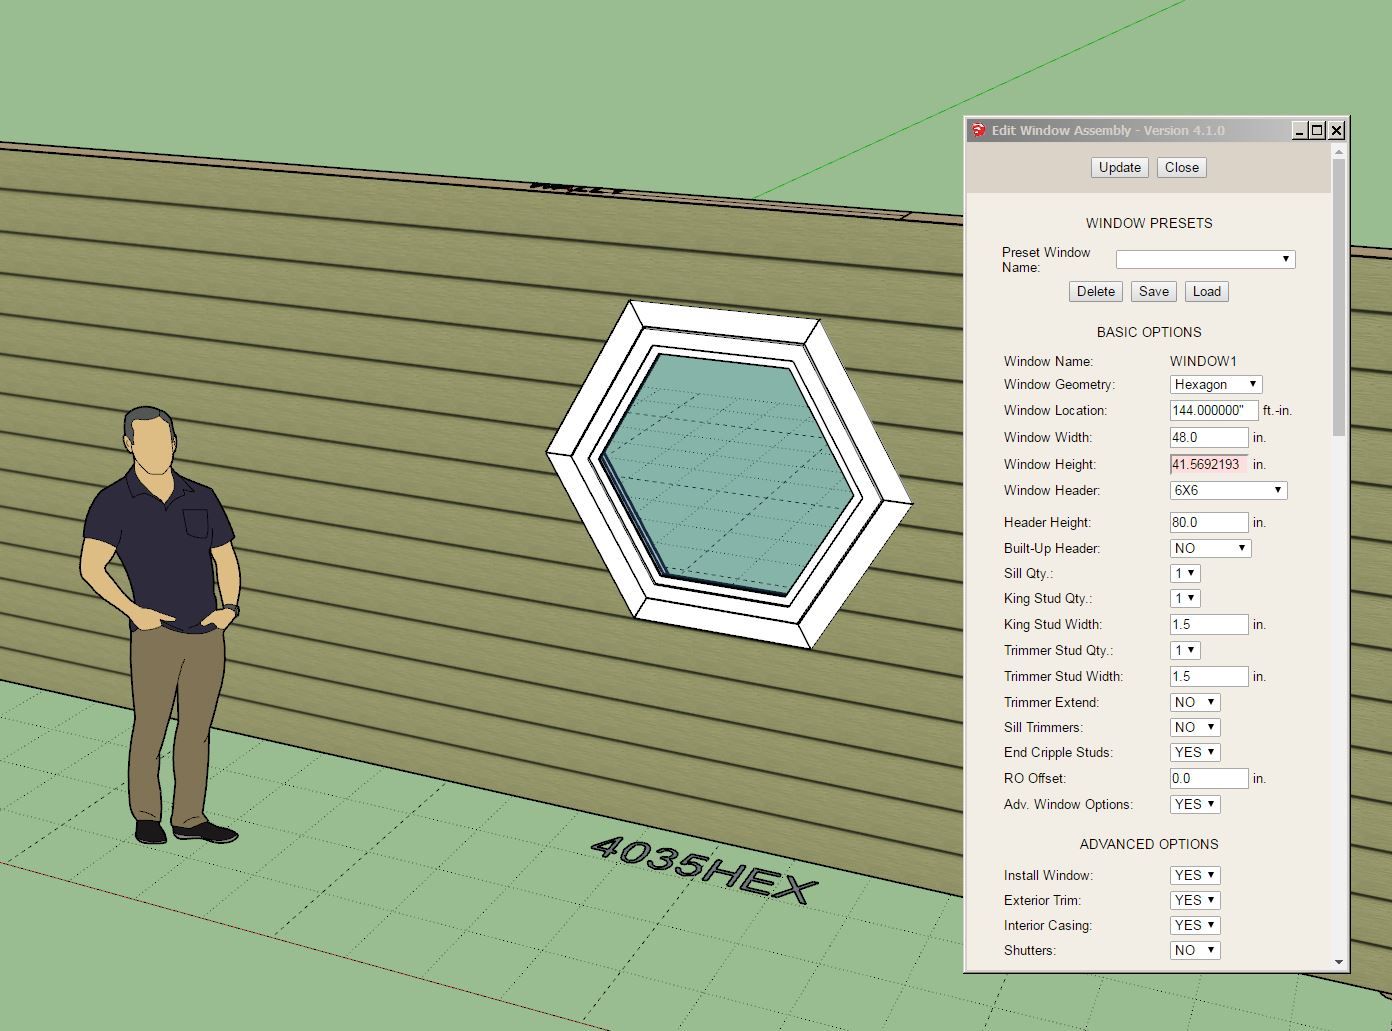
Note, that to get a regular hexagon window you will want to enter in a window height that is given by this formula:
height = width x 0.8660254
So for example if window is 48" wide its height will be: 48" x 0.8660254 = 41.569219"
One can always enter in any size for example an elongated hexagon or squished hexagon but I suspect most manufacturers will typically only stock a "regular" hexagon shaped windows in various sizes.
-
Version 4.1.3 - 08.21.2025
- Added a "Label Scaling" parameter for all wall types.
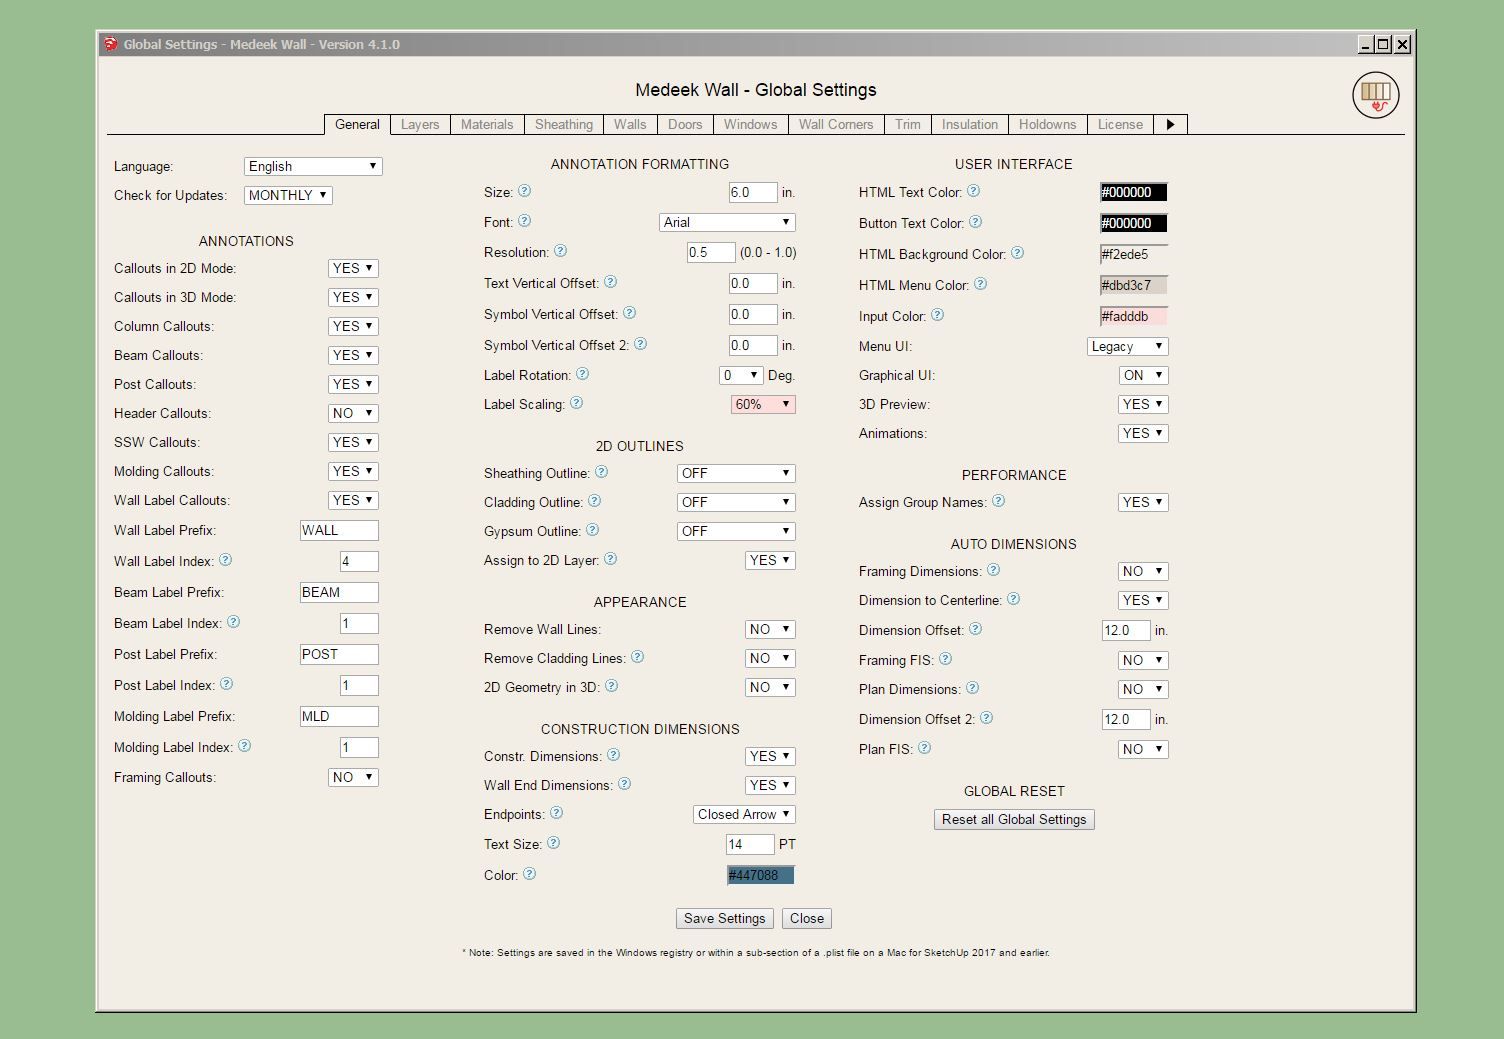
Update per customer request.
-
any future option on framing (wall and trusses) to include the plate end marks? e.g.
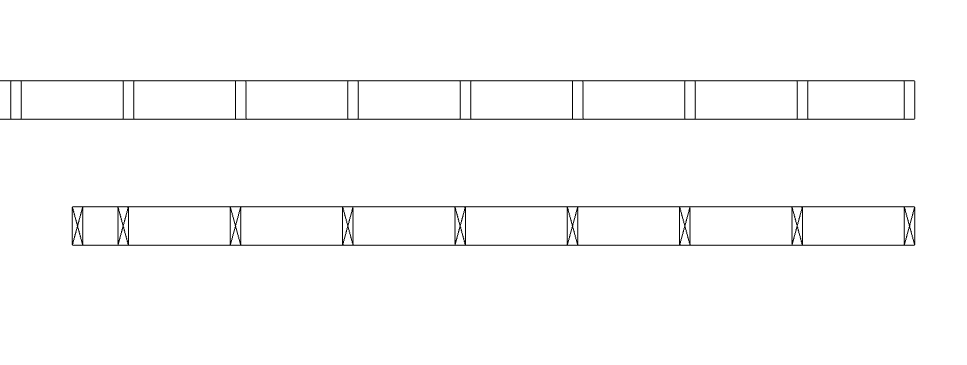
also on the blocking (noggin marks?) etc.?
Glenn
-
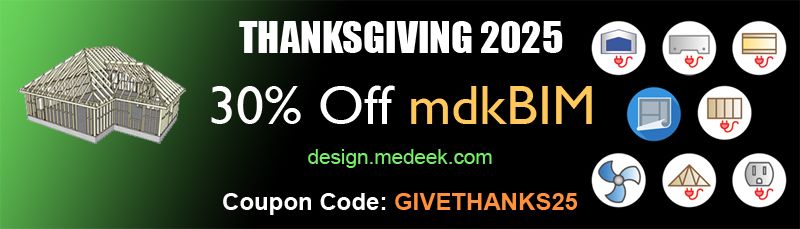
I will be running a Thanksgiving promotion beginning Oct. 30th until Dec. 1st with 30% off of the regular mdkBIM bundle price (permanent license) using the coupon code GIVETHANKS25.
This will reduce the bundle price from $280.00 USD to $196.00 USD. This promo code does not apply to any of the extensions purchased separately. As part of this promotion a permanent license for the Electrical, HVAC and Engineering plugins will also be included upon request at no additional cost. The offer ends on Dec.1st and no rain checks will issued thereafter.
-
Version 4.1.4 - 11.26.2025
- Added "GPS" and "PU" foam insulation as an option for SIP wall panels.
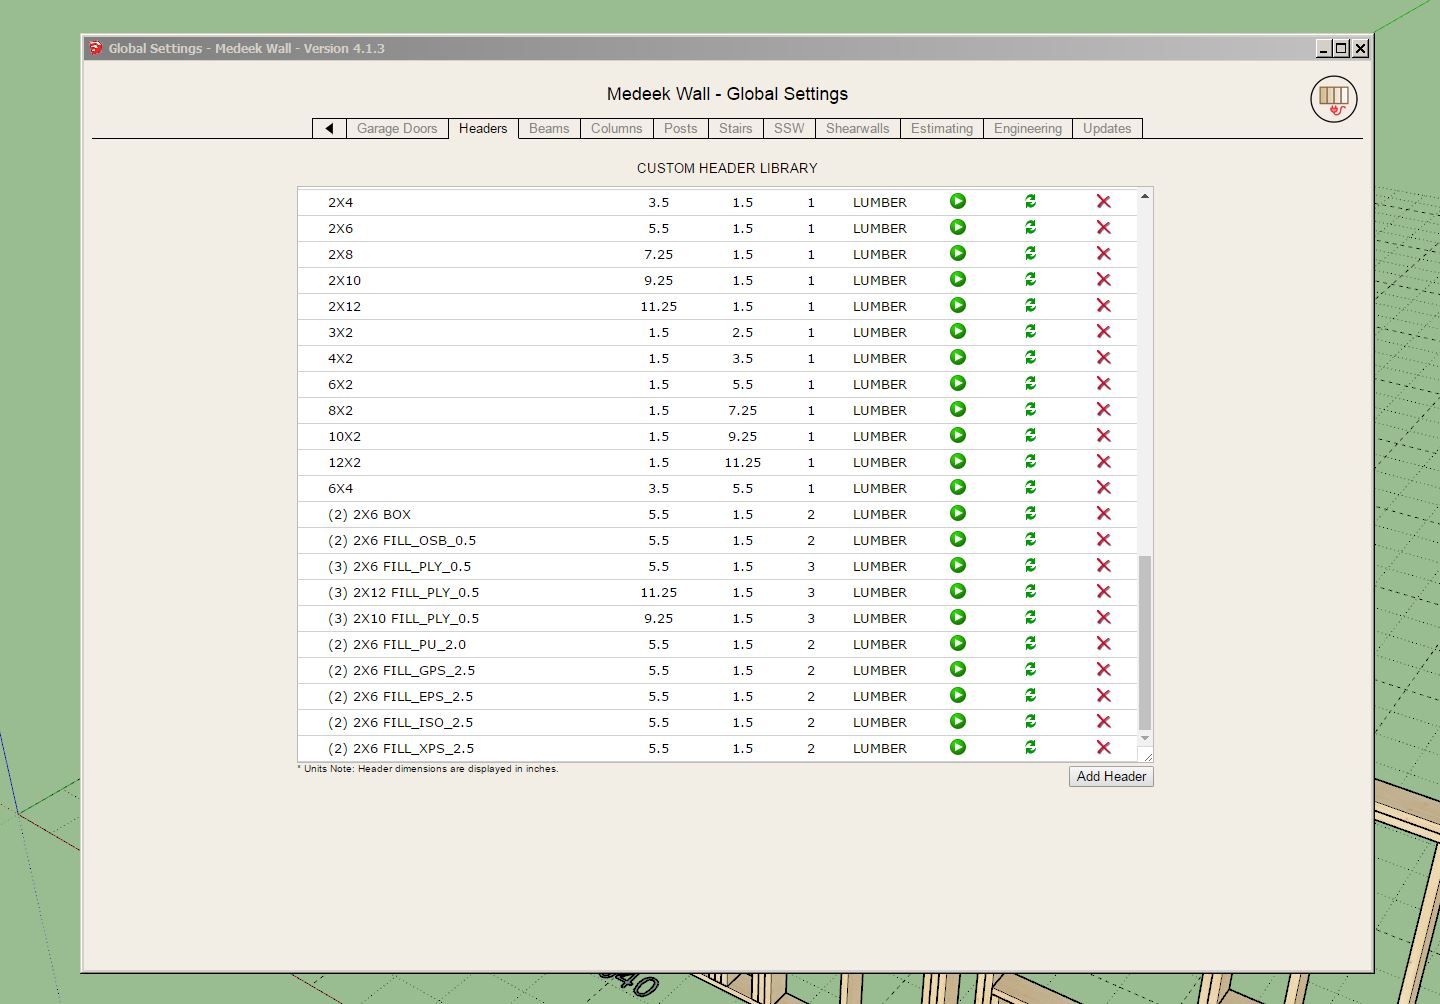
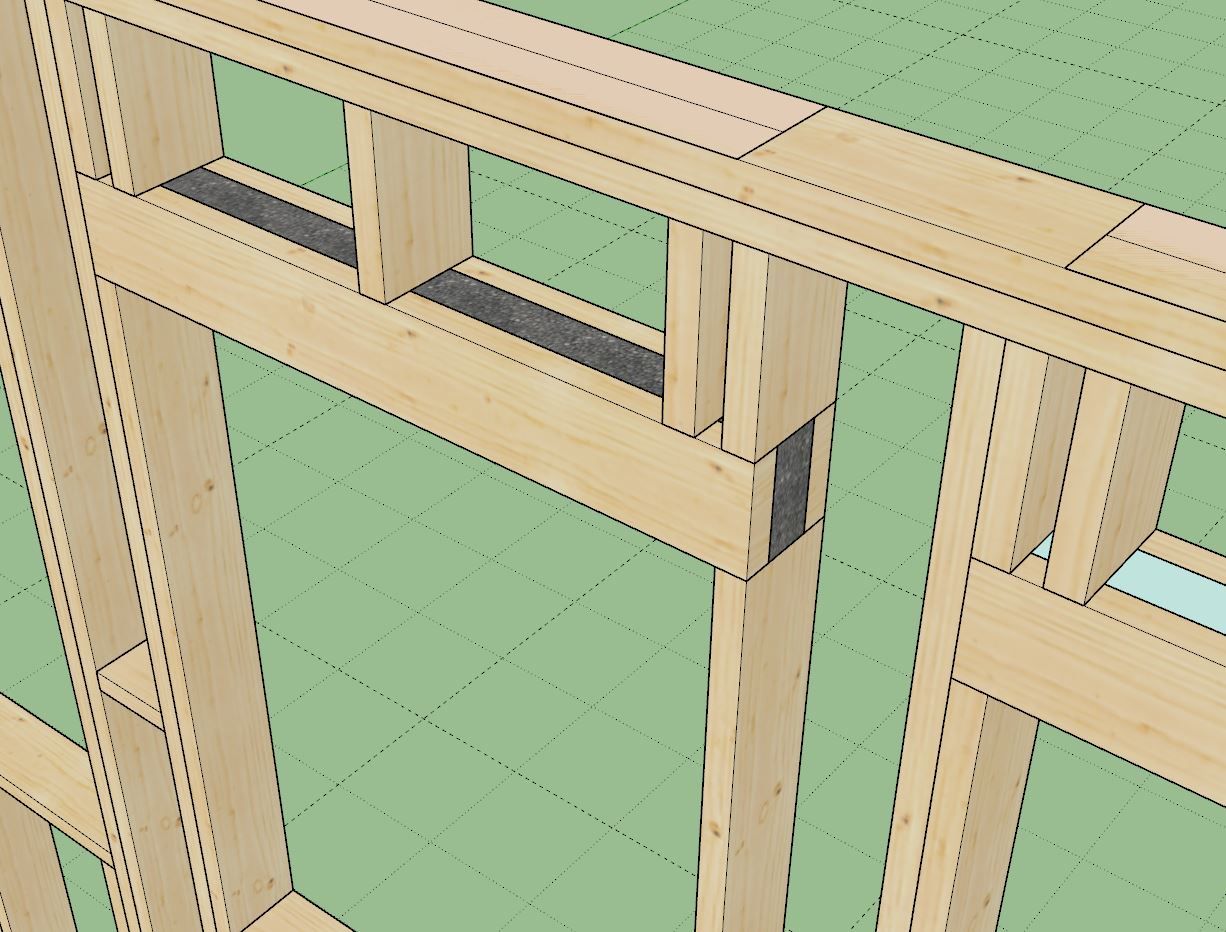
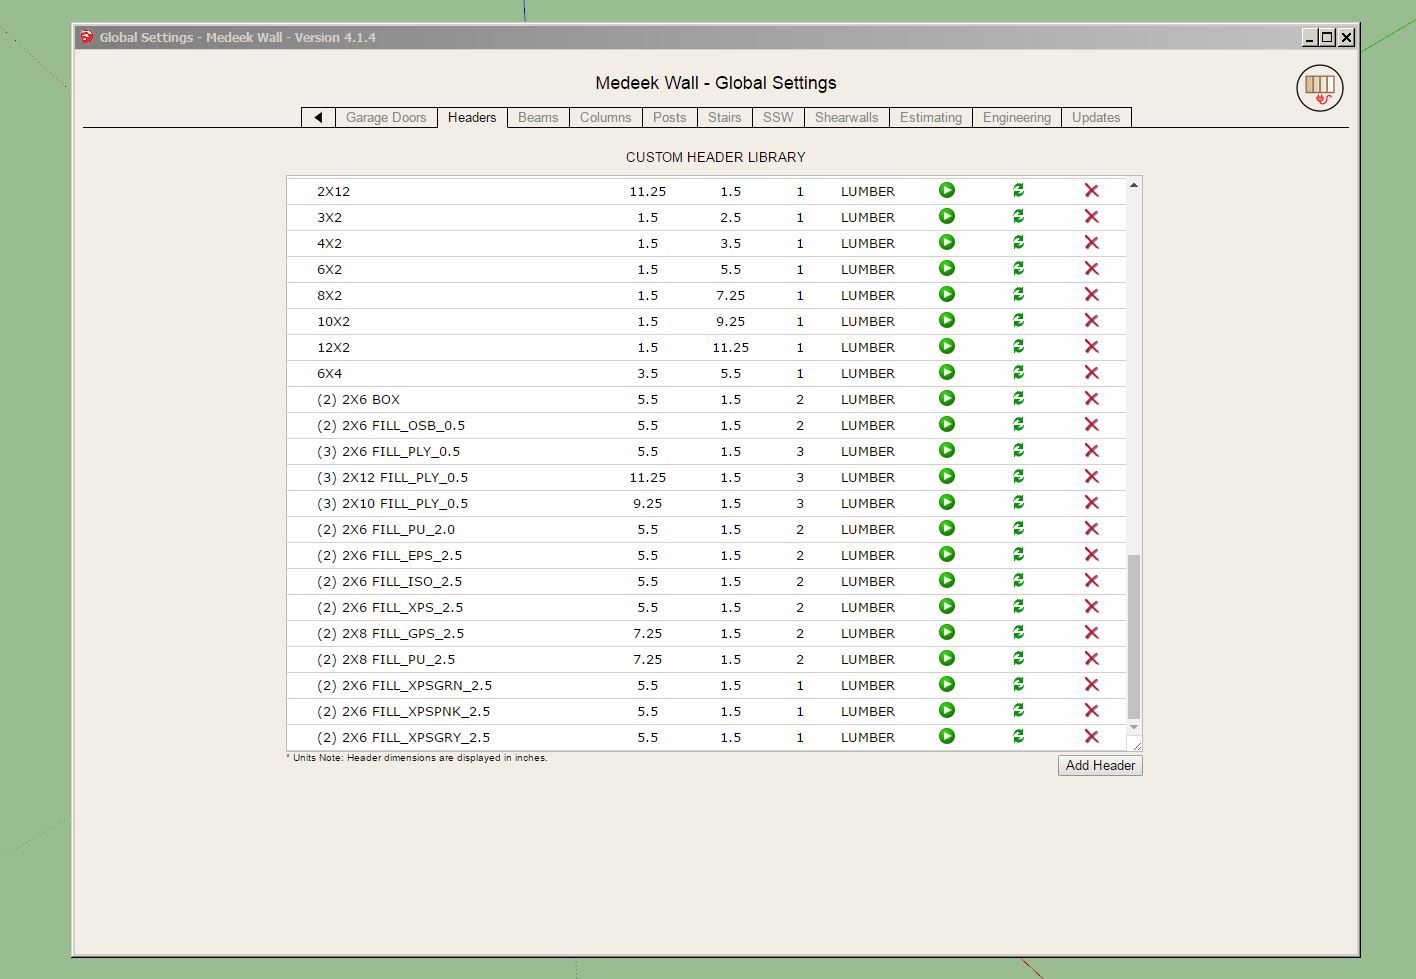
- Enabled insulated (filled) custom headers for windows, doors and garage doors: XPS, ISO, EPS, GPS, PU.
- Insulated headers can be customized/created with the Global Settings similar to standard (OSB/PLY) headers.
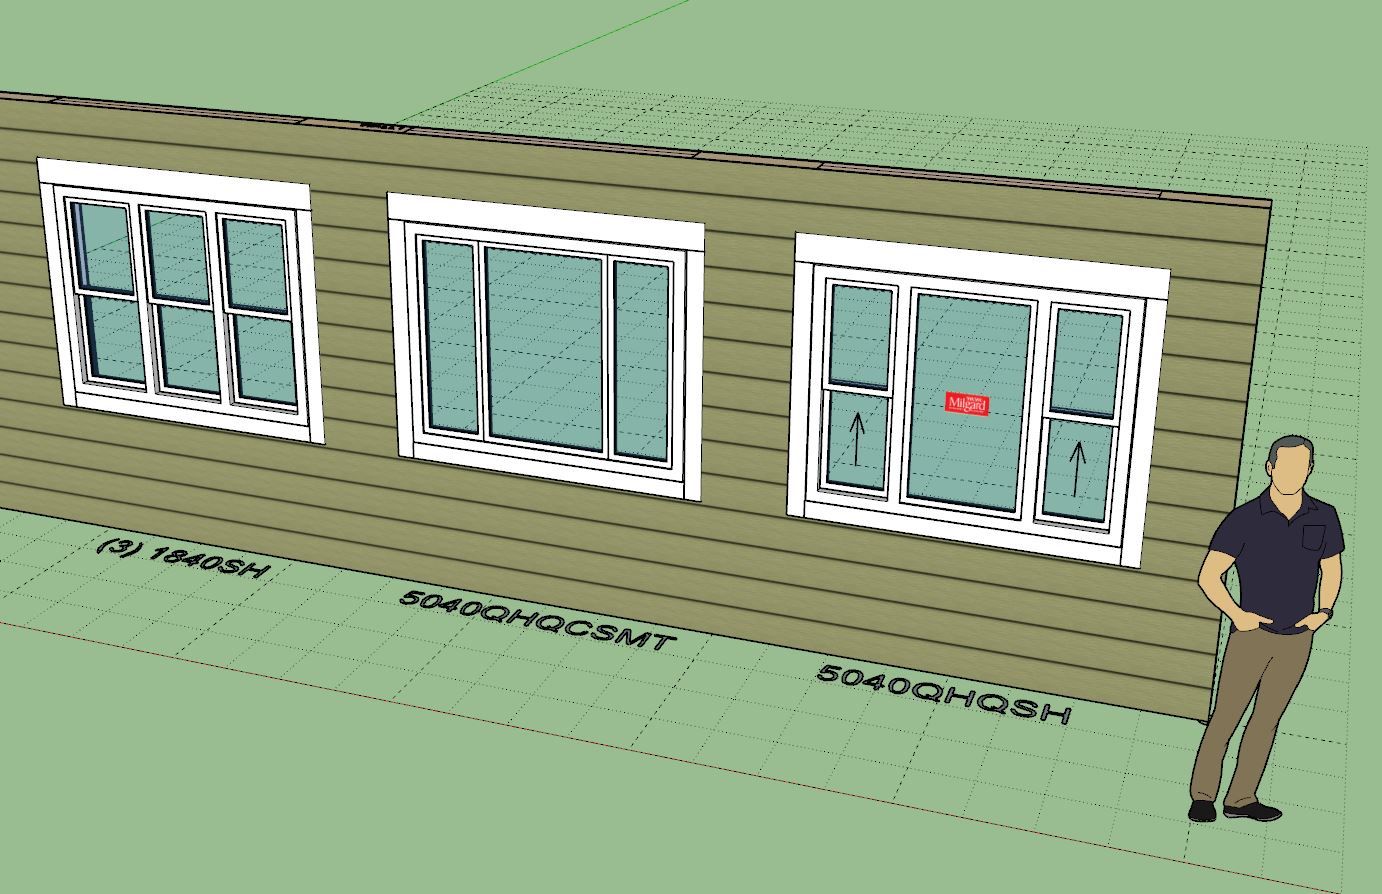
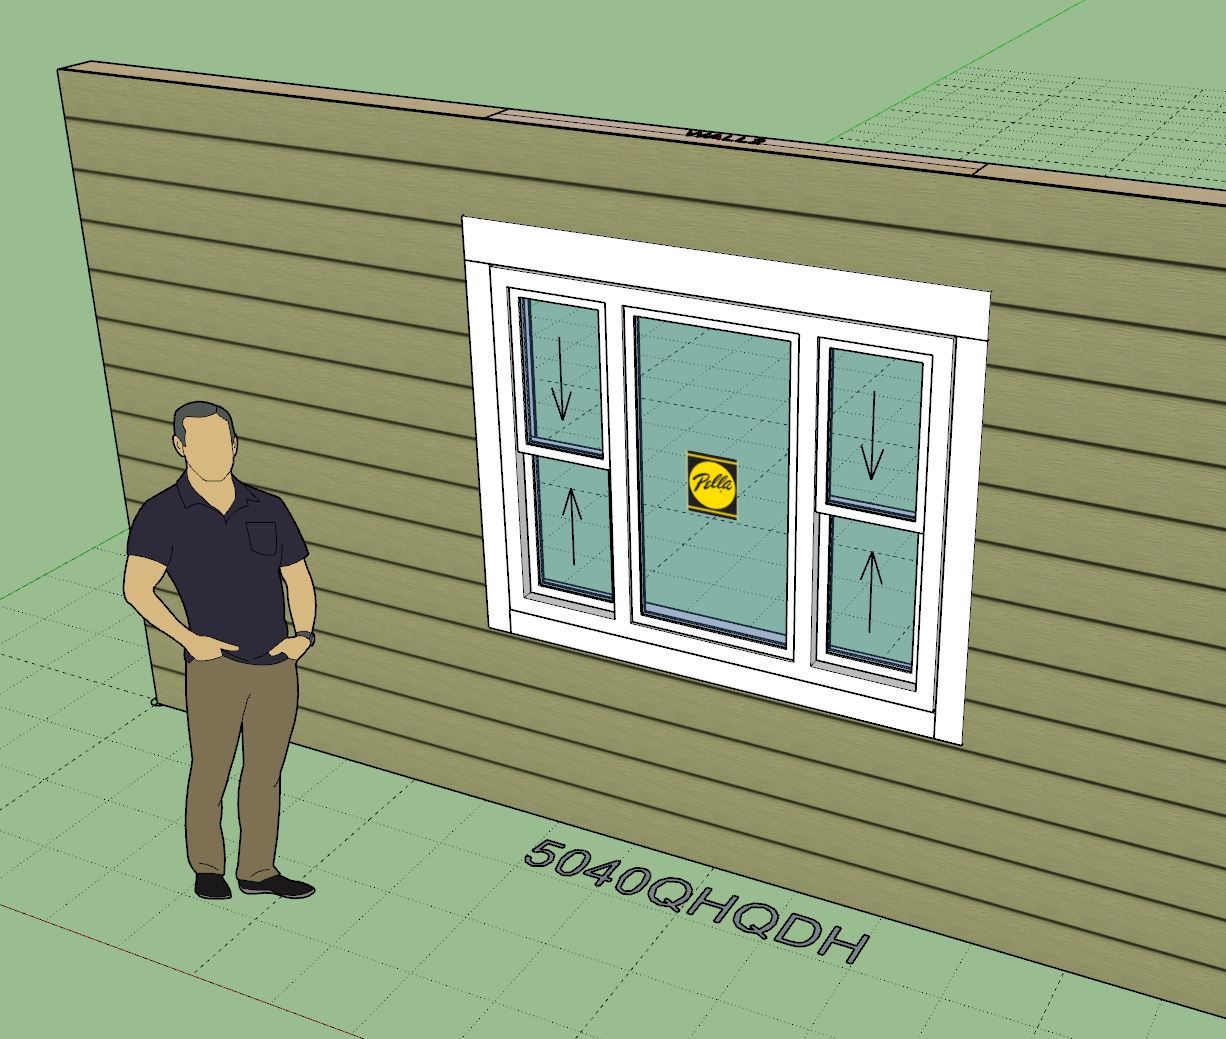
- Added a QHQ Single Hung window to the window draw and edit menus.

All updates per customer requests.
-
Tutorial 74 - Insulated Headers (6:28 min.)
-
Version 4.1.5 - 11.29.2025
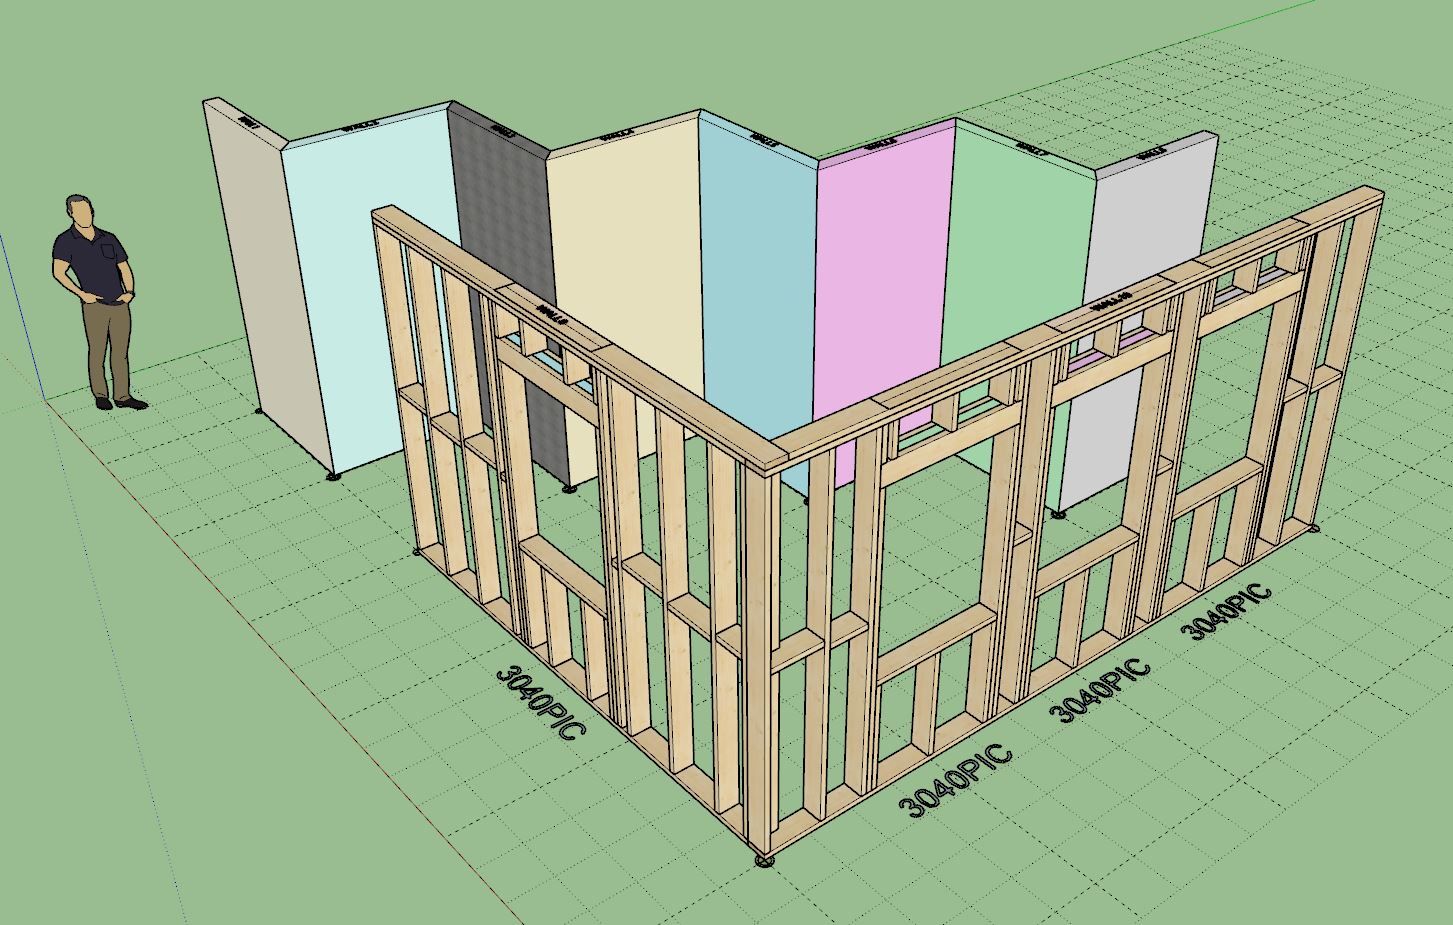
- Enabled Green, Pink and Grey options for XPS headers and SIP wall panels.
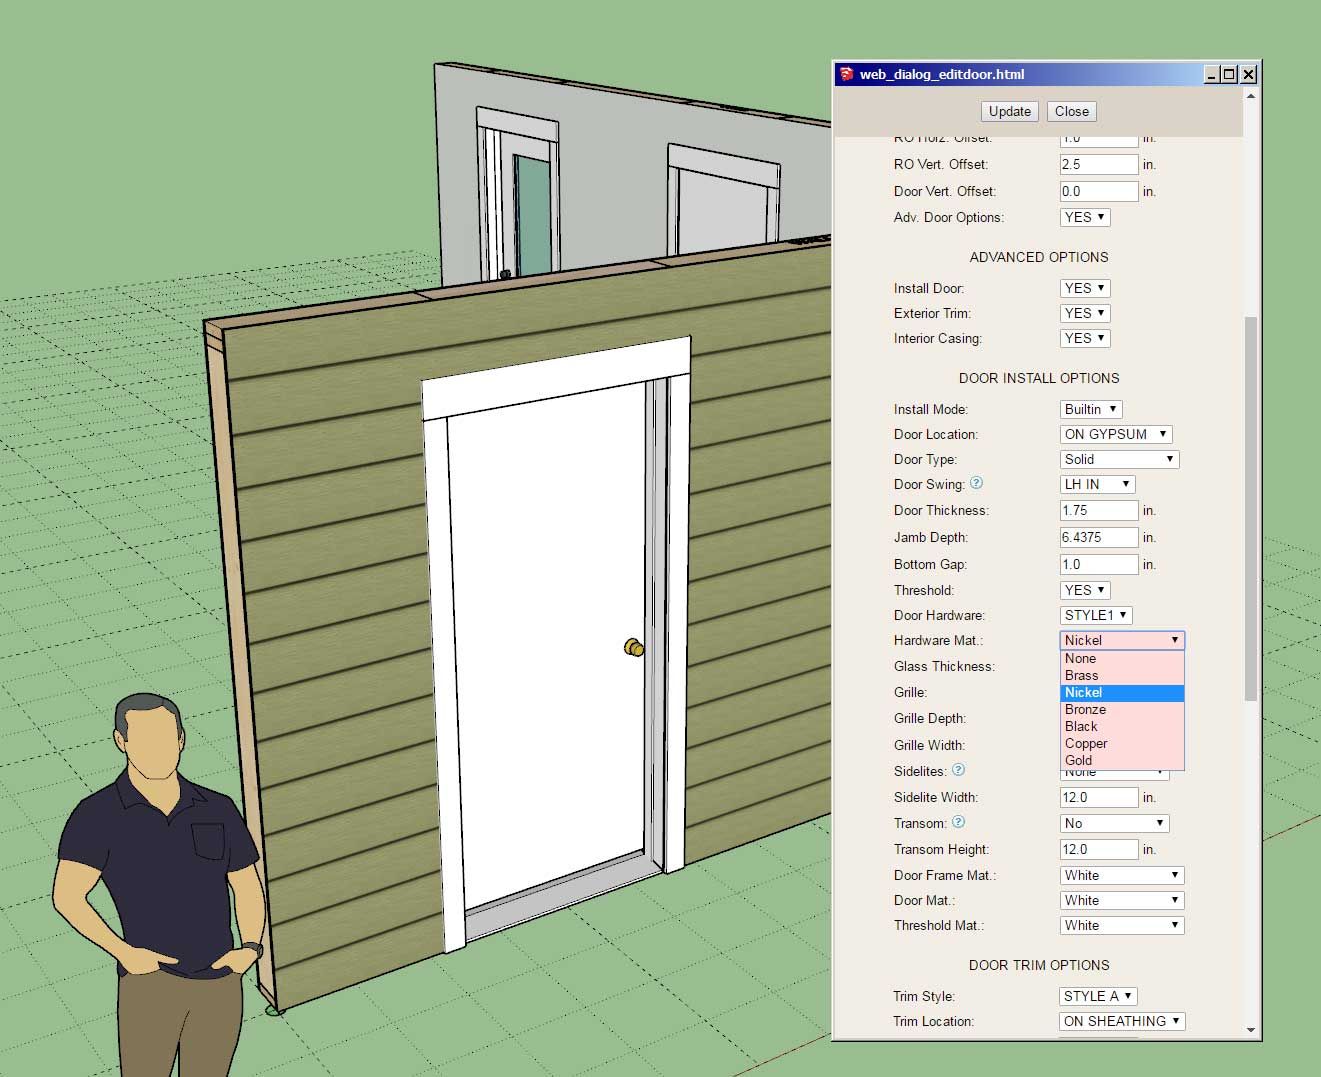
- Added an option in the door draw and edit menus to change the door hardware material/color: None, Brass, Nickel, Bronze, Black, Copper, Gold.
- Updated the file/component loading method for door hardware and shearwall holdowns to increase plugin performance.
-
Version 4.1.6 - 11.30.2025
- Updated the context menus for walls with an “Edit Opening…” option if the selected (right click) wall contains a door, window or garage door.
- Added “Arial Bold” as a font within the Annotation Formatting section of the General tab of the Global Settings.
- Fixed a bug with Single and Double Hung QHQ windows.
- Added a QHQ Double Hung window to the window draw and edit menus.
-
Tutorial 75 - Updated Context Menu (5:22 min.)
-
Version 4.1.7 - 12.05.2025
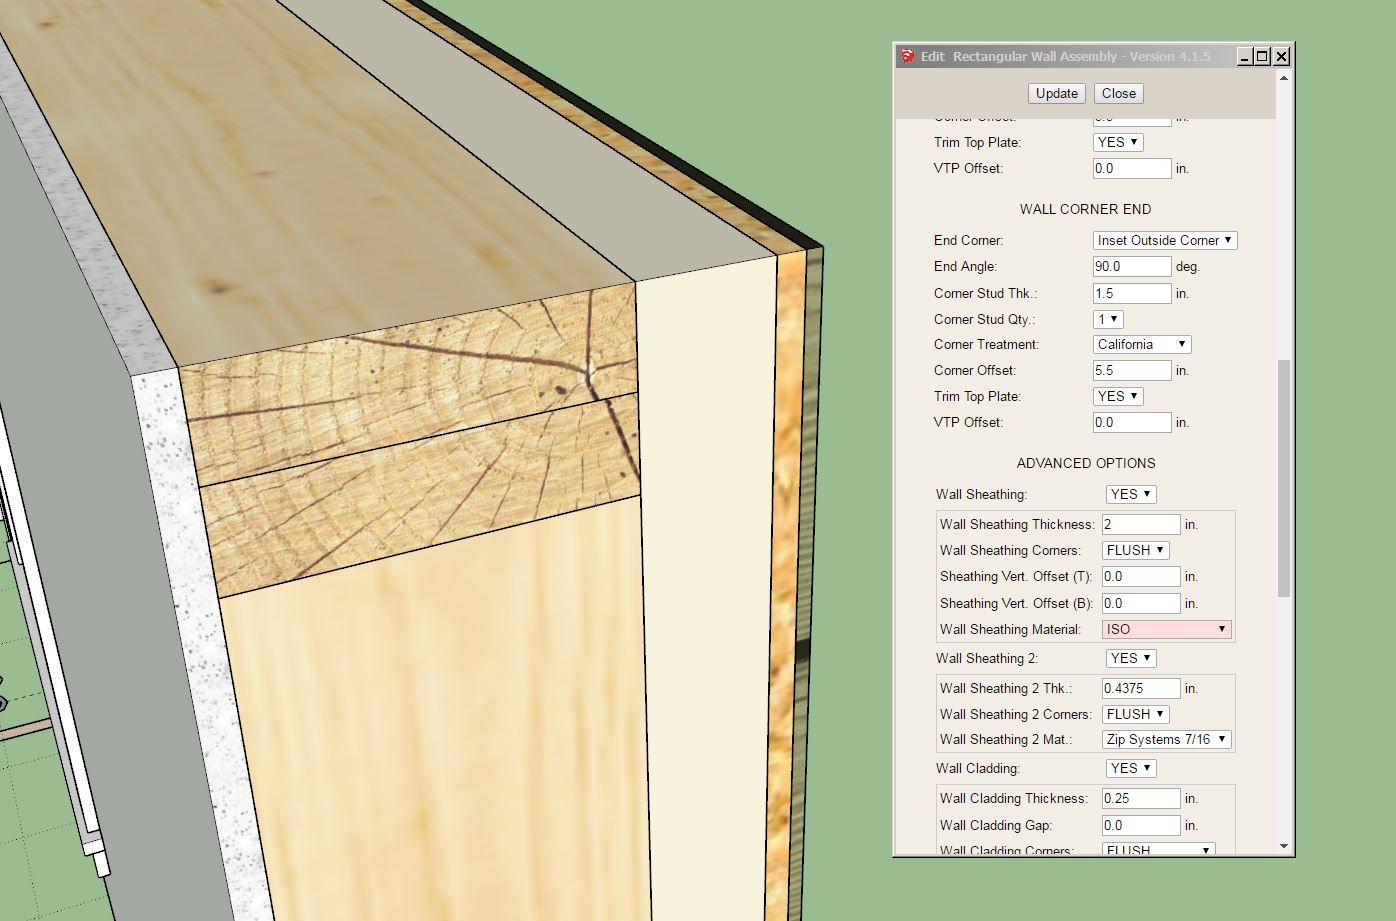
- Enabled XPS (blue, green, pink and grey), ISO, EPS, GPS, and PU foam insulation within the wall sheathing options.
-
Tutorial 76 - Double Stud Walls (18:03 min.)
-
Tutorial 77 - Mitek vs. Simpson (11:00 min.)


Hello! It looks like you're interested in this conversation, but you don't have an account yet.
Getting fed up of having to scroll through the same posts each visit? When you register for an account, you'll always come back to exactly where you were before, and choose to be notified of new replies (either via email, or push notification). You'll also be able to save bookmarks and upvote posts to show your appreciation to other community members.
With your input, this post could be even better 💗
Register Login


Advertisement