How do I precisely place a material on a tube?
-
I need to texture a tube... actually just 1/3rd -- 80 degrees of a tube, with the lower edge of the texture aligned to the lower edge of the open tube... same texture on the opposite side, same positioning requirement.
There are 16 segments for each of the 80d sides and the texture needs to be a smooth image across all of them.
I have the same need for the top of a sphere.
How do I do that?
-
@genma saotome said:
I need to texture a tube... actually just 1/3rd -- 80 degrees of a tube, with the lower edge of the texture aligned to the lower edge of the open tube... same texture on the opposite side, same positioning requirement.
There are 16 segments for each of the 80d sides and the texture needs to be a smooth image across all of them.
I have the same need for the top of a sphere.
How do I do that?
If my math is right, we are talking about a 72 segment circle/tube. So, using the Protractor Tool, create two guide lines 80d or 16 segments apart. Using the Pencil Tool, draw vertical lines down the surface of the tube from each of the guide lines. This will "cut" the circle and create an arc. Select the arc and, using the Move Tool+Ctrl, copy the arc to connect the bottoms of the two lines previously drawn. This will create a face that you can apply the desired material to.
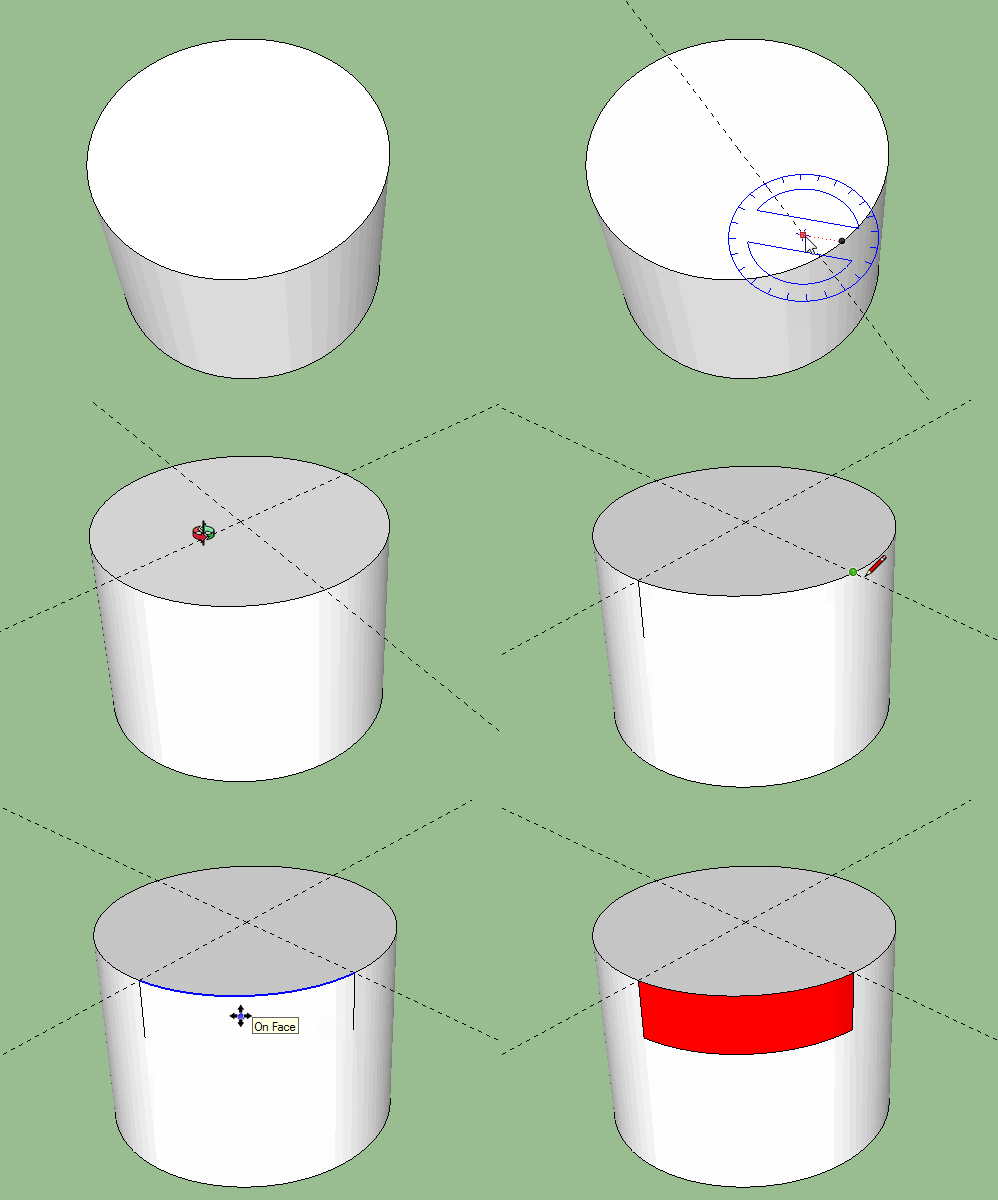
-
Ahhh... I should have been more specific.
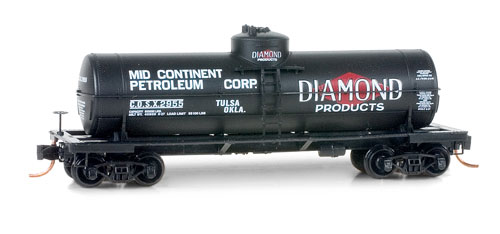
What I'm trying to do is run text the length of the tube where the text is in the materials texture. It's not this image but something similar. The alignment of the material has to be precise and cannot be distorted by the curved surface.
If you look closely you'll note text is p[laced on three different curved surfaces - side, dome, and end. I need to do all of that.
-
You can project the texture on the surface...
-
Search on the plugin store for the term "UV".
There are a number of plugins, most of which will help you to do this, to do with UV layout and texture projection - sketchup's own capabilities in this regard are unfortunately lacking, to say the least. -
@oceanembers said:
...sketchup's own capabilities in this regard are unfortunately lacking, to say the least.
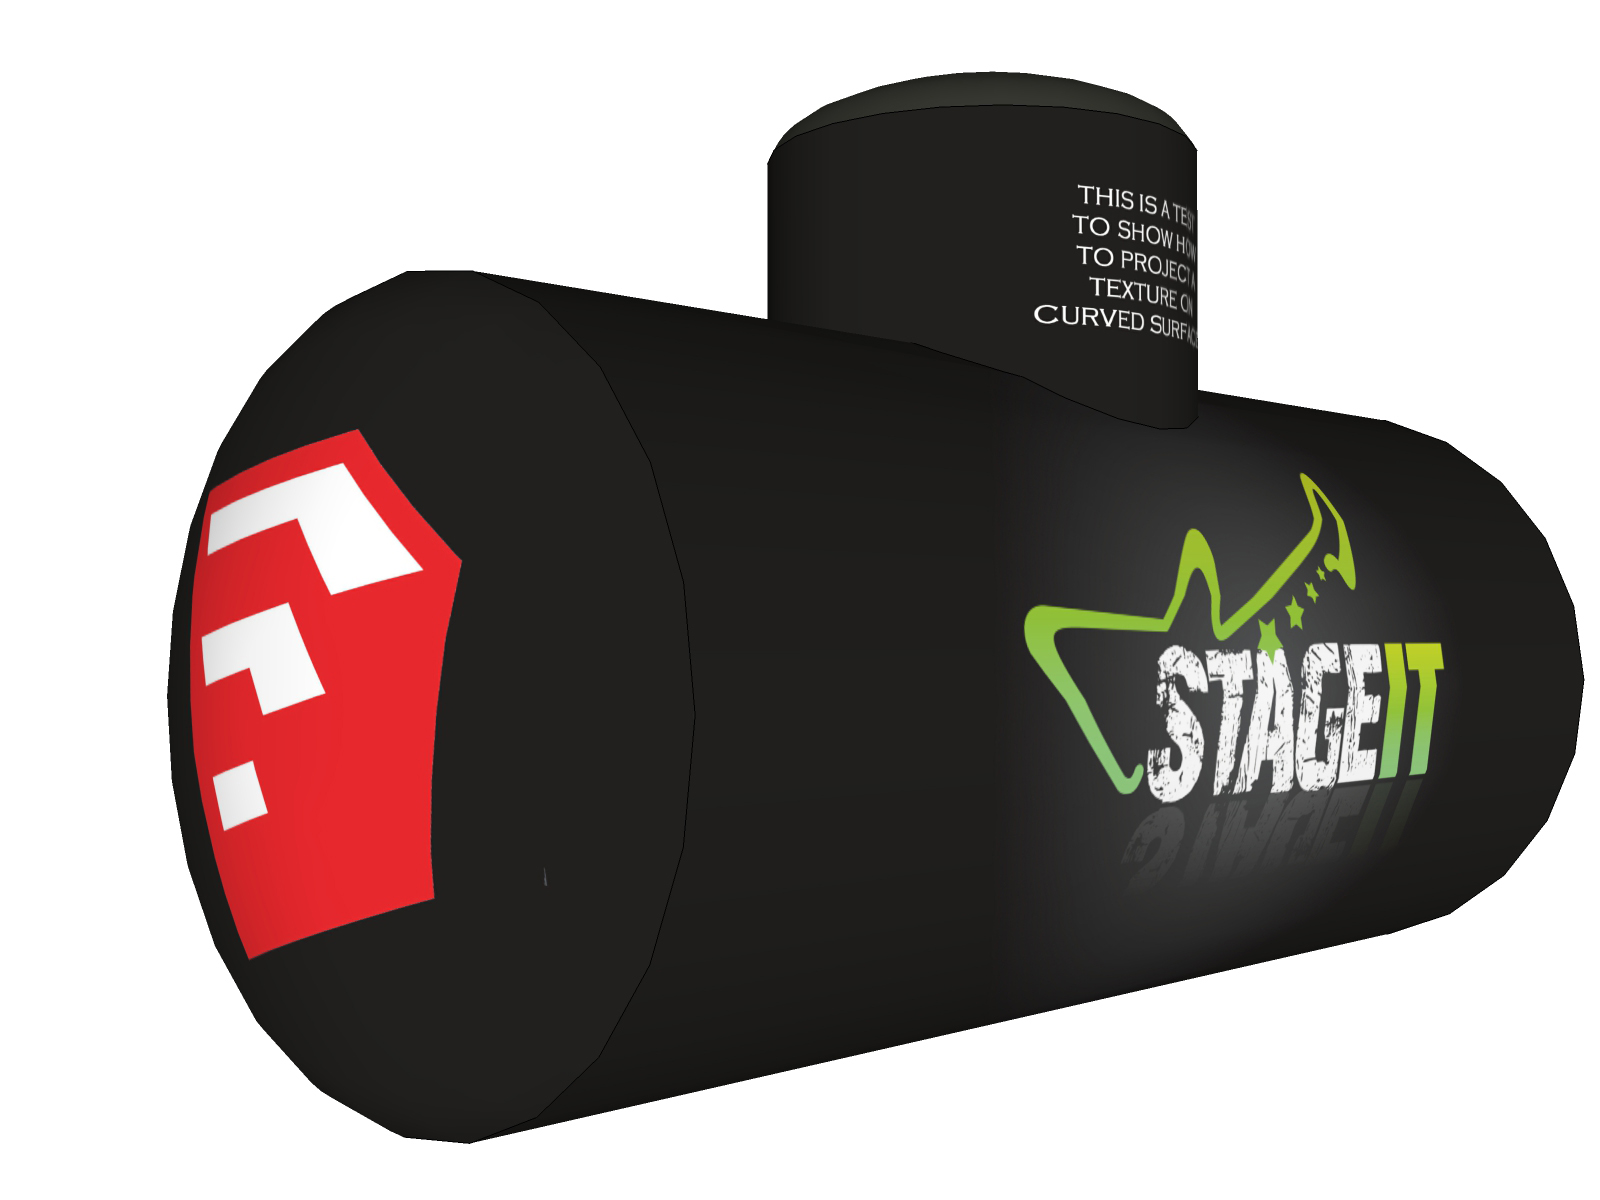
Although I agree that SU lack better UV tools, you can easily do this by projecting textures, without the need of any extra plugins to learn...

I've attached the 'skippy' to take some learnings from...
Turn the layers on and off to see how the textures are made and how you place them precisely as you're asking to do...Hope this will help you further!
-
Kim, I downloaded your model and took a look and yes, the results are what I'm looking for... but I cannot yet replicate what you did. I see you used the UV plugin... when I try that the results are never right... either the texture gets angled down as it runs along the long axis or is all broken up by the faces of the tube.
Is there something I'm missing (besides my unfamiliarity with the UV tool)?
Oh, one more thing: Your use of the word projection... I do know the word of course but as used in your sentence I was not sure if you meant it to refer to a specific SU or Plug-In function or not..
-
This was done like Frederick described without plugins.
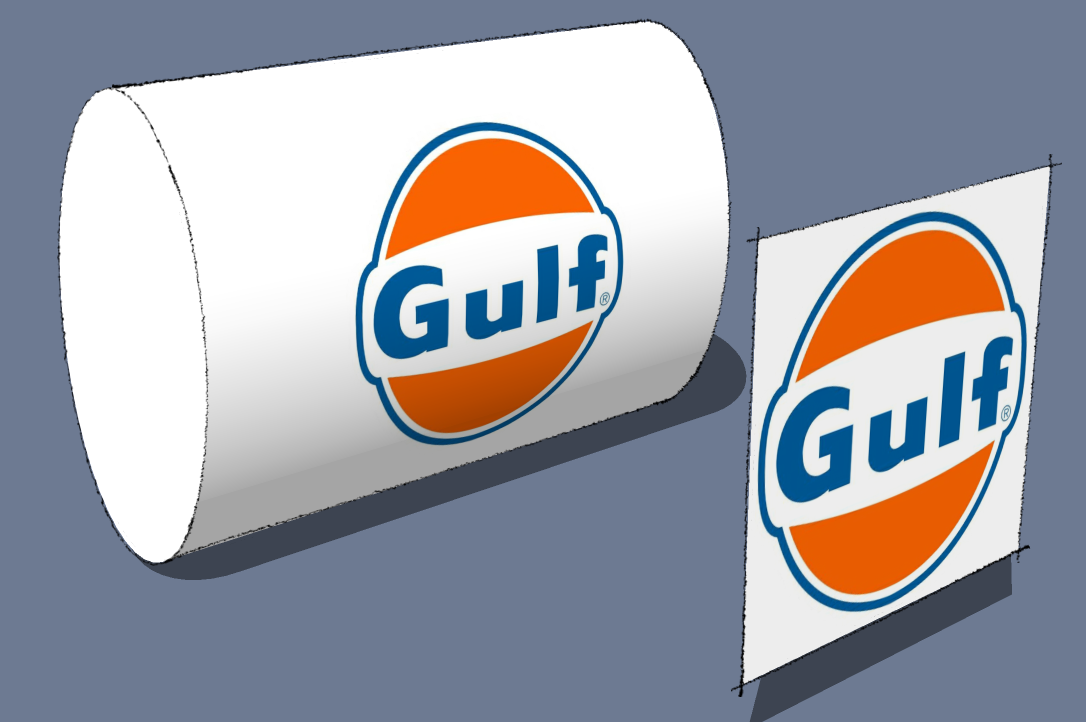
When I need to do this sort of thing, I put the texture on a flat surface aligned with where I want the texture and then sample it and apply it on the curved surface. Projection is a setting for the texture. Not a plugin.
-
ThruPaint by Fredo6 don't help in any of this ?
-
@genma saotome said:
I see you used the UV plugin...
No... As Dave R already wrote, I haven't used any plugins...!
This was done straight in SU, where I projected the textures...@genma saotome said:
Oh, one more thing: Your use of the word projection... I do know the word of course but as used in your sentence I was not sure if you meant it to refer to a specific SU or Plug-In function or not..
It's in the sub-menu if you right-click on a texture and select "Texture"...

I've attached a screen capture, which should explain this better...I've attached a pdf-document with a small tutorial, which explain things...
Hopefully this will make it more clear...!?
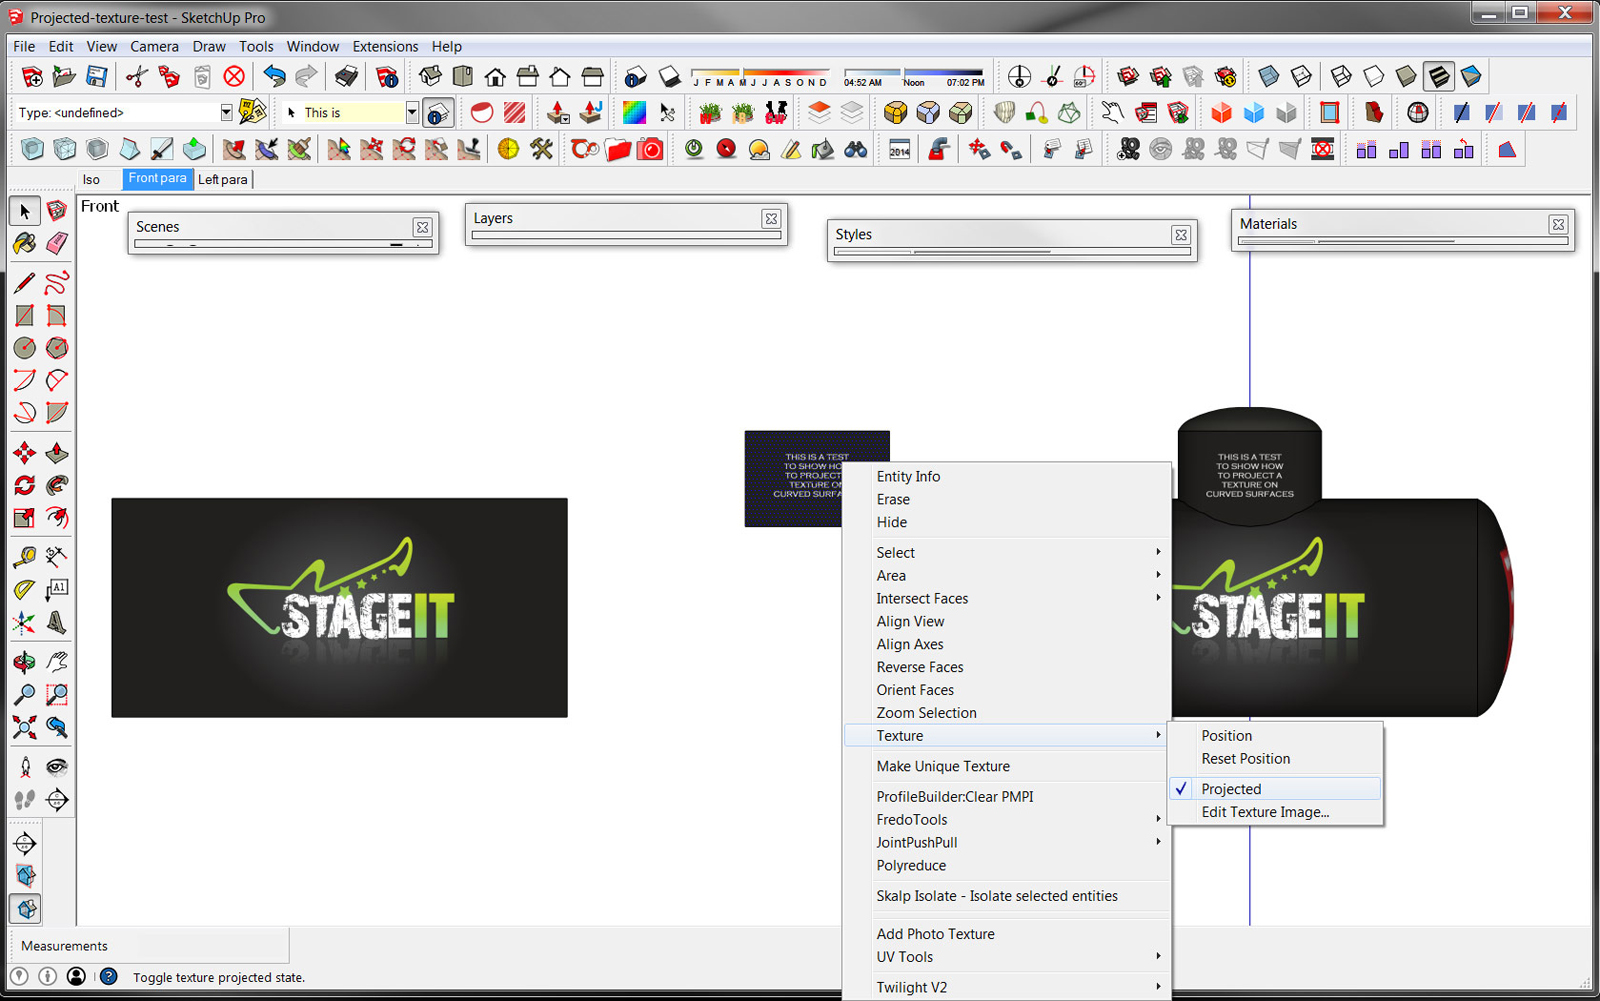
-
Small tutorial uploaded in the above post...
-
Projection will cause distortion at the extremities of the cylinder, so it maybe isn't the best idea for any graphics/decals that aren't decently central, unless you want to start sectioning off areas for different projections. Other than that, yeah projection will work in OP's instance, it was probably overkill for me to suggest UV tools.
-
Here is an excellent (IMHO) tutorial on projecting a texture onto a curved surface: https://www.youtube.com/watch?v=HHsRRLCAOm8
-
@oceanembers said:
Projection will cause distortion at the extremities of the cylinder, so it maybe isn't the best idea for any graphics/decals that aren't decently central, unless you want to start sectioning off areas for different projections. Other than that, yeah projection will work in OP's instance, it was probably overkill for me to suggest UV tools.
Working with one of the UV plugins would indeed be the best and most accurate approach - no doubt...
However, although the OP have set his SU experience to advanced, he seem to have limited knowledge about UV and how it works - as far as I can tell - hence I suggested the projection approach before jumping into more complex plugins and ways to apply textures on cylinder shapes...You need to learn how to crawl before you know how to walk...

Advertisement


