Problems with a half-torus
-
@pbacot said:
Following. The point about the circle: keep one circle for your reference below everything. Copy it if you must but don't have the follow-me circle touching the model, and don't throw it out until you are absolutely done modeling. I suspected intersecting with that circle was a problem on your latest try.
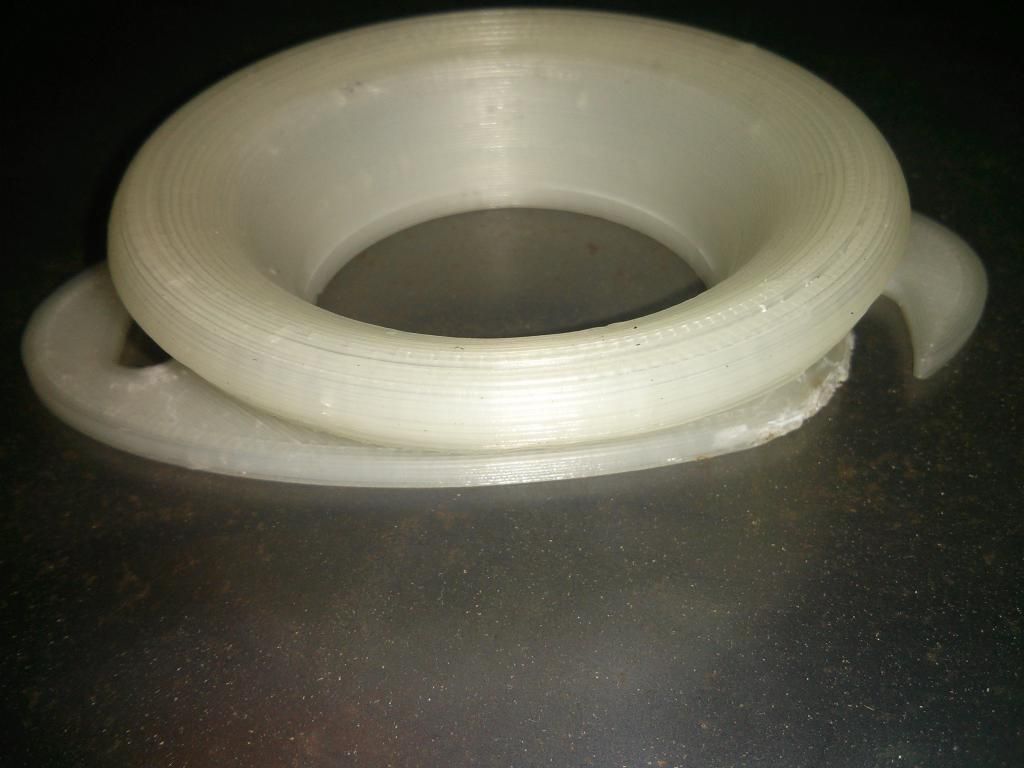
Also you guys are showing a torus floating inside the shape. Don't you have to get rid of that? Or will it print as a void?Up until this version with the 'internal torus' I have been running the Follow Me from a model-touching circle of the radius I wanted, it was a big moment when I had that idea and it worked, up until your statement above I have been assuming that was the ticket to success.
I assume the inner torus will be printed albeit with support structures which (the idea is) will be lighter than printing it in solid plastic. Then again, I know nothing!

-
Me too, Teig--I am learning about printing only from forums like this...
Sometimes followme is best when the profile is right on the path shape. In the case of a circle (flat in the X-Y plane), it doesn't matter. The point is, you don't want the circle intersecting with your complex model, and the circle as a guide may continue to be helpful.
I think Box means that the distance from the CENTER of the guide circle must be correct to where you have located the followme profile (in the x-y) plane. It doesn't matter what the radius of the guide circle is, unless you were using it as part of the model. The number of segments is important, and depends on the number of segments you want in the model.
-
@teig said:
@box said:
Any circle will do, the radius is immaterial
So how will I set the radius of the throat at 23.2mm?
@box said:
but the center of the circle must be at the correct distance from your profile to be the right size, and the number of segments needs to be what you want.
Sorry? Do you mean the radius of the 'lead' circle has to be the correct outside radius, i.e. 45mm in this case?
I understand the principles of the 'DaveR technique', I'll practice it.
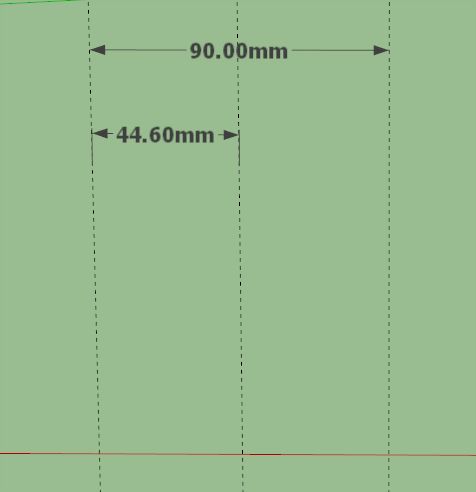
The distance marked here is the radius of the inner most point of the finished object.
So the actual radius of the circle can be anything, but the center of that circle to the nearest edge of your profile is the 'radius' that is important.

That is probably the extent of my posting today, I have to collect one of my brothers from the airport and as I haven't seen him in more than 12 years there will no doubt be a gargantuan amount of beer disposed of. -
Teig, regarding making a hole in the shape to save material, it likely won't make a difference in this small of a model. This is because when using a desktop printer, you can set the printer to only fill the interior with a percentage of plastic, say 20%. This way you would get the same effect of saving material much more efficiently.
If using a commercial printer, you would also need to add escape holes to remove the support material, or you'd lose the benefit of the making the model hollow anyway.
-
@d12dozr said:
Teig, regarding making a hole in the shape to save material, it likely won't make a difference in this small of a model. This is because when using a desktop printer, you can set the printer to only fill the interior with a percentage of plastic, say 20%. This way you would get the same effect of saving material much more efficiently.
If using a commercial printer, you would also need to add escape holes to remove the support material, or you'd lose the benefit of the making the model hollow anyway.
If I understand you correctly ,faffing around with the 'torus-within-a-torus' was a complete waste of time then?
Another good learning curve though I suppose... -
@box said:
@teig said:
@box said:
Any circle will do, the radius is immaterial
So how will I set the radius of the throat at 23.2mm?
@box said:
but the center of the circle must be at the correct distance from your profile to be the right size, and the number of segments needs to be what you want.
Sorry? Do you mean the radius of the 'lead' circle has to be the correct outside radius, i.e. 45mm in this case?
I understand the principles of the 'DaveR technique', I'll practice it.
The distance marked here is the radius of the inner most point of the finished object.
So the actual radius of the circle can be anything, but the center of that circle to the nearest edge of your profile is the 'radius' that is important.
[attachment=0:1i0fywpc]<!-- ia0 -->Radius.JPG<!-- ia0 -->[/attachment:1i0fywpc]
That is probably the extent of my posting today, I have to collect one of my brothers from the airport and as I haven't seen him in more than 12 years there will no doubt be a gargantuan amount of beer disposed of.I really wish I knew what you're saying Box but I don't
 I'm not really stupid just [obviously] not as sharp as you guys...
I have a critical internal diameter at the base of the throat of the bellmouth which has to be 44.6mm (within a nadge) and a not-so-critical exterior diameter of 90mm. I'm gonna go back to scratch and start again.
I hope you had a good night out with your bro'

-
Can't type, too drunk, perhaps gif will explain better,
-
@teig said:
If I understand you correctly ,faffing around with the 'torus-within-a-torus' was a complete waste of time then?
Another good learning curve though I suppose...Not completely...in other cases where you have a bigger model or you're printing with a powder-based printer, it would make sense, but you'd still have to think about how to remove the support material. For example on a powder printer, 2 5mm holes on opposite sides of the model connecting the inner torus to the outside would allow for removal by compressed air.
-
@box said:
Can't type, too drunk, perhaps gif will explain better,
Top drunken gif skills Box! Thank you again.
-
Well after all manner of grief with the desktop printer I've finally been able to run v36 off

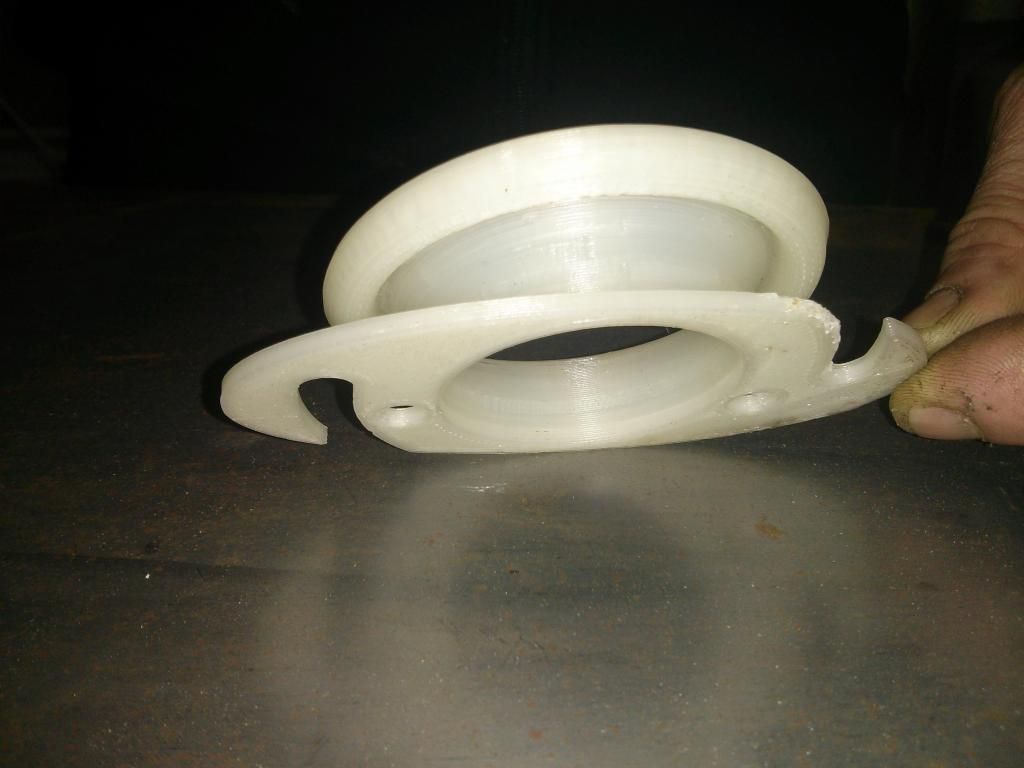
And seeing that we had some weak joins and design improvements I've moved on to version 37. But... the .stl file is too big for our printer at 15mb, can any of you fine chaps show me a way of bringing the file size down? I've run the Purge Unused but it makes no difference.
-
@teig said:
Yes, I've been trying to get the throat super-smooth so have been using 100 segments as standard, never considered anything else for the other parts - I suppose using less segments would keep the file size down?
Remember this bit. My answer was yes.
Reduce the number of segments in the areas that don't need to be super smooth and your file size will get smaller.
Even the circle that you are using for your follow me can have fewer segments as any faceting running up the throat would cause minimal airflow problems. -
Thanks again Box, I do remember and I tried drawing with less facets but I got in a mess with the model creating lots of radial lines and the only way out was to draw at 100 segments again. I'll try again...

-
I'm not sure what you mean by the radial lines. Unless you mean unsoftened lines.
But here are two quick sample with 50 segments in the throat itself and less elsewhere for one and 100 in the other.
The file size for 50 is just over half a meg and 100 just over 2meg so you have plenty of room to play. These aren't accurate, just rough samples to show you some potential size saving options for the structure.
Your holes and cutouts certainly don't need 100 segments, keep them to what is comfortable and even run a bit of sand paper over any roughness when printed if you need to, or even a bit of a fire polish. Your v36 looks like it does come out fairly rough.
-
No I don't mean unsoftened lines. You see how your base has segmenting? I had that but all the segmental radii were on the top of the base and gave me enough grief to make me bin it. I'm on the case again, at least I will be after I've had some sleeps, it's 0730 now and I'm toast
-
Yep, what Box said...the best way is to optimize the segments at the beginning. That said, you can use Netfabb Basic to quickly decimate (reduce the # of polygons) an existing model with out having to re-draw the whole thing.
Here's how: open model in Netfabb, Right click > Level of Detail > Choose something like 50%.
-
@d12dozr said:
Yep, what Box said...the best way is to optimize the segments at the beginning. That said, you can use Netfabb Basic to quickly decimate (reduce the # of polygons) an existing model with out having to re-draw the whole thing.
Here's how: open model in Netfabb, Right click > Level of Detail > Choose something like 50%.
It must be something like Netfabb my mate's brother had to use for this last print, he ran it through some jiggery-pokery and took the file size down by 90%.
I'll do this version again on night shift tonight with all your suggestions for minimising and see what happens, thanks again Marcus and Box

-
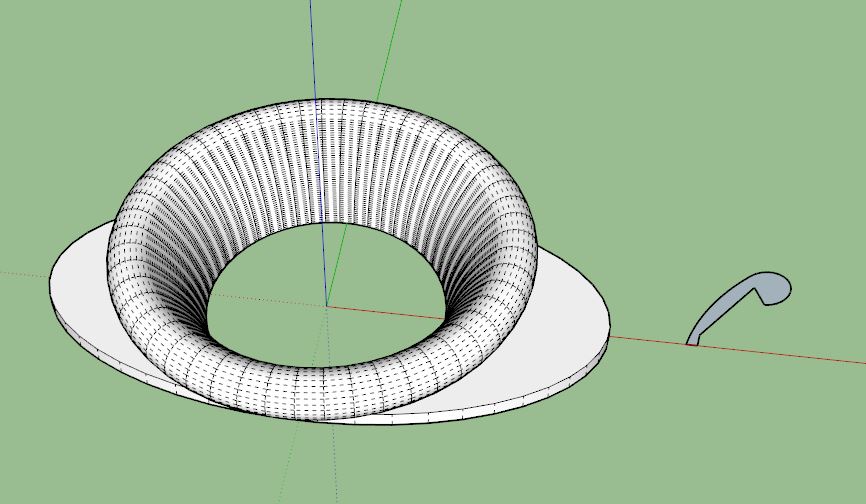
I've just lashed one up tonight, with fewer sides/segments the .stl rolls in at 1.8mb, much better. I'll email it off for printing now.
-
Nice and clean! Show us some photos after the print is back...
-
Yep, a very nice bit of modelling there. Well done.
-
The strengthening of the throat-base was giving me some grief until I had a eureka moment and put the channels for the air vents underneath. Took about 20 minutes to draw, a far cry from a month ago when it took me 8 hours to get an outline


Hello! It looks like you're interested in this conversation, but you don't have an account yet.
Getting fed up of having to scroll through the same posts each visit? When you register for an account, you'll always come back to exactly where you were before, and choose to be notified of new replies (either via email, or push notification). You'll also be able to save bookmarks and upvote posts to show your appreciation to other community members.
With your input, this post could be even better 💗
Register Login


Advertisement